
:max_bytes(150000):strip_icc():format(webp)/Unlockedphone_mikkelwilliam_Getty_Eplus-bd0f806b392b4069ab6618d3b520f5b7.jpg)
2024 Approved Navigating the World of Audio Production A Beginners Guide to REAPER
“Navigating the World of Audio Production: A Beginner’s Guide to REAPER”
DAW stands for Digital Audio Workstation. It is where you can record, edit, mix or even master your music. You always need good DAW software to help you with the job to produce music or live recording musicians.
A good DAW software must have a multi-track audio recording , virtual instruments, MIDI sequencer, excellent mixing capabilities, and plug-in processor hosting. The software is found for all major operating systems such as Linux , Windows, and Mac. If you want to learn more about DAW, then stay with us. The article will discuss in detail REAPER Recording Software.
In this article
01 What Is REAPER Recording Software?
02 How to Download and Install REAPER Software?
03 Tutorial for Using REAPER Recording Software
Part 1. What Is REAPER Recording Software?
Recording software like REAPER records computer audio is used to produce music, edit it, transform, and customize your music. With REAPER Recording Software , you can record multi-layer audio and MIDI in various formats. REAPER has the easiest interface that allows you to drag and drop to import, split, move and do many other tasks.

This is just one feature of REAPER that sounds very interesting. In this section, we will talk about more of its features.
1. Record and Edit
You can easily record the audio and (MIDI) Musical Instrumental Digital Interface with REAPER recording software. It lets you edit and customize everything. You can record and edit things limitlessly. When it comes to recording, it’s not at all difficult for REAPER software to record various instruments or vocals.
2. Mixing
Initially, the mixer might seem inflexible, but in reality, REAPER has a lot to offer you. It has great automated capabilities for instrument and effect parameters. It doesn’t matter if you are working because you can still bounce or freeze tracks while working.
The mixer is very flexible. With REAPERs mixer, you just have to drag and drop your recordings so that you can create tracks, and also, you can customize the arrangements by moving the portions.
3. Interface
While looking at the interface, you might question yourself about how to use its interface. Some people love to learn about new things, such as the REAPER Recording Software. Whereas, some people seem least interested because the half-empty interface is not intuitive to them.
Whereas, the best thing about its interface is that you can customize it. REAPER allows you to add different wallpapers and layouts to your software interface.
4. Strong Stability
REAPER Recording Software has very strong stability. This is one of its strongest features as compared to other competitors. The RAM is rarely affected by the load time and the used resources. Moreover, the software offers a wide range of languages. You can select your desired language to run the software.
Part 2. How to Download and Install REAPER Software?
REAPER is a Digital Audio Workstation. The perfect platform where you can manipulate and transform your audio. With REAPER Record Computer audio, you can work efficiently in a resource-friendly studio with saving your time. Stay tuned if you plan to learn more about its pricing and requirements.

Pricing of REAPER Software
A reaper is a brilliant software. It has a 60-day trial period. REAPER costs $60 in total to register. It has complete MIDI sequencing. You can also get a discounted license if REAPER is the best private option for you or has commercial usage. You can set the equal license key on every computer for someone with multiple computers.
System Requirements
The recording software has uncountable features. REAPER software facilitates its users at every level by giving the best audio manipulating platform. The best thing about REAPER Recording Software is its compatibility with different operating systems. Let us add more to your knowledge on this.
Windows
REAPER software is available for Windows 7, 8, 10, XP, and Vista. The version of REAPER for Windows is 6.42. This is for Windows 64-bit whereas, a download package is also available for Windows 32-bit.
macOS
For macOS 64-bit, REAPER has a 6.42 version. This version is compatible with macOS 10.5 – 10.14. Whereas, for macOS 10.15+, the available version of REAPER is 6.42 with a 15MB file size.
Linux
REAPER Recording Software is also compatible with Linux x86_64. The REAPER version is 6.42 with an 11 MB file size. This version can also work on AMD64 64-bit.
Downloading and Installing REAPER
Now that REAPER Record Computer Audio has impressed you a lot. You must be thinking about how to download it. If this is on your mind, then we got you. Allow us to share its steps that will guide you to download the software easily.
Step 1: To install REAPER software, first of all, visit its official website. Then locate and head over to its download section.
Step 2: Click on ‘Download REAPER from the download section.’ For Windows users, they can download the Windows installation package. At the same time, Linux and macOS users can select their installation packages.
Step 3: Lastly, after you have downloaded your systems compatible installation package, you simply have to run it and then install it according to your respective operating system.
Part 3. Tutorial for Using REAPER Recording Software
After its attractive features and detailed downloading procedure, it is finally the time to talk about its works. This section of the article will explain to you more about REAPER Recording Software as we are now going to present a tutorial on how to use the software.
Understand the Layout
Understanding and knowing the layout of your software before you start working on it is essential. The crucial components of REAPER software include the Timeline, Arrangement Window, Track Panel, Toolbar, and lastly, Transport.

The Arrangement window holds all the added items. The items are played from left to right order, similar to their timeline arrangement. You can also zoom in and out. Then comes the transport toolbar, which holds the functions to stop, rewind, play, fast forward, adjust the timeline speed, etc. The toolbar holds all the toggle buttons. You can also customize your toolbar.
New Track Creation
For creating a new track on REAPER, go to the Track menu and hit Insert New Track. A track is like another layer to your audio. Multiple layers and tracks make your work complex yet interesting as you can play all the different tracks at the same time. By double-clicking in the Track Control Panel, you can set a name for the added track.

Audio Hardware Settings for Audio Recording
It is best suggested always to check your audio hardware settings before you start to record, edit or mix with REAPER Recording Software. Your primary focus should be on the recording device’s devices should be set as Input Device, whereas the listening device should be set as the Output Device.
For this, you have to select Preferences from the Options menu. A window will appear in front of you, the REAPER Preference window. You have to select the correct Input and Output devices from the dropdown menu from this window.

Arm your Track
Arming your track is very important. For this, head over to the Track Control Panel, and next to your track name, hit the red circle. If you have various tracks, you should solo this track and mute the other tracks.
As soon as the track is armed, a Gain Meter will activate on the side. From this, you can check if you have properly set the microphone or not. This could be tested by tapping on the microphone.

Record
After all, the hardware settings are done, and your track is armed, it’s time to start the recording. For that, just tap on the Record button in the Transport toolbar. A yellow line in the timeline will indicate the end of the recording.

To end the recording, tap on the Stop button from the Transport Toolbar. Lastly, REAPER Recording Software will ask you to save the file. In case you don’t want it, you can also delete it.
Create and Manipulate Clips
Things like manipulation get a lot easier if you split the clips in REAPER. From the items menu, you have to select the option of Split Item on Cursor. This divides your clip into two clips on each side of the cursor. You can also remove the clips by going to the Items Menu. From there, you just have to hit the Remove Item option, or else, simply press the Delete key on your keyboard.

Removing clips will create a gap in the arrangement window that can be filled by dragging forward the remaining clip.
Volume Adjustments – Normalize
By double-clicking on the item or by selecting ‘Item Properties’ from a right-click, you can normalize the item. A new window will appear as Media Item Properties, from where you have to locate the Volume Settings and then select the option of Normalize.
If your item is already loud, then nothing will happen, but if it is not, then the slider will change from 0.00 dB showing an increase in the volume. Lastly, hit the ‘Apply’ or ‘OK’ button to imply the changes.
Fade in/out
With the Media Properties, you can also adjust a Fade in and a Fade out. For this, you simply have to set an end time for the Fade in, whereas a start time is entered for Fade out. Hit the ‘Ok’ or ‘Apply’ button to apply the changes.
From the Arrangement window, fades can be adjusted. For adjusting the fades, hover with your mouse over the red line. You will see a newly shaped cursor. Just drag on the timeline to play and adjust the Fade with this new cursor.

Automate Changes
With REAPER, you can also automate changes in track parameters. We will guide about automation from Track Envelopes. From Track Control Panel, hit the Trim option. A new Envelopes window will open at this point from where you have to check the Volume box.
A new Volume Track will open up. Here, you have to set new Envelope points. That could be done by holding the shift key, right-clicking on the point, and then selecting Create New Point. A green circle will indicate the new point.
By dragging the Envelope point, you can also adjust the volume. Dragging it towards the top will increase the volume, whereas dragging it towards the bottom will eventually decrease.

Finalize the Audio – Render
After all the above steps have been completed to set the order and adjust your desired volume, the last step comes to render your project file. For that, move to the File menu and select the ‘Render’ option. A window will be opened as ‘Render to File.’ Now, from the dropdown menu, select your desired Output Format.
Lastly, hit the Render 1 File button, and then REAPER will export your project. You can immediately listen to it by selecting the ‘Launch File’ option.

Concluding Thoughts
This article is everything you need to learn about REAPER Recording Software. The article that started from an introduction on DAW took you on a roller coaster ride. Everything about REAPER software has been shared.
We hope that this article helps you in all possible ways. The attractive features impress you, and its pricing and system specifications increase your knowledge. Along with that, the shared tutorial will guide you thoroughly on how to use it.
02 How to Download and Install REAPER Software?
03 Tutorial for Using REAPER Recording Software
Part 1. What Is REAPER Recording Software?
Recording software like REAPER records computer audio is used to produce music, edit it, transform, and customize your music. With REAPER Recording Software , you can record multi-layer audio and MIDI in various formats. REAPER has the easiest interface that allows you to drag and drop to import, split, move and do many other tasks.
This is just one feature of REAPER that sounds very interesting. In this section, we will talk about more of its features.
1. Record and Edit
You can easily record the audio and (MIDI) Musical Instrumental Digital Interface with REAPER recording software. It lets you edit and customize everything. You can record and edit things limitlessly. When it comes to recording, it’s not at all difficult for REAPER software to record various instruments or vocals.
2. Mixing
Initially, the mixer might seem inflexible, but in reality, REAPER has a lot to offer you. It has great automated capabilities for instrument and effect parameters. It doesn’t matter if you are working because you can still bounce or freeze tracks while working.
The mixer is very flexible. With REAPERs mixer, you just have to drag and drop your recordings so that you can create tracks, and also, you can customize the arrangements by moving the portions.
3. Interface
While looking at the interface, you might question yourself about how to use its interface. Some people love to learn about new things, such as the REAPER Recording Software. Whereas, some people seem least interested because the half-empty interface is not intuitive to them.
Whereas, the best thing about its interface is that you can customize it. REAPER allows you to add different wallpapers and layouts to your software interface.
4. Strong Stability
REAPER Recording Software has very strong stability. This is one of its strongest features as compared to other competitors. The RAM is rarely affected by the load time and the used resources. Moreover, the software offers a wide range of languages. You can select your desired language to run the software.
Part 2. How to Download and Install REAPER Software?
REAPER is a Digital Audio Workstation. The perfect platform where you can manipulate and transform your audio. With REAPER Record Computer audio, you can work efficiently in a resource-friendly studio with saving your time. Stay tuned if you plan to learn more about its pricing and requirements.
Pricing of REAPER Software
A reaper is a brilliant software. It has a 60-day trial period. REAPER costs $60 in total to register. It has complete MIDI sequencing. You can also get a discounted license if REAPER is the best private option for you or has commercial usage. You can set the equal license key on every computer for someone with multiple computers.
System Requirements
The recording software has uncountable features. REAPER software facilitates its users at every level by giving the best audio manipulating platform. The best thing about REAPER Recording Software is its compatibility with different operating systems. Let us add more to your knowledge on this.
Windows
REAPER software is available for Windows 7, 8, 10, XP, and Vista. The version of REAPER for Windows is 6.42. This is for Windows 64-bit whereas, a download package is also available for Windows 32-bit.
macOS
For macOS 64-bit, REAPER has a 6.42 version. This version is compatible with macOS 10.5 – 10.14. Whereas, for macOS 10.15+, the available version of REAPER is 6.42 with a 15MB file size.
Linux
REAPER Recording Software is also compatible with Linux x86_64. The REAPER version is 6.42 with an 11 MB file size. This version can also work on AMD64 64-bit.
Downloading and Installing REAPER
Now that REAPER Record Computer Audio has impressed you a lot. You must be thinking about how to download it. If this is on your mind, then we got you. Allow us to share its steps that will guide you to download the software easily.
Step 1: To install REAPER software, first of all, visit its official website. Then locate and head over to its download section.
Step 2: Click on ‘Download REAPER from the download section.’ For Windows users, they can download the Windows installation package. At the same time, Linux and macOS users can select their installation packages.
Step 3: Lastly, after you have downloaded your systems compatible installation package, you simply have to run it and then install it according to your respective operating system.
Part 3. Tutorial for Using REAPER Recording Software
After its attractive features and detailed downloading procedure, it is finally the time to talk about its works. This section of the article will explain to you more about REAPER Recording Software as we are now going to present a tutorial on how to use the software.
Understand the Layout
Understanding and knowing the layout of your software before you start working on it is essential. The crucial components of REAPER software include the Timeline, Arrangement Window, Track Panel, Toolbar, and lastly, Transport.
The Arrangement window holds all the added items. The items are played from left to right order, similar to their timeline arrangement. You can also zoom in and out. Then comes the transport toolbar, which holds the functions to stop, rewind, play, fast forward, adjust the timeline speed, etc. The toolbar holds all the toggle buttons. You can also customize your toolbar.
New Track Creation
For creating a new track on REAPER, go to the Track menu and hit Insert New Track. A track is like another layer to your audio. Multiple layers and tracks make your work complex yet interesting as you can play all the different tracks at the same time. By double-clicking in the Track Control Panel, you can set a name for the added track.
Audio Hardware Settings for Audio Recording
It is best suggested always to check your audio hardware settings before you start to record, edit or mix with REAPER Recording Software. Your primary focus should be on the recording device’s devices should be set as Input Device, whereas the listening device should be set as the Output Device.
For this, you have to select Preferences from the Options menu. A window will appear in front of you, the REAPER Preference window. You have to select the correct Input and Output devices from the dropdown menu from this window.
Arm your Track
Arming your track is very important. For this, head over to the Track Control Panel, and next to your track name, hit the red circle. If you have various tracks, you should solo this track and mute the other tracks.
As soon as the track is armed, a Gain Meter will activate on the side. From this, you can check if you have properly set the microphone or not. This could be tested by tapping on the microphone.
Record
After all, the hardware settings are done, and your track is armed, it’s time to start the recording. For that, just tap on the Record button in the Transport toolbar. A yellow line in the timeline will indicate the end of the recording.
To end the recording, tap on the Stop button from the Transport Toolbar. Lastly, REAPER Recording Software will ask you to save the file. In case you don’t want it, you can also delete it.
Create and Manipulate Clips
Things like manipulation get a lot easier if you split the clips in REAPER. From the items menu, you have to select the option of Split Item on Cursor. This divides your clip into two clips on each side of the cursor. You can also remove the clips by going to the Items Menu. From there, you just have to hit the Remove Item option, or else, simply press the Delete key on your keyboard.
Removing clips will create a gap in the arrangement window that can be filled by dragging forward the remaining clip.
Volume Adjustments – Normalize
By double-clicking on the item or by selecting ‘Item Properties’ from a right-click, you can normalize the item. A new window will appear as Media Item Properties, from where you have to locate the Volume Settings and then select the option of Normalize.
If your item is already loud, then nothing will happen, but if it is not, then the slider will change from 0.00 dB showing an increase in the volume. Lastly, hit the ‘Apply’ or ‘OK’ button to imply the changes.
Fade in/out
With the Media Properties, you can also adjust a Fade in and a Fade out. For this, you simply have to set an end time for the Fade in, whereas a start time is entered for Fade out. Hit the ‘Ok’ or ‘Apply’ button to apply the changes.
From the Arrangement window, fades can be adjusted. For adjusting the fades, hover with your mouse over the red line. You will see a newly shaped cursor. Just drag on the timeline to play and adjust the Fade with this new cursor.
Automate Changes
With REAPER, you can also automate changes in track parameters. We will guide about automation from Track Envelopes. From Track Control Panel, hit the Trim option. A new Envelopes window will open at this point from where you have to check the Volume box.
A new Volume Track will open up. Here, you have to set new Envelope points. That could be done by holding the shift key, right-clicking on the point, and then selecting Create New Point. A green circle will indicate the new point.
By dragging the Envelope point, you can also adjust the volume. Dragging it towards the top will increase the volume, whereas dragging it towards the bottom will eventually decrease.
Finalize the Audio – Render
After all the above steps have been completed to set the order and adjust your desired volume, the last step comes to render your project file. For that, move to the File menu and select the ‘Render’ option. A window will be opened as ‘Render to File.’ Now, from the dropdown menu, select your desired Output Format.
Lastly, hit the Render 1 File button, and then REAPER will export your project. You can immediately listen to it by selecting the ‘Launch File’ option.
Concluding Thoughts
This article is everything you need to learn about REAPER Recording Software. The article that started from an introduction on DAW took you on a roller coaster ride. Everything about REAPER software has been shared.
We hope that this article helps you in all possible ways. The attractive features impress you, and its pricing and system specifications increase your knowledge. Along with that, the shared tutorial will guide you thoroughly on how to use it.
10 Best Online Music Makers [Free&Paid]
FREE 10 Best Online Music Makers

Benjamin Arango
Apr 26, 2024• Proven solutions


Expressing ideas through music was never easy, and even today in the age of powerful digital audio stations like Ableton Live or FruityLoops , producing original music requires a certain set of skills. However, online content producers often need music for their videos, but they neither have the time or the budget to hire a professional musician to create a soundtrack for their project in studio conditions. If you are looking for a quick way to make your own music online, then you should keep reading, because in this article we are going to take you through the ten best online music makers you should check out in 2021.
10 Best Online Music Makers in 2021
The music-making platforms that are currently available online are still not as nearly as powerful as professional software products for music producers. Nonetheless, this doesn’t mean that you can’t use them to create the music you like or just have fun with them. Here are the ten best online music makers in 2019.
1. Typeatone
Price: Free
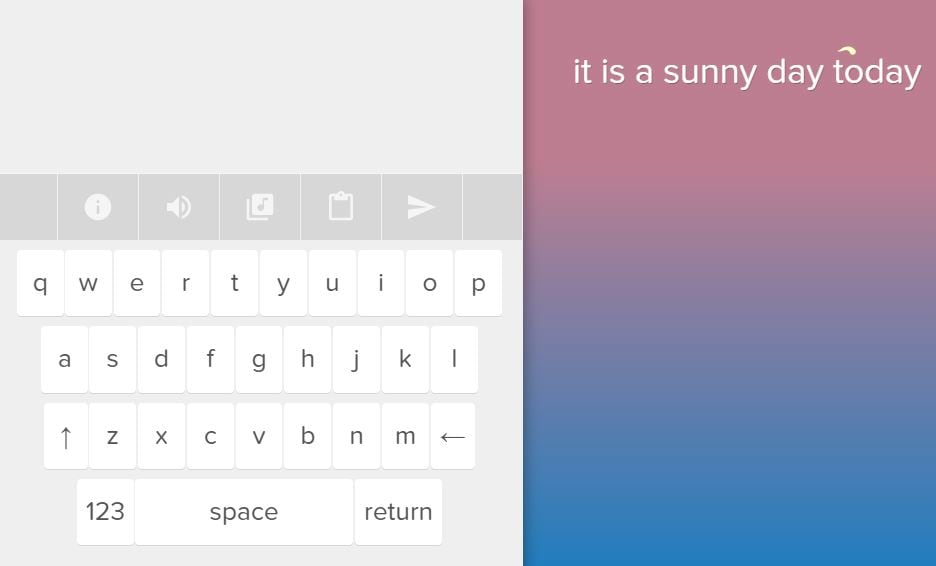
Image from Internet
Have you ever wondered what your words would sound like if they were turned into music? Head over to the Typeatone platform if you want to find out since all you have to do in order to start creating your own music is type in the text. As you type, the platform will automatically start playing your words and once you’re done, you’ll be able to hear your new song. You can also choose between different instruments to make the process of creating music with Typeatone even more entertaining. You can share all of your creations with your friends on social media.
![]()
A cross-platform for making videos anywhere for all creators

Why your video editing isn’t good enough? How about some creative inspo?
- 100 Million+ Users
- 150+ Countries and Regions
- 4 Million+ Social Media Followers
- 5 Million+ Stock Media for Use
* Secure Download

2. Audiotool
Price: Free
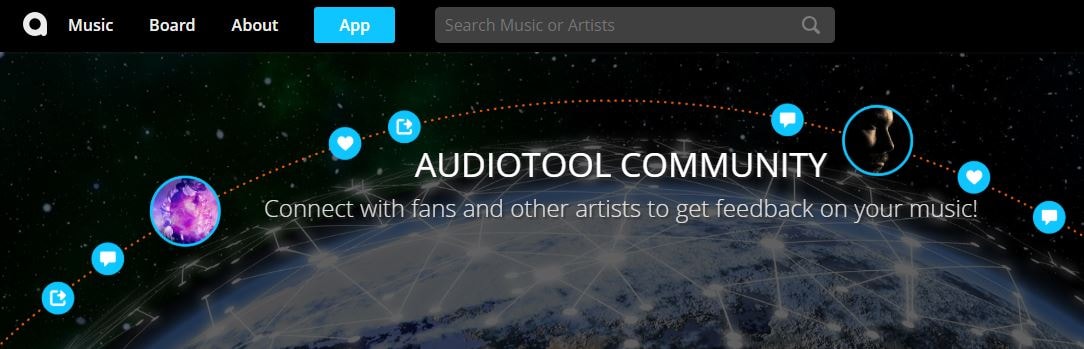
Image from Internet
Electronic music producers who often use synthesizers like Roland TB-303 or Roland TR-909 are going to love the features this online collaborative platform offers. Audiotool hosts a huge music library, you can explore even if you are not a registered user. In order to access the platform’s music studio, you first have to create an account and make sure that you are signed in. Audiotool is also a community of like-minded people where you can meet artists whose work you appreciate or hear what others think about your work. The only downside is that Audiotool’s abundance of features can be overwhelming for the newcomers to the world of electronic music production.
3. AudioSauna
Price: Free
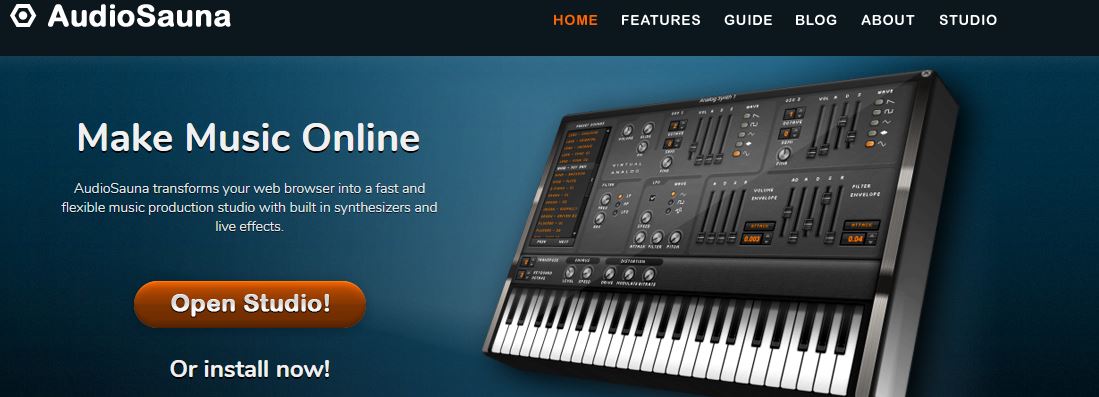
Image from Internet
AudioSauna seems to offer everything its users need to create inspiring music because it is equipped with frequency modulation synth, virtual analog synth and a sampler that provides layering features. Moreover, its intuitive interface makes the process of arranging the song structure or changing several note values simultaneously much easier. Creating an account on AudioSauna will enable to record all your projects and export them as audio files that can be uploaded to SoundCloud or any other audio distribution platform. AudioSauna is a perfect tool for skilled producers who want to create their music online.
4. Soundtrap
Price: Free trial available, subscription plans start at $3.99 per month

Image from Internet
Soundtrap offers a long list of features that enable professional musicians to create their music online. All you have to do is create an account and you will get access to the Sountrap’s studio that let you create new beat patterns, use a synthesizer or even invite friends to make music together. The platform also offers the possibility to connect your own instruments to the Soundtrap’s studio, so that you can record your music as you play it. This online platform also has an Education section where you can share your knowledge with others or learn valuable music lessons.
5. PatternSketch
Price: Free
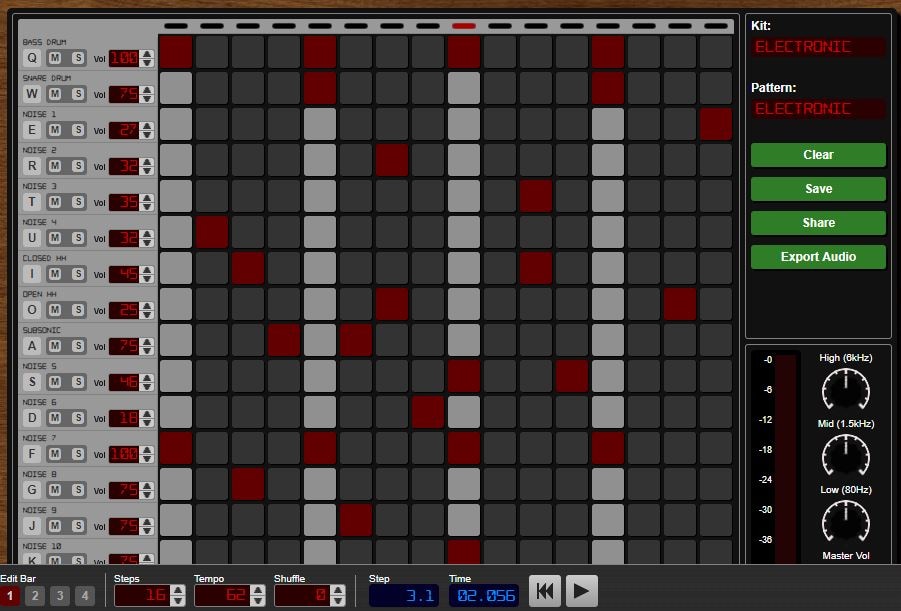
Image from Internet
This basic and yet effective drum machine can help you generate amazing beats for the songs you’re working on. Once you sign up, you will be able to choose from a number of different kits and patterns that are fully customizable or create your own original beats. After you create a pattern you like, you can save it with a single click or send it to your friends via email. Optionally, you can export all of your creations from PatternSketch and save them as wav, mp3 or ogg files, although in some cases mp3 audio files may not loop properly.
6. Soundation
Price: Free version available, pricing plans start at $1.99 per month

Image from Internet
If you choose to create music with the free version of Soundation, you’ll be able to work on up to ten projects, try out over 700 audio effects and loops, and export all your music in low quality. Purchasing the Intro pricing plan will enable you to work on an unlimited number of projects, make live audio recordings, import audio files smaller than 100MB or use an external midi controller. Moreover, opting for any of the annual or monthly subscription plans will allow you to export entire projects and audio files in high resolution from Soundation.
7. Text to Speech
Price: Free

online-music-maker-Text to Speech.jpg
Vocals are often overlooked in contemporary electronic music, but there are so many ways they can be used creatively. The platform lets you turn up to 50000 characters into speech at once, and it also offers several different voices you can choose from. Before you create an audio file you can determine how fast the text is going to be vocalized, so you should try different options and see which one fits your project the best. Text to Speech platform can be used during the process of creating a new song, but the tools it offers are not enough to make an entire song.
8. Looplabs
Price: Free
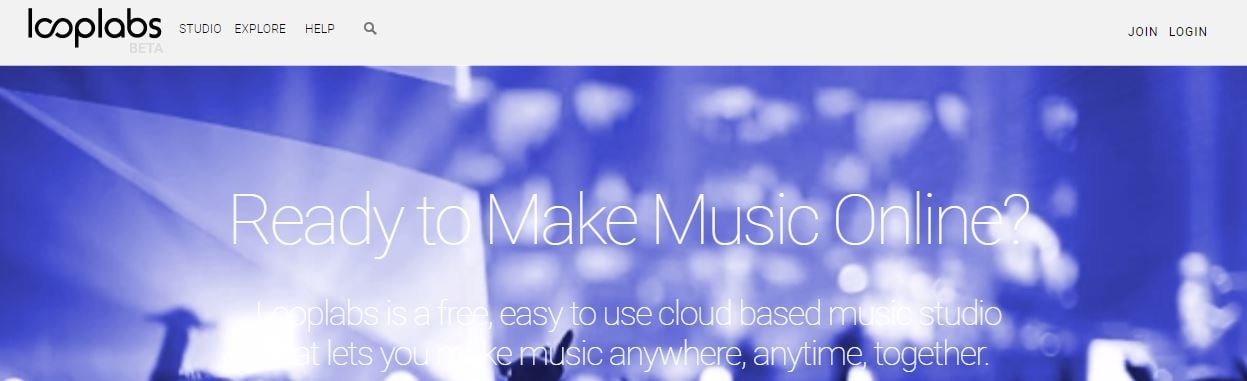
Music enthusiasts who would like to produce different genres of music online should definitely get familiar with Looplabs, as this online music maker lets its users remix songs or make music from scratch. Besides being one of the best places on the Internet to record music, Looplabs is also a community where you can meet people who like your music or discover artists whose work you admire. The Looplab’s studio features samples for a broad range of music genres and musical instruments, and you can use it to make Electro or Funk music equally effectively.
9. Online Sequencer
Price: Free
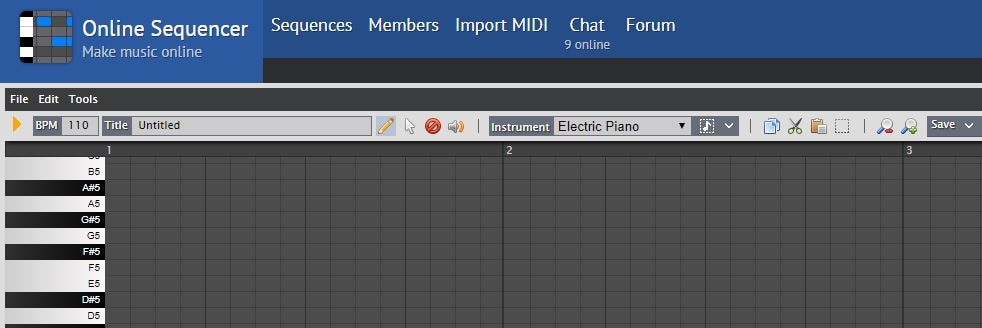
This is a perfect tool for developing an idea for a song, as you can create a sequence in just a few minutes. You can choose from Piano, Drums and Guitar categories of instruments or browse through a huge collection of fully customizable preset sequences that is updated on a daily basis. The platform also lets you import MIDI files and work on projects you’ve already started developing or you can export your sequences as MIDI files from the Online Sequencer and edit them with your DAW. Even though Online Sequencer is a useful tool for making music, the features it offers can’t really be compared with those on Soundation or AudioSauna.
10. Autochords
Price: Free
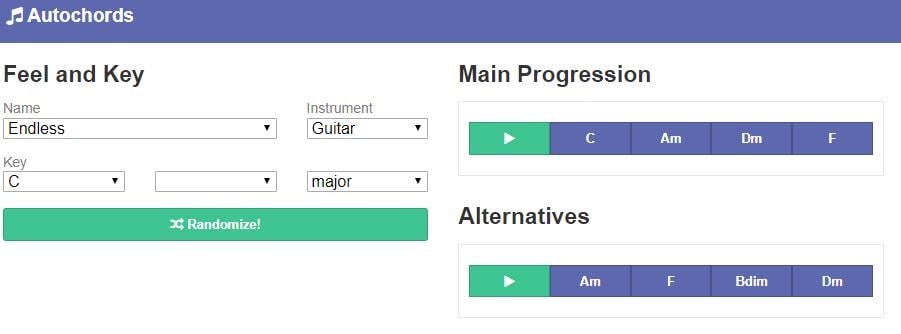
Finding new ideas for songs is often more difficult than it sounds, and if you ever face a creative block you should simply head over to Autochords. This platform suggests chord progressions based on the parameters you set, so you just have to select an instrument and the name of the song to set the feel, and the platform will show you the main progression and its alternatives. Rather than being an online music maker, Autochords is more a tool that helps piano and guitar players understand chord progressions better. iPhone and iPad users can download the Autochords app from the App Store for free.
Read More to Get : Best Free DAW for Windows and Mac for Beginners >>
Conclusion
You don’t have to be a professional musician in order to start making music online, you just have to love music, and an online music maker of your choice will take care of the rest. Do you use online music makers for entertainment or to express your creativity? Leave a comment below and share your opinions with us.
Benjamin Arango
Benjamin Arango is a writer and a lover of all things video.
Follow @Benjamin Arango
Benjamin Arango
Apr 26, 2024• Proven solutions
Expressing ideas through music was never easy, and even today in the age of powerful digital audio stations like Ableton Live or FruityLoops , producing original music requires a certain set of skills. However, online content producers often need music for their videos, but they neither have the time or the budget to hire a professional musician to create a soundtrack for their project in studio conditions. If you are looking for a quick way to make your own music online, then you should keep reading, because in this article we are going to take you through the ten best online music makers you should check out in 2021.
10 Best Online Music Makers in 2021
The music-making platforms that are currently available online are still not as nearly as powerful as professional software products for music producers. Nonetheless, this doesn’t mean that you can’t use them to create the music you like or just have fun with them. Here are the ten best online music makers in 2019.
1. Typeatone
Price: Free
Image from Internet
Have you ever wondered what your words would sound like if they were turned into music? Head over to the Typeatone platform if you want to find out since all you have to do in order to start creating your own music is type in the text. As you type, the platform will automatically start playing your words and once you’re done, you’ll be able to hear your new song. You can also choose between different instruments to make the process of creating music with Typeatone even more entertaining. You can share all of your creations with your friends on social media.
![]()
A cross-platform for making videos anywhere for all creators
Why your video editing isn’t good enough? How about some creative inspo?
- 100 Million+ Users
- 150+ Countries and Regions
- 4 Million+ Social Media Followers
- 5 Million+ Stock Media for Use
* Secure Download
2. Audiotool
Price: Free
Image from Internet
Electronic music producers who often use synthesizers like Roland TB-303 or Roland TR-909 are going to love the features this online collaborative platform offers. Audiotool hosts a huge music library, you can explore even if you are not a registered user. In order to access the platform’s music studio, you first have to create an account and make sure that you are signed in. Audiotool is also a community of like-minded people where you can meet artists whose work you appreciate or hear what others think about your work. The only downside is that Audiotool’s abundance of features can be overwhelming for the newcomers to the world of electronic music production.
3. AudioSauna
Price: Free
Image from Internet
AudioSauna seems to offer everything its users need to create inspiring music because it is equipped with frequency modulation synth, virtual analog synth and a sampler that provides layering features. Moreover, its intuitive interface makes the process of arranging the song structure or changing several note values simultaneously much easier. Creating an account on AudioSauna will enable to record all your projects and export them as audio files that can be uploaded to SoundCloud or any other audio distribution platform. AudioSauna is a perfect tool for skilled producers who want to create their music online.
4. Soundtrap
Price: Free trial available, subscription plans start at $3.99 per month
Image from Internet
Soundtrap offers a long list of features that enable professional musicians to create their music online. All you have to do is create an account and you will get access to the Sountrap’s studio that let you create new beat patterns, use a synthesizer or even invite friends to make music together. The platform also offers the possibility to connect your own instruments to the Soundtrap’s studio, so that you can record your music as you play it. This online platform also has an Education section where you can share your knowledge with others or learn valuable music lessons.
5. PatternSketch
Price: Free
Image from Internet
This basic and yet effective drum machine can help you generate amazing beats for the songs you’re working on. Once you sign up, you will be able to choose from a number of different kits and patterns that are fully customizable or create your own original beats. After you create a pattern you like, you can save it with a single click or send it to your friends via email. Optionally, you can export all of your creations from PatternSketch and save them as wav, mp3 or ogg files, although in some cases mp3 audio files may not loop properly.
6. Soundation
Price: Free version available, pricing plans start at $1.99 per month
Image from Internet
If you choose to create music with the free version of Soundation, you’ll be able to work on up to ten projects, try out over 700 audio effects and loops, and export all your music in low quality. Purchasing the Intro pricing plan will enable you to work on an unlimited number of projects, make live audio recordings, import audio files smaller than 100MB or use an external midi controller. Moreover, opting for any of the annual or monthly subscription plans will allow you to export entire projects and audio files in high resolution from Soundation.
7. Text to Speech
Price: Free

online-music-maker-Text to Speech.jpg
Vocals are often overlooked in contemporary electronic music, but there are so many ways they can be used creatively. The platform lets you turn up to 50000 characters into speech at once, and it also offers several different voices you can choose from. Before you create an audio file you can determine how fast the text is going to be vocalized, so you should try different options and see which one fits your project the best. Text to Speech platform can be used during the process of creating a new song, but the tools it offers are not enough to make an entire song.
8. Looplabs
Price: Free
Music enthusiasts who would like to produce different genres of music online should definitely get familiar with Looplabs, as this online music maker lets its users remix songs or make music from scratch. Besides being one of the best places on the Internet to record music, Looplabs is also a community where you can meet people who like your music or discover artists whose work you admire. The Looplab’s studio features samples for a broad range of music genres and musical instruments, and you can use it to make Electro or Funk music equally effectively.
9. Online Sequencer
Price: Free
This is a perfect tool for developing an idea for a song, as you can create a sequence in just a few minutes. You can choose from Piano, Drums and Guitar categories of instruments or browse through a huge collection of fully customizable preset sequences that is updated on a daily basis. The platform also lets you import MIDI files and work on projects you’ve already started developing or you can export your sequences as MIDI files from the Online Sequencer and edit them with your DAW. Even though Online Sequencer is a useful tool for making music, the features it offers can’t really be compared with those on Soundation or AudioSauna.
10. Autochords
Price: Free
Finding new ideas for songs is often more difficult than it sounds, and if you ever face a creative block you should simply head over to Autochords. This platform suggests chord progressions based on the parameters you set, so you just have to select an instrument and the name of the song to set the feel, and the platform will show you the main progression and its alternatives. Rather than being an online music maker, Autochords is more a tool that helps piano and guitar players understand chord progressions better. iPhone and iPad users can download the Autochords app from the App Store for free.
Read More to Get : Best Free DAW for Windows and Mac for Beginners >>
Conclusion
You don’t have to be a professional musician in order to start making music online, you just have to love music, and an online music maker of your choice will take care of the rest. Do you use online music makers for entertainment or to express your creativity? Leave a comment below and share your opinions with us.
Benjamin Arango
Benjamin Arango is a writer and a lover of all things video.
Follow @Benjamin Arango
Taming Audio Chaos: Advanced Tips and Tricks for Reducing Room Noise in Microphones
The noise removal tool allows users to remove noise from voice recording to optimize live streaming. With the help of these noise removal tools, users can enjoy clearer and more focused audio. Some microphones can filter background noise to improve the audio experience. The better the experience, the better results you can get from your video content creation.
Seeing all the benefits of controlling noise in recordings and videos, you might seek a tool for this. In this article, we will talk about online and offline tools to let you remove noise from recordings.
AI Background Noise Remover A cross-platform for facilitating your video editing process by offering valuable benefits!
Free Download Free Download Learn More

Part 1. What Are Some Practical Applications for Using Microphone Background Noise Reducers?
Microphone filter background noise reducers help clear your voice when you’re speaking into a mic. There are many online and offline tools available that can help reduce the noise. You can make use of these noise-reducer tools for the following applications:
Voice and Video Calls
When you are video chatting for professional purposes, background noise can cause interruptions. In such situations, you can remove noise from the recording to make the call clearer. Without any disturbance from the background, you can communicate effectively.
Online Meetings
During online meetings, background noise reducers can help you sound better. When you’re in a noisy environment, the application of these tools becomes important. This helps you maintain the professional stature of your meeting.
Gaming Live Streaming
Gamers often reduce microphone background noise with the help of such tools. It can help them improve the audio of their in-game sound by eliminating distractions. If you consider monetizing your gaming channels, it is important to ensure there’s no noise.
Recording Music
Musicians and home studio enthusiasts use noise reducers to clean up their recordings. With the help of this voice recorder noise reduction, they create more polished music. This can inculcate a system of better music composition on a smaller scale.
Part 2. Looking Into Some Prominent Options To Reduce Microphone Background Noise
Many professionals search for tools to tackle microphone background noise. As clear audio is crucial in various fields, removing noise from recordings has become necessary. In this section, we will talk about offline and online solutions to this noise problem. After going through this section, you will be able to choose the best tool for audio content creation.
Section 1: Offline Methods for Reducing Microphone Background Noise
When it comes to reducing background noise using offline methods, there are several tools you can use. Here, we will introduce you to tools that will help you in this regard. These tools can remove background noise from voice recording in just a few clicks.
1. Wondershare UniConverter
Wondershare UniConverter removes noise from the microphone with its AI-powered technology. It detects and removes voices such as wind, traffic, rain, or fan noise. Additionally, you can remove static, echo, talking noise, and humming. This AI tool is compatible and supports over 1,000 formats of audio and video files. The support of batch processing allows you to denoise a video and audio in an effective manner.

Key Features
- You can improve the quality of your video blogs by removing unwanted talking noises.
- It denoises a recorded video from the voices of keyboard sounds, echo, and hissing sounds.
- This AI tool offers a powerful video toolbox to convert and edit your denoised videos.
2. Krisp
Krisp enhances the video quality of online meetings and additionally provides help from AI. With this tool, you can make your voice clear during your meeting and get a meeting assistant. It denoises a video and removes noise from the microphone, ensuring distraction-free calls. Users can remove different noise types on this tool, such as barking dogs and crying babies.

Key Features
- You can keep your voice only in the call with its noise cancellation feature.
- It removes the background voices of other people talking in the same place.
- Krisp can remove echoes caused by wall reflections and those originating from your own voice.
3. Audacity
Audacity reduces microphone background noise such as whistles, buzzes, hiss, and whines. This tool is suitable for irregular noise, such as from traffic or an audience. During noise reduction, you can filter out the noise in different DB values. Moreover, users can customize the sensitivity and frequency smoothing of noise bands. It calculates the statistics of the noise with an automation process.

Key Features
- The notch filter feature of this tool reduces the mains hum or a high-pitched whistle.
- In the residue section, it lets you hear the sound that the tool filters out.
- This AI tool supports cassette tapes and reduces sound from them in an efficient way.
4. SoliCall Pro
SoliCall Pro enhances call audio quality on Windows PCs. This tool works by performing bi-directional noise reduction and echo cancellation. You can remove non-human and even human voices while consuming minimal CPU resources. The software is easy to integrate with soft-phone and VoIP applications, like Zoom, Skype, and Teams. It supports call recording and works on almost all Windows versions.

Key Features
- It offers reference-based noise reduction to remove the voices of others during announcements.
- The profile-based noise reduction technology attenuates non-human sounds like a dog bark.
- A classical, powerful, and robust noise algorithm cancels noise.
5. Izotope RX10
Izotope RX10 offers audio repair and background noise reduction. It combines visual tools from DAWs with spectrogram displays for powerful audio editing. The goal of this tool is seamless repair without introducing distracting artifacts. Moreover, its focus is to find the balance between problem reduction and preserving the original audio quality.

Key Features
- It replaces damaged or missing audio sections with natural-sounding patches.
- The tool eradicates pops, clicks, and mouth noises without introducing artifacts.
- You can achieve precise repair of audible analog and digital clipping.
Section 2: Online Methods For Reducing Microphone Background Noise
When musicians record, their microphone is bound to pick up sounds like static or noises. While there is no clear option to get rid of the noise completely, there is still one solution to it. There are a series of software and tools that can help you reduce microphone background noise. So, let’s explore the top tools that can help you reduce background noise :
1. Flixier
Flixier is an online audio enhancement tool that removes background noise from voice recording. It removes any type of noise and makes your content sound professional. Additionally, all you have to do is upload your audio file. After that, you can access the enhanced audio menu and choose to remove background noise. This feature will let you aid out background noises and lets you create online videos.

Key Features
- Flixier offers a cloud server to let you reduce microphone background noise without leaving the browser.
- You can use the fade-in and fade-out effects to give visual transitions to your audio tracks.
- There is also a feature for removing and replacing audio from your videos.
2. LALAL.AI
LALAL.AI is an AI-based application that can remove noise from voice recording. This platform utilizes modern technology like “Phoenix” to deliver quality results. Moreover, users can upload their audio files ranging from 50 MB to 2GB. Furthermore, they can convert, change, and remove any instrumental noise from audio and video. These files can include formats like MP3, AVI, or MKV.

Key Features
- You can add up to 20 files at a time to remove noise from voice recording.
- It can detach any background and musical instruments from your video and audio.
- There are special tools that can extract instruments like drums, pianos, and electric guitars.
3. Cleanvoice AI
Cleanvoice is a powerful AI audio editing tool that can remove unwanted sounds. These sounds can include background noises, stuttering, or voices. Additionally, Cleanvoice also provides comprehensive support in creating podcasts. It also offers help in assisting with the pre-production of podcasts. Furthermore, this tool ensures that your podcast achieves professional professional-level excellence.

Key Features
- This tool ensures that your audio is free from any distractions like traffic noise.
- Cleanvoice reduces noise recording from your podcast for a clearer experience.
- You can now enjoy an engaging podcast as it removes long and boring pauses.
4. Media.io
Media.io is an excellent online platform that removes background noises with an AI-integrated system. Its features include various types of audio files like music, songs, and recordings. Moreover, its feature allows musicians to remove noise from voice recording. This tool can also remove noises with any type of audio file like MP3, WMA, or others. Furthermore, Media.io provides these features and services free of cost.

Key Features
- This tool removes background noise from voice recordings like hum or wind sounds.
- You can remove background noise from audio files, including songs, music, or recordings.
- It also offers a fine-tuning feature where you can optimize your audio according to your needs.
5. Podcastle
Podcastle is an outstanding AI background noise reduction tool. This tool can remove annoying noises like static, chatter, or voices in your audio. Moreover, its noise cancellation feature removes microphone background noise and delivers clean audio. Furthermore, it offers sound enhancement features that can generate clean audio.

Key Features
- This tool automatically removes silent segments and long pauses in your audio track.
- You can add various sound effects to your track with its long music collection.
- It has other editing features like text-to-speech, voice cloning, and others.
Bonus Part. Separating Vocals For Finer Editing Using Wondershare Filmora
When creating impactful videos, having effective audio content is vital. Hence, controlling vocals is a crucial part of conveying a desired message. That is why Wondershare Filmora offers an excellent solution where you can remove background noise from voice recording. The latest version of Filmora V13 introduces the AI vocal remover feature.
Free Download For Win 7 or later(64-bit)
Free Download For macOS 10.14 or later
This feature can analyze the audio and remove vocals from the background. Furthermore, it allows you to add effects, adjust, and even replace vocals. Thus, video creators can achieve a professional audio experience with its AI features. Moreover, having a tool that can remove noise from voice recording can enhance the final production.
Steps to Separate Vocals Using Wondershare Filmora
Now, as we have discussed, the new version of Filmora can remove any background noises. Let us delve into the steps on how to separate vocals from your audio or video:
Step 1Import your Audio or Video File
First, download Wondershare Filmora from its website and install its latest version. After that, click on “New Project’’ and import your file by clicking on the “Import” button. You can also drag and drop the file by clicking on the icon.

Step 2Add File and Proceed To Vocal Removal
Now, drag your file over to the timeline at the bottom of the Filmora interface. This is where you’ll remove background noise from voice recording. Right-click on the file on the timeline and click the “AI Vocal Remover” feature present on the menu.

Step 3Apply the AI Vocal Remover Effect
After clicking the vocal remover, it will remove all the background noises from your file. When it separates vocals from your audio or video, you can look into it across the “Preview” window.

Conclusion
Now that you are aware of the noise removal features of these tools choose the best one for your needs. All these tools will help you in several ways to remove noise from recordings. After choosing the appropriate tool, you will be able to streamline the audio content. No matter if you are a musician or podcaster, these tools will boost the quality of your sound.
Free Download For Win 7 or later(64-bit)
Free Download For macOS 10.14 or later
Free Download Free Download Learn More
Part 1. What Are Some Practical Applications for Using Microphone Background Noise Reducers?
Microphone filter background noise reducers help clear your voice when you’re speaking into a mic. There are many online and offline tools available that can help reduce the noise. You can make use of these noise-reducer tools for the following applications:
Voice and Video Calls
When you are video chatting for professional purposes, background noise can cause interruptions. In such situations, you can remove noise from the recording to make the call clearer. Without any disturbance from the background, you can communicate effectively.
Online Meetings
During online meetings, background noise reducers can help you sound better. When you’re in a noisy environment, the application of these tools becomes important. This helps you maintain the professional stature of your meeting.
Gaming Live Streaming
Gamers often reduce microphone background noise with the help of such tools. It can help them improve the audio of their in-game sound by eliminating distractions. If you consider monetizing your gaming channels, it is important to ensure there’s no noise.
Recording Music
Musicians and home studio enthusiasts use noise reducers to clean up their recordings. With the help of this voice recorder noise reduction, they create more polished music. This can inculcate a system of better music composition on a smaller scale.
Part 2. Looking Into Some Prominent Options To Reduce Microphone Background Noise
Many professionals search for tools to tackle microphone background noise. As clear audio is crucial in various fields, removing noise from recordings has become necessary. In this section, we will talk about offline and online solutions to this noise problem. After going through this section, you will be able to choose the best tool for audio content creation.
Section 1: Offline Methods for Reducing Microphone Background Noise
When it comes to reducing background noise using offline methods, there are several tools you can use. Here, we will introduce you to tools that will help you in this regard. These tools can remove background noise from voice recording in just a few clicks.
1. Wondershare UniConverter
Wondershare UniConverter removes noise from the microphone with its AI-powered technology. It detects and removes voices such as wind, traffic, rain, or fan noise. Additionally, you can remove static, echo, talking noise, and humming. This AI tool is compatible and supports over 1,000 formats of audio and video files. The support of batch processing allows you to denoise a video and audio in an effective manner.
Key Features
- You can improve the quality of your video blogs by removing unwanted talking noises.
- It denoises a recorded video from the voices of keyboard sounds, echo, and hissing sounds.
- This AI tool offers a powerful video toolbox to convert and edit your denoised videos.
2. Krisp
Krisp enhances the video quality of online meetings and additionally provides help from AI. With this tool, you can make your voice clear during your meeting and get a meeting assistant. It denoises a video and removes noise from the microphone, ensuring distraction-free calls. Users can remove different noise types on this tool, such as barking dogs and crying babies.
Key Features
- You can keep your voice only in the call with its noise cancellation feature.
- It removes the background voices of other people talking in the same place.
- Krisp can remove echoes caused by wall reflections and those originating from your own voice.
3. Audacity
Audacity reduces microphone background noise such as whistles, buzzes, hiss, and whines. This tool is suitable for irregular noise, such as from traffic or an audience. During noise reduction, you can filter out the noise in different DB values. Moreover, users can customize the sensitivity and frequency smoothing of noise bands. It calculates the statistics of the noise with an automation process.
Key Features
- The notch filter feature of this tool reduces the mains hum or a high-pitched whistle.
- In the residue section, it lets you hear the sound that the tool filters out.
- This AI tool supports cassette tapes and reduces sound from them in an efficient way.
4. SoliCall Pro
SoliCall Pro enhances call audio quality on Windows PCs. This tool works by performing bi-directional noise reduction and echo cancellation. You can remove non-human and even human voices while consuming minimal CPU resources. The software is easy to integrate with soft-phone and VoIP applications, like Zoom, Skype, and Teams. It supports call recording and works on almost all Windows versions.
Key Features
- It offers reference-based noise reduction to remove the voices of others during announcements.
- The profile-based noise reduction technology attenuates non-human sounds like a dog bark.
- A classical, powerful, and robust noise algorithm cancels noise.
5. Izotope RX10
Izotope RX10 offers audio repair and background noise reduction. It combines visual tools from DAWs with spectrogram displays for powerful audio editing. The goal of this tool is seamless repair without introducing distracting artifacts. Moreover, its focus is to find the balance between problem reduction and preserving the original audio quality.
Key Features
- It replaces damaged or missing audio sections with natural-sounding patches.
- The tool eradicates pops, clicks, and mouth noises without introducing artifacts.
- You can achieve precise repair of audible analog and digital clipping.
Section 2: Online Methods For Reducing Microphone Background Noise
When musicians record, their microphone is bound to pick up sounds like static or noises. While there is no clear option to get rid of the noise completely, there is still one solution to it. There are a series of software and tools that can help you reduce microphone background noise. So, let’s explore the top tools that can help you reduce background noise :
1. Flixier
Flixier is an online audio enhancement tool that removes background noise from voice recording. It removes any type of noise and makes your content sound professional. Additionally, all you have to do is upload your audio file. After that, you can access the enhanced audio menu and choose to remove background noise. This feature will let you aid out background noises and lets you create online videos.
Key Features
- Flixier offers a cloud server to let you reduce microphone background noise without leaving the browser.
- You can use the fade-in and fade-out effects to give visual transitions to your audio tracks.
- There is also a feature for removing and replacing audio from your videos.
2. LALAL.AI
LALAL.AI is an AI-based application that can remove noise from voice recording. This platform utilizes modern technology like “Phoenix” to deliver quality results. Moreover, users can upload their audio files ranging from 50 MB to 2GB. Furthermore, they can convert, change, and remove any instrumental noise from audio and video. These files can include formats like MP3, AVI, or MKV.
Key Features
- You can add up to 20 files at a time to remove noise from voice recording.
- It can detach any background and musical instruments from your video and audio.
- There are special tools that can extract instruments like drums, pianos, and electric guitars.
3. Cleanvoice AI
Cleanvoice is a powerful AI audio editing tool that can remove unwanted sounds. These sounds can include background noises, stuttering, or voices. Additionally, Cleanvoice also provides comprehensive support in creating podcasts. It also offers help in assisting with the pre-production of podcasts. Furthermore, this tool ensures that your podcast achieves professional professional-level excellence.
Key Features
- This tool ensures that your audio is free from any distractions like traffic noise.
- Cleanvoice reduces noise recording from your podcast for a clearer experience.
- You can now enjoy an engaging podcast as it removes long and boring pauses.
4. Media.io
Media.io is an excellent online platform that removes background noises with an AI-integrated system. Its features include various types of audio files like music, songs, and recordings. Moreover, its feature allows musicians to remove noise from voice recording. This tool can also remove noises with any type of audio file like MP3, WMA, or others. Furthermore, Media.io provides these features and services free of cost.
Key Features
- This tool removes background noise from voice recordings like hum or wind sounds.
- You can remove background noise from audio files, including songs, music, or recordings.
- It also offers a fine-tuning feature where you can optimize your audio according to your needs.
5. Podcastle
Podcastle is an outstanding AI background noise reduction tool. This tool can remove annoying noises like static, chatter, or voices in your audio. Moreover, its noise cancellation feature removes microphone background noise and delivers clean audio. Furthermore, it offers sound enhancement features that can generate clean audio.
Key Features
- This tool automatically removes silent segments and long pauses in your audio track.
- You can add various sound effects to your track with its long music collection.
- It has other editing features like text-to-speech, voice cloning, and others.
Bonus Part. Separating Vocals For Finer Editing Using Wondershare Filmora
When creating impactful videos, having effective audio content is vital. Hence, controlling vocals is a crucial part of conveying a desired message. That is why Wondershare Filmora offers an excellent solution where you can remove background noise from voice recording. The latest version of Filmora V13 introduces the AI vocal remover feature.
Free Download For Win 7 or later(64-bit)
Free Download For macOS 10.14 or later
This feature can analyze the audio and remove vocals from the background. Furthermore, it allows you to add effects, adjust, and even replace vocals. Thus, video creators can achieve a professional audio experience with its AI features. Moreover, having a tool that can remove noise from voice recording can enhance the final production.
Steps to Separate Vocals Using Wondershare Filmora
Now, as we have discussed, the new version of Filmora can remove any background noises. Let us delve into the steps on how to separate vocals from your audio or video:
Step 1Import your Audio or Video File
First, download Wondershare Filmora from its website and install its latest version. After that, click on “New Project’’ and import your file by clicking on the “Import” button. You can also drag and drop the file by clicking on the icon.
Step 2Add File and Proceed To Vocal Removal
Now, drag your file over to the timeline at the bottom of the Filmora interface. This is where you’ll remove background noise from voice recording. Right-click on the file on the timeline and click the “AI Vocal Remover” feature present on the menu.
Step 3Apply the AI Vocal Remover Effect
After clicking the vocal remover, it will remove all the background noises from your file. When it separates vocals from your audio or video, you can look into it across the “Preview” window.
Conclusion
Now that you are aware of the noise removal features of these tools choose the best one for your needs. All these tools will help you in several ways to remove noise from recordings. After choosing the appropriate tool, you will be able to streamline the audio content. No matter if you are a musician or podcaster, these tools will boost the quality of your sound.
Free Download For Win 7 or later(64-bit)
Free Download For macOS 10.14 or later
Also read:
- New Decibel Defense Empowering Users to Tame Digital Audio Chaos for 2024
- Updated In 2024, The Soundless Filmmakers Handbook Techniques for Removing Audio From iPhones
- Updated Master the Process of Installing/Uninstalling Audacity on Your Chromebook for 2024
- New 2024 Approved Sonic Journey on the House Start Listening to Music for Nothing
- 2024 Approved Trace Acoustic Expressions Linked to Painting Devices
- Updated Behind-the-Scenes Sound Management Expert Insights Into Using Ducking Effects
- Updated 2024 Approved Identifying Repositories of Flatulence-Related Auditory Experiences for Creative Use
- FREE MUSIC Integration Into Digital Photography on PC/Mobile Devices
- New 2024 Approved Voice Capture Made Easy The Ultimate Mac Users Guide for High-Quality Recordings
- In 2024, Zero Distraction Viewing Stripping Down Your Videos Acoustic Layers
- In 2024, Navigating the Synergy Between Soundtracks and Photographic Frames
- Deciphering Sound Quality Improvement Leveraging Adobe Audition for Clear Music Production
- Updated Probing Sound Clarity An Updated Analysis of Cambridges CXU Series
- Updated In 2024, Elevate Your Online Communication The Best Skype Voice Changing Technologies
- In 2024, Mastering Audio Integration in Updated MKV Formats
- New A Step-by-Step Guide to Integrating Lame MP3 Encoder with Audacity
- New Integrating Audible Elements Into Your Slides A Comprehensive Guide for Recording Sound in PowerPoint on PC/Mac Systems for 2024
- Updated How to Remove Distortion From Audio for Your Video
- Updated Curated Collection Unrestricted Melodies Ideal for Visual Storytelling for 2024
- Beyond Virtualdub Exploring the Best Video Editing Software Alternatives for 2024
- The way to recover deleted photos on Vivo X Fold 2 without backup.
- Updated 2024 Approved Unleash Your Creativity The Best Mobile Video Editing Software for iPhone and Android
- How to Change Location On Facebook Dating for your Xiaomi Redmi K70 Pro | Dr.fone
- In 2024, How to Transfer Contacts from Vivo T2 5G to iPhone XS/11 | Dr.fone
- Updated Discover the Top Reaction Video Creators of the Year
- New In 2024, Split, Trim, and Edit Mastering Video Editing in Windows Live Movie Maker
- Updated 2024 Approved The Ratio Revolution How Aspect Ratio Choices Influence Your Video Content
- All You Need To Know About Mega Greninja For Lava Yuva 3 | Dr.fone
- Updated 2024 Approved The Ultimate 4K Showcase Must-See Video Clips for Any Enthusiast
- How To Reset Your iPhone 6 Plus Without iTunes? | Dr.fone
- How to Remove a Previously Synced Google Account from Your Infinix Note 30i
- How to Make a Video a Live Photo
- Full Guide to Bypass Nubia Z50 Ultra FRP
- In 2024, Network Locked SIM Card Inserted On Your Nokia Phone? Unlock It Now
- New 2024 Approved Zero-Cost AVI Video Editors Our Top 5 Recommendations
- Title: 2024 Approved Navigating the World of Audio Production A Beginners Guide to REAPER
- Author: Ella
- Created at : 2024-05-19 06:26:23
- Updated at : 2024-05-20 06:26:23
- Link: https://sound-optimizing.techidaily.com/2024-approved-navigating-the-world-of-audio-production-a-beginners-guide-to-reaper/
- License: This work is licensed under CC BY-NC-SA 4.0.
