
:max_bytes(150000):strip_icc():format(webp)/removerokuchannel-c354faa0f712495384a4d5888017e30c.png)
2024 Approved Perfecting Soft Audio Edges A Guide to Smooth Transitioning in iMovie
Perfecting Soft Audio Edges: A Guide to Smooth Transitioning in iMovie
How to Fade Music and Audio in iMovie on Mac?

Shanoon Cox
Mar 27, 2024• Proven solutions
Fade-in and fade-out effects can help you smooth the video, music, and audio transitions, thus you can make a better movie. When editing videos in iMovie, people may have many video clips and transitions connected to the clips. The fade in and fade out effect seems more important than ever. This tutorial will show you how to fade music and audio in iMovie.
- Part 1: How to Fade Music and Audio in iMovie on Mac
- Part 2: An Easier Way to Fade Audio and Music on Mac
Apart from fading in/fading out the audio, we also want to introduce the video fade-in and fade-out effects, which will help your video to get more attention. Watch the tutorial below to get detailed information about how to fade in/fade out your videos easily.


Related : How to Fade-in and Fade-out Video Clips
After adding the fade-in and fade-out effects to your video, let’s check how to fade your music and audio in iMovie first, and then we will show you how to fade in/fade out your music and audio file in an easier way.
You may also like:
- iMovie for Windows: 10 Best iMovie Alternatives for You
- How to Add Audio to Your Videos
- How to Add Video Effects in iMovie
Part 1: How to Fade Music and Audio in iMovie on Mac
There are two ways available to fade music and audio with iMovie. One is using the fade handles, and the other is using the audio inspector. Before using iMovie audio fade-out effects, please import your video and audio files to iMovie and start a new project.
Method 1: Use Fade Handles to Add Fade in/Fade out Effect in iMovie
Firstly, let’s take a look at the video below to check how to fade audio in/out the audio in iMovie with fade handles.
Step 1. Enable Audio Waveform
When the project opens, check “Show Waveforms” at the bottom of the Project window.

Note: The Blue waveforms indicate the sound recorded within your video clips. Green and purple waveforms indicate sounds and music you’ve added to your project.
Step 2. Move Pointer to Apply Fade Effects
Move the pointer over a waveform, and drag the small gray fade handle at the left of the clip to adjust the fade audio in effect. Then drag the small fade handle at the right of the clip to adjust the fade-out effect.

Step 3. Playback to Check
Move the playhead to the beginning part of the clips with fade effects to check the fade-in and fade-out effects. If everything works OK, uncheck “Show Waveforms” to hide the waveforms.

Related: How to Remove Background Noise from Video
Method 2: Use the Audio Inspector to Apply Fade in/Fade Out Effect in iMovie
To fade audios in and out in iMovie with the audio inspector, you can follow these steps:
Step 1. Open Your iMovie Project and Select a Clip
Double-click the video clip, choose “Clip Adjustments” to open the Inspector, and then click the “Audio” tab.

If there are two audio tracks, and you want to set the fade in and fade out in iMovie for the background music, you can double-click the background music clip to open the audio inspector. This inspector is a little different. If you don’t know how to add background music to iMovie, you can refer to this post: add background music in iMovie .
Step 2. Set the Fade In and Fade Out Effect
In the window, you can manually set the fade-in and fade-out length by dragging the slider bar to the right or left.
If you do not choose “Manual”, that means you’d like iMovie to automatically set it for you. Usually, when you drag video clips to the Project, iMovie will set the fade-in and fade-out effect randomly by increasing the audio volume at the beginning of the clip and decrease the volume at the end of the clip.
If you manually adjust the effect, you can have a better effect.
Step 3. Save the Audio Fade In and Out Effect

After the settings, you can preview the effect in the viewing window to make sure all goes well, and you are much satisfied. Then click “Done” to save the audio fade-in and fade-out effects in iMovie.
Now, that’s done! I hope the above information does help you to set the fade effects to smooth your video and audio transitions.
Related: How to Get More iMovie Themes
Part 2: An Easier Way to Fade Audio and Music on Mac
Let watch the video below to check how to apply fade-in and fade-out effects in an easier way with Wondershare Filmora for Mac. And download it now to try it by yourself.
Download Mac Version ](https://tools.techidaily.com/wondershare/filmora/download/ )
If you want to quickly apply fade-in or fade-out effects, iMovie’s alternative for Mac - Wondershare Filmora can help you. It enables you to easily edit videos. After you’ve made your creation, it also allows you to directly upload the complete video file to YouTube and Vimeo for sharing. Check out the quick guide below to see how to add audio fade effects in Filmora.
Step 1. Import Your Video
Import the video clip you want to add audio in and out effect. To do this, click “File” > “Import Media” to import your local file to the user’s album. Or you can drag and drop these target files from the computer to this app’s album.
Step 2. Add the Audio Fade In/Out Effect to Your Video
Place the video onto the timeline. Double-click on it and then choose “Audio”. In the tab, you can drag the slider bar to the right or left to manually set the fade in and fade out the length.

Step 3. Save Your Video
Click the “Export” button to select one of the export methods. You can choose your desired format or mobile devices, burn it to DVD and upload it to YouTube and Vimeo.

That’s all about how to fade music and audio with iMovie and its alternative. If you want to learn more about how to edit video clips with Filmora, you can visit its YouTube channel to get more detailed information. Feel free to leave comments below if you need further assistance.
Shanoon Cox
Shanoon Cox is a writer and a lover of all things video.
Follow @Shanoon Cox
Shanoon Cox
Mar 27, 2024• Proven solutions
Fade-in and fade-out effects can help you smooth the video, music, and audio transitions, thus you can make a better movie. When editing videos in iMovie, people may have many video clips and transitions connected to the clips. The fade in and fade out effect seems more important than ever. This tutorial will show you how to fade music and audio in iMovie.
- Part 1: How to Fade Music and Audio in iMovie on Mac
- Part 2: An Easier Way to Fade Audio and Music on Mac
Apart from fading in/fading out the audio, we also want to introduce the video fade-in and fade-out effects, which will help your video to get more attention. Watch the tutorial below to get detailed information about how to fade in/fade out your videos easily.
Related : How to Fade-in and Fade-out Video Clips
After adding the fade-in and fade-out effects to your video, let’s check how to fade your music and audio in iMovie first, and then we will show you how to fade in/fade out your music and audio file in an easier way.
You may also like:
- iMovie for Windows: 10 Best iMovie Alternatives for You
- How to Add Audio to Your Videos
- How to Add Video Effects in iMovie
Part 1: How to Fade Music and Audio in iMovie on Mac
There are two ways available to fade music and audio with iMovie. One is using the fade handles, and the other is using the audio inspector. Before using iMovie audio fade-out effects, please import your video and audio files to iMovie and start a new project.
Method 1: Use Fade Handles to Add Fade in/Fade out Effect in iMovie
Firstly, let’s take a look at the video below to check how to fade audio in/out the audio in iMovie with fade handles.
Step 1. Enable Audio Waveform
When the project opens, check “Show Waveforms” at the bottom of the Project window.
Note: The Blue waveforms indicate the sound recorded within your video clips. Green and purple waveforms indicate sounds and music you’ve added to your project.
Step 2. Move Pointer to Apply Fade Effects
Move the pointer over a waveform, and drag the small gray fade handle at the left of the clip to adjust the fade audio in effect. Then drag the small fade handle at the right of the clip to adjust the fade-out effect.
Step 3. Playback to Check
Move the playhead to the beginning part of the clips with fade effects to check the fade-in and fade-out effects. If everything works OK, uncheck “Show Waveforms” to hide the waveforms.
Related: How to Remove Background Noise from Video
Method 2: Use the Audio Inspector to Apply Fade in/Fade Out Effect in iMovie
To fade audios in and out in iMovie with the audio inspector, you can follow these steps:
Step 1. Open Your iMovie Project and Select a Clip
Double-click the video clip, choose “Clip Adjustments” to open the Inspector, and then click the “Audio” tab.
If there are two audio tracks, and you want to set the fade in and fade out in iMovie for the background music, you can double-click the background music clip to open the audio inspector. This inspector is a little different. If you don’t know how to add background music to iMovie, you can refer to this post: add background music in iMovie .
Step 2. Set the Fade In and Fade Out Effect
In the window, you can manually set the fade-in and fade-out length by dragging the slider bar to the right or left.
If you do not choose “Manual”, that means you’d like iMovie to automatically set it for you. Usually, when you drag video clips to the Project, iMovie will set the fade-in and fade-out effect randomly by increasing the audio volume at the beginning of the clip and decrease the volume at the end of the clip.
If you manually adjust the effect, you can have a better effect.
Step 3. Save the Audio Fade In and Out Effect
After the settings, you can preview the effect in the viewing window to make sure all goes well, and you are much satisfied. Then click “Done” to save the audio fade-in and fade-out effects in iMovie.
Now, that’s done! I hope the above information does help you to set the fade effects to smooth your video and audio transitions.
Related: How to Get More iMovie Themes
Part 2: An Easier Way to Fade Audio and Music on Mac
Let watch the video below to check how to apply fade-in and fade-out effects in an easier way with Wondershare Filmora for Mac. And download it now to try it by yourself.
Download Mac Version ](https://tools.techidaily.com/wondershare/filmora/download/ )
If you want to quickly apply fade-in or fade-out effects, iMovie’s alternative for Mac - Wondershare Filmora can help you. It enables you to easily edit videos. After you’ve made your creation, it also allows you to directly upload the complete video file to YouTube and Vimeo for sharing. Check out the quick guide below to see how to add audio fade effects in Filmora.
Step 1. Import Your Video
Import the video clip you want to add audio in and out effect. To do this, click “File” > “Import Media” to import your local file to the user’s album. Or you can drag and drop these target files from the computer to this app’s album.
Step 2. Add the Audio Fade In/Out Effect to Your Video
Place the video onto the timeline. Double-click on it and then choose “Audio”. In the tab, you can drag the slider bar to the right or left to manually set the fade in and fade out the length.
Step 3. Save Your Video
Click the “Export” button to select one of the export methods. You can choose your desired format or mobile devices, burn it to DVD and upload it to YouTube and Vimeo.
That’s all about how to fade music and audio with iMovie and its alternative. If you want to learn more about how to edit video clips with Filmora, you can visit its YouTube channel to get more detailed information. Feel free to leave comments below if you need further assistance.
Shanoon Cox
Shanoon Cox is a writer and a lover of all things video.
Follow @Shanoon Cox
“Mastering Audio Editing: A Step-by-Step Approach for Isolating Vocals with Audacity”
Removing vocals from audio tracks or songs can be tricky. You may want to create a video and need an instrumental track to add to the background. Maybe you are a content creator looking to remove vocals from a song and extract the instrumental parts for background music in various projects. The Audacity vocal remover makes it easy to achieve this. The vocal remover in Audacity is a great tool that brings satisfactory results without losing the quality of the original track. In this article, we explain two methods of vocal reduction and isolation Audacity and the steps you can follow to do the same in Filmora.
AI Vocal Remover A cross-platform for facilitating your video editing process by offering valuable benefits!
Free Download Free Download Learn More

Method 1: Remove Vocals Using Audacity Vocal Reduction Tool
The first method of removing vocals in Audacity is using the built-in vocal remover. This method is effective in completely removing vocals depending on how much processing is on the vocal. Even if the vocals are not completely removed, the method will reduce the volume significantly to give you great results. Let’s have a look at how to isolate vocal audacity with this method.
Step 1: Open Audacity
The first thing you need to do is open the Audacity software in preparation for the vocal removal.

Step 2: Import the Audio Track
Go to File > Import > Audio to import the audio track you want to edit.

Step 3: Select Audio Track
Select the song or audio track from which you want to remove the vocals. This allows Audacity to load the waveform of the track into the editor.

Step 4: Export as MP3
Backup the file so that you still have the whole song available for use later. Go to File > Export > Export as MP3. Audacity will export the track in the original file format. If it was a WAV audio file, the export will be to that type. This ensures that the audio artifacts are kept in the best condition for editing. Be sure to name the exported file in something you will easily remember.

Step 5: Import the New Audio File
Once you have exported the audio file, click “Close “on the original file. Then import the file you exported in the last step.

Step 6: Apply Vocal Reduction and Isolation
Click on Select, then Select All. On the Effect drop-down menu, select Audacity Vocal Reduction and Isolation.

Step 7: Remove Vocals
Click on the Action tab and select Remove Vocals. Wait for Audacity to remove the vocal and click Play to listen to the edited track. Audacity isolate vocals giving you clear instruments for your audio track or song file.

This method is a quick and easy way to remove vocals from any song in Audacity. It works best with any kind of song and will produce the edited track in just a matter of minutes. On the drawback, this method does not always wholly remove vocal and you may at times still hear bits of it. It may also remove other elements of the audio in addition to the vocal. Nonetheless, it is an effective approach that will work most of the time.
Method 2: Remove Vocals Using Audacity Splitting Audio Channels
When working with songs or audio tracks with vocals in one channel and instruments in another, this is the best method to use. The Audacity vocal remover plugin gives you a simple way to separate the vocals and other sounds in an audio file. However, you cannot tell song that has multiple channels simply by looking at or listening to it. Therefore, you can try this method with any of your files and see the quality of the outcome. Here are the steps for this audacity separate vocals method:
Step 1: Import Your File
Start by importing your audio track or song file into Audacity.

Step 2: Split Stereo to Mono
In the title of the audio, click the Down Arrow. Then select Split Stereo to Mono.

Step 3: Play Solo
Click on the Play button and choose Solo on each track. This allows you to see if there is any isolated vocal on either channel.

Step 4: Delete Isolated Vocal
From the results, delete the section that contains the isolated vocal from the Audacity session.

This alternative method is also effective in extract vocals Audacity. The main benefit is it has fewer steps than the first method. It will also completely remove vocals that are on their own channel. However, the method is limited in that it does not work for the vast majority of audio. It will only work for audio tracks with vols on one channel and instruments on another.
Alternative Way to Remove Vocals from Audio with Filmora
Another great option for removing vocals from a song is using Wondershare Filmora. The video editing software comes with some interesting features, including vocal removal. The recently released Filmora Version 13 is more versatile and user-friendly for better edits. With the integration of AI, users can automate vocal removal which would normally require a lot of time and incredible skill to execute. The AI in the software does this in a few minutes. Filmora also has some amazing features that automate video editing, allowing you to do more with less effort.
Free Download For Win 7 or later(64-bit)
Free Download For macOS 10.14 or later
Quick Tutorial on Removing Vocals with Filmora
The AI Vocal Remover feature on Filmora separates vocals and music from any song or audio track. You can use this feature to extract any acapella from music tracks or dub videos freely by removing the vocals completely. The feature allows you to keep high-quality audio while removing the vocals. It uses advanced algorithms to isolate vocals while maintaining exceptional audio quality. This ensures that vocals are effectively separated from the background music, by audio fidelity is not lost. To remove vocals from your video or audio files, follow these simple steps:
Method 1: Filmora Top Toolbar
Step 1 – Launch Filmors and Create a New Projects
Click on the Filmora icon on your desktop to launch the software. Log in to sign up using the Profile icon at the top. Navigate to the control panel on the left side, and then choose the Create Project Option, and click New Project.

Step 2: Import Source Files and Add to Timeline
On the Main Filmora Interface, select Media from the custom toolbar. Then click Files and import the files you want to use to Filmora. Select the imported files, and drag and drop them into the timeline panel.

Step 3 – Enable AI Vocal Removal
Select the audio track or music clip you want to use in the timeline. Navigate toward the Tools tab at the top toolbar. Choose the Audio option from the drop-down menu and click on the AI Vocal Remover.

Method 2: Running AI Vocal Remover from the Timeline
Once you upload media Filmora, select the media that you want to remove vocal from. Then drag and drop it to the timeline panel. Right-click on the video and choose the AI Vocal Remover from the options panel. This will automatically remove vocals from the video.

Compared to Audacity, Filmora’s AI Vocal Remover tool is quick and easy to use. It will facilitate your video editing process by allowing you to remove vocals and use instrumentals on the go. For instance, this feature allows you to easily dub any video without having to cover up the current vocals. This means that your videos will be more entertaining and engaging while keeping great soundtracks. Match the energy in your videos with the quality of the instrumentals with just a few clicks.
Conclusion
Removing vocals from a video song or audio file gives you more freedom in your projects. You can use the audio as an instrumental or in other creative ways. Audacity is among the most popular vocal removers on the internet. It offers several ways to remove vocals clearly from your audio tracks or music files. Vocal isolation audacity is easy and takes only a few steps. However, we recommend the AI vocal remover feature by Filmora because it is more versatile and accurate. The automated feature takes care of everything for you when removing the vocals from your audio files. You also get to utilize other useful video editing features that automate mundane tasks.
Free Download Free Download Learn More
Method 1: Remove Vocals Using Audacity Vocal Reduction Tool
The first method of removing vocals in Audacity is using the built-in vocal remover. This method is effective in completely removing vocals depending on how much processing is on the vocal. Even if the vocals are not completely removed, the method will reduce the volume significantly to give you great results. Let’s have a look at how to isolate vocal audacity with this method.
Step 1: Open Audacity
The first thing you need to do is open the Audacity software in preparation for the vocal removal.
Step 2: Import the Audio Track
Go to File > Import > Audio to import the audio track you want to edit.
Step 3: Select Audio Track
Select the song or audio track from which you want to remove the vocals. This allows Audacity to load the waveform of the track into the editor.
Step 4: Export as MP3
Backup the file so that you still have the whole song available for use later. Go to File > Export > Export as MP3. Audacity will export the track in the original file format. If it was a WAV audio file, the export will be to that type. This ensures that the audio artifacts are kept in the best condition for editing. Be sure to name the exported file in something you will easily remember.
Step 5: Import the New Audio File
Once you have exported the audio file, click “Close “on the original file. Then import the file you exported in the last step.
Step 6: Apply Vocal Reduction and Isolation
Click on Select, then Select All. On the Effect drop-down menu, select Audacity Vocal Reduction and Isolation.
Step 7: Remove Vocals
Click on the Action tab and select Remove Vocals. Wait for Audacity to remove the vocal and click Play to listen to the edited track. Audacity isolate vocals giving you clear instruments for your audio track or song file.
This method is a quick and easy way to remove vocals from any song in Audacity. It works best with any kind of song and will produce the edited track in just a matter of minutes. On the drawback, this method does not always wholly remove vocal and you may at times still hear bits of it. It may also remove other elements of the audio in addition to the vocal. Nonetheless, it is an effective approach that will work most of the time.
Method 2: Remove Vocals Using Audacity Splitting Audio Channels
When working with songs or audio tracks with vocals in one channel and instruments in another, this is the best method to use. The Audacity vocal remover plugin gives you a simple way to separate the vocals and other sounds in an audio file. However, you cannot tell song that has multiple channels simply by looking at or listening to it. Therefore, you can try this method with any of your files and see the quality of the outcome. Here are the steps for this audacity separate vocals method:
Step 1: Import Your File
Start by importing your audio track or song file into Audacity.
Step 2: Split Stereo to Mono
In the title of the audio, click the Down Arrow. Then select Split Stereo to Mono.
Step 3: Play Solo
Click on the Play button and choose Solo on each track. This allows you to see if there is any isolated vocal on either channel.
Step 4: Delete Isolated Vocal
From the results, delete the section that contains the isolated vocal from the Audacity session.
This alternative method is also effective in extract vocals Audacity. The main benefit is it has fewer steps than the first method. It will also completely remove vocals that are on their own channel. However, the method is limited in that it does not work for the vast majority of audio. It will only work for audio tracks with vols on one channel and instruments on another.
Alternative Way to Remove Vocals from Audio with Filmora
Another great option for removing vocals from a song is using Wondershare Filmora. The video editing software comes with some interesting features, including vocal removal. The recently released Filmora Version 13 is more versatile and user-friendly for better edits. With the integration of AI, users can automate vocal removal which would normally require a lot of time and incredible skill to execute. The AI in the software does this in a few minutes. Filmora also has some amazing features that automate video editing, allowing you to do more with less effort.
Free Download For Win 7 or later(64-bit)
Free Download For macOS 10.14 or later
Quick Tutorial on Removing Vocals with Filmora
The AI Vocal Remover feature on Filmora separates vocals and music from any song or audio track. You can use this feature to extract any acapella from music tracks or dub videos freely by removing the vocals completely. The feature allows you to keep high-quality audio while removing the vocals. It uses advanced algorithms to isolate vocals while maintaining exceptional audio quality. This ensures that vocals are effectively separated from the background music, by audio fidelity is not lost. To remove vocals from your video or audio files, follow these simple steps:
Method 1: Filmora Top Toolbar
Step 1 – Launch Filmors and Create a New Projects
Click on the Filmora icon on your desktop to launch the software. Log in to sign up using the Profile icon at the top. Navigate to the control panel on the left side, and then choose the Create Project Option, and click New Project.
Step 2: Import Source Files and Add to Timeline
On the Main Filmora Interface, select Media from the custom toolbar. Then click Files and import the files you want to use to Filmora. Select the imported files, and drag and drop them into the timeline panel.
Step 3 – Enable AI Vocal Removal
Select the audio track or music clip you want to use in the timeline. Navigate toward the Tools tab at the top toolbar. Choose the Audio option from the drop-down menu and click on the AI Vocal Remover.
Method 2: Running AI Vocal Remover from the Timeline
Once you upload media Filmora, select the media that you want to remove vocal from. Then drag and drop it to the timeline panel. Right-click on the video and choose the AI Vocal Remover from the options panel. This will automatically remove vocals from the video.
Compared to Audacity, Filmora’s AI Vocal Remover tool is quick and easy to use. It will facilitate your video editing process by allowing you to remove vocals and use instrumentals on the go. For instance, this feature allows you to easily dub any video without having to cover up the current vocals. This means that your videos will be more entertaining and engaging while keeping great soundtracks. Match the energy in your videos with the quality of the instrumentals with just a few clicks.
Conclusion
Removing vocals from a video song or audio file gives you more freedom in your projects. You can use the audio as an instrumental or in other creative ways. Audacity is among the most popular vocal removers on the internet. It offers several ways to remove vocals clearly from your audio tracks or music files. Vocal isolation audacity is easy and takes only a few steps. However, we recommend the AI vocal remover feature by Filmora because it is more versatile and accurate. The automated feature takes care of everything for you when removing the vocals from your audio files. You also get to utilize other useful video editing features that automate mundane tasks.
Top 8 Animated Audio Tracks for Creatives: Free Downloads
8 Best Cartoon Sound Effects You Can Download

Benjamin Arango
Mar 27, 2024• Proven solutions
The sound plays a significant role in the videos. Without the right sound effects, your videos become dull. It doesn’t create an impact to grab the attention of the viewers. Especially when it comes to attracting the attention of kids while they watch cartoons.
Are you working on a cartoon video for kids or some animated action cartoons? Use the cartoon sound effects to add more intensity and emotions to the videos. Every time creating a new sound effect for your cartoon video becomes difficult.
If you are on a strict budget, producing new content becomes almost impossible. In such situations, free cartoon sound effects are the best way to enhance your cartoon videos.
In this article, you will learn eight best cartoon sound effects that you can download and make your videos perfect.
8 Best Cartoon Sound Effects Resources
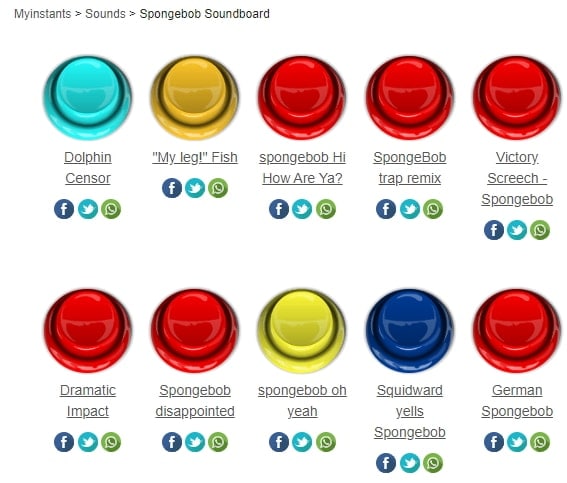
1. Spongebob Sound Effects
MyInstant’s Spongebob soundboard offers a range of cartoon sound effects that can be easily downloaded just by clicking on the Download mp3 sound effect button. You can listen to over 120 classic cartoon sound effects and download it for free. You can also copy the embed link and paste it to your website.
2. Hanna Barbera Sound Effects
From Sounddogs, Hanna Barbera sound effects library, you can find over 2200 cartoon sound effects that are divided into 4 CDs. It has almost all the legendary classic cartoon sound effects from the cartoon shows like Yogi Bear, Huckleberry Hound, the Flintstones, The Jetsons, Quick Draw McGraw, and all the rest of the gang.
You can download the mp3 cartoon sound effects completely free by clicking on the Download ID number mentioned at the right end of each link.
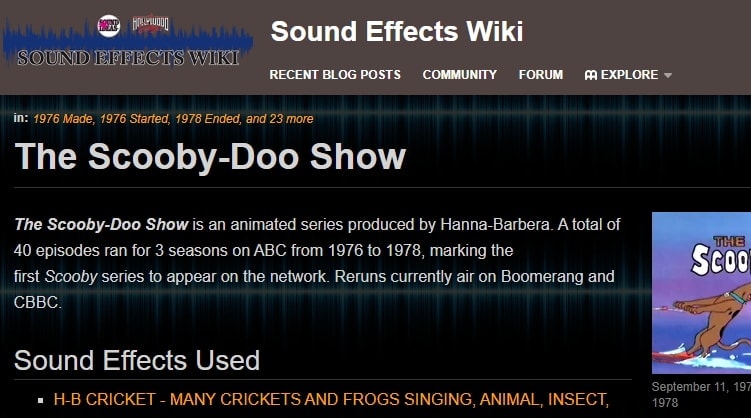
3. Scooby Doo Running Sound
Fandom’s Scooby Doo running sound effects offers all the ideas used in 40 episodes of Scooby Doo throughout the three seasons on ABC. It is over 37000 pages wiki that you can click and browse through the pages to find the right sound effect and download it for free.
4. Tom and Jerry Sound Effects
Pond5 offers 13 Tom and Jerry sound effects that you can listen by scrolling the cursor over the boxes and download the free preview of cartoon sound effects by clicking on Download Preview.
If you want to download the entire cartoon sound effect, you need to register, log in, and pay for it. There are filters like price, collections, duration, etc. to make your selection more precise.
5. Free SFX
In FreeSFX website, you can find a range of comical cartoon sound effects that includes classic effects like descend, boink, impact, pop, musical, running, rip and snap, bounce spring, slide whistle, squelch and splat, horn and loads more.
You need to log in to the website to download free cartoon sound effects.

6.GRSites
With over 1980 cartoon sound effects, the GRSites is one of the best free sites for downloading both mp3 and WAV files. You can browse from a range of categories to find the best cartoon sound effects for your videos.
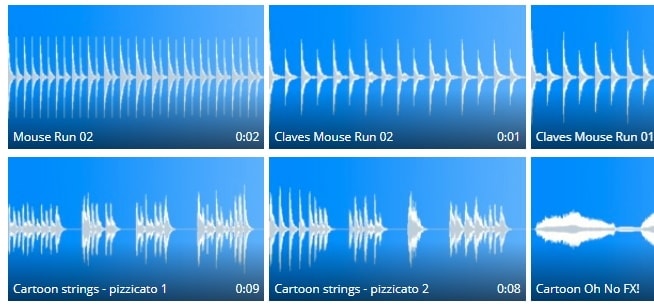
7. Cartoon Running Sound Effect
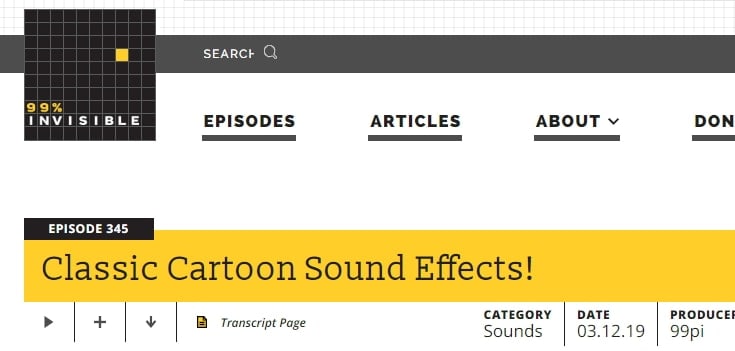
If you are looking for cartoon running sound effect, turn to Episode 345 in 99PercentInvisible. You can download the complete transcript page of around 30 minutes to use it in your video. Use the cartoon running sound effect produced by 99pi to enhance your video.
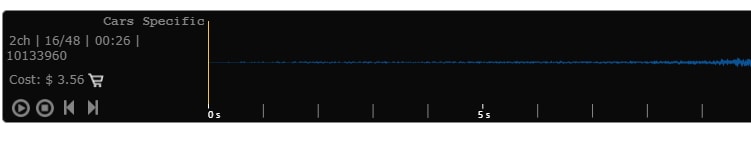
8. Big Fish Audio
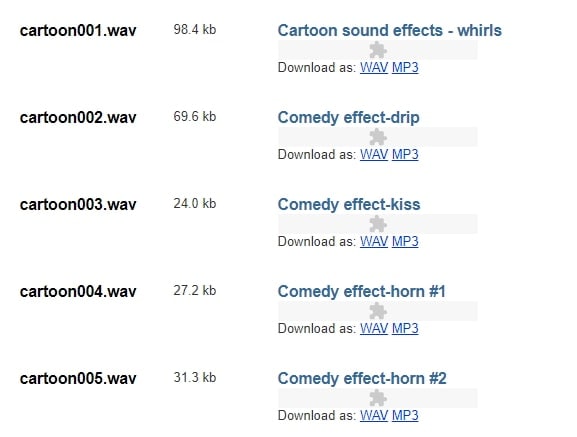
The Big Fish Audio’s cartoon sound FX includes 23 free classic cartoon sound effects. The filters include a range of sound FX types, styles, format, brand, etc.
You can click on the cartoon sound effect and listen to it or add it to your playlist. But, if you wish to download the free cartoon sound effects, you need to register and pay to use the sound effect.

You may also like: How to Extract Audio from Videos on Win/Mac/Phone >>
Conclusion
Make your cartoon videos perfect with the fantastic free cartoon sound effects available for download completely free. With the range of free cartoon sound effects, you don’t need to worry about creating new sounds or expenses. You need to download the free sounds and beautifully enhance it with your creativity. There are several other sites for downloading free cartoon sound effects, but here you can check out some of the trusted ones to use.
Benjamin Arango
Benjamin Arango is a writer and a lover of all things video.
Follow @Benjamin Arango
Benjamin Arango
Mar 27, 2024• Proven solutions
The sound plays a significant role in the videos. Without the right sound effects, your videos become dull. It doesn’t create an impact to grab the attention of the viewers. Especially when it comes to attracting the attention of kids while they watch cartoons.
Are you working on a cartoon video for kids or some animated action cartoons? Use the cartoon sound effects to add more intensity and emotions to the videos. Every time creating a new sound effect for your cartoon video becomes difficult.
If you are on a strict budget, producing new content becomes almost impossible. In such situations, free cartoon sound effects are the best way to enhance your cartoon videos.
In this article, you will learn eight best cartoon sound effects that you can download and make your videos perfect.
8 Best Cartoon Sound Effects Resources
1. Spongebob Sound Effects
MyInstant’s Spongebob soundboard offers a range of cartoon sound effects that can be easily downloaded just by clicking on the Download mp3 sound effect button. You can listen to over 120 classic cartoon sound effects and download it for free. You can also copy the embed link and paste it to your website.
2. Hanna Barbera Sound Effects
From Sounddogs, Hanna Barbera sound effects library, you can find over 2200 cartoon sound effects that are divided into 4 CDs. It has almost all the legendary classic cartoon sound effects from the cartoon shows like Yogi Bear, Huckleberry Hound, the Flintstones, The Jetsons, Quick Draw McGraw, and all the rest of the gang.
You can download the mp3 cartoon sound effects completely free by clicking on the Download ID number mentioned at the right end of each link.
3. Scooby Doo Running Sound
Fandom’s Scooby Doo running sound effects offers all the ideas used in 40 episodes of Scooby Doo throughout the three seasons on ABC. It is over 37000 pages wiki that you can click and browse through the pages to find the right sound effect and download it for free.
4. Tom and Jerry Sound Effects
Pond5 offers 13 Tom and Jerry sound effects that you can listen by scrolling the cursor over the boxes and download the free preview of cartoon sound effects by clicking on Download Preview.
If you want to download the entire cartoon sound effect, you need to register, log in, and pay for it. There are filters like price, collections, duration, etc. to make your selection more precise.
5. Free SFX
In FreeSFX website, you can find a range of comical cartoon sound effects that includes classic effects like descend, boink, impact, pop, musical, running, rip and snap, bounce spring, slide whistle, squelch and splat, horn and loads more.
You need to log in to the website to download free cartoon sound effects.
6.GRSites
With over 1980 cartoon sound effects, the GRSites is one of the best free sites for downloading both mp3 and WAV files. You can browse from a range of categories to find the best cartoon sound effects for your videos.
7. Cartoon Running Sound Effect
If you are looking for cartoon running sound effect, turn to Episode 345 in 99PercentInvisible. You can download the complete transcript page of around 30 minutes to use it in your video. Use the cartoon running sound effect produced by 99pi to enhance your video.
8. Big Fish Audio
The Big Fish Audio’s cartoon sound FX includes 23 free classic cartoon sound effects. The filters include a range of sound FX types, styles, format, brand, etc.
You can click on the cartoon sound effect and listen to it or add it to your playlist. But, if you wish to download the free cartoon sound effects, you need to register and pay to use the sound effect.
You may also like: How to Extract Audio from Videos on Win/Mac/Phone >>
Conclusion
Make your cartoon videos perfect with the fantastic free cartoon sound effects available for download completely free. With the range of free cartoon sound effects, you don’t need to worry about creating new sounds or expenses. You need to download the free sounds and beautifully enhance it with your creativity. There are several other sites for downloading free cartoon sound effects, but here you can check out some of the trusted ones to use.
Benjamin Arango
Benjamin Arango is a writer and a lover of all things video.
Follow @Benjamin Arango
Also read:
- New 2024 Approved 3 Top-Ranked Online Tools for Enhancing Audio Clarity
- Updated The Ultimate List of iPhone and iPad Audio Cutting Software
- Updated 2024 Approved Precision in Perception Eliminating Background Buzz with Audacitys Tools
- 2024 Approved Speak Simply Top 10 Software Solutions to Streamline Your Voice Recordings
- Updated In 2024, Key Information on Utilizing YouTubes Sound Bank
- Locating Broken Glass Disturbance Noise
- 5 Best MP3 Cutters Online for 2024
- Updated A Dive Into Digital Audio Recording Alternatives to Vocaroo Explored for 2024
- 2024 Approved Vanguard Womans Phonetic Alteration Service Online - Free Edition
- Updated 2024 Approved Mastering the Art of Photographic Audio Fusion Visual & Auditory Synthesis
- Updated The Definitive Guide to Chromebook-Compatible DAWs Ranked Top 8 for Professional Sound Engineers for 2024
- In 2024, Step-by-Step Instructions for AirPod and Computer Harmony in the Modern Era
- 2024 Approved Blending Motion Picture with Soundtracks A Modern Approach
- Top Sites to Download Lofi Wallpapers and Lofi Background Music
- Updated 2024 Approved Introduction Guide Mastering Wave Editor Tools and Techniques
- New In 2024, Sonic Storytelling Showcasing Sound Waves & Engaging Animated Sequences with Sony Vegas Pro
- New The Ultimate List Best Voice Modification Tools to Enhance Your Google Meet Experience
- New Investigating Canine Emotional Responses Understanding the Roar of Discontent
- New The Ultimate Fix for Flawed Frequencies Steps to Remove Distortion in Multimedia Projects for 2024
- New Best Chat Apps for Video Conversations The Top Virtual Community Platforms for 2024
- The Quickest Way to Convert WhatsApp Voice Calls to MP3 Format for 2024
- New In 2024, Expertly Curated List of Music to Text Transcription Tools
- 2024 Approved Joyful Ambiance Tunes for a 24Th Anniversary Celebration
- Removing Background Noise Extracting Silent Videos
- New 10 Must-Have Sound Recording Devices for Broadcast Enthusiasts for 2024
- New In 2024, Demystifying the Functionality of Googles Audio Streaming Feature Podcast Edition
- In 2024, The Ultimate List of the Most Accessible, No-Cost DAW Programs for Emerging Producers
- New In 2024, Behind the Scenes with Lexis Audio Editor Expert Reviews and Practical Walkthroughs
- In 2024, How to Unlock SIM Card on Nokia 130 Music online without jailbreak
- New 2024 Approved Get Started with VN Video Editor on Mac or Find Suitable Replacements
- Ultimate Guide to Catch the Regional-Located Pokemon For Oppo A58 4G | Dr.fone
- In 2024, Is GSM Flasher ADB Legit? Full Review To Bypass Your Honor Magic 5 Lite Phone FRP Lock
- How to Downgrade Apple iPhone 7 to an Older iOS System Version? | Dr.fone
- How To Repair iOS of iPhone 12? | Dr.fone
- 5 Hassle-Free Solutions to Fake Location on Find My Friends Of Itel S23+ | Dr.fone
- 2024 Approved Are You Searching for Professional Subtitle Apps? Read This Article to Explore Various Compatible Subtitle Apps that You Can Run on Multiple Platforms
- In 2024, How to Cast Motorola Moto G14 to Computer for iPhone and Android? | Dr.fone
- In 2024, A Quick Guide to Xiaomi 14 Ultra FRP Bypass Instantly
- Why Is My Vivo Y100 Offline? Troubleshooting Guide | Dr.fone
- New 2024 Approved FCP Essentials How to Give Your Footage a VHS Makeover
- Title: 2024 Approved Perfecting Soft Audio Edges A Guide to Smooth Transitioning in iMovie
- Author: Ella
- Created at : 2024-05-19 06:26:24
- Updated at : 2024-05-20 06:26:24
- Link: https://sound-optimizing.techidaily.com/2024-approved-perfecting-soft-audio-edges-a-guide-to-smooth-transitioning-in-imovie/
- License: This work is licensed under CC BY-NC-SA 4.0.
