
:max_bytes(150000):strip_icc():format(webp)/jens-kreuter-85328-c5ada5fb87224444a49aaa4ad1e16897.jpg)
2024 Approved The Art of Audio Zoning Implementing Ducking Effects for Clear Soundscapes
The Art of Audio Zoning: Implementing Ducking Effects for Clear Soundscapes
What is Audio Ducking and How to Use it in Filmora: A Beginner-friendly Guide

Benjamin Arango
Mar 27, 2024• Proven solutions
If you are a content creator, you might already know the importance of having the right audio component in a video. For attaining a perfect balance between voiceovers and the background audio, the concept of “ducking” is implemented. I have come up with this post to help you know more about audio ducking and its importance. I will also include a detailed guide for implementing audio ducking on a video in a stepwise manner. Let’s begin!

- Part 1: What Is Audio Ducking?
- Part 2: When to Use Audio Ducking?
- Part 3: How to Use the Audio Ducking Feature in Filmora?
Audio Ducking: What Is It All About?
In nutshell, it is a process that “ducks” or lowers the background volume when a voiceover appears. For instance, let’s consider that we already have a background score in our video playing. When we would add a narrator’s voice or apply a voiceover, it would create a lot of confusion. Therefore, we implement the audio ducking process to lower the background audio and amplify the voiceover instead.
In most cases, it is achieved through a side-chain compression technique. A control channel is set up that enables the compression of one sound (the background) while amplifying another (the voiceover).


When Do You Need to Implement Audio Ducking?
Since the concept of audio ducking is pretty useful, it can be implemented in different ways during the video editing process. While you can apply the process to any video, here are some of the major instances where it is used.
Travel Vlogs
If you are a travel vlogger, you might already know how tough it can be to make yourself heard in a video. When there are too many background noises, your voice can be diminished. This is exactly where you can apply audio ducking to decrease the background noise and focus on your voice.
Make-up Tutorials
While creating make-up video tutorials, most of us use a background track to keep our viewers engaged. At the same time, you need to let them know about the process by speaking clearly. If you use audio ducking, then you can easily attain a perfect balance between both sounds.
Other Instances
Ideally, if you are creating any other tutorial video for your audience, then audio ducking can be useful. From making video game tutorials to coming up with video lectures on a crucial topic, the concept would come in handy time and time again.
How to Use the Audio Ducking Feature in Filmora?
To implement audio ducking in your videos, you can use a reliable editing tool like Wondershare Filmora . It is a user-friendly and powerful video editing application that lets you “duck” the background sound and easily amplify voiceovers.
- Without undergoing any complicated process, you can implement audio ducking and even scale it (from 1 to 100) to attain the right balance in your videos.
- Filmora also offers tons of powerful audio features for video editing. It has a dedicated audio mixer that would let you split, detach, split, or mute the audio.
- The application can also be used to add voiceovers to your video on its native interface. You can also use its inbuilt operations like noise remover, fade in/fade out, equalizer, etc. to make the needed changes.
- Besides audio ducking, you can also access tons of advanced editing features in Filmora like motion tracking, color grading, keyframing, and so much more.
- The application also offers a wide range of filters, presets, effects, stickers, and royalty-free music that you can easily use in your videos.
To learn how to implement audio ducking in your videos using Filmora, you can go through these basic steps:
Step 1. Import Your Videos on Filmora
To begin with, you have to install Wondershare Filmora on your computer and launch it. Now, go to the “Import” feature from the top, choose to add files, and browse and load your videos. After adding the video, you can drag it to the timeline below to start editing.

Step 2. Import An Audio or Record Voiceovers
Let’s suppose that your video already has an audio track in the background, and now you wish to add another audio component. Most of the people would like to record their voices in the video. For this, you can click on the voiceover (mic) icon at the bottom of the preview panel. This will open a dedicated window so that you can start recording your voice for the video.

Apart from that, you can also go to the “Import” feature to add any other audio component to the project. Besides that, Wondershare Filmora also has a wide range of royalty-free audio files that you can easily add to your projects.

Step 3. Apply Audio Ducking to Your Video
After adding the second audio component, you can view it under the video timeline on Filmora. Now, you need to select the audio track you wish to amplify (like your voiceover) and not the track that already has a prominent volume.

Once you have selected the audio you wish to amplify, right-click to get its context menu. Just select the “Adjust Audio” feature from all the available options.

This will launch a dedicated window on the screen with various audio options to apply. Go to the “Ducking” option here and enable the “Lower the volume of other clips” feature. You can also use a slider here to adjust how much you wish to lower the volume of other clips in the project.

That’s it! Once you have selected the value, click on the “OK” button. You can now preview the results on Filmora and check that the volume of other audio components has been ducked. You can later go to the “Export” option and save the project in the format of your choice.

After reading this post, I’m sure that you will know more about audio ducking and how we can implement it. Since many content creators encounter issues while working on their videos, audio ducking would certainly be a helpful feature. With an application like Wondershare Filmora, you can easily implement audio ducking on multiple files and further edit your videos like a pro!
Benjamin Arango
Benjamin Arango is a writer and a lover of all things video.
Follow @Benjamin Arango
Benjamin Arango
Mar 27, 2024• Proven solutions
If you are a content creator, you might already know the importance of having the right audio component in a video. For attaining a perfect balance between voiceovers and the background audio, the concept of “ducking” is implemented. I have come up with this post to help you know more about audio ducking and its importance. I will also include a detailed guide for implementing audio ducking on a video in a stepwise manner. Let’s begin!
- Part 1: What Is Audio Ducking?
- Part 2: When to Use Audio Ducking?
- Part 3: How to Use the Audio Ducking Feature in Filmora?
Audio Ducking: What Is It All About?
In nutshell, it is a process that “ducks” or lowers the background volume when a voiceover appears. For instance, let’s consider that we already have a background score in our video playing. When we would add a narrator’s voice or apply a voiceover, it would create a lot of confusion. Therefore, we implement the audio ducking process to lower the background audio and amplify the voiceover instead.
In most cases, it is achieved through a side-chain compression technique. A control channel is set up that enables the compression of one sound (the background) while amplifying another (the voiceover).
When Do You Need to Implement Audio Ducking?
Since the concept of audio ducking is pretty useful, it can be implemented in different ways during the video editing process. While you can apply the process to any video, here are some of the major instances where it is used.
Travel Vlogs
If you are a travel vlogger, you might already know how tough it can be to make yourself heard in a video. When there are too many background noises, your voice can be diminished. This is exactly where you can apply audio ducking to decrease the background noise and focus on your voice.
Make-up Tutorials
While creating make-up video tutorials, most of us use a background track to keep our viewers engaged. At the same time, you need to let them know about the process by speaking clearly. If you use audio ducking, then you can easily attain a perfect balance between both sounds.
Other Instances
Ideally, if you are creating any other tutorial video for your audience, then audio ducking can be useful. From making video game tutorials to coming up with video lectures on a crucial topic, the concept would come in handy time and time again.
How to Use the Audio Ducking Feature in Filmora?
To implement audio ducking in your videos, you can use a reliable editing tool like Wondershare Filmora . It is a user-friendly and powerful video editing application that lets you “duck” the background sound and easily amplify voiceovers.
- Without undergoing any complicated process, you can implement audio ducking and even scale it (from 1 to 100) to attain the right balance in your videos.
- Filmora also offers tons of powerful audio features for video editing. It has a dedicated audio mixer that would let you split, detach, split, or mute the audio.
- The application can also be used to add voiceovers to your video on its native interface. You can also use its inbuilt operations like noise remover, fade in/fade out, equalizer, etc. to make the needed changes.
- Besides audio ducking, you can also access tons of advanced editing features in Filmora like motion tracking, color grading, keyframing, and so much more.
- The application also offers a wide range of filters, presets, effects, stickers, and royalty-free music that you can easily use in your videos.
To learn how to implement audio ducking in your videos using Filmora, you can go through these basic steps:
Step 1. Import Your Videos on Filmora
To begin with, you have to install Wondershare Filmora on your computer and launch it. Now, go to the “Import” feature from the top, choose to add files, and browse and load your videos. After adding the video, you can drag it to the timeline below to start editing.
Step 2. Import An Audio or Record Voiceovers
Let’s suppose that your video already has an audio track in the background, and now you wish to add another audio component. Most of the people would like to record their voices in the video. For this, you can click on the voiceover (mic) icon at the bottom of the preview panel. This will open a dedicated window so that you can start recording your voice for the video.
Apart from that, you can also go to the “Import” feature to add any other audio component to the project. Besides that, Wondershare Filmora also has a wide range of royalty-free audio files that you can easily add to your projects.
Step 3. Apply Audio Ducking to Your Video
After adding the second audio component, you can view it under the video timeline on Filmora. Now, you need to select the audio track you wish to amplify (like your voiceover) and not the track that already has a prominent volume.
Once you have selected the audio you wish to amplify, right-click to get its context menu. Just select the “Adjust Audio” feature from all the available options.
This will launch a dedicated window on the screen with various audio options to apply. Go to the “Ducking” option here and enable the “Lower the volume of other clips” feature. You can also use a slider here to adjust how much you wish to lower the volume of other clips in the project.
That’s it! Once you have selected the value, click on the “OK” button. You can now preview the results on Filmora and check that the volume of other audio components has been ducked. You can later go to the “Export” option and save the project in the format of your choice.
After reading this post, I’m sure that you will know more about audio ducking and how we can implement it. Since many content creators encounter issues while working on their videos, audio ducking would certainly be a helpful feature. With an application like Wondershare Filmora, you can easily implement audio ducking on multiple files and further edit your videos like a pro!
Benjamin Arango
Benjamin Arango is a writer and a lover of all things video.
Follow @Benjamin Arango
Top 10 Budget-Friendly Options: Premium-Free Podcast Players for Modern Smartphones
10+ Best Podcast Player Apps for iPhone and Android
Benjamin Arango
Mar 27, 2024• Proven solutions
It has been a little over fifteen years since Ben Hammersley coined the term podcast. During this time, radio and TV stations, as well as people from all walks of life, have embraced this new medium of spreading information through either audio or video files.
Even though podcasts often have the form of a talk show, the topics podcasters cover in their shows range from presenting the latest music releases to discussing political topics. Listening to a podcast from a Smartphone without a player is not an option, which is why we made a selection of some of the best podcast player apps for iPhone and Android devices.
Best Free Podcast Player Apps for iOS and Android Devices
Nearly all podcast player apps have similar features. You can discover new shows, limit how many episodes can be downloaded to your device or reduce silences to the very minimum.
The list of features a podcast player provides should help you determine if that app is the right choice for you. Here are some of the best free podcast player apps for iOS and Android devices you can find on the market in 2019.
1. Breaker
Price: Free, but offers in-app purchases
Compatibility: iOS
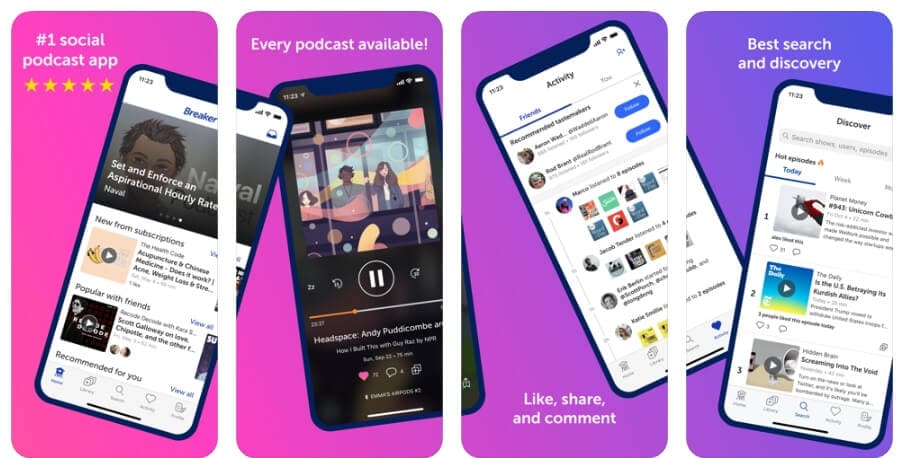
Discovering new podcasts, connecting with friends who use Breaker or sharing the latest episode of the podcast you’re following on Facebook or Twitter is easy with this podcast player. Moreover, the app lets you see which podcasts your friends like the most so you can send them messages and start conversations about an episode you like.
Breaker enables you to create your own playlists and customize them in any way you want. The Sleep Timer feature can be useful if you’re going to set up the episode playing time before your iPhone goes to the Sleep mode.
2. Castbox
Price: Free, but offers in-app purchases
Castbox lets you browse through million podcast episodes and choose from a variety of podcast genres. So, if you would like to follow the latest episodes of music and news related podcasts or talk shows, Castbox may be one of the best options on the market.
This cross-platform app is equipped with the tools that enable you to adjust the audio playback speed, trim silence or customize the sleep timer. You can subscribe to any podcast you discover with Castbox with a single tap, but you must make in-app purchases if you want to access to all features.
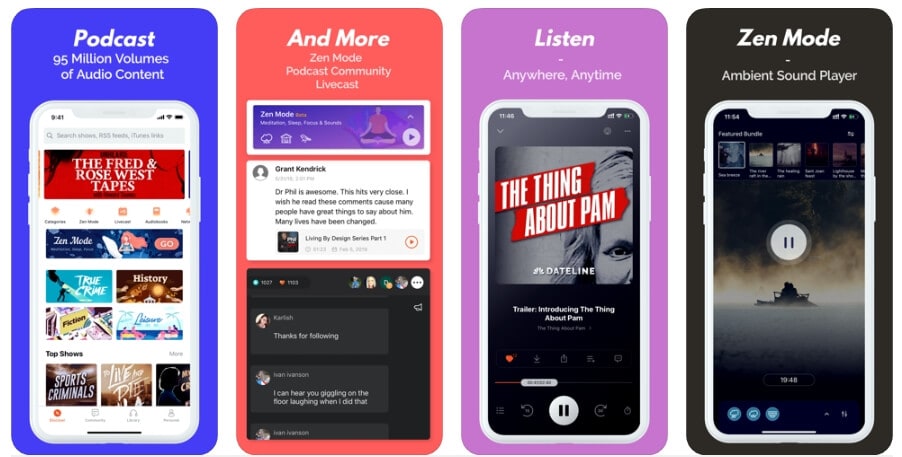
3. Himalaya
Price: Free

This app for Android and iOS devices lets you listen to radio shows, audiobooks, podcasts and allows you to stream shows from a single app. You can customize your homepage or create as many playlists as you want. Each podcast you discover with Himalaya can be shared with your accounts on Instagram, Twitter, and other popular social media platforms.
The app grants you access to more than 500, 000 shows that are organized into 30 categories so you can easily choose a topic and search for an episode you’d like to listen to. Himalaya features a sleep timer, which means that you can listen to your favorite podcast before you fall asleep.
4. Downcast
Price: $2,99, offers in-app purchases
Compatibility: iOS
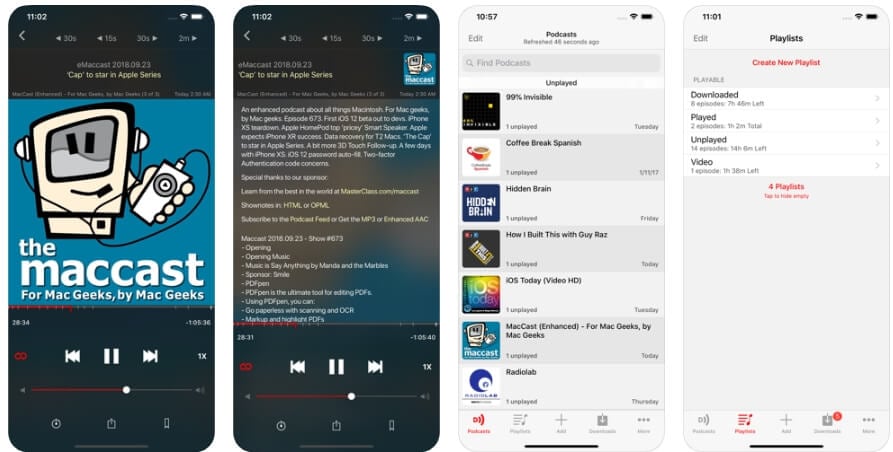
This podcast player provides all the features you are going to need for a superb podcasting experience. Subscribing to a new podcast with this app is a straightforward process which can be completed in an instant. You can also choose if you want to download episodes to your device automatically or browse through old episodes of podcasts you subscribed to.
Downcast also lets you adjust the playback speed, and it offers chapter support for enhanced podcasts. Organizing and customizing podcasts with Downcast requires a minimum amount of effort, which makes this app an excellent choice for anyone who listens or watches a large number of podcasts daily.
5. Stitcher
Price: Free, offers in-app purchases

Politics, sports, or comedy are just a few topics podcasts available on Stitcher cover. You can use the app’s on-demand feature if you want to follow a particular show. Select your favorite genres and tap on the play button to listen to an episode of your choosing.
The app is compatible with more than fifty car models, which enables you to enjoy podcasts while driving. However, the free version of the app offers limited capabilities, and you must upgrade to the premium version if you want to have the full scope of the app’s options.
6. Pocket Casts
Price: Free, but offers in-app purchases

The app’s functional design makes it easy to find and manage podcasts by enabling you to create playback queues effortlessly. Trimming silence, skipping intros or streaming episodes without downloading them are just a few among countless options the Pocket Casts app offers.
Moreover, the Car Play feature enables you to play audio and video podcasts wherever you go. You can also download podcasts if you want to listen to them while you are offline.
Besides, you can play all episodes on your TV or your sound system using the Airplay and Chromecast integrations. The only downside is that you have to purchase the annual or monthly plan if you want to use all of the Pocket Casts’ podcasting options.
7. Apple Podcasts
Price: Free
Compatibility: iOS
This is one of the most popular destinations for all iPhone, iPad and Apple Watch owners who listen to podcasts frequently. Apple Podcasts lets you browse through more than 750.000 shows and 20 million episodes that are organized into categories. You can subscribe to any show you find on Apple Podcasts for free, download episodes you like to your Apple devices and listen to them wherever you go.
The platform’s editor recommends the shows based on your browsing history and helps you discover content that you are going to enjoy watching and listening to. Even so, Apple Podcasts lack the tools that enable its users to control the playback speed, skip intros or set timers before they go to sleep.
8. Spotify
Price: Free
Compatibility: web-based , iOS , Android

People from all over the world have been using Spotify to enjoy music from virtually any genre ever created. This Swedish-American company has been investing a lot into its podcasting services in the last couple of years.
Today Spotify offers access to podcasters to one of the most massive online audiences. Finding new shows and following the latest episodes your favorite podcasters share on this platform is as easy as discovering a new band. There are thousands of podcasts to browse through on Spotify, and some of them can only be played through this podcast player, either online or on iPhone or Android devices.
9. Overcast
Price: Free
Compatibility: iOS

Overcast was launched just five years ago, but today it is recognized as one of the best podcast player apps for iPhones, iWatches, and iPads. If you are looking for an app that will shorten the silences in podcasts, normalize the volume of the voices or enable you to adjust the playback speed of the audio files, then Overcast is probably one of your best options.
The app also provides CarPlay support and allows you to listen to your favorite podcasts even while you are on the road. However, Overcast contains ads, and you must purchase the Premium version of the app if you want to remove them.
10. Castro
Price: Free, but offers in-app purchases
Compatibility: iOS

Managing large numbers of episodes with Castro won’t take much more than a few moments of your time. Subscribe to a podcast you like, and all of the latest episodes will land in the New tab. You can then decide if you want to add them to the queue and listen to them while you are driving or on your iPhone.
The free version of the app doesn’t allow you to skip intros, enhance voices or reduce silence, and you must purchase Castro Plus to access these options. Before you decide to install Castro or Castro Plus on your device, you must make sure that the app is compatible with the version of iOS you have.
11. Podbean
Price: Free but offers in-app purchases

With the selection of over 50 million episodes, Podbean is easily one of the most versatile podcast player apps on this list. You can search for podcasts based on the topic you are interested in, or browse through different categories, and use the name of the podcast, or the author’s name to find the episode you are looking for.
Podbean is equipped with an audio recorder that features a rich selection of audio effects and a versatile set of audio editing tools. Moreover, the app provides support for live audio streaming so you can create or listen to live broadcast directly from your Smartphone.
12. Laughable
Price: Free, offers in-app purchases

Keeping in touch with the latest trends in the comedy world is going to become easy if you install Laughable on your device. The app hosts the world’s largest database of comedy artist profiles and enables you to discover and follow comedians effortlessly. Each time they release a new episode of their podcast or make a guest appearance, you’ll receive a notification, which enables you to follow their latest work.
Besides an impressive collection of comedy podcasts, Laughable also lets you browse through podcasts featuring celebrities like Jordan Peterson, Barak Obama or Oprah. The app is free for just ten days, afterward, you must upgrade to Laughable Insider if you want to have access to all the shows and episodes this podcast player has to offer.
How to Pick the Right Podcast Player App?
The majority of podcast players offer a similar set of options, which complicates the process of finding an app you can use to listen to podcasts on your Smartphones. The operating system your Smartphone supports or whether the app you’re considering offers podcast streaming options can influence your choice of a podcast player app.
Ultimately, the selection of shows and episodes an app offers, as well as its playback control options can help you determine which podcast player is the best option for you. In case you listen to podcasts on a daily basis, purchasing a monthly or annual subscription is a much better option than listening to podcasts with a free version of the app.
Below is a brief summary of the podcast player app listed above. Hope it can help to find out the best podcast app on your iPhone or Android phone.
| Podcast Player | User Rating | Supported OS | Price | Best For |
|---|---|---|---|---|
| Breaker | 4.7 | iOS 11.0 or later | Free, offers in-app purchases | Discovering and sharing podcasts |
| Castbox | 4.8 | iOS 10.0 or later, Android 5.0 or later | Free, offers in-app purchases | Discovering and listening to podcasts |
| Himalaya | 4.7 | iOS 9.1 or later, Android 4.1 or later | Free, offers in-app purchases | Discovering and listening to podcasts |
| Downcast | 4.2 | iOS 11.4 or later | $2,99, offers in-app purchases | Discovering and listening to podcasts |
| Stitcher | 3.6 | iOS 10.0 or later, Android 4.2 and up | Free, offers in-app purchases | Discovering and listening to podcasts |
| Pocket Cast | 3.9 | iOS 11.0 or later, Android 5.0 or up | Free, offers in-app purchases | Discovering and listening to podcasts |
| Apple Podcast | No information | iOS 10.0 or later | Free | Discovering and listening to podcasts |
| Spotify | 4.8 | Web-based, iOS 11.0 or later, varies on device | Free, offers in-app purchases | Discovering and listening to podcasts |
| Overcast | 4.7 | iOS 13.0 or later | Free, offers in-app purchases | Discovering and listening to podcasts |
| Castro | 4.7 | iOS 12.2 or later | Free, offers in-app purchases | Discovering and listening to podcasts |
| Podbean | 4.8 | iOS 10.0 or later | Free, offers in-app purchases | Discovering and listening to podcasts |
| Laughable | 4.8 | iOS 11.4 or later, Android 5.0 and up | Free, offers in-app purchases | Discovering comedy podcasts |
Conclusion
Listening to your favorite podcasts wherever you are, has never been easier, even if you don’t have access to the Internet. Podcast player apps like Spotify or Himalaya grant you access to millions of episodes, but each app we featured in this article can provide a superb experience. Which app are you using to listen to podcasts on your iOS and Android devices? Leave a comment and let us know.
Benjamin Arango
Benjamin Arango is a writer and a lover of all things video.
Follow @Benjamin Arango
Benjamin Arango
Mar 27, 2024• Proven solutions
It has been a little over fifteen years since Ben Hammersley coined the term podcast. During this time, radio and TV stations, as well as people from all walks of life, have embraced this new medium of spreading information through either audio or video files.
Even though podcasts often have the form of a talk show, the topics podcasters cover in their shows range from presenting the latest music releases to discussing political topics. Listening to a podcast from a Smartphone without a player is not an option, which is why we made a selection of some of the best podcast player apps for iPhone and Android devices.
Best Free Podcast Player Apps for iOS and Android Devices
Nearly all podcast player apps have similar features. You can discover new shows, limit how many episodes can be downloaded to your device or reduce silences to the very minimum.
The list of features a podcast player provides should help you determine if that app is the right choice for you. Here are some of the best free podcast player apps for iOS and Android devices you can find on the market in 2019.
1. Breaker
Price: Free, but offers in-app purchases
Compatibility: iOS
Discovering new podcasts, connecting with friends who use Breaker or sharing the latest episode of the podcast you’re following on Facebook or Twitter is easy with this podcast player. Moreover, the app lets you see which podcasts your friends like the most so you can send them messages and start conversations about an episode you like.
Breaker enables you to create your own playlists and customize them in any way you want. The Sleep Timer feature can be useful if you’re going to set up the episode playing time before your iPhone goes to the Sleep mode.
2. Castbox
Price: Free, but offers in-app purchases
Castbox lets you browse through million podcast episodes and choose from a variety of podcast genres. So, if you would like to follow the latest episodes of music and news related podcasts or talk shows, Castbox may be one of the best options on the market.
This cross-platform app is equipped with the tools that enable you to adjust the audio playback speed, trim silence or customize the sleep timer. You can subscribe to any podcast you discover with Castbox with a single tap, but you must make in-app purchases if you want to access to all features.
3. Himalaya
Price: Free
This app for Android and iOS devices lets you listen to radio shows, audiobooks, podcasts and allows you to stream shows from a single app. You can customize your homepage or create as many playlists as you want. Each podcast you discover with Himalaya can be shared with your accounts on Instagram, Twitter, and other popular social media platforms.
The app grants you access to more than 500, 000 shows that are organized into 30 categories so you can easily choose a topic and search for an episode you’d like to listen to. Himalaya features a sleep timer, which means that you can listen to your favorite podcast before you fall asleep.
4. Downcast
Price: $2,99, offers in-app purchases
Compatibility: iOS
This podcast player provides all the features you are going to need for a superb podcasting experience. Subscribing to a new podcast with this app is a straightforward process which can be completed in an instant. You can also choose if you want to download episodes to your device automatically or browse through old episodes of podcasts you subscribed to.
Downcast also lets you adjust the playback speed, and it offers chapter support for enhanced podcasts. Organizing and customizing podcasts with Downcast requires a minimum amount of effort, which makes this app an excellent choice for anyone who listens or watches a large number of podcasts daily.
5. Stitcher
Price: Free, offers in-app purchases
Politics, sports, or comedy are just a few topics podcasts available on Stitcher cover. You can use the app’s on-demand feature if you want to follow a particular show. Select your favorite genres and tap on the play button to listen to an episode of your choosing.
The app is compatible with more than fifty car models, which enables you to enjoy podcasts while driving. However, the free version of the app offers limited capabilities, and you must upgrade to the premium version if you want to have the full scope of the app’s options.
6. Pocket Casts
Price: Free, but offers in-app purchases
The app’s functional design makes it easy to find and manage podcasts by enabling you to create playback queues effortlessly. Trimming silence, skipping intros or streaming episodes without downloading them are just a few among countless options the Pocket Casts app offers.
Moreover, the Car Play feature enables you to play audio and video podcasts wherever you go. You can also download podcasts if you want to listen to them while you are offline.
Besides, you can play all episodes on your TV or your sound system using the Airplay and Chromecast integrations. The only downside is that you have to purchase the annual or monthly plan if you want to use all of the Pocket Casts’ podcasting options.
7. Apple Podcasts
Price: Free
Compatibility: iOS
This is one of the most popular destinations for all iPhone, iPad and Apple Watch owners who listen to podcasts frequently. Apple Podcasts lets you browse through more than 750.000 shows and 20 million episodes that are organized into categories. You can subscribe to any show you find on Apple Podcasts for free, download episodes you like to your Apple devices and listen to them wherever you go.
The platform’s editor recommends the shows based on your browsing history and helps you discover content that you are going to enjoy watching and listening to. Even so, Apple Podcasts lack the tools that enable its users to control the playback speed, skip intros or set timers before they go to sleep.
8. Spotify
Price: Free
Compatibility: web-based , iOS , Android
People from all over the world have been using Spotify to enjoy music from virtually any genre ever created. This Swedish-American company has been investing a lot into its podcasting services in the last couple of years.
Today Spotify offers access to podcasters to one of the most massive online audiences. Finding new shows and following the latest episodes your favorite podcasters share on this platform is as easy as discovering a new band. There are thousands of podcasts to browse through on Spotify, and some of them can only be played through this podcast player, either online or on iPhone or Android devices.
9. Overcast
Price: Free
Compatibility: iOS
Overcast was launched just five years ago, but today it is recognized as one of the best podcast player apps for iPhones, iWatches, and iPads. If you are looking for an app that will shorten the silences in podcasts, normalize the volume of the voices or enable you to adjust the playback speed of the audio files, then Overcast is probably one of your best options.
The app also provides CarPlay support and allows you to listen to your favorite podcasts even while you are on the road. However, Overcast contains ads, and you must purchase the Premium version of the app if you want to remove them.
10. Castro
Price: Free, but offers in-app purchases
Compatibility: iOS
Managing large numbers of episodes with Castro won’t take much more than a few moments of your time. Subscribe to a podcast you like, and all of the latest episodes will land in the New tab. You can then decide if you want to add them to the queue and listen to them while you are driving or on your iPhone.
The free version of the app doesn’t allow you to skip intros, enhance voices or reduce silence, and you must purchase Castro Plus to access these options. Before you decide to install Castro or Castro Plus on your device, you must make sure that the app is compatible with the version of iOS you have.
11. Podbean
Price: Free but offers in-app purchases
With the selection of over 50 million episodes, Podbean is easily one of the most versatile podcast player apps on this list. You can search for podcasts based on the topic you are interested in, or browse through different categories, and use the name of the podcast, or the author’s name to find the episode you are looking for.
Podbean is equipped with an audio recorder that features a rich selection of audio effects and a versatile set of audio editing tools. Moreover, the app provides support for live audio streaming so you can create or listen to live broadcast directly from your Smartphone.
12. Laughable
Price: Free, offers in-app purchases
Keeping in touch with the latest trends in the comedy world is going to become easy if you install Laughable on your device. The app hosts the world’s largest database of comedy artist profiles and enables you to discover and follow comedians effortlessly. Each time they release a new episode of their podcast or make a guest appearance, you’ll receive a notification, which enables you to follow their latest work.
Besides an impressive collection of comedy podcasts, Laughable also lets you browse through podcasts featuring celebrities like Jordan Peterson, Barak Obama or Oprah. The app is free for just ten days, afterward, you must upgrade to Laughable Insider if you want to have access to all the shows and episodes this podcast player has to offer.
How to Pick the Right Podcast Player App?
The majority of podcast players offer a similar set of options, which complicates the process of finding an app you can use to listen to podcasts on your Smartphones. The operating system your Smartphone supports or whether the app you’re considering offers podcast streaming options can influence your choice of a podcast player app.
Ultimately, the selection of shows and episodes an app offers, as well as its playback control options can help you determine which podcast player is the best option for you. In case you listen to podcasts on a daily basis, purchasing a monthly or annual subscription is a much better option than listening to podcasts with a free version of the app.
Below is a brief summary of the podcast player app listed above. Hope it can help to find out the best podcast app on your iPhone or Android phone.
| Podcast Player | User Rating | Supported OS | Price | Best For |
|---|---|---|---|---|
| Breaker | 4.7 | iOS 11.0 or later | Free, offers in-app purchases | Discovering and sharing podcasts |
| Castbox | 4.8 | iOS 10.0 or later, Android 5.0 or later | Free, offers in-app purchases | Discovering and listening to podcasts |
| Himalaya | 4.7 | iOS 9.1 or later, Android 4.1 or later | Free, offers in-app purchases | Discovering and listening to podcasts |
| Downcast | 4.2 | iOS 11.4 or later | $2,99, offers in-app purchases | Discovering and listening to podcasts |
| Stitcher | 3.6 | iOS 10.0 or later, Android 4.2 and up | Free, offers in-app purchases | Discovering and listening to podcasts |
| Pocket Cast | 3.9 | iOS 11.0 or later, Android 5.0 or up | Free, offers in-app purchases | Discovering and listening to podcasts |
| Apple Podcast | No information | iOS 10.0 or later | Free | Discovering and listening to podcasts |
| Spotify | 4.8 | Web-based, iOS 11.0 or later, varies on device | Free, offers in-app purchases | Discovering and listening to podcasts |
| Overcast | 4.7 | iOS 13.0 or later | Free, offers in-app purchases | Discovering and listening to podcasts |
| Castro | 4.7 | iOS 12.2 or later | Free, offers in-app purchases | Discovering and listening to podcasts |
| Podbean | 4.8 | iOS 10.0 or later | Free, offers in-app purchases | Discovering and listening to podcasts |
| Laughable | 4.8 | iOS 11.4 or later, Android 5.0 and up | Free, offers in-app purchases | Discovering comedy podcasts |
Conclusion
Listening to your favorite podcasts wherever you are, has never been easier, even if you don’t have access to the Internet. Podcast player apps like Spotify or Himalaya grant you access to millions of episodes, but each app we featured in this article can provide a superb experience. Which app are you using to listen to podcasts on your iOS and Android devices? Leave a comment and let us know.
Benjamin Arango
Benjamin Arango is a writer and a lover of all things video.
Follow @Benjamin Arango
How to Record on GarageBand? Step by Step Guide
Apple GarageBand is an in-built tool in Mac that lets you make incredible music with or without an instrument. The software acts as a music creation tool that enables you to record, mix, and master the music world. GarageBand recording has become popular due to a diverse range of editing functions. Essentially, do you want to know how to record on GarageBand? Be our guest! We have covered your basis.
In this article
01 What is GarageBand Recording Software?
02 How to Download and Install GarageBand Recording Software?
03 Tutorial for How to Record on GarageBand
Part 1: What is GarageBand Recording Software?
GarageBand for podcasting and GarageBand voice recording is the two phenomenal usages of Apple GarageBand . The Mac users have access to a sound library constituting synths, loops, and instrument presets. The user can add a song, start a track, and develop a musical career effortlessly.
The app is free for iOS, macOS, and iPadOS; sharing and creating music is effortless. Additionally, the Apple iCloud integration plays a pivotal role in adding tracks across devices. The workability is as easy as it can get. Willing to know how to record on GarageBand? Keep following us!
As far as the interface is concerned, it has been designed to make music easier and compatible with beginners. The “Quick Help” function can be enabled to get useful hints every time you have to hover over the cursor. The music artist can also get creative with Transform Pad Smart Control. It helps produce morph and tweak sounds as you deem necessary.

Along with this, there is a great collection of lessons for piano and guitar. It makes the user get right into the feels. One can also get instant feedback on your playing to hone the skills flawlessly.
So, are you with us? Let us begin! Now that we have established the performance of Apple GarageBand, let us look at its features.
Groove Track Feature
The Groove Track feature is considered a spell checker for rhythm. It adjusts and synchronizes the timing of the chosen track to the groove under action.
Smart Controls
The smart controls are designed to shape any sound in the library with a customized set of buttons, sliders, and knobs—the look of the smart control changes with each instrument.
Logic Remote
The logic remote helps navigate the song to browse the Sound Library and access smart controls. One can also use the tool by using multi-touch gestures.
Drummer Feature
The “Drummer” plays a pivotal role in adding the virtual session drummer and producing beats. There are around 33 players from genres, including Hip Hop, Rock, and EDM. The different groove and fill combinations make the process effortless.
Amps and Stompboxes
The Bass Amp designer helps dial-up modern and classic tones. One can also build their guitar rig via 25 legendary amps and cabinets. Moreover, there are 35 creative and fun stompbox effects.
Are you willing to know how to record voice on GarageBand? Should we? Let us first understand the procedure to download and install Apple GarageBand.
Part 2: How to Download and Install GarageBand Recording Software?
Do you need to make a GarageBand podcast? Before getting done with the process, ensure that your Mac computer completes the minimum system requirements. The Mac computer requires MacOS 11.0 or later. Apple GarageBand covers the size of 783.1 MB; therefore, you should have this storage.

Image alt: install apple garageband
MacOS 11 requires at least 20GB of free hard drive storage to handle the installation process. A 4GB RAM and 1.1 GHz processor are also system requirements to download Apple GarageBand . The software comes in-built with the macOS computer. However, if you don’t find it, install it through the following procedure:
Step 1: Launching App Store
To begin, launch App Store from your macOS computer. After that, go to the search bar and type “GarageBand.”
Step 2: Installing GarageBand
Click on Apple GarageBand from there. The “Get” option appears. Click on it and get done with the process.
Part 3: Tutorial for How to Record on GarageBand
Want to know how to record on GarageBand? Do you have a concern about how to record voice on GarageBand? Worry no more! We are here at your disposal!
Apple GarageBand may offer ease of use for musicians and artists. However, understanding how it works is mandatory. The section of the article reflects upon the complete procedure to record on Apple GarageBand to conclude the process. Henceforth, let us not wait any longer! Time to dive in!
Step 1: Initiating the Project
Tempo and time signature can also be tailored as per need. Launch Apple GarageBand from your Mac computer and then plug in your external microphone. As soon as the interface pops up, click on “Voice.” Expand the “Details” menu located in the bottom left corner of the project selection box. Tap “Input Device” and choose the microphone from your list. Moving on, click on “Choose” in the bottom right corner.

Step 2: Adding the New Track
Moving on, you are expected to add a new track. To do this, click on the button with (+), located in the top left corner of the tracks panel. GarageBand offers four tracks. Pick one as you deem necessary. Tap the “Audio” option and then plug in the external microphone or guitar. Hit the “Input” dropdown and choose the list. Click on “Create” afterward.

Step 3: Recording the Sound
Now, it is time to record the sound. Pick the track that you will be recording by clicking on the track panel. Use the square bottom to stop it. Hit red circle to begin recording.

Step 4: Recording the Multiple Tracks
Moreover, you can record multiple tracks as well. To begin, choose the track where the first track was recorded through the track header. Navigate the play head to the start of the original take. Tap the red circle to initiate the recording process. Now, click on the number in the recorded segment in the top left corner. Pick the take you have to keep and then “Delete Unused Takes to get rid of other takes.

Step 5: Exporting the File
After you are done, it is time to export the finished project. Navigate to the top bar and click on “Share.” Choose “ Export Song to Disk “ from the context menu that appears, choose “Export Song to Disk.” A dialogue box appears.

Step 6: Saving Process
Rename the file, enter the file location, format, and sound quality—hit “Export” when you are done. The project can be saved in MP3 , WAV, and AIFF.

Wrapping Up
There is a diverse range of voice recorders and music-creating software in the business, creating chaos. Apple GarageBand recording is one such Mac recording studio doing wonders in the market. With advanced features and multiple functions, one can count on the tool to create magic in the music fraternity. The users are expected to test the features first before making the call.
02 How to Download and Install GarageBand Recording Software?
03 Tutorial for How to Record on GarageBand
Part 1: What is GarageBand Recording Software?
GarageBand for podcasting and GarageBand voice recording is the two phenomenal usages of Apple GarageBand . The Mac users have access to a sound library constituting synths, loops, and instrument presets. The user can add a song, start a track, and develop a musical career effortlessly.
The app is free for iOS, macOS, and iPadOS; sharing and creating music is effortless. Additionally, the Apple iCloud integration plays a pivotal role in adding tracks across devices. The workability is as easy as it can get. Willing to know how to record on GarageBand? Keep following us!
As far as the interface is concerned, it has been designed to make music easier and compatible with beginners. The “Quick Help” function can be enabled to get useful hints every time you have to hover over the cursor. The music artist can also get creative with Transform Pad Smart Control. It helps produce morph and tweak sounds as you deem necessary.
Along with this, there is a great collection of lessons for piano and guitar. It makes the user get right into the feels. One can also get instant feedback on your playing to hone the skills flawlessly.
So, are you with us? Let us begin! Now that we have established the performance of Apple GarageBand, let us look at its features.
Groove Track Feature
The Groove Track feature is considered a spell checker for rhythm. It adjusts and synchronizes the timing of the chosen track to the groove under action.
Smart Controls
The smart controls are designed to shape any sound in the library with a customized set of buttons, sliders, and knobs—the look of the smart control changes with each instrument.
Logic Remote
The logic remote helps navigate the song to browse the Sound Library and access smart controls. One can also use the tool by using multi-touch gestures.
Drummer Feature
The “Drummer” plays a pivotal role in adding the virtual session drummer and producing beats. There are around 33 players from genres, including Hip Hop, Rock, and EDM. The different groove and fill combinations make the process effortless.
Amps and Stompboxes
The Bass Amp designer helps dial-up modern and classic tones. One can also build their guitar rig via 25 legendary amps and cabinets. Moreover, there are 35 creative and fun stompbox effects.
Are you willing to know how to record voice on GarageBand? Should we? Let us first understand the procedure to download and install Apple GarageBand.
Part 2: How to Download and Install GarageBand Recording Software?
Do you need to make a GarageBand podcast? Before getting done with the process, ensure that your Mac computer completes the minimum system requirements. The Mac computer requires MacOS 11.0 or later. Apple GarageBand covers the size of 783.1 MB; therefore, you should have this storage.
Image alt: install apple garageband
MacOS 11 requires at least 20GB of free hard drive storage to handle the installation process. A 4GB RAM and 1.1 GHz processor are also system requirements to download Apple GarageBand . The software comes in-built with the macOS computer. However, if you don’t find it, install it through the following procedure:
Step 1: Launching App Store
To begin, launch App Store from your macOS computer. After that, go to the search bar and type “GarageBand.”
Step 2: Installing GarageBand
Click on Apple GarageBand from there. The “Get” option appears. Click on it and get done with the process.
Part 3: Tutorial for How to Record on GarageBand
Want to know how to record on GarageBand? Do you have a concern about how to record voice on GarageBand? Worry no more! We are here at your disposal!
Apple GarageBand may offer ease of use for musicians and artists. However, understanding how it works is mandatory. The section of the article reflects upon the complete procedure to record on Apple GarageBand to conclude the process. Henceforth, let us not wait any longer! Time to dive in!
Step 1: Initiating the Project
Tempo and time signature can also be tailored as per need. Launch Apple GarageBand from your Mac computer and then plug in your external microphone. As soon as the interface pops up, click on “Voice.” Expand the “Details” menu located in the bottom left corner of the project selection box. Tap “Input Device” and choose the microphone from your list. Moving on, click on “Choose” in the bottom right corner.
Step 2: Adding the New Track
Moving on, you are expected to add a new track. To do this, click on the button with (+), located in the top left corner of the tracks panel. GarageBand offers four tracks. Pick one as you deem necessary. Tap the “Audio” option and then plug in the external microphone or guitar. Hit the “Input” dropdown and choose the list. Click on “Create” afterward.
Step 3: Recording the Sound
Now, it is time to record the sound. Pick the track that you will be recording by clicking on the track panel. Use the square bottom to stop it. Hit red circle to begin recording.
Step 4: Recording the Multiple Tracks
Moreover, you can record multiple tracks as well. To begin, choose the track where the first track was recorded through the track header. Navigate the play head to the start of the original take. Tap the red circle to initiate the recording process. Now, click on the number in the recorded segment in the top left corner. Pick the take you have to keep and then “Delete Unused Takes to get rid of other takes.
Step 5: Exporting the File
After you are done, it is time to export the finished project. Navigate to the top bar and click on “Share.” Choose “ Export Song to Disk “ from the context menu that appears, choose “Export Song to Disk.” A dialogue box appears.
Step 6: Saving Process
Rename the file, enter the file location, format, and sound quality—hit “Export” when you are done. The project can be saved in MP3 , WAV, and AIFF.
Wrapping Up
There is a diverse range of voice recorders and music-creating software in the business, creating chaos. Apple GarageBand recording is one such Mac recording studio doing wonders in the market. With advanced features and multiple functions, one can count on the tool to create magic in the music fraternity. The users are expected to test the features first before making the call.
Also read:
- Updated The Ultimate Guide to Implementing Audio Keyframes Using Adobe Premiere Pro for Mac Users
- New Winning Lineup of Most Popular Digital Music Capture Tools for Windows Users for 2024
- Updated 2024 Approved Rhythmic Realm Find and Download Top-Tier DJ Mixes
- Updated Explore Silent Bubbles Auditory Display
- Updated In 2024, The Ultimate Guide to Silencing Sounds Cutting Audio From iPhones/Mac Videos
- Chord Connoisseurs Top Choice Mobile Apps for Identifying Songs on Android Devices
- New 2024 Approved The SFX Seekers Companion Navigating to 8 Exceptional Online Locations for Accessing Premium-Quality, No-Cost Audio Assets
- New How to Connect AirPods to PC for 2024
- New In 2024, Pro Audio Advantages Unveiling the Top 4 Video Volume Enhancers on the Net
- New 2024 Approved Exploring the Archives A List of Resources for Horrifying Sound Tracks
- Updated 2024 Approved Top 5 Mac-Compatible Auto Music Mixers Unleash Your Beat Potential
- New The Ultimate Voice Transformation Handbook for Gamers for 2024
- The Complete Manual of Sound Control Enhancing Your Live Stream with OBS Ducking
- New Your First Guide to iPhone Audio Transformation Voice Changer Plus Explained for 2024
- Updated Refined Audio Enhancers for Online Video and Podcasting Endeavors
- Updated Identify Applause Acoustic Marker
- Silent Screens Methods to Remove Sound Tracks From MP4, MKV, AVI, MOV, WMV Videos for 2024
- Updated 2024 Approved Unlocking New Dimensions in Communication Utilizing DiscoVoice on Discord Platforms
- Updated Linux Listens Well The Best Free Software and Practices for Capturing Exceptional Soundtracks for 2024
- Cutting-Edge Sound Design with Adobe Premiere Pro Mastering Ducking Functions on Windows Systems for 2024
- Updated In 2024, Exploring Options Beyond Apowersoft A Complete Guide to Audio Recording Tools
- New How to Enhance Your Digital Audio Experience – Top 5 MP3 Editor Reviews
- 2024 Approved Rapid Rhythm Adjustment Simplified Audio Pace Tweaking Strategies
- In 2024, How To Choose the Best Mac MP3 Tag Editor?
- MP3 Cat Sound Effect for 2024
- Updated Unleash Your Inner Producer Explore the Best 8 DAW Apps Available on Android for 2024
- New 2024 Approved 6 Ways to Convert Video to Audio for FREE
- New 2024 Approved How to Generate a Noise-Free AVI Version for Presentation Purposes
- In 2024, Free & Value-Oriented Mac Audio Editing Suite
- Updated In 2024, Harmony Helpers The Premier Sync Edit Software for Video Rhythms, 2023 Release
- In 2024, Guide to Mirror Your Tecno Spark 10C to Other Android devices | Dr.fone
- New Trim and Cut AVI Videos Like a Pro Top 16 Software Solutions
- How To Update or Downgrade iPhone 11 Without Losing Anything? | Dr.fone
- In 2024, 4 Ways to Transfer Music from Oppo Find X6 Pro to iPhone | Dr.fone
- Guide How To Unbrick a Bricked Samsung Galaxy M14 4G Phone | Dr.fone
- Cutting-Edge MKV Trimmers for Mac Top 3 Reviews for 2024
- 5 Ways to Track Infinix Note 30 VIP Racing Edition without App | Dr.fone
- In 2024, Delete Gmail Account With/Without Password On Realme 11 Pro
- How to Change Location on TikTok to See More Content On your Nubia Red Magic 9 Pro+ | Dr.fone
- Authentication Error Occurred on Vivo G2? Here Are 10 Proven Fixes | Dr.fone
- Easy Tutorial for Activating iCloud on Apple iPhone 14 Pro Safe and Legal
- A Complete Guide To OEM Unlocking on Meizu
- How to Fix Nokia C110 Find My Friends No Location Found? | Dr.fone
- The Ultimate Guide to Get the Rare Candy on Pokemon Go Fire Red On Apple iPhone 14 Pro Max | Dr.fone
- How to Transfer Music from Realme C53 to iPod | Dr.fone
- In 2024, How Do I Stop Someone From Tracking My Apple iPhone 12? | Dr.fone
- Realme 11 Pro Not Receiving Texts? 10 Hassle-Free Solutions Here | Dr.fone
- How to Remove a Previously Synced Google Account from Your Nubia Red Magic 9 Pro
- In 2024, Full Guide on Mirroring Your Lava Yuva 3 to Your PC/Mac | Dr.fone
- The Easiest Methods to Hard Reset Xiaomi 14 Ultra | Dr.fone
- In 2024, How to Unlock SIM Card on Vivo Y100t online without jailbreak
- Different Methods for Resetting Itel S23+ Phones with Screen Locked and Not | Dr.fone
- Read This Guide to Find a Reliable Alternative to Fake GPS On Tecno Pop 8 | Dr.fone
- In 2024, How to Come up With the Best Pokemon Team On Poco C55? | Dr.fone
- In 2024, Pokemon Go No GPS Signal? Heres Every Possible Solution On Oppo Find X6 Pro | Dr.fone
- Top 7 Phone Number Locators To Track Xiaomi Redmi K70E Location | Dr.fone
- Premiere Pro Text Effects Beginner Guide for 2024
- 3 Ways to Erase iPhone 6 Plus When Its Locked Within Seconds | Dr.fone
- Updated 2024 Approved 10 Leading Music Video Editors to Elevate Your Artistry
- Updated Endless Playback Top Free Video Loopers for Windows and Mac
- Title: 2024 Approved The Art of Audio Zoning Implementing Ducking Effects for Clear Soundscapes
- Author: Ella
- Created at : 2024-05-19 06:26:32
- Updated at : 2024-05-20 06:26:32
- Link: https://sound-optimizing.techidaily.com/2024-approved-the-art-of-audio-zoning-implementing-ducking-effects-for-clear-soundscapes/
- License: This work is licensed under CC BY-NC-SA 4.0.
