
Adobe Audition Reimagined The Essential Features for Audio Enthusiasts and Professionals
“Adobe Audition Reimagined : The Essential Features for Audio Enthusiasts and Professionals”
What can be more useful than audio editing on a single platform? There is software that will solve this problem under the name of ‘Adobe Audition.’ This Adobe audio editor has got all the facilities that you might need while editing audio. The audio might be edited for professional purposes or random fun sessions.
Do you want to know more about this particular Adobe voice editor? Continue reading this article to enhance your knowledge of this specific editor.
In this article
01 What Is Adobe Audio Editor?
02 Key Features of Adobe Auditionos
03 Pros and Cons of Adobe Audio Editor-Adobe Audition
04 How Do You Edit Audio in Adobe Audition?
Part 1. What Is Adobe Audio Editor?
Adobe developed ‘Audition ,’ an Adobe audio editor that is a powerful platform that you can use for making significant changes in audio files. Audition is an editor for mastering audio editing for different purposes. You can use this Adobe voice editor to control the audio you want to edit, and it can remove the background noises.
This Adobe audio editor has an intuitive interface that attracts users. It has a straightforward way of editing that helps beginner-level users a lot. You can edit single track and also multi-tracks and use tons of plug-ins as they are supported by this Adobe voice editor.

Part 2. Key Features of Adobe Audition
This Adobe audio editor is a very famous editor among both beginners and professionals. It is loaded with amazing features and editing options. You can completely transform your audio files with Adobe Audition. Let’s share some of the key features of this Adobe voice editor.
· Audio Restoration
The biggest factor that attracts users is the AI Audio Restoration feature of Adobe Audition. This is not just an editor; it can automatically restore your damaged files. Moreover, the sound sampling tool also helps remove sounds like crack, rumble, etc.
· Spectral Analysis
Do you know that this Adobe voice editor offers spectral analysis? With this feature, you can look at the audio but in frequency. In addition to this, you can also select the unwanted part of the audio and easily remove it.
· Essential Sounds
For adding effects on Adobe Audition, this is the best option. Users can easily access this feature and assign a category like SFX, Music, Ambience, and Dialogue. After selecting a category, you get different effects like; In a large Room, From Outside, Podcast Voice, Make Distant, etc.
· Envelopes
What are envelopes in this Adobe audio editor? Each track has lines running through them in Adobe Audition. With these, you can control the volume the ability of the pan. Moreover, you can also have control over the EQ envelope.
Part 3. Pros and Cons of Adobe Audio Editor-Adobe Audition
There are a lot of audio editors available in the world that you can use. There is always some downside to any product you use, as nothing is perfect. In this section, we are discussing the pros and cons of Adobe Audition, Adobe Audio Editor.
Pros
- Have you used any software that allows the user to have AI recovery? Adobe Audition has given AI recovery access to users with ease.
- You must have used noise reduction in other software. The quality of the noise reduction services provided by this editor is among the top-notch service providers available.
- Have you used 100+ effects for audios? Audition provides 100+ audio effects. They can be edited on individual clips or over the whole track.
- Moreover, background noises like hum crackle can be reduced using AI tools, while sounds like barking dogs or cars passing by can be removed by Spectral Frequency Display.
Con
- Adobe voice editor has inconvenient subscription options. For example, you can buy Adobe Audition for 20.99$ per month; on the other hand; you can have all the Adobe applications for 52.99$ per month.
Part 4. How Do You Edit Audio in Adobe Audition?
This Adobe audio editor is an impressive audio editing software. You get different and unique editing options that are very useful for creating great audio files. If you are looking for steps to edit in Adobe Audition, this section is for you.
1. Adobe Audition Workflow for Beginner
Are you a beginner? Let’s share some basic details about Adobe Audition. You can start by recording the audio, and once done; you can pause it. The waveform view of the recording will appear on the screen. Furthermore, you have a Files option in the top left corner where all the files appear. Just below this, you get the Media Browser tab, where you can browse the media files from your device.
Do you know something about the Effects Rack? This part of the interface allows you to add and save effects for editing. If you record things and make notes, the Markers tab is great for noting things along the timeline. For adding audio effects, the Essential Sound section will be visible on the right side of the screen.
2. Getting Started with Audition Audio Mixing
Mixing files is always fun, but what about mixing files with Adobe voice editor? Let’s share the steps for this mixing purpose.
Step 1: Start by importing all the media files you plan to mix. Next, head to the Multitrack option from the top left corner to mix multiple tracks. Then, you have to drag and drop the audio files on the timeline.

Step 2: Now, listen to the audio files and analyze the volumes. If you need to adjust the volume, select the tracks, and from the sub-menu, hit on ‘Match Clip Loudness.’

Step 3: If you wish to add effects to the tracks, head to the ‘Effects Rack’ section. There you can get options like Amplify, Compression, etc.

Step 4: While mixing files with Adobe, you can also edit and add volume envelope points. Select the audio file, right-click on it, and look for the Remix option for smart mixing.

3. How Can You Apply Effects in Adobe Audition
If you have successfully mixed the files, we should discuss audio effects. So, let’s get started.
Step 1: For adding effects, start by heading to the Windows tab. From the submenu, select the Effects Rack option. Or else, you can also access Effect racks from the left screen pane. Remember, you can add effects in both forms, either its Waveform timeline or Multitrack.

Step 2: After this, it’s time to add your favorite effect; for that, hit the side arrow in front of every effect number. A list of offered effects will appear; you can select an effect of your choice.

Step 3: After adding an effect, the effect will be added to the list in the effect rack. Secondly, a window appears on the screen, it’s the Effect Control Box, to customize and adjust the settings of the added effect.

Step 4: This exceptional Adobe audio editor offers different presets that could be used instead of using the default effect. Moreover, you can also add the effect to the preset section after adjusting the Effect Control Box. You can also turn off or turn on individual effects by pressing the button along every option in Effect Rack.

4. How to Do Noise Reduction & Restoration in Adobe Audition
You might have recorded a great podcast or voiceover, but when you check it, you are devastated. This is because there is a lot of background noise, disturbing the file quality. Try Noise Reduction in Adobe voice editor by following these steps.
Step 1: Start by importing the audio file to Adobe Audition. Then, carefully listen and analyze the file. This is because you have to identify the part where you get the extra noise to work on it.

Step 2: After the part has been identified, let’s move further and head to the Effects tab. From the submenu, hover on the Noise Reduction/ Restoration option. Now, select the Capture Noise Print option; this feature finds all the highlighted part information.

Step 3: Next step demands you to open the Effects tab. Once that is done, go to the Noise Reduction / Restoration option. Further, select the Noise Reduction Process.

Step 4: This will open a pop-up window for Noise Reduction Control where you can adjust things. This Adobe voice editor allows you to adjust Noise reduction by using the slider. For detailed editing, open Advanced options like Smoothing, etc.

Final Thoughts
Adobe Audition is a known and stunning Adobe audio editor. For you to learn everything, we discussed Adobe Audition in detail. The article talked about its features, pros, cons, and various ways to edit files with this Adobe voice editor. An equally amazing audio editor is Filmora Audio Editor. An amazing, all-in-one audio editor.
Filmora offers a list of basic as well as advanced editing options. Wondershare Filmora is easy to download and quite simple to use. Users who have multiple uses of the software across the video along the audio should consider using this tool.
Wondershare Filmora
Get started easily with Filmora’s powerful performance, intuitive interface, and countless effects Try It Free Try It Free Learn More >

02 Key Features of Adobe Auditionos
03 Pros and Cons of Adobe Audio Editor-Adobe Audition
04 How Do You Edit Audio in Adobe Audition?
Part 1. What Is Adobe Audio Editor?
Adobe developed ‘Audition ,’ an Adobe audio editor that is a powerful platform that you can use for making significant changes in audio files. Audition is an editor for mastering audio editing for different purposes. You can use this Adobe voice editor to control the audio you want to edit, and it can remove the background noises.
This Adobe audio editor has an intuitive interface that attracts users. It has a straightforward way of editing that helps beginner-level users a lot. You can edit single track and also multi-tracks and use tons of plug-ins as they are supported by this Adobe voice editor.
Part 2. Key Features of Adobe Audition
This Adobe audio editor is a very famous editor among both beginners and professionals. It is loaded with amazing features and editing options. You can completely transform your audio files with Adobe Audition. Let’s share some of the key features of this Adobe voice editor.
· Audio Restoration
The biggest factor that attracts users is the AI Audio Restoration feature of Adobe Audition. This is not just an editor; it can automatically restore your damaged files. Moreover, the sound sampling tool also helps remove sounds like crack, rumble, etc.
· Spectral Analysis
Do you know that this Adobe voice editor offers spectral analysis? With this feature, you can look at the audio but in frequency. In addition to this, you can also select the unwanted part of the audio and easily remove it.
· Essential Sounds
For adding effects on Adobe Audition, this is the best option. Users can easily access this feature and assign a category like SFX, Music, Ambience, and Dialogue. After selecting a category, you get different effects like; In a large Room, From Outside, Podcast Voice, Make Distant, etc.
· Envelopes
What are envelopes in this Adobe audio editor? Each track has lines running through them in Adobe Audition. With these, you can control the volume the ability of the pan. Moreover, you can also have control over the EQ envelope.
Part 3. Pros and Cons of Adobe Audio Editor-Adobe Audition
There are a lot of audio editors available in the world that you can use. There is always some downside to any product you use, as nothing is perfect. In this section, we are discussing the pros and cons of Adobe Audition, Adobe Audio Editor.
Pros
- Have you used any software that allows the user to have AI recovery? Adobe Audition has given AI recovery access to users with ease.
- You must have used noise reduction in other software. The quality of the noise reduction services provided by this editor is among the top-notch service providers available.
- Have you used 100+ effects for audios? Audition provides 100+ audio effects. They can be edited on individual clips or over the whole track.
- Moreover, background noises like hum crackle can be reduced using AI tools, while sounds like barking dogs or cars passing by can be removed by Spectral Frequency Display.
Con
- Adobe voice editor has inconvenient subscription options. For example, you can buy Adobe Audition for 20.99$ per month; on the other hand; you can have all the Adobe applications for 52.99$ per month.
Part 4. How Do You Edit Audio in Adobe Audition?
This Adobe audio editor is an impressive audio editing software. You get different and unique editing options that are very useful for creating great audio files. If you are looking for steps to edit in Adobe Audition, this section is for you.
1. Adobe Audition Workflow for Beginner
Are you a beginner? Let’s share some basic details about Adobe Audition. You can start by recording the audio, and once done; you can pause it. The waveform view of the recording will appear on the screen. Furthermore, you have a Files option in the top left corner where all the files appear. Just below this, you get the Media Browser tab, where you can browse the media files from your device.
Do you know something about the Effects Rack? This part of the interface allows you to add and save effects for editing. If you record things and make notes, the Markers tab is great for noting things along the timeline. For adding audio effects, the Essential Sound section will be visible on the right side of the screen.
2. Getting Started with Audition Audio Mixing
Mixing files is always fun, but what about mixing files with Adobe voice editor? Let’s share the steps for this mixing purpose.
Step 1: Start by importing all the media files you plan to mix. Next, head to the Multitrack option from the top left corner to mix multiple tracks. Then, you have to drag and drop the audio files on the timeline.
Step 2: Now, listen to the audio files and analyze the volumes. If you need to adjust the volume, select the tracks, and from the sub-menu, hit on ‘Match Clip Loudness.’
Step 3: If you wish to add effects to the tracks, head to the ‘Effects Rack’ section. There you can get options like Amplify, Compression, etc.
Step 4: While mixing files with Adobe, you can also edit and add volume envelope points. Select the audio file, right-click on it, and look for the Remix option for smart mixing.
3. How Can You Apply Effects in Adobe Audition
If you have successfully mixed the files, we should discuss audio effects. So, let’s get started.
Step 1: For adding effects, start by heading to the Windows tab. From the submenu, select the Effects Rack option. Or else, you can also access Effect racks from the left screen pane. Remember, you can add effects in both forms, either its Waveform timeline or Multitrack.
Step 2: After this, it’s time to add your favorite effect; for that, hit the side arrow in front of every effect number. A list of offered effects will appear; you can select an effect of your choice.
Step 3: After adding an effect, the effect will be added to the list in the effect rack. Secondly, a window appears on the screen, it’s the Effect Control Box, to customize and adjust the settings of the added effect.
Step 4: This exceptional Adobe audio editor offers different presets that could be used instead of using the default effect. Moreover, you can also add the effect to the preset section after adjusting the Effect Control Box. You can also turn off or turn on individual effects by pressing the button along every option in Effect Rack.
4. How to Do Noise Reduction & Restoration in Adobe Audition
You might have recorded a great podcast or voiceover, but when you check it, you are devastated. This is because there is a lot of background noise, disturbing the file quality. Try Noise Reduction in Adobe voice editor by following these steps.
Step 1: Start by importing the audio file to Adobe Audition. Then, carefully listen and analyze the file. This is because you have to identify the part where you get the extra noise to work on it.
Step 2: After the part has been identified, let’s move further and head to the Effects tab. From the submenu, hover on the Noise Reduction/ Restoration option. Now, select the Capture Noise Print option; this feature finds all the highlighted part information.
Step 3: Next step demands you to open the Effects tab. Once that is done, go to the Noise Reduction / Restoration option. Further, select the Noise Reduction Process.
Step 4: This will open a pop-up window for Noise Reduction Control where you can adjust things. This Adobe voice editor allows you to adjust Noise reduction by using the slider. For detailed editing, open Advanced options like Smoothing, etc.
Final Thoughts
Adobe Audition is a known and stunning Adobe audio editor. For you to learn everything, we discussed Adobe Audition in detail. The article talked about its features, pros, cons, and various ways to edit files with this Adobe voice editor. An equally amazing audio editor is Filmora Audio Editor. An amazing, all-in-one audio editor.
Filmora offers a list of basic as well as advanced editing options. Wondershare Filmora is easy to download and quite simple to use. Users who have multiple uses of the software across the video along the audio should consider using this tool.
Wondershare Filmora
Get started easily with Filmora’s powerful performance, intuitive interface, and countless effects Try It Free Try It Free Learn More >
Selecting Prime Android Applications for High-Quality Voice Recording (FREE)
10 Best Voice Recording Apps for Android Devices [Free Included]

Benjamin Arango
Mar 27, 2024• Proven solutions
Memorizing every bit of information you need to perform your daily or weekly tasks becomes increasingly difficult as your workload rises. Students, journalists, and professionals from a wide array of industries can benefit from making audio notes or even recording entire conversations with their Smartphones.
A simple Android voice recorder can make this task easy since you can just tap on the Record button and create an audio note in seconds. However, with so many voice recorder apps for Android devices out there, finding the one best suited for your needs can be more complicated than it seems. So, in this article, we are going to help you discover some best free voice recorder for an Android device you are currently using.
Want to record voiceover and audio on iPhone? Check 10 Best Voice Recorder Apps for iPhones >>
10 Best Free Voice Recording Apps for Android Devices
Recording audio is no longer a highly technical process since now you can create an audio note or record an interview with an Android phone and a voice recorder app. The question is which voice recording app should you install on your device. So, let’s take a look at some of the most potent Android voice recorders you can find at Google Play Store.
1. Easy Voice Recorder Pro
Price: $3.99
Supported OS: Varies with the device
Best for: Students, musicians, and businessmen
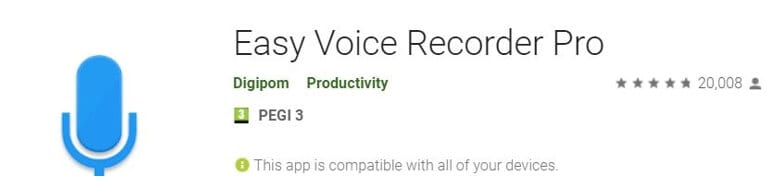
App in Google Play
As the app’s name suggests making recordings for a broad range of purposes is easy. All you need to do is launch the app and start a new audio recording session. Easy Voice Recorder Pro doesn’t limit the duration of your recordings, and it also allows you to compress the recorded audio . That is perfect if you need to record long lectures or conversations. Besides, you can connect an external microphone with the app in case you want to increase the quality of the sound you are recording. The app also lets you store your recordings on Dropbox or Google Drive, while it also offers the possibility to send recordings via email.
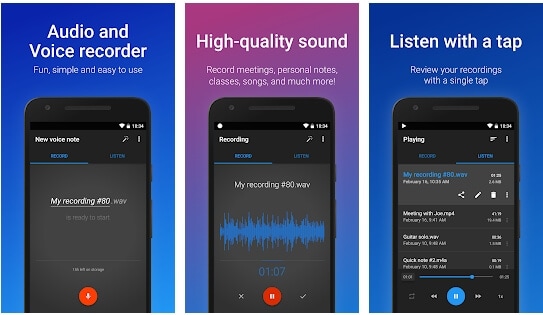
Easy Voice Recorder Pro Interface
Pros
- Allows users to manage and organize their recordings effortlessly
- Supports all standard output audio file formats
- Offers the option to record in stereo
- Recordings made with this app can be used as the ringtone
Cons
- Ads can be frustrating
- Limited basic audio editing tools
2. Smart Recorder – High-quality voice recorder
Price: Free, but contains ads and offers in-app purchases
Supported OS: Varies with the device
Best for: Students, musicians, and businessmen
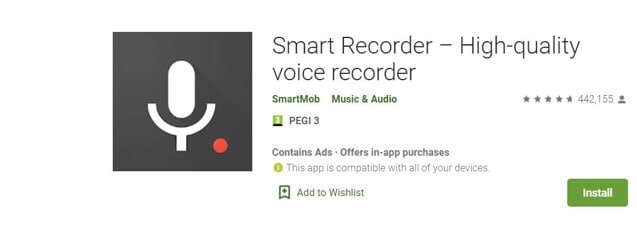
App in Google Play
Capturing high-quality audio recordings effortlessly is the ultimate goal of all Android users who want to use voice recorders. As one of the best free voice recorders for Android, Smart Recorder app has a plethora of features that enable users to make high-quality audio recordings even in imperfect conditions. Options like Live Audio Spectrum Analyzer, microphone gain calibration or automatic and manual sensitivity control in Skip Silence mode are just a few reasons why this app has over 10 million installs. However, you should keep in mind that you cannot create audio files that are larger than 2 GB with this app.
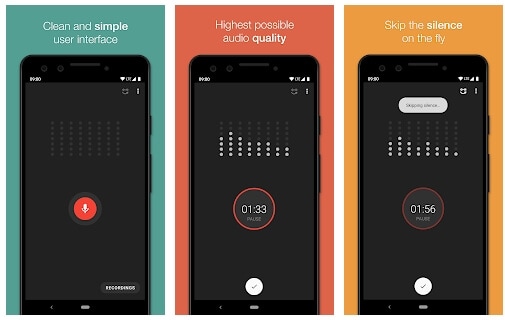
Smart Recorder – High-quality voice recorder Interface
Pros
- Provides full control over the audio recording process
- Equipped with the Wave Lock feature that prevents the device from going into the sleep mode
- Features a live audio spectrum analyzer
- Preserves battery life
Cons
- No phone call recording options
- Limited file-sharing capabilities
3. RecForge II Audio Recorder
Price: Free, but contains ads
Supported OS: Android 4.0 and up
Best for: Musicians
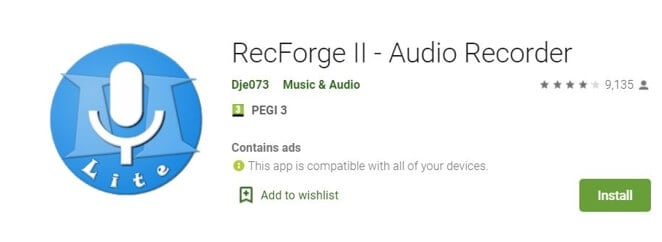
RecForge-audio-recorder App in Google Play
If you are looking for an Android voice recorder that allows you to customize bit rates, sample rates, choose codecs or record in mono or stereo mode, then you should consider installing RecForge II Audio Recorder on your device. The app allows you to schedule recordings, connect different types of external microphones or adjust the gain manually. In addition, you can also adjust the pitch , tempo and the playback rate of all audio files you record and edit with this app. RecForge II Audio Recorder continues working even while you are using other apps, and it keeps the battery consumption at the very minimum.
Pros
- Supports nearly all common audio file formats
- Offers a versatile set of audio editing tools
- Excellent file-sharing capabilities
- Allows users to increase the audio quality by disabling Automatic Gain Control
Cons
- The maximum duration of a recording is limited for some file formats
- Can be too complicated for inexperienced users
4. Hi-Q MP3 Voice Recorder
Price: Free
Supported OS: Varies with the device
Best for: Students, general use
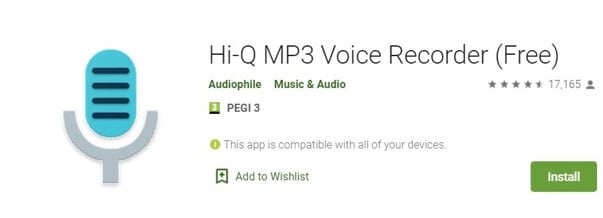
Hi-Q MP3 Voice Recorder App in Google Play
You don’t need any previous audio recording experience to record long lectures, interviews and all other types of voice recordings with Hi-Q MP3 Voice Recorder. The free version of the app limits the maximum duration of a recording you can make to just 10 minutes. That is why you must upgrade to the Pro version of Hi-Q MP3 Voice Recorder if you want to capture hours of material directly from your phone. The best part is that all versions of the app automatically upload recordings to Google Drive or Dropbox which frees up space on your device.
Pros
- Intuitive and modernly designed interface
- Simple audio recording session setup
- Customizable audio quality
- Excellent file management capabilities
Cons
- Recording with external microphones is not an option
- The free version of the app limits the maximum duration of recordings
5. Voice Recorder
Price: Free, but contains ads
Supported OS: Android 4.1 and up
Best for: Students, musicians, and businessmen
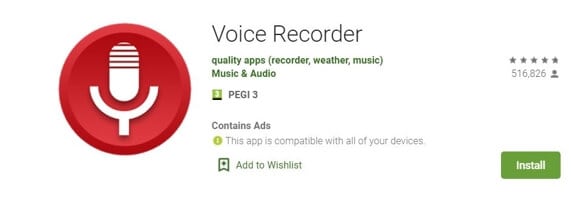
Voice Recorder App in Google Play
If you are looking for an app you can use to record an interview, a business meeting or a lecture, then Voice Recorder may be one of your best options. You can record audio files without any restrictions and visualize the sounds with the Audio Spectrum Analyzer. The app continues recording from the background even while the phone’s screen is off which preserves battery life and enables you to perform other tasks while the recording session is in progress. Voice Recorder offers a broad range of file-sharing capabilities so that you can easily send your audio recordings via SMS, email and the Messenger app or share them on Facebook and WhatsApp.
Pros
- Available for free to all Android users
- Stopping, pausing or resuming a recording session is easy
- Allows users to adjust the sample rate
- Offers the microphone gain calibration tool
Cons
- Audio recordings can only be saved in two different file formats
- Doesn’t provide audio editing options
6. Music Maker JAM
Price: Free, but contains ads and offers in-app purchases
Supported OS: Varies with the device
Best for: Musicians
Music Maker JAM App in Google Play
With the selection of 300 mix packs, Music Maker JAM is one of the best android apps for aspiring musicians who want to compose their music even while they are on the go. You can choose from a variety of samples, audio loops and beats to create your next song or record live performances with the app’s 8-channel mixer. Music Maker JAM also enables you to record vocals, adjust the tempo of the audio files or apply effects to all recordings you edit with this app. Once your recording is ready, you can upload it to SoundCloud directly from the app or post it on Facebook and other social networks.
Pros
- Shake your Android phone to remix a song
- The app lets you choose from more than 300 mix packs
- Supports multi-channel recording
- Offers advanced audio editing options
Cons
- Music Maker JAM is not primarily a voice recorder
- No support for external microphones
7. LectureNotes
Price: Free
Supported OS: Android 3.0 and up
Best for: Students
LectureNotes App in Google Play
In case you take notes often, then this app can be an excellent choice for you as it allows you to use a stylus to create notes. However, the trial version limits the number of notebooks to just two, and neither of the notebooks can have more than eight pages. Moreover, if you would like to utilize the app’s voice recording features, you must install LectureRecordings plugin on your device. To capture videos, you must first install the LectureVideos plugin. Another disappointing thing is that you won’t be able to adjust the settings for your audio recording sessions or edit the recording you create with this app.
Pros
- An efficient tool for creating hand-written notes
- The app can be used while your Android phone is offline
- Allows users to export PDF files
- Compatible with OneNote and Evernote apps
Cons
- Underwhelming voice recording options
- You must install a plugin to record audio files
8. ASR Voice Recorder
Price: Free, but contains ads
Supported OS: Android 5.0 and up
Best for: Journalists, musicians, students

ASR Voice Recorder App in Google Play
A brief look at the list of features this app offers, you will find this is a well-rounded voice recorder because it offers all the tools you are going to need to create high-quality recordings. You can choose from a variety of file formats, add notes to recordings at recording or control the playback speed of all audio files you listen to in AVR Voice Recorder. You can also skip silences, connect a headset microphone to the app via Bluetooth or arrange your voice recordings in any way you want. The app lets you upload your audio files to Dropbox, Google Drive, and other file-hosting platforms.
Pros
- Provides excellent audio recording options for free
- Allows users to save recordings in different file formats
- Equipped with an audio playback controller
- Sharing multiple files is easy
Cons
- Offers only basic audio editing tools
- No audio transcription options
9. Call Recorder
Price: Free, but contains ads
Supported OS: Android 4.0 and up
Best for: Marketing professionals
Call Recorder App in Google Play
If you would like to record all incoming and outgoing calls on your device, the Call Recorder app is one of the best options you have at your disposal. Besides recording all calls from whitelisted numbers automatically, this app also allows you to choose from a variety of different recording modes. Furthermore, Call Recorder lets you blacklist numbers from which you don’t want to receive calls and enables you to organize your recordings efficiently. All files created with this app can be sent via Skype, SMS, Dropbox and other messaging services, which makes Call Recorder app a perfect choice for marketing professionals.
Pros
- No previous experience required to start using the app
- Records an unlimited number of phone calls
- Simple audio file management
- Offers several recording modes
Cons
- No voice recording options
- Doesn’t provide audio editing tools
10. Otter Voice Meeting Notes
Price: Free, but offers in-app purchases
Supported OS: Android 5.0 and up
Best for: Large teams of professionals
Otter Voice Meeting Notes App in Google Play
Besides being a powerful voice recorder, Otter Voice Meeting Notes is a collaborative tool that enables multiple team members to highlight and edit the transcripts this app generates in real-time. In addition to recording business meetings, you can also use Otter Voice Meeting Notes to record interviews, webinars or podcasts . Starting a new recording session takes only a second since you just have to tap on the Record button to capture the voices of all speakers in the room. What’s more, the app lets you add photos or slides to transcripts while the recording session is still in progress.
Pros
- Makes collaboration on a single transcript easier
- The app’s AI identifies different speakers automatically after the initial training
- Allows users to export MP3 audio files
- Compatible with the Call Recorder app
Cons
- In-app purchases are expensive
- Audio editing tools could be better
You may also like: 10 Best Free Discord Voice Changers
Conclusion
Creating an audio note or recording an entire interview with an Android device has never been easier. Each of the voice recorder apps we featured in this article enables you to create high-quality audio files you can share via email or store on the cloud.
Which of these Android voice recorders you are going to choose depends on a broad spectrum of factors, which range from the context in which you want to make the recording toaudio editing tools you want to use to process the audio files you created.
We’ve summarized the essential information in the table below. Hope that will help you to determine. What is your favorite Android voice recorder? Leave a comment and let us know.
| Voice recorder app | Price | Supported OS | User Rating | Best for |
|---|---|---|---|---|
| Easy Voice Recorder Pro | $3.99 | Varies with the device | 4.8 | Students, musicians, and businessmen |
| Smart Recorder – High-quality voice recorder | Free, but contains ads and offers in-app purchases | Varies with the device | 4.7 | Students, musicians, and businessmen |
| RecForge II Audio Recorder | Free, but contains ads | Android 4.0 and up | 4.0 | Musicians |
| Hi-Q MP3 Voice Recorder | Free | Varies with the device | 4.5 | Students |
| Voice Recorder | Free, but contains ads | Android 4.1 and up | 4.8 | Students, musicians, and businessmen |
| Music Maker JAM | Free, but contains ads and offers in-app purchases | Varies with the device | 4.6 | Musicians |
| LectureNotes | Free | Android 3.0 and up | 4.3 | Students |
| ASR Voice Recorder | Free, but contains ads | Android 5.0 and up | 4.4 | Journalists, musicians, students |
| Call Recorder | Free, but contains ads | Android 4.0 and up | 4.3 | Marketing professionals |
| Otter Voice Meeting Notes | Free, but offers in-app purchases | Android 5.0 and up | 4.5 | Large teams of professionals |
Benjamin Arango
Benjamin Arango is a writer and a lover of all things video.
Follow @Benjamin Arango
Benjamin Arango
Mar 27, 2024• Proven solutions
Memorizing every bit of information you need to perform your daily or weekly tasks becomes increasingly difficult as your workload rises. Students, journalists, and professionals from a wide array of industries can benefit from making audio notes or even recording entire conversations with their Smartphones.
A simple Android voice recorder can make this task easy since you can just tap on the Record button and create an audio note in seconds. However, with so many voice recorder apps for Android devices out there, finding the one best suited for your needs can be more complicated than it seems. So, in this article, we are going to help you discover some best free voice recorder for an Android device you are currently using.
Want to record voiceover and audio on iPhone? Check 10 Best Voice Recorder Apps for iPhones >>
10 Best Free Voice Recording Apps for Android Devices
Recording audio is no longer a highly technical process since now you can create an audio note or record an interview with an Android phone and a voice recorder app. The question is which voice recording app should you install on your device. So, let’s take a look at some of the most potent Android voice recorders you can find at Google Play Store.
1. Easy Voice Recorder Pro
Price: $3.99
Supported OS: Varies with the device
Best for: Students, musicians, and businessmen
App in Google Play
As the app’s name suggests making recordings for a broad range of purposes is easy. All you need to do is launch the app and start a new audio recording session. Easy Voice Recorder Pro doesn’t limit the duration of your recordings, and it also allows you to compress the recorded audio . That is perfect if you need to record long lectures or conversations. Besides, you can connect an external microphone with the app in case you want to increase the quality of the sound you are recording. The app also lets you store your recordings on Dropbox or Google Drive, while it also offers the possibility to send recordings via email.
Easy Voice Recorder Pro Interface
Pros
- Allows users to manage and organize their recordings effortlessly
- Supports all standard output audio file formats
- Offers the option to record in stereo
- Recordings made with this app can be used as the ringtone
Cons
- Ads can be frustrating
- Limited basic audio editing tools
2. Smart Recorder – High-quality voice recorder
Price: Free, but contains ads and offers in-app purchases
Supported OS: Varies with the device
Best for: Students, musicians, and businessmen
App in Google Play
Capturing high-quality audio recordings effortlessly is the ultimate goal of all Android users who want to use voice recorders. As one of the best free voice recorders for Android, Smart Recorder app has a plethora of features that enable users to make high-quality audio recordings even in imperfect conditions. Options like Live Audio Spectrum Analyzer, microphone gain calibration or automatic and manual sensitivity control in Skip Silence mode are just a few reasons why this app has over 10 million installs. However, you should keep in mind that you cannot create audio files that are larger than 2 GB with this app.
Smart Recorder – High-quality voice recorder Interface
Pros
- Provides full control over the audio recording process
- Equipped with the Wave Lock feature that prevents the device from going into the sleep mode
- Features a live audio spectrum analyzer
- Preserves battery life
Cons
- No phone call recording options
- Limited file-sharing capabilities
3. RecForge II Audio Recorder
Price: Free, but contains ads
Supported OS: Android 4.0 and up
Best for: Musicians
RecForge-audio-recorder App in Google Play
If you are looking for an Android voice recorder that allows you to customize bit rates, sample rates, choose codecs or record in mono or stereo mode, then you should consider installing RecForge II Audio Recorder on your device. The app allows you to schedule recordings, connect different types of external microphones or adjust the gain manually. In addition, you can also adjust the pitch , tempo and the playback rate of all audio files you record and edit with this app. RecForge II Audio Recorder continues working even while you are using other apps, and it keeps the battery consumption at the very minimum.
Pros
- Supports nearly all common audio file formats
- Offers a versatile set of audio editing tools
- Excellent file-sharing capabilities
- Allows users to increase the audio quality by disabling Automatic Gain Control
Cons
- The maximum duration of a recording is limited for some file formats
- Can be too complicated for inexperienced users
4. Hi-Q MP3 Voice Recorder
Price: Free
Supported OS: Varies with the device
Best for: Students, general use
Hi-Q MP3 Voice Recorder App in Google Play
You don’t need any previous audio recording experience to record long lectures, interviews and all other types of voice recordings with Hi-Q MP3 Voice Recorder. The free version of the app limits the maximum duration of a recording you can make to just 10 minutes. That is why you must upgrade to the Pro version of Hi-Q MP3 Voice Recorder if you want to capture hours of material directly from your phone. The best part is that all versions of the app automatically upload recordings to Google Drive or Dropbox which frees up space on your device.
Pros
- Intuitive and modernly designed interface
- Simple audio recording session setup
- Customizable audio quality
- Excellent file management capabilities
Cons
- Recording with external microphones is not an option
- The free version of the app limits the maximum duration of recordings
5. Voice Recorder
Price: Free, but contains ads
Supported OS: Android 4.1 and up
Best for: Students, musicians, and businessmen
Voice Recorder App in Google Play
If you are looking for an app you can use to record an interview, a business meeting or a lecture, then Voice Recorder may be one of your best options. You can record audio files without any restrictions and visualize the sounds with the Audio Spectrum Analyzer. The app continues recording from the background even while the phone’s screen is off which preserves battery life and enables you to perform other tasks while the recording session is in progress. Voice Recorder offers a broad range of file-sharing capabilities so that you can easily send your audio recordings via SMS, email and the Messenger app or share them on Facebook and WhatsApp.
Pros
- Available for free to all Android users
- Stopping, pausing or resuming a recording session is easy
- Allows users to adjust the sample rate
- Offers the microphone gain calibration tool
Cons
- Audio recordings can only be saved in two different file formats
- Doesn’t provide audio editing options
6. Music Maker JAM
Price: Free, but contains ads and offers in-app purchases
Supported OS: Varies with the device
Best for: Musicians
Music Maker JAM App in Google Play
With the selection of 300 mix packs, Music Maker JAM is one of the best android apps for aspiring musicians who want to compose their music even while they are on the go. You can choose from a variety of samples, audio loops and beats to create your next song or record live performances with the app’s 8-channel mixer. Music Maker JAM also enables you to record vocals, adjust the tempo of the audio files or apply effects to all recordings you edit with this app. Once your recording is ready, you can upload it to SoundCloud directly from the app or post it on Facebook and other social networks.
Pros
- Shake your Android phone to remix a song
- The app lets you choose from more than 300 mix packs
- Supports multi-channel recording
- Offers advanced audio editing options
Cons
- Music Maker JAM is not primarily a voice recorder
- No support for external microphones
7. LectureNotes
Price: Free
Supported OS: Android 3.0 and up
Best for: Students
LectureNotes App in Google Play
In case you take notes often, then this app can be an excellent choice for you as it allows you to use a stylus to create notes. However, the trial version limits the number of notebooks to just two, and neither of the notebooks can have more than eight pages. Moreover, if you would like to utilize the app’s voice recording features, you must install LectureRecordings plugin on your device. To capture videos, you must first install the LectureVideos plugin. Another disappointing thing is that you won’t be able to adjust the settings for your audio recording sessions or edit the recording you create with this app.
Pros
- An efficient tool for creating hand-written notes
- The app can be used while your Android phone is offline
- Allows users to export PDF files
- Compatible with OneNote and Evernote apps
Cons
- Underwhelming voice recording options
- You must install a plugin to record audio files
8. ASR Voice Recorder
Price: Free, but contains ads
Supported OS: Android 5.0 and up
Best for: Journalists, musicians, students
ASR Voice Recorder App in Google Play
A brief look at the list of features this app offers, you will find this is a well-rounded voice recorder because it offers all the tools you are going to need to create high-quality recordings. You can choose from a variety of file formats, add notes to recordings at recording or control the playback speed of all audio files you listen to in AVR Voice Recorder. You can also skip silences, connect a headset microphone to the app via Bluetooth or arrange your voice recordings in any way you want. The app lets you upload your audio files to Dropbox, Google Drive, and other file-hosting platforms.
Pros
- Provides excellent audio recording options for free
- Allows users to save recordings in different file formats
- Equipped with an audio playback controller
- Sharing multiple files is easy
Cons
- Offers only basic audio editing tools
- No audio transcription options
9. Call Recorder
Price: Free, but contains ads
Supported OS: Android 4.0 and up
Best for: Marketing professionals
Call Recorder App in Google Play
If you would like to record all incoming and outgoing calls on your device, the Call Recorder app is one of the best options you have at your disposal. Besides recording all calls from whitelisted numbers automatically, this app also allows you to choose from a variety of different recording modes. Furthermore, Call Recorder lets you blacklist numbers from which you don’t want to receive calls and enables you to organize your recordings efficiently. All files created with this app can be sent via Skype, SMS, Dropbox and other messaging services, which makes Call Recorder app a perfect choice for marketing professionals.
Pros
- No previous experience required to start using the app
- Records an unlimited number of phone calls
- Simple audio file management
- Offers several recording modes
Cons
- No voice recording options
- Doesn’t provide audio editing tools
10. Otter Voice Meeting Notes
Price: Free, but offers in-app purchases
Supported OS: Android 5.0 and up
Best for: Large teams of professionals
Otter Voice Meeting Notes App in Google Play
Besides being a powerful voice recorder, Otter Voice Meeting Notes is a collaborative tool that enables multiple team members to highlight and edit the transcripts this app generates in real-time. In addition to recording business meetings, you can also use Otter Voice Meeting Notes to record interviews, webinars or podcasts . Starting a new recording session takes only a second since you just have to tap on the Record button to capture the voices of all speakers in the room. What’s more, the app lets you add photos or slides to transcripts while the recording session is still in progress.
Pros
- Makes collaboration on a single transcript easier
- The app’s AI identifies different speakers automatically after the initial training
- Allows users to export MP3 audio files
- Compatible with the Call Recorder app
Cons
- In-app purchases are expensive
- Audio editing tools could be better
You may also like: 10 Best Free Discord Voice Changers
Conclusion
Creating an audio note or recording an entire interview with an Android device has never been easier. Each of the voice recorder apps we featured in this article enables you to create high-quality audio files you can share via email or store on the cloud.
Which of these Android voice recorders you are going to choose depends on a broad spectrum of factors, which range from the context in which you want to make the recording toaudio editing tools you want to use to process the audio files you created.
We’ve summarized the essential information in the table below. Hope that will help you to determine. What is your favorite Android voice recorder? Leave a comment and let us know.
| Voice recorder app | Price | Supported OS | User Rating | Best for |
|---|---|---|---|---|
| Easy Voice Recorder Pro | $3.99 | Varies with the device | 4.8 | Students, musicians, and businessmen |
| Smart Recorder – High-quality voice recorder | Free, but contains ads and offers in-app purchases | Varies with the device | 4.7 | Students, musicians, and businessmen |
| RecForge II Audio Recorder | Free, but contains ads | Android 4.0 and up | 4.0 | Musicians |
| Hi-Q MP3 Voice Recorder | Free | Varies with the device | 4.5 | Students |
| Voice Recorder | Free, but contains ads | Android 4.1 and up | 4.8 | Students, musicians, and businessmen |
| Music Maker JAM | Free, but contains ads and offers in-app purchases | Varies with the device | 4.6 | Musicians |
| LectureNotes | Free | Android 3.0 and up | 4.3 | Students |
| ASR Voice Recorder | Free, but contains ads | Android 5.0 and up | 4.4 | Journalists, musicians, students |
| Call Recorder | Free, but contains ads | Android 4.0 and up | 4.3 | Marketing professionals |
| Otter Voice Meeting Notes | Free, but offers in-app purchases | Android 5.0 and up | 4.5 | Large teams of professionals |
Benjamin Arango
Benjamin Arango is a writer and a lover of all things video.
Follow @Benjamin Arango
Comprehensive Vimeo Video Breakdown Including Aspect Ratio
Video customization does not come automatically. There is something extraordinary you need to look around. One platform that most people are aware of is YouTube that offers video sharing services. But the world is not so small. There exists a new genre picking up pace with personalized effect. The talk is about Vimeo, the latest trending video streaming site, with a vast viewer base after YouTube.

It is a beautiful platform for those professional videographers, filmmakers, event organizers, graphic designers, or those who want to expand their business and gain a viewer base. While creating videos for the platform, there are some basic requirements such as Vimeo Aspect RatioorVimeo Thumbnail Dimensions. If all these terms look unknown to you, and you are eager to discover more with Vimeo Ratio, you have landed the right place. Here, you will get all the recipe ingredients required to prepare for a professional-looking, customized video through Vimeo.
In this article
04 How big of a File can upload to Vimeo
Part 1: What is Vimeo?
Vimeo is a video streaming and hosting services provider online platform that equips a user with a powerful video customization feature. This feature distinguishes it from other video streaming sites. Vimeo reflects the vision of its founder filmmakers, who furnish advanced video customization features for Audio and Video content. Vimeo renders services from “Freemium” the free users to that of Advance business partners.

Basic features it enabled in itself are:
- Users can customize and promote their videos
- HD audio and video quality
- Freemium account for free usage
- Supports 8K Video resolution
- The pricing plan ranges from $7 to $75
- Specific sites promotion option
- Customized screen end view
- Multiple options such as color, size, or different types of buttons
- For the same URL video replacement option
- Featuring Team collaboration
- Live Streaming
In addition, additional features and services get added up with each account up-gradation.
Part 2: Vimeo Video Requirement
If you are also interested in being a part of Vimeo’s community and geared up to share the video, you must be aware of Vimeo Video requirements and Vimeo dimensions. So that you can upload the video with ease on the site without facing any issue. Let’s look at some of the critical video ratios and other requirements.

- Frame Rate:
Keep the Video Frame Rate constant. Some common frame rates are: 60, 59.94, 50, 30, 29.97, 25, 24, and 23.98. While compressing, keep the frame rate below 60.
- Codecs:
Codecs represent video encoded format. Some of the most recommended codecs are , (), Apple ProRes (HQ) 422
- Color
Most of the color display is acceptable. But the recommended ones are:
- Color Matrix Coefficients/Primaries- [BT.709 (Rec.709), BT.2020, whereas Rec.2020 HLG for Dolby Vision]
- Bit Depth- 10 or more than 10 for better quality.
- Characteristics of Color Transfer- Multiple ranges for SDR. But HLG or PQ (SMPTE 2084) for HDR
- Bit Rate- Video file size, visual quality control by data rate/Bit-rate. Go with Variable Bit Rate. That might range in different parameters, or you can choose from 2 to 50 MBPS. Where for SD (2 to 5), 720P (5 to 10), 1080p (10 to 20), 2k (20 to 30), 4k (30 to 60), 8k (50 to 80).
- Scan Type- Progressive playback is advisable before uploading de-interlace the video.
- Resolution/Aspect Ratio
Though all shapes and sizes are available, the most preferable Vimeo Video Aspect Ratio and Proportions are:
| Format | Aspect Ratio | Resolution |
|---|---|---|
| HD (720P) | 16:9 | 1280X720 |
| HD (1080P) | 16:9 | 1920X1080 |
| SD | 16:9 | 640X360 |
| SD | 4:3 | 640X480 |
| 2K | 16:9 | 2560X1440 |
| UHD (4K) | 16:9 | 3840X2160 |
| UHD (DCI 4K) | 17:9 | 4096X2160 |
| Stereoscopic 360 4K | 2:1 | 4096X2048 |
| Monoscopic 3604K | 2:1 | 4096X2048 |
| UHD 8K | 17:9 | 8192X4320 |
Here, a question that might arise. OK, these are the requirements by Vimeo Video Ratio. But, how to set the Vimeo dimensions? For this purpose, one valuable suggestion is the Wondershare Filmora Video Editing tool.
Wondershare Filmora is a friendly and effective interface if looking to adjust the Vimeo Video size ratio or pre-setting the Vimeo Aspect Ratio to make it as per the norms of Vimeo. Then we can go with the efficient, quick, and easy-to-use way to edit the Vimeo Aspect ratio.
Versatile Video Editor - Wondershare Filmora
An easy yet powerful editor
Numerous effects to choose from
Detailed tutorials provided by the official channel
Steps are simple: land the home page of Wondershare Filmora, upload your video project, and select the desired video Ratiounder project settings.
Part 3: Size Limit of Vimeo File
Are you ready to create an exciting video and about to upload that into your Vimeo account? Then, there is a precious suggestion to you. Wait for a while, as some restrictions come under Vimeo dimensions uploading. And you must be aware of that. Let’s first understand about Size Limit of the Vimeo File. In terms of duration, there is no limit, but for file size following criteria is used:
As per Vimeo, the user can upload a file of any size. For instance, it can upload videos ranging from the most minor 30 seconds to a whopping 3-hour duration epics. The maximum limit is 25GB per video.
Part 4: How big of a File can upload to Vimeo
The following important question comes out, how big a file can you upload to Vimeo? Let’s scrap out this information for you:
- Basic account- 5GB total
- Vimeo Plus- Up to 250 GB in a year
- Vimeo Pro- 1TB in a Year
- Vimeo Business- 5 TB in total
- Vimeo Premium – 7 TB in total
So, by checking the above criteria, it becomes easy for you to create and upload your video as per the mentioned guidelines. So, let you be ready with your sizzling video following Vimeo ratio and size criteria.
Part 5: Vimeo Weekly Upload Limit
Now, it is crucial to understand. What could be the weekly upload limit to your Vimeo account? As accordingly, you will plan for the appropriate tab. Here are the details:
- Free Account- 500 MB/week
- Vimeo Plus Account- 5GB/week
- Vimeo Pro Account- 20GB/week
- Vimeo Business Account- No Weekly Limit
- Vimeo Premium Account- Unlimited Live Streaming
It looks like Vimeo has divided its size criteria into different frames, usage, daily basis, weekly basis, yearly basis, and maximum limit. So, if you, as a potential user, have all this valuable information to grow your business, hobby, or any peculiar interest, it will become a bonanza to your efforts. As exemplary efforts always show the way to success. I hope that till now, all your queries, concerns such as Vimeo Thumbnail dimensions, Vimeo Video Size ratio, duration, size limit gets filled up. So, without delay, rock on in the video world of Vimeo and let the world know your potential right away.
Conclusion:
Vimeo Video Size Ratio and other requirements to upload your video to the Vimeo site are covered here. Indeed, these will be going to be the milestone to start or progress your business with Vimeo. Vimeo is trending nowadays, especially among the users who prefer a customized look to their video and a solution to grow their business with proper after support. So, doing little pre-work in terms of Vimeo Video Dimensions will pave the way to start your journey. In addition, while adjusting Vimeo Aspect Ratio, Wondershare Filmora will act as the right approach with appropriate tools to change the Vimeo Aspect Ratio and other important editing options. All the best!
04 How big of a File can upload to Vimeo
Part 1: What is Vimeo?
Vimeo is a video streaming and hosting services provider online platform that equips a user with a powerful video customization feature. This feature distinguishes it from other video streaming sites. Vimeo reflects the vision of its founder filmmakers, who furnish advanced video customization features for Audio and Video content. Vimeo renders services from “Freemium” the free users to that of Advance business partners.
Basic features it enabled in itself are:
- Users can customize and promote their videos
- HD audio and video quality
- Freemium account for free usage
- Supports 8K Video resolution
- The pricing plan ranges from $7 to $75
- Specific sites promotion option
- Customized screen end view
- Multiple options such as color, size, or different types of buttons
- For the same URL video replacement option
- Featuring Team collaboration
- Live Streaming
In addition, additional features and services get added up with each account up-gradation.
Part 2: Vimeo Video Requirement
If you are also interested in being a part of Vimeo’s community and geared up to share the video, you must be aware of Vimeo Video requirements and Vimeo dimensions. So that you can upload the video with ease on the site without facing any issue. Let’s look at some of the critical video ratios and other requirements.
- Frame Rate:
Keep the Video Frame Rate constant. Some common frame rates are: 60, 59.94, 50, 30, 29.97, 25, 24, and 23.98. While compressing, keep the frame rate below 60.
- Codecs:
Codecs represent video encoded format. Some of the most recommended codecs are , (), Apple ProRes (HQ) 422
- Color
Most of the color display is acceptable. But the recommended ones are:
- Color Matrix Coefficients/Primaries- [BT.709 (Rec.709), BT.2020, whereas Rec.2020 HLG for Dolby Vision]
- Bit Depth- 10 or more than 10 for better quality.
- Characteristics of Color Transfer- Multiple ranges for SDR. But HLG or PQ (SMPTE 2084) for HDR
- Bit Rate- Video file size, visual quality control by data rate/Bit-rate. Go with Variable Bit Rate. That might range in different parameters, or you can choose from 2 to 50 MBPS. Where for SD (2 to 5), 720P (5 to 10), 1080p (10 to 20), 2k (20 to 30), 4k (30 to 60), 8k (50 to 80).
- Scan Type- Progressive playback is advisable before uploading de-interlace the video.
- Resolution/Aspect Ratio
Though all shapes and sizes are available, the most preferable Vimeo Video Aspect Ratio and Proportions are:
| Format | Aspect Ratio | Resolution |
|---|---|---|
| HD (720P) | 16:9 | 1280X720 |
| HD (1080P) | 16:9 | 1920X1080 |
| SD | 16:9 | 640X360 |
| SD | 4:3 | 640X480 |
| 2K | 16:9 | 2560X1440 |
| UHD (4K) | 16:9 | 3840X2160 |
| UHD (DCI 4K) | 17:9 | 4096X2160 |
| Stereoscopic 360 4K | 2:1 | 4096X2048 |
| Monoscopic 3604K | 2:1 | 4096X2048 |
| UHD 8K | 17:9 | 8192X4320 |
Here, a question that might arise. OK, these are the requirements by Vimeo Video Ratio. But, how to set the Vimeo dimensions? For this purpose, one valuable suggestion is the Wondershare Filmora Video Editing tool.
Wondershare Filmora is a friendly and effective interface if looking to adjust the Vimeo Video size ratio or pre-setting the Vimeo Aspect Ratio to make it as per the norms of Vimeo. Then we can go with the efficient, quick, and easy-to-use way to edit the Vimeo Aspect ratio.
Versatile Video Editor - Wondershare Filmora
An easy yet powerful editor
Numerous effects to choose from
Detailed tutorials provided by the official channel
Steps are simple: land the home page of Wondershare Filmora, upload your video project, and select the desired video Ratiounder project settings.
Part 3: Size Limit of Vimeo File
Are you ready to create an exciting video and about to upload that into your Vimeo account? Then, there is a precious suggestion to you. Wait for a while, as some restrictions come under Vimeo dimensions uploading. And you must be aware of that. Let’s first understand about Size Limit of the Vimeo File. In terms of duration, there is no limit, but for file size following criteria is used:
As per Vimeo, the user can upload a file of any size. For instance, it can upload videos ranging from the most minor 30 seconds to a whopping 3-hour duration epics. The maximum limit is 25GB per video.
Part 4: How big of a File can upload to Vimeo
The following important question comes out, how big a file can you upload to Vimeo? Let’s scrap out this information for you:
- Basic account- 5GB total
- Vimeo Plus- Up to 250 GB in a year
- Vimeo Pro- 1TB in a Year
- Vimeo Business- 5 TB in total
- Vimeo Premium – 7 TB in total
So, by checking the above criteria, it becomes easy for you to create and upload your video as per the mentioned guidelines. So, let you be ready with your sizzling video following Vimeo ratio and size criteria.
Part 5: Vimeo Weekly Upload Limit
Now, it is crucial to understand. What could be the weekly upload limit to your Vimeo account? As accordingly, you will plan for the appropriate tab. Here are the details:
- Free Account- 500 MB/week
- Vimeo Plus Account- 5GB/week
- Vimeo Pro Account- 20GB/week
- Vimeo Business Account- No Weekly Limit
- Vimeo Premium Account- Unlimited Live Streaming
It looks like Vimeo has divided its size criteria into different frames, usage, daily basis, weekly basis, yearly basis, and maximum limit. So, if you, as a potential user, have all this valuable information to grow your business, hobby, or any peculiar interest, it will become a bonanza to your efforts. As exemplary efforts always show the way to success. I hope that till now, all your queries, concerns such as Vimeo Thumbnail dimensions, Vimeo Video Size ratio, duration, size limit gets filled up. So, without delay, rock on in the video world of Vimeo and let the world know your potential right away.
Conclusion:
Vimeo Video Size Ratio and other requirements to upload your video to the Vimeo site are covered here. Indeed, these will be going to be the milestone to start or progress your business with Vimeo. Vimeo is trending nowadays, especially among the users who prefer a customized look to their video and a solution to grow their business with proper after support. So, doing little pre-work in terms of Vimeo Video Dimensions will pave the way to start your journey. In addition, while adjusting Vimeo Aspect Ratio, Wondershare Filmora will act as the right approach with appropriate tools to change the Vimeo Aspect Ratio and other important editing options. All the best!
Also read:
- 5 Superior Equalizers and Compressors Revolutionizing Live Transmission for 2024
- New 2024 Approved Navigating Post-Omegle Ban A Pathway Back Into Conversation
- New Where Can I Find Dog Sound Effects?
- New In 2024, Breathing Life Into Your Sound A Comprehensive Guide to Modifying Your Natural Voice
- In 2024, Unlocking Free Integration Techniques for Music in Online Visual Media
- Updated In 2024, Step-by-Step Eliminating Rhythm Units From Your Songs Digitally
- New 2024 Approved Karaoke Key Effortless MP3 Reduction Online Service for Vocal Victory.
- Updated Cacophony of the Gigantic An Archive of Titans Roaring Audio for 2024
- New The Ultimate Guide to Sound Modification Tools From Introduction to Alternatives
- Updated Transform Your Skype Speech Patterns with These 5 Must-Have Voice Change Tools
- New Video Editors Best Picks 10 Innovative Reaper Extraction Solutions You Cant Ignore
- Updated Adobe Audition Expertise Eliminating Unwanted Sounds and Noise for 2024
- In 2024, The Step-by-Step Guide to Personalizing Mobile Notifications
- Updated 2024 Approved Optimal Music File Converter Transforming MPA Files Into High-Quality MP3s Without Cost
- New Essential Female to Male Voice Conversion Software for PC and Mac Enthusiasts
- Interactive Webcast The Ultimate Informative Experience
- New In 2024, Mastering the Art of Silencing Irrelevant Acoustic Interferences in Web-Based Audio Content
- Updated 2024 Approved Explore Cost-Free Methods for Musical Video Addition
- New In 2024, The Artistic Edge of Professional Sound Editing Software Analyzing Features, Advantages, Limitations, and Competitive Overview
- New Framing Moments with Notes Composers and Clip Assembly in Filmography
- Streamline Your Mixes A Curated List of the Top 5 Dynamic Audio Ducking Tools for Producers
- 2024 Approved Your Guide to Androids Favorite Voice Modification Applications
- 2024 Approved How To Normalize Volume in VLC
- New In 2024, REAPER Decoded In-Depth Analysis of Its Professional Recording Suite and Educational Materials
- Updated In 2024, The Seven Keys to Auditory Mastery for Fresh Audio Creation Techniques
- New In 2024, Best Sound Remover From Video Windows/Mac/Online
- New 2024 Approved The Pace Adjuster How to Modify Musical Velocity While Upholding Original Frequencies
- New Adding Effective Audio to Your QuickTime Projects 2023 Edition
- New In 2024, Win & Mac Users Best Picks Top MP3 Recording Software and Hardware
- New In 2024, Find Laughing Sound Effect
- New Fusion of Forms Innovative Methods for Merging Video with Sound () for 2024
- Updated Master Effortless Audio Enhancement with These 7 Online Audio Processors
- New In 2024, The Editors Edge Techniques for Removing Background Noise and Selective Muting in Video Post-Production
- Updated Audiovisual Symphony Top Tunes to Accompany Every Style of Video Content for 2024
- Beat Blend Benders A Curated List of Highest-Rated Audio-Synchronization Editors, 2023 for 2024
- Updated In 2024, Expert Guide to Volume Control in Audio/Video Content
- Updated Unlocking the Potential of Lexis Audio Editor In-Depth Analysis and Learning Resources for 2024
- Updated Top 7 Audio Recording Apps Beyond Audacity for Android Users
- Updated 2024 Approved Mastering GarageBand Recording Your Step-by-Step Tutorial
- New Essential Tips on Acquiring Ideal Instrumental Sounds for Enhanced Video Experience
- In 2024, Next-Gen Sound The Most Impressive DJ Audio Editing Solutions Reviewed
- 2024 Approved Deciphering the World of Clubhouse A Thorough Analysis of Its Purpose, Mechanisms, and Evolving Landscape
- Updated 2024 Approved Top 10 Mobile Tools for Mastering Melodies IOS Vs. Android Edition
- In 2024, The Ultimate List of Green-Themed Audio Apps for Smartphones
- New In 2024, The Best Video Creation Tools with Music and Audio Options
- All Must-Knows to Use Fake GPS GO Location Spoofer On Realme GT 5 | Dr.fone
- New Secret Tips & Tricks to Use in Filmora for 2024
- Updated A Guide to Find a High-Quality Video Marketing Agency
- Create Stunning Cartoons Top Mobile Apps for Animation
- A Quick Guide to Realme 12 Pro 5G FRP Bypass Instantly
- Updated Chromebooks Best Android Video Editors for Seamless Editing for 2024
- How to Create Your Own Subscribe Channel Graphics
- In 2024, Whatre the Best Alternatives to Pexels?
- In 2024, Top 10 Best Spy Watches For your Apple iPhone 14 Pro Max | Dr.fone
- In 2024, 5 Solutions For Nokia G22 Unlock Without Password
- In 2024, Unova Stone Pokémon Go Evolution List and How Catch Them For Vivo S17 | Dr.fone
- The Complete Stop Motion Toolkit Software, Tutorials, and Best Practices
- In 2024, Full Guide to Unlock Your Samsung Galaxy M34 5G
- 5 Solutions For Tecno Spark 10 Pro Unlock Without Password
- Updated 2024 Approved Unleash Your Creativity Best GoPro Video Editing Software (Beyond GoPro Studio)
- New 2024 Approved Easiest Video Editor for Mac Make Impressive Videos with Ease
- Easy Guide How To Bypass Motorola G24 Power FRP Android 10/11/12/13
- Updated Best 5 AI Music Video Examples and Makers to Make Them
- Different Methods for Resetting Motorola Moto E13 Phones with Screen Locked and Not | Dr.fone
- In 2024, Ultimate Guide to Catch the Regional-Located Pokemon For Poco X6 Pro | Dr.fone
- The Ultimate Guide to Get the Rare Candy on Pokemon Go Fire Red On Motorola Edge+ (2023) | Dr.fone
- In 2024, The Ultimate Guide to Get the Rare Candy on Pokemon Go Fire Red On Xiaomi Redmi Note 12 Pro+ 5G | Dr.fone
- In 2024, Full Guide to Catch 100 IV Pokémon Using a Map On Samsung Galaxy XCover 6 Pro Tactical Edition | Dr.fone
- New FCP Aspect Ratio Adjustment A Beginners Guide (Updated)
- How to recover deleted contacts from Oppo Find X7 Ultra.
- In 2024, How to Remove Forgotten PIN Of Your Xiaomi Mix Fold 3
- New In 2024, The Best Free Video Splitting Solutions Reviewed
- In 2024, Here Are Some Reliable Ways to Get Pokemon Go Friend Codes For Honor Magic 5 Pro | Dr.fone
- In 2024, Full Tutorial to Bypass Your Realme 11 Pro Face Lock?
- 2024 Approved How to Make an Animation With 7 Steps
- In 2024, 7 Ways to Unlock a Locked Vivo Y17s Phone
- Will the iPogo Get You Banned and How to Solve It On Honor 100 Pro | Dr.fone
- How to Change/Fake Your Sony Xperia 5 V Location on Viber | Dr.fone
- How to Bypass iPhone 13 Pro Passcode Easily Video Inside
- Unlock iPhone 7 Plus screen lock without losing data
- Updated Best Free Online Face Generators to Create Fake Faces
- In 2024, Unlock Your Xiaomi 13 Ultras Potential The Top 20 Lock Screen Apps You Need to Try
- In 2024, Can I Bypass a Forgotten Phone Password Of Poco M6 Pro 4G?
- In 2024, Ways to trade pokemon go from far away On Samsung Galaxy A05s? | Dr.fone
- In 2024, A Step-by-Step Guide on Using ADB and Fastboot to Remove FRP Lock on your Vivo S17
- Title: Adobe Audition Reimagined The Essential Features for Audio Enthusiasts and Professionals
- Author: Ella
- Created at : 2024-06-23 23:11:16
- Updated at : 2024-06-24 23:11:16
- Link: https://sound-optimizing.techidaily.com/adobe-audition-reimagined-the-essential-features-for-audio-enthusiasts-and-professionals/
- License: This work is licensed under CC BY-NC-SA 4.0.
