
:max_bytes(150000):strip_icc():format(webp)/Twitter-and-X-4c4103f6bc3c42e0b7197b60a50317ca.jpg)
In 2024, Discover the Top 5 Budget-Friendly Audio Intensity Normalizers
Discover the Top 5 Budget-Friendly Audio Intensity Normalizers
When you are listening to music, or to podcast, or some other type of audio files, would it make it enjoyable if the volume was so low at some point that you couldn’t understand anything? Now add another possibility to this very unpleasant imagination – what if the volume was so high at another point that your ears can’t handle it? – Of course, you would stop listening, and you would also not think high of the creator of this content. In other words, this will become the reason why this creator might lose their audiences. Well, sad story for the creator, isn’t it? And, what if YOU were the creator? A little laziness or a failure in paying attention to detail and your content goes to waste!
So, what is the solution? Of course, a little editing! Even if your voice doesn’t sound like it’s worth listening, you can make it happen by normalizing the volume. This actually is the process when a constant amount of gain is applied to the audio recording, bringing the amplitude to a desirable level, which is “the norm” for the project. When this tool is applied to the volume, the whole recording has the same amount of gain across it, every piece is affected the same way, and the relative dynamics are not changed.
With this tool, you have an extra guarantor that people will want to convert to being loyal subscribers, viewers and listeners, because simply, their user experience is now favored, they enjoy a good, edited content.
Actually, we might use audio normalizing when we need to get the maximum volume, but another reason is is when we need to match different volumes.
As in most cases, there is not only one type of audio normalization, so let’s explain what each of them represents: one is a so-called peak normalization, helping adjust the recording based on the highest signal level present in the recording; another is called loudness normalization and it adjusts the recording based on perceived loudness. RMS (Root-Mean-Square), changes the value of all the samples, where their average electrical volume overall is a specified level.
With this knowledge in mind, let’s now move to the topic we are going to cover in this article: let’s discuss 5 best free MP3 volume normalizers. Knowing about them will save you time and equip you with the right ways so that when you are going to need audio normalization, you will choose one of them, bypass exhausting process of the research, and find the free, easy-to-use programs that will help you master your sounds!
So, we chose the following programs as 5 best free MP3 normalizers: Wondershare Filmora X, Adobe Premiere Pro, VLC Media Player, MP3 Gain and Movavi.
Wondershare Filmora X
Now, even though we already know how to normalize audio in VLC in the simplest, as well as in the more advanced way, it might be even better if we know some more about normalizing audios in different programs. Something worth discussing is a software called Wondershare Filmora X , which carries out the same task wonderfully. Although, unlike VLC Media Player, it is a real video editor, but don’t panic if you have never laid your hand on editing – it is one of the easiest to use ini the word, operating also both on Mac and Windows, and its interface is utterly understandable for beginners right away. And, actually, it is a qhile that Wondershare Filmora X introduced the feature to normalize the audio for the first time. What to say more - you might want to stop now and download the latest version of Filmora X because now we are about to learn how to normalize audio from the video there – so, tune in!
Free Download For Win 7 or later(64-bit)
Free Download For macOS 10.14 or later
When it is done installing, open the software. Now, click and drag the video of which the audio you want to normalize. Now you can select the clip you have chosen – if there are multiple, select all of them, then right-click and choose Detach Audio.

Now if you have this kind of graphic before your eyes, you can be pretty sure without even listening, that the noises are really, really different from each other, which highlights once again how useful audio normalization can be:

Select these files, right-click and choose Adjust Audio. New panel will be opened on left top and there, you will see Audio Normalization – check the box there.


After you have clicked on it, wait until the normalization completes.

Soon, all audio will be normalized, and you will already be able to see on the graphics that the volumes are almost on the same level and when you listen to it, you will make sure that there is no longer apparent difference between how they sound. And from there on, you can save the file you just normalized!
Adobe Premiere Pro
Adobe Premiere Pro is the industry-leading video editing software, and it is a timeline-based. Premiere Pro always tries to make its use easier and easier, as new features are rolling out regularly to simplify steps and save time. The very same can be said about normalizing audio files, which is actually pretty easy once mastered in a very short time. That is actually why it used by beginners and professionals alike.
To normalize audio Adobe Premiere Pro, first, import your MP3 there. In the timeline, you will see your files in the sequence, in the sound section. Now, the best way to work on them is increase the track height – for that, you need to double-click on the empty space there, next to the little microphone icon.


Now, the track is high, and you can see more of your track. So, say that one of your MP3’s seems very loud, and another is much quieter. Speaking of the loud one, if you can see on the right that there is some red light, it is not a good sign – meaning that audio went above zero (so-called clipping), so you need to avoid it.

(If you can not see your audio meters, just go to Window menu and choose Audio Meters).
So, here, our goal is to bring our audio clips around -3 – and for it, it’s possible to bring up and down the white line on the track, but it can be pretty time-consuming actually.

So a better way to do it would be next: click on the track and then right-click, find Audio Gain, and choose Normalize Max Peak to…:

Max Peak is basically the loudest, highest peak in the audio clip. So, you can write in -3 and click OK, which will ensure the entire audio waveform will have the gain of it adjusted so that the max peak is at -3. You can proceed to the next track and carry out the exact same process on it too. Then, on Audio Meters on the right again, you will be able to see that both tracks (or more, if you have them) peak at -3. In case you have a lot of clips on the timeline, you can select them all, then go to Audio Gain and normalize all of their max peaks simultaneously, which will save you so much time and help you enormously!
VLC Media Player
VLC is a well-known media player, it is a free-to-use, robust, and feature-packed software that plays a wide range of audio, image, and video files. It is worth noting that it can also play multimedia files directly from extractable devices or the PC and can stream from the most successful websites such as Disney+, Hulu, Netflix, and so on.
But there is another magic a simple media player can actually do - we can also normalize volume in VLC Media Player. It is a very handy feature and it works on Windows as well as on Mac. It is very simple, so follow these steps:
You need to have VLC Media Player installed on your device. Once you have it installed, open VLC. Go to the Tools and Preferences and there, check the single box which is next to Normalize volume in Effects. Now, set the level to the one that works best for you. Then, when you are happy with the result, click on Save.
What VLC does is just let adjust the general volume, leaving the specifics out of our control.

If you are not so satisfied with the simple editing and want a little more to get from the editing process on VLC, you can do more with the Audio Effects menu:
Find Tools and in the menu, go to Preferences. The window will open, and you need to select All in Show settings – on the bottom left corner of the window. Then, navigate to Audio, and a little below, click on Filters and highlight it. You also need to check the checkbox next to the Dynamic range compressor.

In the left panel, find Compressor and select it. From now, you can make the changes to the levels as you wish.

Here, concentrate the most on Makeup gain, Threshold, and Ratio. The first one is by which you adjust in quiet sequences to raise the volume, the second will help you reduce louder sequences to even things out, and ratio is the maximum level of all audio within a movie, let’s say.
Attack time and release time can also be very helpful. You can play around with them set them to your liking, and see if it’s better sounding, because actually this will ensure that you have a fluid transition in and out of the scene and there are less sudden, unexpected volume changes.
MP3Gain
MP3Gain is actually the only one in this list which is developed exactly for the task we are discussing in this article. It is an audio normalization software tool. The tool is available on multiple platforms and is free software. It analyzes the MP3 and reversibly changes its volume. The volume can be adjusted for single files or as album where all files would have the same perceived loudness. When applying the tool, there is no quality lost in the change because the program adjusts the mp3 file directly, without decoding and re-encoding.
So, to use this software, go and download MP3Gain. Install and open it when it is ready. You will see that your program is absolutely empty and it has a lot of space inside, waiting for you to upload some file(s)…

Now, you can either choose adding files manually, with you choosing each of them, but let’s say you have an album (which would be more comfortable, needless to say) in which you want to change the volume of all MP3’s. So, in this case, you can choose Add Folder, and when the window opens, choose the folder full of your MP3’s – all your files will be added in the program.

Now, find the Target “Normal” Volume above the files, and fill in the gap, if you will, or just use default dB. Then, click Album Analysis, and the process will start.

The software will show you the volume of each of the file, and then you will need to just click on Track Gain.

Now, wait for the process to be completed, and then you will see that the volumes changed for each of your files – so, it’s done!

Movavi
Powerful multimedia software for creating and editing videos – this is Movavi. It packs lots of video and audio editing power into a simple interface. On their official web-site, the program is described as: “An all-in-one video maker: an editor, converter, screen recorder, and more. Perfect for remote work and distance learning.” So, you can go and download the program, and learn audio normalization there very easily!
Install and open the program and then proceed directly to Adding Files. After having chosen your file, you drag and drop it in the timeline sequence.

If the audio is uneven, now double-click on the audio track, which will open the Clip Properties window. You will see the Normalize box, which you need to check. Doing this will even out the sound level for the whole track.

To save the result, click Export, choose the format, folder and name for your file, and then click Start, so your file can be exported.
So, it’s done – now you know a whole lot more about audio normalization, its types, why and when should we use it, and which are the 5 best free MP3 normalizers, along with the detailed guidelines on how to work with those tools to have your desired results. Let’s hope that you will be able to choose from Wondershare Filmora X, Adobe Premiere Pro, VLC Media Player, MP3 Gain and Movavi, and make your user experience so wonderful, and shareable!
Free Download For macOS 10.14 or later
When it is done installing, open the software. Now, click and drag the video of which the audio you want to normalize. Now you can select the clip you have chosen – if there are multiple, select all of them, then right-click and choose Detach Audio.
Now if you have this kind of graphic before your eyes, you can be pretty sure without even listening, that the noises are really, really different from each other, which highlights once again how useful audio normalization can be:
Select these files, right-click and choose Adjust Audio. New panel will be opened on left top and there, you will see Audio Normalization – check the box there.
After you have clicked on it, wait until the normalization completes.
Soon, all audio will be normalized, and you will already be able to see on the graphics that the volumes are almost on the same level and when you listen to it, you will make sure that there is no longer apparent difference between how they sound. And from there on, you can save the file you just normalized!
Adobe Premiere Pro
Adobe Premiere Pro is the industry-leading video editing software, and it is a timeline-based. Premiere Pro always tries to make its use easier and easier, as new features are rolling out regularly to simplify steps and save time. The very same can be said about normalizing audio files, which is actually pretty easy once mastered in a very short time. That is actually why it used by beginners and professionals alike.
To normalize audio Adobe Premiere Pro, first, import your MP3 there. In the timeline, you will see your files in the sequence, in the sound section. Now, the best way to work on them is increase the track height – for that, you need to double-click on the empty space there, next to the little microphone icon.
Now, the track is high, and you can see more of your track. So, say that one of your MP3’s seems very loud, and another is much quieter. Speaking of the loud one, if you can see on the right that there is some red light, it is not a good sign – meaning that audio went above zero (so-called clipping), so you need to avoid it.
(If you can not see your audio meters, just go to Window menu and choose Audio Meters).
So, here, our goal is to bring our audio clips around -3 – and for it, it’s possible to bring up and down the white line on the track, but it can be pretty time-consuming actually.
So a better way to do it would be next: click on the track and then right-click, find Audio Gain, and choose Normalize Max Peak to…:
Max Peak is basically the loudest, highest peak in the audio clip. So, you can write in -3 and click OK, which will ensure the entire audio waveform will have the gain of it adjusted so that the max peak is at -3. You can proceed to the next track and carry out the exact same process on it too. Then, on Audio Meters on the right again, you will be able to see that both tracks (or more, if you have them) peak at -3. In case you have a lot of clips on the timeline, you can select them all, then go to Audio Gain and normalize all of their max peaks simultaneously, which will save you so much time and help you enormously!
VLC Media Player
VLC is a well-known media player, it is a free-to-use, robust, and feature-packed software that plays a wide range of audio, image, and video files. It is worth noting that it can also play multimedia files directly from extractable devices or the PC and can stream from the most successful websites such as Disney+, Hulu, Netflix, and so on.
But there is another magic a simple media player can actually do - we can also normalize volume in VLC Media Player. It is a very handy feature and it works on Windows as well as on Mac. It is very simple, so follow these steps:
You need to have VLC Media Player installed on your device. Once you have it installed, open VLC. Go to the Tools and Preferences and there, check the single box which is next to Normalize volume in Effects. Now, set the level to the one that works best for you. Then, when you are happy with the result, click on Save.
What VLC does is just let adjust the general volume, leaving the specifics out of our control.
If you are not so satisfied with the simple editing and want a little more to get from the editing process on VLC, you can do more with the Audio Effects menu:
Find Tools and in the menu, go to Preferences. The window will open, and you need to select All in Show settings – on the bottom left corner of the window. Then, navigate to Audio, and a little below, click on Filters and highlight it. You also need to check the checkbox next to the Dynamic range compressor.
In the left panel, find Compressor and select it. From now, you can make the changes to the levels as you wish.
Here, concentrate the most on Makeup gain, Threshold, and Ratio. The first one is by which you adjust in quiet sequences to raise the volume, the second will help you reduce louder sequences to even things out, and ratio is the maximum level of all audio within a movie, let’s say.
Attack time and release time can also be very helpful. You can play around with them set them to your liking, and see if it’s better sounding, because actually this will ensure that you have a fluid transition in and out of the scene and there are less sudden, unexpected volume changes.
MP3Gain
MP3Gain is actually the only one in this list which is developed exactly for the task we are discussing in this article. It is an audio normalization software tool. The tool is available on multiple platforms and is free software. It analyzes the MP3 and reversibly changes its volume. The volume can be adjusted for single files or as album where all files would have the same perceived loudness. When applying the tool, there is no quality lost in the change because the program adjusts the mp3 file directly, without decoding and re-encoding.
So, to use this software, go and download MP3Gain. Install and open it when it is ready. You will see that your program is absolutely empty and it has a lot of space inside, waiting for you to upload some file(s)…
Now, you can either choose adding files manually, with you choosing each of them, but let’s say you have an album (which would be more comfortable, needless to say) in which you want to change the volume of all MP3’s. So, in this case, you can choose Add Folder, and when the window opens, choose the folder full of your MP3’s – all your files will be added in the program.
Now, find the Target “Normal” Volume above the files, and fill in the gap, if you will, or just use default dB. Then, click Album Analysis, and the process will start.
The software will show you the volume of each of the file, and then you will need to just click on Track Gain.
Now, wait for the process to be completed, and then you will see that the volumes changed for each of your files – so, it’s done!
Movavi
Powerful multimedia software for creating and editing videos – this is Movavi. It packs lots of video and audio editing power into a simple interface. On their official web-site, the program is described as: “An all-in-one video maker: an editor, converter, screen recorder, and more. Perfect for remote work and distance learning.” So, you can go and download the program, and learn audio normalization there very easily!
Install and open the program and then proceed directly to Adding Files. After having chosen your file, you drag and drop it in the timeline sequence.
If the audio is uneven, now double-click on the audio track, which will open the Clip Properties window. You will see the Normalize box, which you need to check. Doing this will even out the sound level for the whole track.
To save the result, click Export, choose the format, folder and name for your file, and then click Start, so your file can be exported.
So, it’s done – now you know a whole lot more about audio normalization, its types, why and when should we use it, and which are the 5 best free MP3 normalizers, along with the detailed guidelines on how to work with those tools to have your desired results. Let’s hope that you will be able to choose from Wondershare Filmora X, Adobe Premiere Pro, VLC Media Player, MP3 Gain and Movavi, and make your user experience so wonderful, and shareable!
Discover the Best Android Speech-to-Text Programs with No Monthly Fees
10 Best Voice Recording Apps for Android Devices [Free Included]

Benjamin Arango
Mar 27, 2024• Proven solutions
Memorizing every bit of information you need to perform your daily or weekly tasks becomes increasingly difficult as your workload rises. Students, journalists, and professionals from a wide array of industries can benefit from making audio notes or even recording entire conversations with their Smartphones.
A simple Android voice recorder can make this task easy since you can just tap on the Record button and create an audio note in seconds. However, with so many voice recorder apps for Android devices out there, finding the one best suited for your needs can be more complicated than it seems. So, in this article, we are going to help you discover some best free voice recorder for an Android device you are currently using.
Want to record voiceover and audio on iPhone? Check 10 Best Voice Recorder Apps for iPhones >>
10 Best Free Voice Recording Apps for Android Devices
Recording audio is no longer a highly technical process since now you can create an audio note or record an interview with an Android phone and a voice recorder app. The question is which voice recording app should you install on your device. So, let’s take a look at some of the most potent Android voice recorders you can find at Google Play Store.
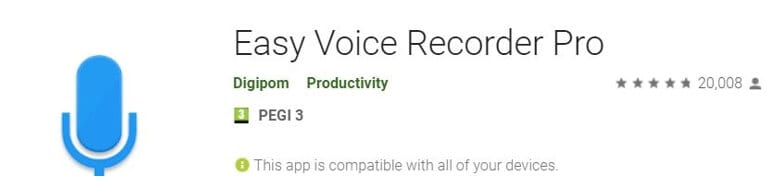
1. Easy Voice Recorder Pro
Price: $3.99
Supported OS: Varies with the device
Best for: Students, musicians, and businessmen
App in Google Play
As the app’s name suggests making recordings for a broad range of purposes is easy. All you need to do is launch the app and start a new audio recording session. Easy Voice Recorder Pro doesn’t limit the duration of your recordings, and it also allows you to compress the recorded audio . That is perfect if you need to record long lectures or conversations. Besides, you can connect an external microphone with the app in case you want to increase the quality of the sound you are recording. The app also lets you store your recordings on Dropbox or Google Drive, while it also offers the possibility to send recordings via email.
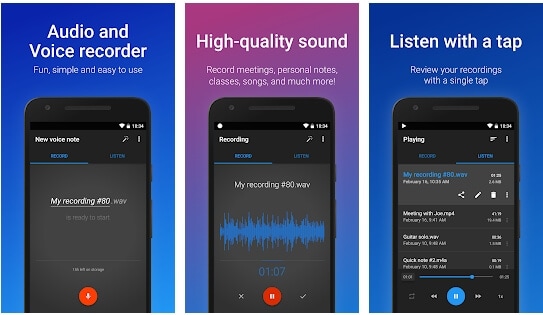
Easy Voice Recorder Pro Interface
Pros
- Allows users to manage and organize their recordings effortlessly
- Supports all standard output audio file formats
- Offers the option to record in stereo
- Recordings made with this app can be used as the ringtone
Cons
- Ads can be frustrating
- Limited basic audio editing tools
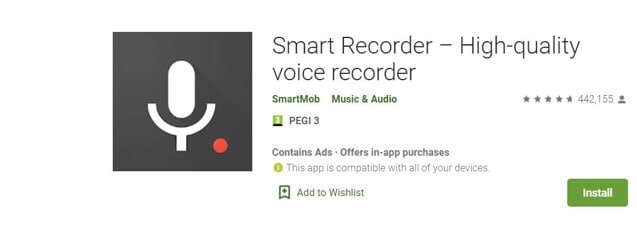
2. Smart Recorder – High-quality voice recorder
Price: Free, but contains ads and offers in-app purchases
Supported OS: Varies with the device
Best for: Students, musicians, and businessmen
App in Google Play
Capturing high-quality audio recordings effortlessly is the ultimate goal of all Android users who want to use voice recorders. As one of the best free voice recorders for Android, Smart Recorder app has a plethora of features that enable users to make high-quality audio recordings even in imperfect conditions. Options like Live Audio Spectrum Analyzer, microphone gain calibration or automatic and manual sensitivity control in Skip Silence mode are just a few reasons why this app has over 10 million installs. However, you should keep in mind that you cannot create audio files that are larger than 2 GB with this app.
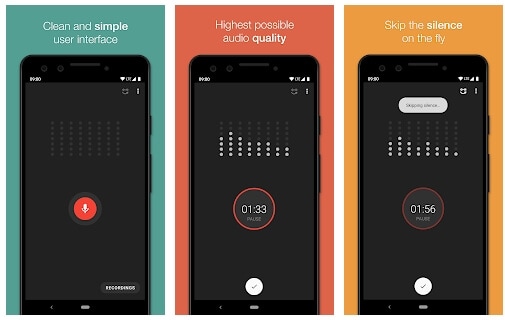
Smart Recorder – High-quality voice recorder Interface
Pros
- Provides full control over the audio recording process
- Equipped with the Wave Lock feature that prevents the device from going into the sleep mode
- Features a live audio spectrum analyzer
- Preserves battery life
Cons
- No phone call recording options
- Limited file-sharing capabilities
3. RecForge II Audio Recorder
Price: Free, but contains ads
Supported OS: Android 4.0 and up
Best for: Musicians
RecForge-audio-recorder App in Google Play
If you are looking for an Android voice recorder that allows you to customize bit rates, sample rates, choose codecs or record in mono or stereo mode, then you should consider installing RecForge II Audio Recorder on your device. The app allows you to schedule recordings, connect different types of external microphones or adjust the gain manually. In addition, you can also adjust the pitch , tempo and the playback rate of all audio files you record and edit with this app. RecForge II Audio Recorder continues working even while you are using other apps, and it keeps the battery consumption at the very minimum.
Pros
- Supports nearly all common audio file formats
- Offers a versatile set of audio editing tools
- Excellent file-sharing capabilities
- Allows users to increase the audio quality by disabling Automatic Gain Control
Cons
- The maximum duration of a recording is limited for some file formats
- Can be too complicated for inexperienced users
4. Hi-Q MP3 Voice Recorder
Price: Free
Supported OS: Varies with the device
Best for: Students, general use
Hi-Q MP3 Voice Recorder App in Google Play
You don’t need any previous audio recording experience to record long lectures, interviews and all other types of voice recordings with Hi-Q MP3 Voice Recorder. The free version of the app limits the maximum duration of a recording you can make to just 10 minutes. That is why you must upgrade to the Pro version of Hi-Q MP3 Voice Recorder if you want to capture hours of material directly from your phone. The best part is that all versions of the app automatically upload recordings to Google Drive or Dropbox which frees up space on your device.
Pros
- Intuitive and modernly designed interface
- Simple audio recording session setup
- Customizable audio quality
- Excellent file management capabilities
Cons
- Recording with external microphones is not an option
- The free version of the app limits the maximum duration of recordings
5. Voice Recorder
Price: Free, but contains ads
Supported OS: Android 4.1 and up
Best for: Students, musicians, and businessmen
Voice Recorder App in Google Play
If you are looking for an app you can use to record an interview, a business meeting or a lecture, then Voice Recorder may be one of your best options. You can record audio files without any restrictions and visualize the sounds with the Audio Spectrum Analyzer. The app continues recording from the background even while the phone’s screen is off which preserves battery life and enables you to perform other tasks while the recording session is in progress. Voice Recorder offers a broad range of file-sharing capabilities so that you can easily send your audio recordings via SMS, email and the Messenger app or share them on Facebook and WhatsApp.
Pros
- Available for free to all Android users
- Stopping, pausing or resuming a recording session is easy
- Allows users to adjust the sample rate
- Offers the microphone gain calibration tool
Cons
- Audio recordings can only be saved in two different file formats
- Doesn’t provide audio editing options
6. Music Maker JAM
Price: Free, but contains ads and offers in-app purchases
Supported OS: Varies with the device
Best for: Musicians
Music Maker JAM App in Google Play
With the selection of 300 mix packs, Music Maker JAM is one of the best android apps for aspiring musicians who want to compose their music even while they are on the go. You can choose from a variety of samples, audio loops and beats to create your next song or record live performances with the app’s 8-channel mixer. Music Maker JAM also enables you to record vocals, adjust the tempo of the audio files or apply effects to all recordings you edit with this app. Once your recording is ready, you can upload it to SoundCloud directly from the app or post it on Facebook and other social networks.
Pros
- Shake your Android phone to remix a song
- The app lets you choose from more than 300 mix packs
- Supports multi-channel recording
- Offers advanced audio editing options
Cons
- Music Maker JAM is not primarily a voice recorder
- No support for external microphones
7. LectureNotes
Price: Free
Supported OS: Android 3.0 and up
Best for: Students
LectureNotes App in Google Play
In case you take notes often, then this app can be an excellent choice for you as it allows you to use a stylus to create notes. However, the trial version limits the number of notebooks to just two, and neither of the notebooks can have more than eight pages. Moreover, if you would like to utilize the app’s voice recording features, you must install LectureRecordings plugin on your device. To capture videos, you must first install the LectureVideos plugin. Another disappointing thing is that you won’t be able to adjust the settings for your audio recording sessions or edit the recording you create with this app.
Pros
- An efficient tool for creating hand-written notes
- The app can be used while your Android phone is offline
- Allows users to export PDF files
- Compatible with OneNote and Evernote apps
Cons
- Underwhelming voice recording options
- You must install a plugin to record audio files
8. ASR Voice Recorder
Price: Free, but contains ads
Supported OS: Android 5.0 and up
Best for: Journalists, musicians, students

ASR Voice Recorder App in Google Play
A brief look at the list of features this app offers, you will find this is a well-rounded voice recorder because it offers all the tools you are going to need to create high-quality recordings. You can choose from a variety of file formats, add notes to recordings at recording or control the playback speed of all audio files you listen to in AVR Voice Recorder. You can also skip silences, connect a headset microphone to the app via Bluetooth or arrange your voice recordings in any way you want. The app lets you upload your audio files to Dropbox, Google Drive, and other file-hosting platforms.
Pros
- Provides excellent audio recording options for free
- Allows users to save recordings in different file formats
- Equipped with an audio playback controller
- Sharing multiple files is easy
Cons
- Offers only basic audio editing tools
- No audio transcription options
9. Call Recorder
Price: Free, but contains ads
Supported OS: Android 4.0 and up
Best for: Marketing professionals
Call Recorder App in Google Play
If you would like to record all incoming and outgoing calls on your device, the Call Recorder app is one of the best options you have at your disposal. Besides recording all calls from whitelisted numbers automatically, this app also allows you to choose from a variety of different recording modes. Furthermore, Call Recorder lets you blacklist numbers from which you don’t want to receive calls and enables you to organize your recordings efficiently. All files created with this app can be sent via Skype, SMS, Dropbox and other messaging services, which makes Call Recorder app a perfect choice for marketing professionals.
Pros
- No previous experience required to start using the app
- Records an unlimited number of phone calls
- Simple audio file management
- Offers several recording modes
Cons
- No voice recording options
- Doesn’t provide audio editing tools
10. Otter Voice Meeting Notes
Price: Free, but offers in-app purchases
Supported OS: Android 5.0 and up
Best for: Large teams of professionals
Otter Voice Meeting Notes App in Google Play
Besides being a powerful voice recorder, Otter Voice Meeting Notes is a collaborative tool that enables multiple team members to highlight and edit the transcripts this app generates in real-time. In addition to recording business meetings, you can also use Otter Voice Meeting Notes to record interviews, webinars or podcasts . Starting a new recording session takes only a second since you just have to tap on the Record button to capture the voices of all speakers in the room. What’s more, the app lets you add photos or slides to transcripts while the recording session is still in progress.
Pros
- Makes collaboration on a single transcript easier
- The app’s AI identifies different speakers automatically after the initial training
- Allows users to export MP3 audio files
- Compatible with the Call Recorder app
Cons
- In-app purchases are expensive
- Audio editing tools could be better
You may also like: 10 Best Free Discord Voice Changers
Conclusion
Creating an audio note or recording an entire interview with an Android device has never been easier. Each of the voice recorder apps we featured in this article enables you to create high-quality audio files you can share via email or store on the cloud.
Which of these Android voice recorders you are going to choose depends on a broad spectrum of factors, which range from the context in which you want to make the recording toaudio editing tools you want to use to process the audio files you created.
We’ve summarized the essential information in the table below. Hope that will help you to determine. What is your favorite Android voice recorder? Leave a comment and let us know.
| Voice recorder app | Price | Supported OS | User Rating | Best for |
|---|---|---|---|---|
| Easy Voice Recorder Pro | $3.99 | Varies with the device | 4.8 | Students, musicians, and businessmen |
| Smart Recorder – High-quality voice recorder | Free, but contains ads and offers in-app purchases | Varies with the device | 4.7 | Students, musicians, and businessmen |
| RecForge II Audio Recorder | Free, but contains ads | Android 4.0 and up | 4.0 | Musicians |
| Hi-Q MP3 Voice Recorder | Free | Varies with the device | 4.5 | Students |
| Voice Recorder | Free, but contains ads | Android 4.1 and up | 4.8 | Students, musicians, and businessmen |
| Music Maker JAM | Free, but contains ads and offers in-app purchases | Varies with the device | 4.6 | Musicians |
| LectureNotes | Free | Android 3.0 and up | 4.3 | Students |
| ASR Voice Recorder | Free, but contains ads | Android 5.0 and up | 4.4 | Journalists, musicians, students |
| Call Recorder | Free, but contains ads | Android 4.0 and up | 4.3 | Marketing professionals |
| Otter Voice Meeting Notes | Free, but offers in-app purchases | Android 5.0 and up | 4.5 | Large teams of professionals |
Benjamin Arango
Benjamin Arango is a writer and a lover of all things video.
Follow @Benjamin Arango
Benjamin Arango
Mar 27, 2024• Proven solutions
Memorizing every bit of information you need to perform your daily or weekly tasks becomes increasingly difficult as your workload rises. Students, journalists, and professionals from a wide array of industries can benefit from making audio notes or even recording entire conversations with their Smartphones.
A simple Android voice recorder can make this task easy since you can just tap on the Record button and create an audio note in seconds. However, with so many voice recorder apps for Android devices out there, finding the one best suited for your needs can be more complicated than it seems. So, in this article, we are going to help you discover some best free voice recorder for an Android device you are currently using.
Want to record voiceover and audio on iPhone? Check 10 Best Voice Recorder Apps for iPhones >>
10 Best Free Voice Recording Apps for Android Devices
Recording audio is no longer a highly technical process since now you can create an audio note or record an interview with an Android phone and a voice recorder app. The question is which voice recording app should you install on your device. So, let’s take a look at some of the most potent Android voice recorders you can find at Google Play Store.
1. Easy Voice Recorder Pro
Price: $3.99
Supported OS: Varies with the device
Best for: Students, musicians, and businessmen
App in Google Play
As the app’s name suggests making recordings for a broad range of purposes is easy. All you need to do is launch the app and start a new audio recording session. Easy Voice Recorder Pro doesn’t limit the duration of your recordings, and it also allows you to compress the recorded audio . That is perfect if you need to record long lectures or conversations. Besides, you can connect an external microphone with the app in case you want to increase the quality of the sound you are recording. The app also lets you store your recordings on Dropbox or Google Drive, while it also offers the possibility to send recordings via email.
Easy Voice Recorder Pro Interface
Pros
- Allows users to manage and organize their recordings effortlessly
- Supports all standard output audio file formats
- Offers the option to record in stereo
- Recordings made with this app can be used as the ringtone
Cons
- Ads can be frustrating
- Limited basic audio editing tools
2. Smart Recorder – High-quality voice recorder
Price: Free, but contains ads and offers in-app purchases
Supported OS: Varies with the device
Best for: Students, musicians, and businessmen
App in Google Play
Capturing high-quality audio recordings effortlessly is the ultimate goal of all Android users who want to use voice recorders. As one of the best free voice recorders for Android, Smart Recorder app has a plethora of features that enable users to make high-quality audio recordings even in imperfect conditions. Options like Live Audio Spectrum Analyzer, microphone gain calibration or automatic and manual sensitivity control in Skip Silence mode are just a few reasons why this app has over 10 million installs. However, you should keep in mind that you cannot create audio files that are larger than 2 GB with this app.
Smart Recorder – High-quality voice recorder Interface
Pros
- Provides full control over the audio recording process
- Equipped with the Wave Lock feature that prevents the device from going into the sleep mode
- Features a live audio spectrum analyzer
- Preserves battery life
Cons
- No phone call recording options
- Limited file-sharing capabilities
3. RecForge II Audio Recorder
Price: Free, but contains ads
Supported OS: Android 4.0 and up
Best for: Musicians
RecForge-audio-recorder App in Google Play
If you are looking for an Android voice recorder that allows you to customize bit rates, sample rates, choose codecs or record in mono or stereo mode, then you should consider installing RecForge II Audio Recorder on your device. The app allows you to schedule recordings, connect different types of external microphones or adjust the gain manually. In addition, you can also adjust the pitch , tempo and the playback rate of all audio files you record and edit with this app. RecForge II Audio Recorder continues working even while you are using other apps, and it keeps the battery consumption at the very minimum.
Pros
- Supports nearly all common audio file formats
- Offers a versatile set of audio editing tools
- Excellent file-sharing capabilities
- Allows users to increase the audio quality by disabling Automatic Gain Control
Cons
- The maximum duration of a recording is limited for some file formats
- Can be too complicated for inexperienced users
4. Hi-Q MP3 Voice Recorder
Price: Free
Supported OS: Varies with the device
Best for: Students, general use
Hi-Q MP3 Voice Recorder App in Google Play
You don’t need any previous audio recording experience to record long lectures, interviews and all other types of voice recordings with Hi-Q MP3 Voice Recorder. The free version of the app limits the maximum duration of a recording you can make to just 10 minutes. That is why you must upgrade to the Pro version of Hi-Q MP3 Voice Recorder if you want to capture hours of material directly from your phone. The best part is that all versions of the app automatically upload recordings to Google Drive or Dropbox which frees up space on your device.
Pros
- Intuitive and modernly designed interface
- Simple audio recording session setup
- Customizable audio quality
- Excellent file management capabilities
Cons
- Recording with external microphones is not an option
- The free version of the app limits the maximum duration of recordings
5. Voice Recorder
Price: Free, but contains ads
Supported OS: Android 4.1 and up
Best for: Students, musicians, and businessmen
Voice Recorder App in Google Play
If you are looking for an app you can use to record an interview, a business meeting or a lecture, then Voice Recorder may be one of your best options. You can record audio files without any restrictions and visualize the sounds with the Audio Spectrum Analyzer. The app continues recording from the background even while the phone’s screen is off which preserves battery life and enables you to perform other tasks while the recording session is in progress. Voice Recorder offers a broad range of file-sharing capabilities so that you can easily send your audio recordings via SMS, email and the Messenger app or share them on Facebook and WhatsApp.
Pros
- Available for free to all Android users
- Stopping, pausing or resuming a recording session is easy
- Allows users to adjust the sample rate
- Offers the microphone gain calibration tool
Cons
- Audio recordings can only be saved in two different file formats
- Doesn’t provide audio editing options
6. Music Maker JAM
Price: Free, but contains ads and offers in-app purchases
Supported OS: Varies with the device
Best for: Musicians
Music Maker JAM App in Google Play
With the selection of 300 mix packs, Music Maker JAM is one of the best android apps for aspiring musicians who want to compose their music even while they are on the go. You can choose from a variety of samples, audio loops and beats to create your next song or record live performances with the app’s 8-channel mixer. Music Maker JAM also enables you to record vocals, adjust the tempo of the audio files or apply effects to all recordings you edit with this app. Once your recording is ready, you can upload it to SoundCloud directly from the app or post it on Facebook and other social networks.
Pros
- Shake your Android phone to remix a song
- The app lets you choose from more than 300 mix packs
- Supports multi-channel recording
- Offers advanced audio editing options
Cons
- Music Maker JAM is not primarily a voice recorder
- No support for external microphones
7. LectureNotes
Price: Free
Supported OS: Android 3.0 and up
Best for: Students
LectureNotes App in Google Play
In case you take notes often, then this app can be an excellent choice for you as it allows you to use a stylus to create notes. However, the trial version limits the number of notebooks to just two, and neither of the notebooks can have more than eight pages. Moreover, if you would like to utilize the app’s voice recording features, you must install LectureRecordings plugin on your device. To capture videos, you must first install the LectureVideos plugin. Another disappointing thing is that you won’t be able to adjust the settings for your audio recording sessions or edit the recording you create with this app.
Pros
- An efficient tool for creating hand-written notes
- The app can be used while your Android phone is offline
- Allows users to export PDF files
- Compatible with OneNote and Evernote apps
Cons
- Underwhelming voice recording options
- You must install a plugin to record audio files
8. ASR Voice Recorder
Price: Free, but contains ads
Supported OS: Android 5.0 and up
Best for: Journalists, musicians, students
ASR Voice Recorder App in Google Play
A brief look at the list of features this app offers, you will find this is a well-rounded voice recorder because it offers all the tools you are going to need to create high-quality recordings. You can choose from a variety of file formats, add notes to recordings at recording or control the playback speed of all audio files you listen to in AVR Voice Recorder. You can also skip silences, connect a headset microphone to the app via Bluetooth or arrange your voice recordings in any way you want. The app lets you upload your audio files to Dropbox, Google Drive, and other file-hosting platforms.
Pros
- Provides excellent audio recording options for free
- Allows users to save recordings in different file formats
- Equipped with an audio playback controller
- Sharing multiple files is easy
Cons
- Offers only basic audio editing tools
- No audio transcription options
9. Call Recorder
Price: Free, but contains ads
Supported OS: Android 4.0 and up
Best for: Marketing professionals
Call Recorder App in Google Play
If you would like to record all incoming and outgoing calls on your device, the Call Recorder app is one of the best options you have at your disposal. Besides recording all calls from whitelisted numbers automatically, this app also allows you to choose from a variety of different recording modes. Furthermore, Call Recorder lets you blacklist numbers from which you don’t want to receive calls and enables you to organize your recordings efficiently. All files created with this app can be sent via Skype, SMS, Dropbox and other messaging services, which makes Call Recorder app a perfect choice for marketing professionals.
Pros
- No previous experience required to start using the app
- Records an unlimited number of phone calls
- Simple audio file management
- Offers several recording modes
Cons
- No voice recording options
- Doesn’t provide audio editing tools
10. Otter Voice Meeting Notes
Price: Free, but offers in-app purchases
Supported OS: Android 5.0 and up
Best for: Large teams of professionals
Otter Voice Meeting Notes App in Google Play
Besides being a powerful voice recorder, Otter Voice Meeting Notes is a collaborative tool that enables multiple team members to highlight and edit the transcripts this app generates in real-time. In addition to recording business meetings, you can also use Otter Voice Meeting Notes to record interviews, webinars or podcasts . Starting a new recording session takes only a second since you just have to tap on the Record button to capture the voices of all speakers in the room. What’s more, the app lets you add photos or slides to transcripts while the recording session is still in progress.
Pros
- Makes collaboration on a single transcript easier
- The app’s AI identifies different speakers automatically after the initial training
- Allows users to export MP3 audio files
- Compatible with the Call Recorder app
Cons
- In-app purchases are expensive
- Audio editing tools could be better
You may also like: 10 Best Free Discord Voice Changers
Conclusion
Creating an audio note or recording an entire interview with an Android device has never been easier. Each of the voice recorder apps we featured in this article enables you to create high-quality audio files you can share via email or store on the cloud.
Which of these Android voice recorders you are going to choose depends on a broad spectrum of factors, which range from the context in which you want to make the recording toaudio editing tools you want to use to process the audio files you created.
We’ve summarized the essential information in the table below. Hope that will help you to determine. What is your favorite Android voice recorder? Leave a comment and let us know.
| Voice recorder app | Price | Supported OS | User Rating | Best for |
|---|---|---|---|---|
| Easy Voice Recorder Pro | $3.99 | Varies with the device | 4.8 | Students, musicians, and businessmen |
| Smart Recorder – High-quality voice recorder | Free, but contains ads and offers in-app purchases | Varies with the device | 4.7 | Students, musicians, and businessmen |
| RecForge II Audio Recorder | Free, but contains ads | Android 4.0 and up | 4.0 | Musicians |
| Hi-Q MP3 Voice Recorder | Free | Varies with the device | 4.5 | Students |
| Voice Recorder | Free, but contains ads | Android 4.1 and up | 4.8 | Students, musicians, and businessmen |
| Music Maker JAM | Free, but contains ads and offers in-app purchases | Varies with the device | 4.6 | Musicians |
| LectureNotes | Free | Android 3.0 and up | 4.3 | Students |
| ASR Voice Recorder | Free, but contains ads | Android 5.0 and up | 4.4 | Journalists, musicians, students |
| Call Recorder | Free, but contains ads | Android 4.0 and up | 4.3 | Marketing professionals |
| Otter Voice Meeting Notes | Free, but offers in-app purchases | Android 5.0 and up | 4.5 | Large teams of professionals |
Benjamin Arango
Benjamin Arango is a writer and a lover of all things video.
Follow @Benjamin Arango
Mastering Audio Removal in Windows 10 Videos: A Cost-Free Technique
You might need to remove sound from video windows 10. However, you may be confused about which tools you should you. Indeed, plenty of video editing tools have complicated user interfaces, which is not good if you are a beginner. Fortunately, in this article, we will recommend some of the reliable tools you can use to remove audio from video windows 10—additionally, a simple guide on how to do it.
Method 1: Use online and free solutions to mute audio in videos (500 words)
1. Kapwing
Kapwing is an easy-to-use but powerful online tool for remove sound from video windows 10. Furthermore, Kapwing has many different features you can use for all sorts of things. Such as making videos, adding subtitles to videos, filtering videos, adding watermarks to videos, and many more.

How to mute audio in videos with Kapwing
Step1 To begin, launch your web browser and search the website Kapwing.com. After that, select “Tool” from the menu.

Step2 in the search bar, type “Mute video” and click on it when the mute video feature pops up.

Step3 Click “upload video” in the next window to add the video you want to mute.

Step4 Once you upload your video, click your video, and you will see the volume feature. You just need to drag the volume to the most left to mute the audio.

Step5 Once you mute the movie audio, click “Export project.”

Step6 When the exporting project is done, you can save your video on your computer by clicking “download file.”

2. Veed.io
VEED is a windows video editor remove audio that makes it easy to remove the sound from a video. You can mute the whole video or just a part of it. There’s no software to install. You can do it right in your browser. VEED, on the other hand, is free and very simple to use.
How to remove mute audio from video with VEED.io
Step1 Open your browser and type “Remove audio mute VEED” into the search bar. After that, click “Choose video” to import the video you want to mute.

Step2 When you’re on the editing page, you’ll see a sound icon. Click that, and then drag the sound bar down to remove the sound. Once you remove the sound, click “Export” in the top right of your screen.

Step3 When the video exporting process is done, you can save the video you edited on your computer by clicking “Download.”

3. Adobe Express
Adobe Express is another tool for remove audio from video windows. You can use to remove sound from your videos. has an easy-to-use interface that makes removing sound in a video only a few steps.

How to remove audio from the video with Adobe Express
Step1 Open your browser and search for “Remove audio with Adobe Express”. In the next window, click “Upload your video” to import your video.

Step2 On the next page, you will see your video, and you will see the option “Mute” press that button to remove the sound on your video. Once you remove the audio from your video, click “download” to save your video.

Method 2: Use Filmora to remove audio from video
Step1 Before going any further, you need to download Filmora and open it on your computer. When you’re done, click “new project.”

Free Download For Win 7 or later(64-bit)
Free Download For macOS 10.14 or later
Step2 In this step, you need to find the video you want to mute on your computer and import it to Filmora. Then, drag your video onto Filmora’s timeline.

Step3 Once you’ve dragged your video onto Filmora’s timeline, click on your video in the timeline and then right-click. Afterwards, choose “detach audio.”

Step4 Now, you will see the audio track below the video track. Simply, click on the audio track and click the “delete” icon. Finally, you are successful in muting the audio from your video.

Step5 Click “Export” to save your video on your computer.

Beside Filmora allow you to mute audio from entire of the video, Filmora also has another audio modify feature called “Silence detection”. Silence Detection is a special add-on for Filmora users, making it easier to cut out silent parts of a video. Silence Detection is a unique Filmora add-on that makes it easier for users to remove silent pauses from a film. The add-on examines the full video to detect all the silent pauses and eliminates them instantly, saving you time and simplifying the editing process.
How to use silence detection?
Step1 Right-click on the clip in the resource, select the video clip on the timeline, and choose the silence detection option to open up the silence detection window.

Step2 The silent detection tool will automatically detect the silent and low sound points.
Furthermore, you can adjust the parameters to recalculate the silence detection or manually fine-tune what the feature has already detected

once everything sounds good, export the video into the Filmora timeline so you can continue editing your video.

Moreover, Filmora also has another feature called “Audio ducking”. Audio ducking is a way to turn down the volume of the background when one voiceover comes on.
How to use audio ducking with Filmora
Step1 Let’s say you already have your voiceover and the audio in your video. If you want you to use duking voice feature, firstly, you need to decide which part of the audio you want to lower. After that, double-click the selected part until the ducking voice feature comes out.

Step2 Next, you just need to drag the audio ducking bar to the left or right. Indeed, if you drag to the right, it will lower the audio. Once you are done adjusting the audio, click “Ok”, and you can preview the result.

Last but not least, Filmora has other features called TTS and STT. Speech to Text (STT) allows you to transcript voice to subtitles in one click. Using speech-to-text will save you a lot of time on subtitling and speed up the editing process. Meanwhile, Text to Speech (TTS) is a feature in Filmora that lets you turn text files into voiceover and add more elements to your video.
How to use STT with Filmora
Step1 Firstly, right-click on the audio track and choose “Speech-to-Text”.

Step2 In the STT parameter setting bar, you can choose the language of the audio to be transcribed and the files to be converted. You can also choose to match automatically to the timeline.

How to use TTS with Filmore
Step1 Go to the “Tittle” and add you default Title. After that, write anything you want.

Step2 Select the title box in the timeline, then right-click. After that, click on “Text-to-Speech”.

Step3 In the TTS parameter setting bar, choose the language this title is in and the voice’s name.

Method 3: Use Windows 10 officially recommend video editor
1. Climpchamp
Clipchamp is an online video editor that makes it easy for anyone to make videos, even if they have never edited before. It lets you combine your videos, images, and audio files, remove audio from the video and then save the finished video to your computer. On the Climpchamp homepage, you can sign up for a free account and start editing your videos right away.

How to mute audio from the video with Climpchamp
Step1 First, open up your browser and search for Climpchamp.com. You must sign up and make an account on the next page first. Please note that creating an account doesn’t cost anything. Once you have an account, you just need to click “Create your first video”.

Step2 In this part, you just need to drag the video file you want to mute into the Clipchamp.

Step3 Once you import your video into Clipchamp. Then, go to “Audio” and simply drag the bar to the most left to remove the audio. When you are done, click “Export” on your top screen.

Step4 When exporting the video is done, click “Save to your computer” to save the video.

Part4: FAQ
Why do we need to mute audio from the video?
Getting rid of the audio from some clips might be necessary for a variety of reasons: perhaps the background noise is too loud, maybe you want to censor something from it, or maybe you simply don’t need it because you plan to use the video as B-roll or play music over it.
Conclusion
Basically, it’s easy to remove sound from video windows 10. You can use the tools mentioned above and follow the step-by-step instructions on how to do it. Out of all the tools listed above, Filmora is the best one to use. Filmora can not only take the sound out of your video but also has many ways to change the sound. Like ducking video or detaching audio
Free Download For macOS 10.14 or later
Step2 In this step, you need to find the video you want to mute on your computer and import it to Filmora. Then, drag your video onto Filmora’s timeline.
Step3 Once you’ve dragged your video onto Filmora’s timeline, click on your video in the timeline and then right-click. Afterwards, choose “detach audio.”
Step4 Now, you will see the audio track below the video track. Simply, click on the audio track and click the “delete” icon. Finally, you are successful in muting the audio from your video.
Step5 Click “Export” to save your video on your computer.
Beside Filmora allow you to mute audio from entire of the video, Filmora also has another audio modify feature called “Silence detection”. Silence Detection is a special add-on for Filmora users, making it easier to cut out silent parts of a video. Silence Detection is a unique Filmora add-on that makes it easier for users to remove silent pauses from a film. The add-on examines the full video to detect all the silent pauses and eliminates them instantly, saving you time and simplifying the editing process.
How to use silence detection?
Step1 Right-click on the clip in the resource, select the video clip on the timeline, and choose the silence detection option to open up the silence detection window.
Step2 The silent detection tool will automatically detect the silent and low sound points.
Furthermore, you can adjust the parameters to recalculate the silence detection or manually fine-tune what the feature has already detected
once everything sounds good, export the video into the Filmora timeline so you can continue editing your video.
Moreover, Filmora also has another feature called “Audio ducking”. Audio ducking is a way to turn down the volume of the background when one voiceover comes on.
How to use audio ducking with Filmora
Step1 Let’s say you already have your voiceover and the audio in your video. If you want you to use duking voice feature, firstly, you need to decide which part of the audio you want to lower. After that, double-click the selected part until the ducking voice feature comes out.
Step2 Next, you just need to drag the audio ducking bar to the left or right. Indeed, if you drag to the right, it will lower the audio. Once you are done adjusting the audio, click “Ok”, and you can preview the result.
Last but not least, Filmora has other features called TTS and STT. Speech to Text (STT) allows you to transcript voice to subtitles in one click. Using speech-to-text will save you a lot of time on subtitling and speed up the editing process. Meanwhile, Text to Speech (TTS) is a feature in Filmora that lets you turn text files into voiceover and add more elements to your video.
How to use STT with Filmora
Step1 Firstly, right-click on the audio track and choose “Speech-to-Text”.
Step2 In the STT parameter setting bar, you can choose the language of the audio to be transcribed and the files to be converted. You can also choose to match automatically to the timeline.
How to use TTS with Filmore
Step1 Go to the “Tittle” and add you default Title. After that, write anything you want.
Step2 Select the title box in the timeline, then right-click. After that, click on “Text-to-Speech”.
Step3 In the TTS parameter setting bar, choose the language this title is in and the voice’s name.
Method 3: Use Windows 10 officially recommend video editor
1. Climpchamp
Clipchamp is an online video editor that makes it easy for anyone to make videos, even if they have never edited before. It lets you combine your videos, images, and audio files, remove audio from the video and then save the finished video to your computer. On the Climpchamp homepage, you can sign up for a free account and start editing your videos right away.
How to mute audio from the video with Climpchamp
Step1 First, open up your browser and search for Climpchamp.com. You must sign up and make an account on the next page first. Please note that creating an account doesn’t cost anything. Once you have an account, you just need to click “Create your first video”.
Step2 In this part, you just need to drag the video file you want to mute into the Clipchamp.
Step3 Once you import your video into Clipchamp. Then, go to “Audio” and simply drag the bar to the most left to remove the audio. When you are done, click “Export” on your top screen.
Step4 When exporting the video is done, click “Save to your computer” to save the video.
Part4: FAQ
Why do we need to mute audio from the video?
Getting rid of the audio from some clips might be necessary for a variety of reasons: perhaps the background noise is too loud, maybe you want to censor something from it, or maybe you simply don’t need it because you plan to use the video as B-roll or play music over it.
Conclusion
Basically, it’s easy to remove sound from video windows 10. You can use the tools mentioned above and follow the step-by-step instructions on how to do it. Out of all the tools listed above, Filmora is the best one to use. Filmora can not only take the sound out of your video but also has many ways to change the sound. Like ducking video or detaching audio
Also read:
- New How to Choose Best Audio Formats for 2024
- New 2024 Approved Ultimate Car Audio Blend Tool for Mac Users
- 2024 Approved Rapid Method for Silencing Audio in Audacity Essential Tips
- New In 2024, The Ultimate Selection of Top 5 Android Audio Editing Software Worth Your Time
- Updated Rapid Remedies for Clearing Up Crippling Static in Soundtracks Instantly
- In 2024, Demystifying Clubhouse Understanding the Social Networks Foundation, Purpose, and Potential Impact
- New Time-Sync Techniques in Video Editing Creating Beats-Aligned Cuts with Premiere Pro for Modern Filmmakers for 2024
- Updated Transforming Music Production in Logic Pro X with These Essential Plugin Tools (Free/Paid) for 2024
- New Solemn Sonatas Classic Music Selections to Enhance Wedding Cinematography
- Updated In 2024, A Practical Walkthrough for Logging Your Google Voice Calls Using Phone Applications and Desktop Operating Systems
- In 2024, Exploring the Impactful Fusion of Audio Elements in Visual Storytelling
- Sonic Clarity Mastering Silence in Recorded Sound with Wondershare Filmora
- New In 2024, Boosting Online Communication Efficiency The Role of the Clownfish Vocal Change Feature in Discord/Fortnite/Skype Chat Rooms
- New Audience Adjustment Pros Incorporating Autotune and Its Plugin Support Into Audacity
- Jazz 101 Key Elements You Must Understand for 2024
- Updated Mastering the Art of Incorporating Soundtracks Into Videos Using Filmora
- 2024 Approved Silencing Skew Advanced Tactics for Rectifying Audio Anomalies and Enhancing Clarity
- 2024 Approved Advanced Audio Setup Installing and Removing Audacity From Chrome OS Devices
- New Unveiling the Best 5 Real-Time Vocal Processor Applications for Dynamic Audioscapes
- New In 2024, Silencing Skew Advanced Tactics for Rectifying Audio Anomalies and Enhancing Clarity
- New Best 11 Android Apps for Audio Editing for 2024
- Updated 2024 Approved Ultimate Playlist Creation 10 Must-Have Recorders to Capture Favorite Melodies Effortlessly
- All-Encompassing Directory Guide for Podcast Platforms for 2024
- Updated 2024 Approved Perfecting Music Syncs with Gifs on a Windows Device
- Updated The Ultimate List of Mobile Audio Augmentation Tools (iOS/Android, 2023 Edition) for 2024
- New Top 10 Alternatives of FaceTime on Android You Can Find
- In 2024, 3 Budget-Friendly Ways to Seamlessly Add Soundtracks to Your Videos
- Updated In 2024, Streamlining Editing How to Excise Audio From Video Tracks Using Premiere Pro
- In 2024, Mastering Music Creation The 6 Best Free DAW Choices for Newcomers
- In 2024, How To Remove Background Noise In Audio Wondershare Filmora Tutorial
- Harmonizing Your Games Seamlessly Inserting Music Into KineMaster
- New In 2024, Unveiling the Most Reliable Websites for Precision MP3 Tagging and Organizing
- Updated Navigating Through the Best Windows Software for Converting Speech to Text
- Updated Aural Journey Illustrating Sound Patterns with Waveform Graphics and Dynamic Animations in NLE Essential for 2024
- Tailoring Your Viewing Experience Eliminating Background Noise From Videos for 2024
- 2024 Approved Perfecting the Playback Speed and Pitch Control for Enhanced Soundscapes in Adobe Rush
- Updated 2024 Approved The Art of Digital Communication Empowering Your Gameplay with Morphvox Voice Customization
- Updated 2024 Approved Win & Apple Users Favorites Top Picks for Audio Recording Technology (MP3)
- New 2024 Approved The Pillars of Jazz Music Essential Information Every Enthusiast Should Learn
- New 2024 Approved Backward Beats Unleashed Hits From the Other Side
- Updated Sonic Imagery Graphically Representing Audio & Crafting Animation Masterpieces in Adobe After Effects
- Updated Add & Edit Background Music to Video with Filmora for 2024
- New Crafting Emotionally Resonant Films Through the Use of Intense and Thrilling Musical Selections
- New In 2024, The Sound Experts Choice 7 Innovative Free Transitions to Revolutionize Your Work
- Synchronize Your Tracks A Guide to Normalizing Audio with DaVinci Resolve for 2024
- Beats & Bits Creating Seamless Synchronization Between Soundtracks and Visuals in the 2023 Edition of FCPX for 2024
- Updated In 2024, Voice Modification Innovations Product Introduction, Reviews, & Comparisons
- 2024 Approved Deciphering the Unheard Advanced Audio Separation Techniques for Digital Videos
- Where Is the Best Place to Catch Dratini On Google Pixel 8 | Dr.fone
- In 2024, 5 Ways to Track Apple iPhone X without App | Dr.fone
- How to Downgrade iPhone 15 Plus without Losing Any Data? | Dr.fone
- New This Article Discusses What Is Hitfilm Express, How to Download, Install and Use It, and Its Key Features. It Further Discusses Its Alternative for Editing Your Videos and More. Check Out Now
- 7 Ways to Unlock a Locked Xiaomi Redmi K70 Phone
- 2024 Approved Premiere on Linux? No Problem! 10 Alternative Video Editors
- In 2024, How to Unlock Disabled iPhone 8 Plus/iPad Without Computer
- All Must-Knows to Use Fake GPS GO Location Spoofer On Realme 10T 5G | Dr.fone
- How To Unbrick a Dead Honor X50 GT | Dr.fone
- How to Come up With the Best Pokemon Team On Samsung Galaxy S23? | Dr.fone
- Life360 Circle Everything You Need to Know On Vivo Y78+ | Dr.fone
- Updated In 2024, The Best Ways to Convert MP4 to MP3 on Your iPhone or Android Device
- New 2024 Approved The Best Free MPEG Video Splitters A Comprehensive Guide
- 2024 Approved Best Movie Intro Software Customize Your Video Intros Easily
- Unlock iPhone 14 Pro Max Without Passcode Easily
- Remove Samsung Lock Screen without Password(Samsung Galaxy A14 4G)
- In 2024, Network Locked SIM Card Inserted On Your Samsung Galaxy Z Fold 5 Phone? Unlock It Now
- Best Fixes For Oppo Find X6 Hard Reset | Dr.fone
- Remove FRP Lock on X100
- Updated 2024 Approved How to Stream on Twitch The Ultimate Guide
- Updated 2024 Approved Edit Like a Pro A Comprehensive Tutorial on MP4 Video Editing for Mac and Windows
- In 2024, How To Create an Apple Developer Account On Apple iPhone 13 mini
- Apple iPhone 14 Pro Max Asking for Passcode after iOS 17/14 Update, What to Do? | Dr.fone
- Change Location on Yik Yak For your Infinix Smart 8 Plus to Enjoy More Fun | Dr.fone
- How To Transfer Data From Apple iPhone 8 To Other iPhone 14 devices? | Dr.fone
- Updated 2024 Approved Ditch Final Cut Pro X? Explore These 10 Powerful Video Editing Alternatives
- Does Airplane Mode Turn off GPS Location On Honor 100 Pro? | Dr.fone
- Looking For A Location Changer On OnePlus Nord N30 5G? Look No Further | Dr.fone
- In 2024, 5 Ways to Track Apple iPhone 14 without App | Dr.fone
- In 2024, The Complete Guide to Samsung Galaxy S24 Ultra FRP Bypass Everything You Need to Know
- Want to Uninstall Google Play Service from Vivo S18 Pro? Here is How | Dr.fone
- Title: In 2024, Discover the Top 5 Budget-Friendly Audio Intensity Normalizers
- Author: Ella
- Created at : 2024-05-19 06:26:06
- Updated at : 2024-05-20 06:26:06
- Link: https://sound-optimizing.techidaily.com/in-2024-discover-the-top-5-budget-friendly-audio-intensity-normalizers/
- License: This work is licensed under CC BY-NC-SA 4.0.
