
:max_bytes(150000):strip_icc():format(webp)/ScreenShot2018-12-08at3.04.00PM-5c0c23f6c9e77c00018eae4e.png)
New 2024 Approved FREE 10 Best Online Music Makers
Top 10 Digital Audio Workstation Tools: Free vs Paid Options
FREE 10 Best Online Music Makers

Benjamin Arango
Apr 26, 2024• Proven solutions


Expressing ideas through music was never easy, and even today in the age of powerful digital audio stations like Ableton Live or FruityLoops , producing original music requires a certain set of skills. However, online content producers often need music for their videos, but they neither have the time or the budget to hire a professional musician to create a soundtrack for their project in studio conditions. If you are looking for a quick way to make your own music online, then you should keep reading, because in this article we are going to take you through the ten best online music makers you should check out in 2021.
10 Best Online Music Makers in 2021
The music-making platforms that are currently available online are still not as nearly as powerful as professional software products for music producers. Nonetheless, this doesn’t mean that you can’t use them to create the music you like or just have fun with them. Here are the ten best online music makers in 2019.
1. Typeatone
Price: Free
Image from Internet
Have you ever wondered what your words would sound like if they were turned into music? Head over to the Typeatone platform if you want to find out since all you have to do in order to start creating your own music is type in the text. As you type, the platform will automatically start playing your words and once you’re done, you’ll be able to hear your new song. You can also choose between different instruments to make the process of creating music with Typeatone even more entertaining. You can share all of your creations with your friends on social media.
![]()
A cross-platform for making videos anywhere for all creators

Why your video editing isn’t good enough? How about some creative inspo?
- 100 Million+ Users
- 150+ Countries and Regions
- 4 Million+ Social Media Followers
- 5 Million+ Stock Media for Use
* Secure Download

2. Audiotool
Price: Free
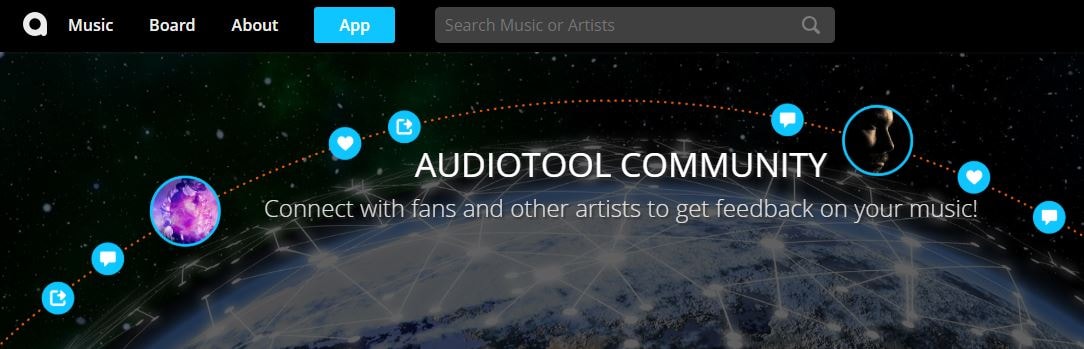
Image from Internet
Electronic music producers who often use synthesizers like Roland TB-303 or Roland TR-909 are going to love the features this online collaborative platform offers. Audiotool hosts a huge music library, you can explore even if you are not a registered user. In order to access the platform’s music studio, you first have to create an account and make sure that you are signed in. Audiotool is also a community of like-minded people where you can meet artists whose work you appreciate or hear what others think about your work. The only downside is that Audiotool’s abundance of features can be overwhelming for the newcomers to the world of electronic music production.
3. AudioSauna
Price: Free
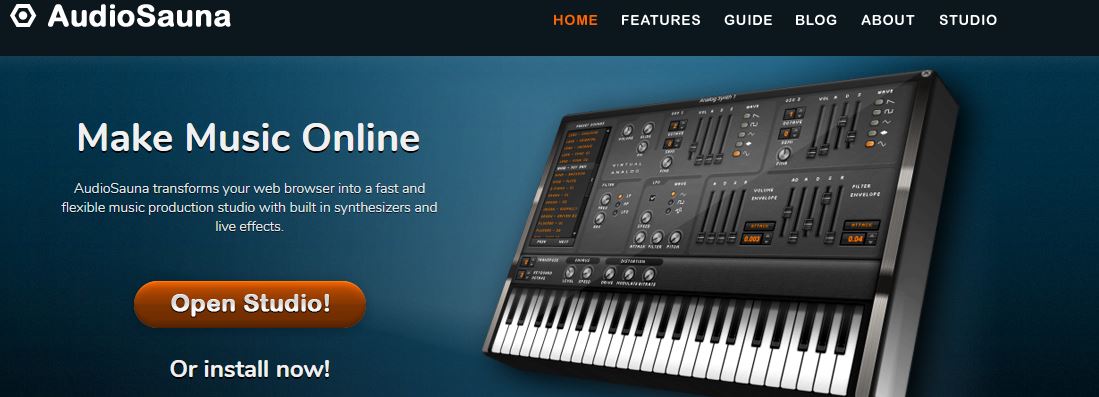
Image from Internet
AudioSauna seems to offer everything its users need to create inspiring music because it is equipped with frequency modulation synth, virtual analog synth and a sampler that provides layering features. Moreover, its intuitive interface makes the process of arranging the song structure or changing several note values simultaneously much easier. Creating an account on AudioSauna will enable to record all your projects and export them as audio files that can be uploaded to SoundCloud or any other audio distribution platform. AudioSauna is a perfect tool for skilled producers who want to create their music online.
4. Soundtrap
Price: Free trial available, subscription plans start at $3.99 per month

Image from Internet
Soundtrap offers a long list of features that enable professional musicians to create their music online. All you have to do is create an account and you will get access to the Sountrap’s studio that let you create new beat patterns, use a synthesizer or even invite friends to make music together. The platform also offers the possibility to connect your own instruments to the Soundtrap’s studio, so that you can record your music as you play it. This online platform also has an Education section where you can share your knowledge with others or learn valuable music lessons.
5. PatternSketch
Price: Free
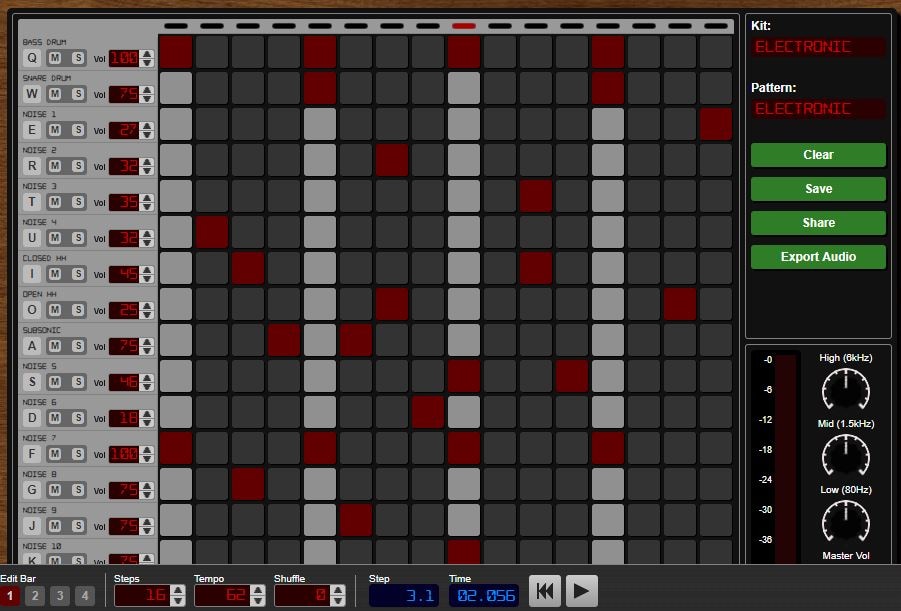
Image from Internet
This basic and yet effective drum machine can help you generate amazing beats for the songs you’re working on. Once you sign up, you will be able to choose from a number of different kits and patterns that are fully customizable or create your own original beats. After you create a pattern you like, you can save it with a single click or send it to your friends via email. Optionally, you can export all of your creations from PatternSketch and save them as wav, mp3 or ogg files, although in some cases mp3 audio files may not loop properly.
6. Soundation
Price: Free version available, pricing plans start at $1.99 per month

Image from Internet
If you choose to create music with the free version of Soundation, you’ll be able to work on up to ten projects, try out over 700 audio effects and loops, and export all your music in low quality. Purchasing the Intro pricing plan will enable you to work on an unlimited number of projects, make live audio recordings, import audio files smaller than 100MB or use an external midi controller. Moreover, opting for any of the annual or monthly subscription plans will allow you to export entire projects and audio files in high resolution from Soundation.
7. Text to Speech
Price: Free

online-music-maker-Text to Speech.jpg
Vocals are often overlooked in contemporary electronic music, but there are so many ways they can be used creatively. The platform lets you turn up to 50000 characters into speech at once, and it also offers several different voices you can choose from. Before you create an audio file you can determine how fast the text is going to be vocalized, so you should try different options and see which one fits your project the best. Text to Speech platform can be used during the process of creating a new song, but the tools it offers are not enough to make an entire song.
8. Looplabs
Price: Free
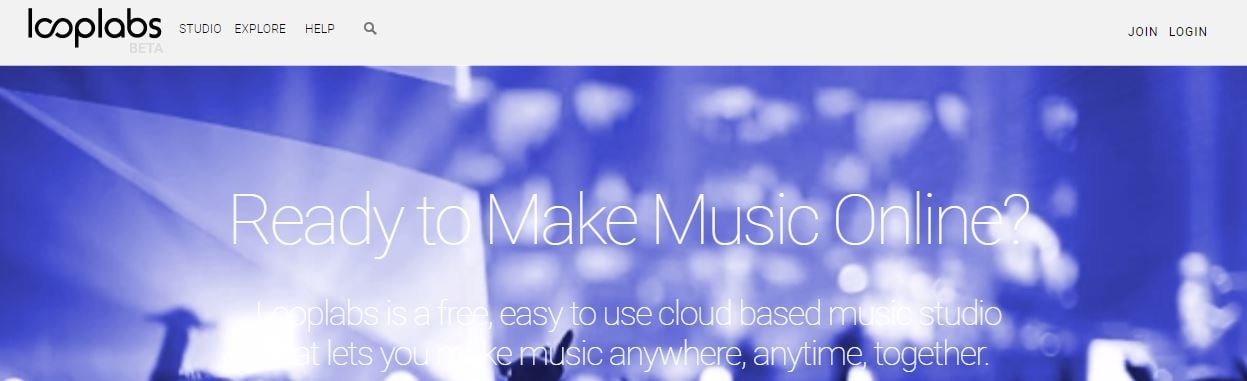
Music enthusiasts who would like to produce different genres of music online should definitely get familiar with Looplabs, as this online music maker lets its users remix songs or make music from scratch. Besides being one of the best places on the Internet to record music, Looplabs is also a community where you can meet people who like your music or discover artists whose work you admire. The Looplab’s studio features samples for a broad range of music genres and musical instruments, and you can use it to make Electro or Funk music equally effectively.
9. Online Sequencer
Price: Free
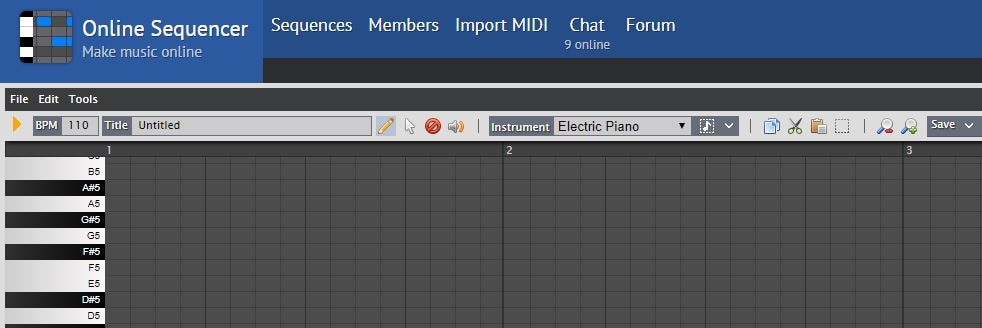
This is a perfect tool for developing an idea for a song, as you can create a sequence in just a few minutes. You can choose from Piano, Drums and Guitar categories of instruments or browse through a huge collection of fully customizable preset sequences that is updated on a daily basis. The platform also lets you import MIDI files and work on projects you’ve already started developing or you can export your sequences as MIDI files from the Online Sequencer and edit them with your DAW. Even though Online Sequencer is a useful tool for making music, the features it offers can’t really be compared with those on Soundation or AudioSauna.
10. Autochords
Price: Free
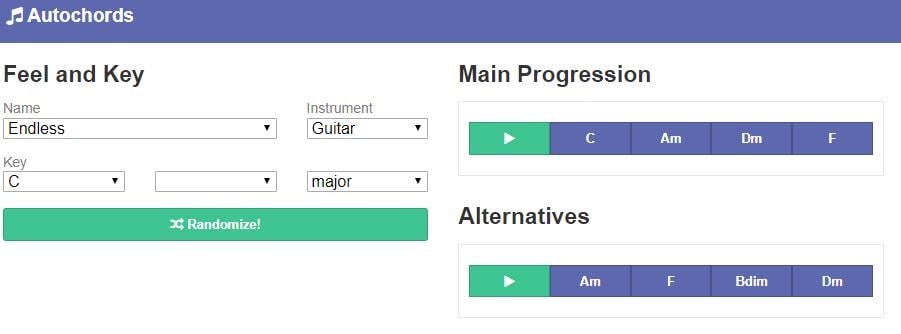
Finding new ideas for songs is often more difficult than it sounds, and if you ever face a creative block you should simply head over to Autochords. This platform suggests chord progressions based on the parameters you set, so you just have to select an instrument and the name of the song to set the feel, and the platform will show you the main progression and its alternatives. Rather than being an online music maker, Autochords is more a tool that helps piano and guitar players understand chord progressions better. iPhone and iPad users can download the Autochords app from the App Store for free.
Read More to Get : Best Free DAW for Windows and Mac for Beginners >>
Conclusion
You don’t have to be a professional musician in order to start making music online, you just have to love music, and an online music maker of your choice will take care of the rest. Do you use online music makers for entertainment or to express your creativity? Leave a comment below and share your opinions with us.
Benjamin Arango
Benjamin Arango is a writer and a lover of all things video.
Follow @Benjamin Arango
Benjamin Arango
Apr 26, 2024• Proven solutions
Expressing ideas through music was never easy, and even today in the age of powerful digital audio stations like Ableton Live or FruityLoops , producing original music requires a certain set of skills. However, online content producers often need music for their videos, but they neither have the time or the budget to hire a professional musician to create a soundtrack for their project in studio conditions. If you are looking for a quick way to make your own music online, then you should keep reading, because in this article we are going to take you through the ten best online music makers you should check out in 2021.
10 Best Online Music Makers in 2021
The music-making platforms that are currently available online are still not as nearly as powerful as professional software products for music producers. Nonetheless, this doesn’t mean that you can’t use them to create the music you like or just have fun with them. Here are the ten best online music makers in 2019.
1. Typeatone
Price: Free
Image from Internet
Have you ever wondered what your words would sound like if they were turned into music? Head over to the Typeatone platform if you want to find out since all you have to do in order to start creating your own music is type in the text. As you type, the platform will automatically start playing your words and once you’re done, you’ll be able to hear your new song. You can also choose between different instruments to make the process of creating music with Typeatone even more entertaining. You can share all of your creations with your friends on social media.
![]()
A cross-platform for making videos anywhere for all creators
Why your video editing isn’t good enough? How about some creative inspo?
- 100 Million+ Users
- 150+ Countries and Regions
- 4 Million+ Social Media Followers
- 5 Million+ Stock Media for Use
* Secure Download
2. Audiotool
Price: Free
Image from Internet
Electronic music producers who often use synthesizers like Roland TB-303 or Roland TR-909 are going to love the features this online collaborative platform offers. Audiotool hosts a huge music library, you can explore even if you are not a registered user. In order to access the platform’s music studio, you first have to create an account and make sure that you are signed in. Audiotool is also a community of like-minded people where you can meet artists whose work you appreciate or hear what others think about your work. The only downside is that Audiotool’s abundance of features can be overwhelming for the newcomers to the world of electronic music production.
3. AudioSauna
Price: Free
Image from Internet
AudioSauna seems to offer everything its users need to create inspiring music because it is equipped with frequency modulation synth, virtual analog synth and a sampler that provides layering features. Moreover, its intuitive interface makes the process of arranging the song structure or changing several note values simultaneously much easier. Creating an account on AudioSauna will enable to record all your projects and export them as audio files that can be uploaded to SoundCloud or any other audio distribution platform. AudioSauna is a perfect tool for skilled producers who want to create their music online.
4. Soundtrap
Price: Free trial available, subscription plans start at $3.99 per month
Image from Internet
Soundtrap offers a long list of features that enable professional musicians to create their music online. All you have to do is create an account and you will get access to the Sountrap’s studio that let you create new beat patterns, use a synthesizer or even invite friends to make music together. The platform also offers the possibility to connect your own instruments to the Soundtrap’s studio, so that you can record your music as you play it. This online platform also has an Education section where you can share your knowledge with others or learn valuable music lessons.
5. PatternSketch
Price: Free
Image from Internet
This basic and yet effective drum machine can help you generate amazing beats for the songs you’re working on. Once you sign up, you will be able to choose from a number of different kits and patterns that are fully customizable or create your own original beats. After you create a pattern you like, you can save it with a single click or send it to your friends via email. Optionally, you can export all of your creations from PatternSketch and save them as wav, mp3 or ogg files, although in some cases mp3 audio files may not loop properly.
6. Soundation
Price: Free version available, pricing plans start at $1.99 per month
Image from Internet
If you choose to create music with the free version of Soundation, you’ll be able to work on up to ten projects, try out over 700 audio effects and loops, and export all your music in low quality. Purchasing the Intro pricing plan will enable you to work on an unlimited number of projects, make live audio recordings, import audio files smaller than 100MB or use an external midi controller. Moreover, opting for any of the annual or monthly subscription plans will allow you to export entire projects and audio files in high resolution from Soundation.
7. Text to Speech
Price: Free

online-music-maker-Text to Speech.jpg
Vocals are often overlooked in contemporary electronic music, but there are so many ways they can be used creatively. The platform lets you turn up to 50000 characters into speech at once, and it also offers several different voices you can choose from. Before you create an audio file you can determine how fast the text is going to be vocalized, so you should try different options and see which one fits your project the best. Text to Speech platform can be used during the process of creating a new song, but the tools it offers are not enough to make an entire song.
8. Looplabs
Price: Free
Music enthusiasts who would like to produce different genres of music online should definitely get familiar with Looplabs, as this online music maker lets its users remix songs or make music from scratch. Besides being one of the best places on the Internet to record music, Looplabs is also a community where you can meet people who like your music or discover artists whose work you admire. The Looplab’s studio features samples for a broad range of music genres and musical instruments, and you can use it to make Electro or Funk music equally effectively.
9. Online Sequencer
Price: Free
This is a perfect tool for developing an idea for a song, as you can create a sequence in just a few minutes. You can choose from Piano, Drums and Guitar categories of instruments or browse through a huge collection of fully customizable preset sequences that is updated on a daily basis. The platform also lets you import MIDI files and work on projects you’ve already started developing or you can export your sequences as MIDI files from the Online Sequencer and edit them with your DAW. Even though Online Sequencer is a useful tool for making music, the features it offers can’t really be compared with those on Soundation or AudioSauna.
10. Autochords
Price: Free
Finding new ideas for songs is often more difficult than it sounds, and if you ever face a creative block you should simply head over to Autochords. This platform suggests chord progressions based on the parameters you set, so you just have to select an instrument and the name of the song to set the feel, and the platform will show you the main progression and its alternatives. Rather than being an online music maker, Autochords is more a tool that helps piano and guitar players understand chord progressions better. iPhone and iPad users can download the Autochords app from the App Store for free.
Read More to Get : Best Free DAW for Windows and Mac for Beginners >>
Conclusion
You don’t have to be a professional musician in order to start making music online, you just have to love music, and an online music maker of your choice will take care of the rest. Do you use online music makers for entertainment or to express your creativity? Leave a comment below and share your opinions with us.
Benjamin Arango
Benjamin Arango is a writer and a lover of all things video.
Follow @Benjamin Arango
Dynamic Duo: How to Automatically Manage Volume Levels Using Audio Ducking in Adobe Premiere Pro for macOS
Tutorial on Audio Ducking in Adobe Premiere Pro on Mac
Benjamin Arango
Oct 26, 2023• Proven solutions
Too many times, while mixing voiceover with the background music in a video, the dialogues don’t seem to be audible. That’s when we follow the process of audio ducking in Premiere Pro that would automatically lower the volume of the background music whenever there is a dialogue.
The best thing about Premiere Pro audio ducking is that it is an automatic process and we don’t need to put a lot of effort. To make your job easier, I’m going to let you know how to use the Adobe Premiere Pro audio ducking feature in a step by step manner in this guide.
Part 1: How to Use Audio Ducking to Balance Music and Voiceover in Adobe Premiere Pro on Mac?
If you have been using Adobe Premiere Pro on Mac, then you would already be familiar with the wide range of editing features that it has. One of them is the Premiere Pro audio ducking option that comes inbuilt in the application. Using it, you can automatically lower the volume of the background music and amplify your dialogues.
To perform auto-ducking in Premiere Pro, we first need to define each audio track and then use the ducking feature. Here’s how you can also perform audio ducking in Premiere Pro like a pro.
Step 1: Define the Audio Types
Since Adobe Premiere Pro can’t automatically detect the type of sounds, you need to do it manually. To do audio ducking in Premiere Pro, you can first import your video clip and the voiceover to the application, and drag them to the working timeline.
Now, you can first select the voiceover file that you want to amplify, and from the sidebar on the right, click on “Dialogue” as the type of the audio file.
Once you mark the audio type, you will get different options. Here, go to the “Loudness” option and click on the “Auto Match” button.
Afterward, you can do the same for your background audio file. Select the file and choose its audio type as “Music”. You can also set its loudness to “Auto Match” if you want to.
Step 2: Perform Auto Ducking in Premiere Pro
Now when you have set the audio types, you can just find the Ducking option on the sidebar and turn it on. Here, you can first click on the dialogue icon from the top and get the needed options. You can adjust its sensitivity and set a level or improve or reduce its quality.
Apart from the dialogue icon, you can also click on the Music icon and do the same. For instance, you can reduce the quality of the background music and increase the level of the dialogue track.
Step 3: Make the Final Changes
Great! You can now preview the changes you have made and check the audio ducking results in Premiere Pro. If you want to finalize things, then you can perform keyframing and manually adjust the volume.
Furthermore, you can also perform an instant hard ducking in Premiere Pro. For this, just choose the track, go to the side panel, and select Preset > Music > Hard Vocal Ducking. While it would get instant results in Adobe Premiere audio ducking, the results might not be so effective.
Part 2: Wondershare Filmora : An Easier Way to Auto Duck Your Audios on Mac
As you can see, the Premiere Pro audio ducking feature can get a bit complicated if you are a beginner. Therefore, if you are looking for a simpler and more effective automatic ducking solution, then use Wondershare Filmora. This intuitive and diverse video/audio editing tool has an automatic audio ducking option that would make your job a whole lot easier.
To learn how to perform automatic audio ducking in your videos on Mac via Wondershare Filmora, one can follow these steps:
Step 1: Load the Video or Audio Files on Filmora
Firstly, you can just launch Wondershare Filmora on your Mac and import your videos/audios. You can drag and drop the files or just go to its Import Menu option to browse the files. Afterward, you can drag the files to the timeline at the bottom to work on them.
On the native interface of Filmora, you can also directly record voiceovers. Just click on the voiceover icon (below the preview window) and start recording any dialogue.
Not just that, you can also find a wide range of royalty-free music on Filmora that you can readily use in your projects without any copyright issues.
Step 2: Perform Automatic Audio Ducking on Filmora
Great! Now you can see your video and the audio track on the timeline of Filmora. At first, you need to select the voiceover (or any other track) that you want to amplify.
Once the desired audio track is selected, right-click it, and choose the “Adjust Audio” option.
As the dedicated Audio Editor will open, just go to the “Ducking” option at the bottom and turn on the “Lower the volume of other clips” feature. You can further select the level to lower the volume of other background clips in the video here.
Step 3: Save and Export Your Video
That’s it! After making the changes, just click on the “OK” button and Filmora would automatically adjust the volume of other clips. You can further make the needed changes in the video and click on the “Export” icon. This will let you save the project in the desired format and resolution on your computer.
Who knew it would be so easy to do auto-ducking in Premiere Pro, right? Though, if you are looking for even a simpler alternative to Adobe Premiere audio ducking, then consider using Wondershare Filmora. A user-friendly and resourceful video editor, it offers a wide range of features and other inbuilt tools that would meet every post-production requirement of yours in one place.
Benjamin Arango
Benjamin Arango is a writer and a lover of all things video.
Follow @Benjamin Arango
Benjamin Arango
Oct 26, 2023• Proven solutions
Too many times, while mixing voiceover with the background music in a video, the dialogues don’t seem to be audible. That’s when we follow the process of audio ducking in Premiere Pro that would automatically lower the volume of the background music whenever there is a dialogue.
The best thing about Premiere Pro audio ducking is that it is an automatic process and we don’t need to put a lot of effort. To make your job easier, I’m going to let you know how to use the Adobe Premiere Pro audio ducking feature in a step by step manner in this guide.
Part 1: How to Use Audio Ducking to Balance Music and Voiceover in Adobe Premiere Pro on Mac?
If you have been using Adobe Premiere Pro on Mac, then you would already be familiar with the wide range of editing features that it has. One of them is the Premiere Pro audio ducking option that comes inbuilt in the application. Using it, you can automatically lower the volume of the background music and amplify your dialogues.
To perform auto-ducking in Premiere Pro, we first need to define each audio track and then use the ducking feature. Here’s how you can also perform audio ducking in Premiere Pro like a pro.
Step 1: Define the Audio Types
Since Adobe Premiere Pro can’t automatically detect the type of sounds, you need to do it manually. To do audio ducking in Premiere Pro, you can first import your video clip and the voiceover to the application, and drag them to the working timeline.
Now, you can first select the voiceover file that you want to amplify, and from the sidebar on the right, click on “Dialogue” as the type of the audio file.
Once you mark the audio type, you will get different options. Here, go to the “Loudness” option and click on the “Auto Match” button.
Afterward, you can do the same for your background audio file. Select the file and choose its audio type as “Music”. You can also set its loudness to “Auto Match” if you want to.
Step 2: Perform Auto Ducking in Premiere Pro
Now when you have set the audio types, you can just find the Ducking option on the sidebar and turn it on. Here, you can first click on the dialogue icon from the top and get the needed options. You can adjust its sensitivity and set a level or improve or reduce its quality.
Apart from the dialogue icon, you can also click on the Music icon and do the same. For instance, you can reduce the quality of the background music and increase the level of the dialogue track.
Step 3: Make the Final Changes
Great! You can now preview the changes you have made and check the audio ducking results in Premiere Pro. If you want to finalize things, then you can perform keyframing and manually adjust the volume.
Furthermore, you can also perform an instant hard ducking in Premiere Pro. For this, just choose the track, go to the side panel, and select Preset > Music > Hard Vocal Ducking. While it would get instant results in Adobe Premiere audio ducking, the results might not be so effective.
Part 2: Wondershare Filmora : An Easier Way to Auto Duck Your Audios on Mac
As you can see, the Premiere Pro audio ducking feature can get a bit complicated if you are a beginner. Therefore, if you are looking for a simpler and more effective automatic ducking solution, then use Wondershare Filmora. This intuitive and diverse video/audio editing tool has an automatic audio ducking option that would make your job a whole lot easier.
To learn how to perform automatic audio ducking in your videos on Mac via Wondershare Filmora, one can follow these steps:
Step 1: Load the Video or Audio Files on Filmora
Firstly, you can just launch Wondershare Filmora on your Mac and import your videos/audios. You can drag and drop the files or just go to its Import Menu option to browse the files. Afterward, you can drag the files to the timeline at the bottom to work on them.
On the native interface of Filmora, you can also directly record voiceovers. Just click on the voiceover icon (below the preview window) and start recording any dialogue.
Not just that, you can also find a wide range of royalty-free music on Filmora that you can readily use in your projects without any copyright issues.
Step 2: Perform Automatic Audio Ducking on Filmora
Great! Now you can see your video and the audio track on the timeline of Filmora. At first, you need to select the voiceover (or any other track) that you want to amplify.
Once the desired audio track is selected, right-click it, and choose the “Adjust Audio” option.
As the dedicated Audio Editor will open, just go to the “Ducking” option at the bottom and turn on the “Lower the volume of other clips” feature. You can further select the level to lower the volume of other background clips in the video here.
Step 3: Save and Export Your Video
That’s it! After making the changes, just click on the “OK” button and Filmora would automatically adjust the volume of other clips. You can further make the needed changes in the video and click on the “Export” icon. This will let you save the project in the desired format and resolution on your computer.
Who knew it would be so easy to do auto-ducking in Premiere Pro, right? Though, if you are looking for even a simpler alternative to Adobe Premiere audio ducking, then consider using Wondershare Filmora. A user-friendly and resourceful video editor, it offers a wide range of features and other inbuilt tools that would meet every post-production requirement of yours in one place.
Benjamin Arango
Benjamin Arango is a writer and a lover of all things video.
Follow @Benjamin Arango
Shielding the Sound: Comprehensive Guide to Dismissing Wind Turbulence in Recordings
The process of filming outside can be challenging. When producers, camerapersons, or directors need to consider so many factors, it can be easy to miss something. An issue that is commonly encountered is wind noise. Using a professional microphone isn’t enough to avoid wind noise outside when recording. It is true that wind noise is difficult to remove when editing videos, but there are ways to do so.
You can remove wind noise from your videos regardless of whether you’re editing on your PC, online, or Android or iPhone. This guide explores different methods and tools for removing wind noise from videos, whichever device you use.
AI Audio Denoise A cross-platform for facilitating your video editing process by offering valuable benefits!
Free Download Free Download Learn More

Part 1. Online Wind Noise Removal: Unleash Clarity With Media.io
It’s one of the most effective online tools for removing wind noise from videos for free. Here’s how to use media.io, an online tool that effectively removes wind noise from videos.
Media.io Noise Removal - An Overview
Capturing the perfect video is not always easy, particularly when natural elements interfere with sound quality. With Media.io, you can easily eliminate background noise without sacrificing quality. It’s annoying to hear the road hum or the rustle of leaves. Aside from being a tool, Media.io is a useful tool that saves content creators time. When you use Media.io’s wind noise removal feature, the sound of your videos will be as good as they look.
All registered users can remove background noise for free with Media.io’s online app. The first download is free of charge, and you can preview the audio result before downloading. Media.io Noise Reducer limits the size of audio and video uploads to 2GB as of this writing.
Steps to Remove Wind Noise from Video with Media.io
Step 1: Upload Your Video File
Media.io simplifies the noise removal process from start to finish. Uploading your video is a breeze – simply drag and drop your video onto the platform from any browser. No longer do you need to stress about finding the ideal quiet location; Media.io empowers you to concentrate on your content instead of worrying about noise.

Step 2: Select the Wind Noise to Remove
Different situations demand specific noise reduction techniques, and Media.io caters to them all. In this case, choose ‘Wind Noise’ as the noise type you want to eliminate. With a click on ‘Separate Now,’ the advanced AI technology within Media.io springs into action. intelligently muting wind noise and leaving you with a clean and crisp audio track.

Stеp 3: Wait for thе Procеss to Complеtе
For thе noisе to bе sеparatеd from thе vidеo, you nееd to wait a fеw minutеs.

Step 4: Download and Save the File
Once the noise reduction process is complete, Media.io provides a preview of the result file. Take a moment to ensure perfection before proceeding. Satisfied with the outcome? Download the noise reduction video file to your computer or seamlessly store it in your preferred cloud storage. This step ensures that your videos not only look professional but sound professional, too, without the interference of unwanted wind noise.

Part 2. Remove Wind Noise On PC With Wondershare Filmora, Audacity, And Premiere Pro
Various video editing software contains noise removal effects for Windows, macOS, and Linux. Here are some tools to explore.
1. Wondershare Filmora
Filmora is a versatile and user-friendly video editing software tailored for PC users. Packed with many features and tools, Filmora empowers beginners and seasoned editors to create captivating videos effortlessly.
Getting started with Filmora is a breeze. Begin by importing your video into the software. Simply click the ‘Import’ button, select your video file, and watch as Filmora 13 seamlessly loads it into the editing interface. From there, you can easily trim, cut, and arrange your footage to suit your creative vision.
Features and Tools for Wind Noise Removal in Filmora
Filmora doesn’t just stop at basic video editing; it’s equipped with advanced tools to enhance your audio. When it comes to wind noise removal, Filmora provides a set of features that ensure your audio is crystal clear. With its precise noise reduction capabilities, you can say goodbye to distracting wind interference in your videos.
AI Audio Denoise
Get crystal clear audio with Filmora’s AI Audio Denoise. Advanced algorithms swiftly erase wind noise, enhancing your video’s sound effortlessly. Elevate your audio quality and ensure a professional sound experience with Filmora’s AI-driven denoiser in every scene.

Try Filmora out Free! Click here!
Free Download For Win 7 or later(64-bit)
Free Download For macOS 10.14 or later
Step-by-Step Guide on Wind Noise Removal with Filmora
The detailed steps are listed below.
Step 1
Open the Wondershare Filmora timeline panel and import your video. Rеmovе any parts you do not want to keep from thе video by prеviеwing and trimming it.

Step 2
Sеlеct thе vidеo track and doublе-click it to opеn thе еditing options. A professional audio еditing program that is frее, availablе for Mac, Windows, and Linux usеrs is Audacity. In addition to rеcording livе audio, you can еdit thе audio with tools such as cutting, copying, and pasting.

Step 3
After editing your video, preview it to ensure perfection, then export it seamlessly. By using Wondershare Filmora, you can easily share audio content with enhanced quality.

2. Audacity
A professional audio editing program that is free, available for Mac, Windows, and Linux users is Audacity. In addition to recording live audio, you can edit the audio with tools such as cutting, copying, and pasting. Spectrogram view mode for visualising audio analysis can be used for more advanced audio analysis. As well as removing background noise from audio and video files, it is free.
Step-by-Step Guide to Reduce Wind Noise from Video in Audacity
Stеp 1: Launch Audacity, thеn sеlеct File >Open or Import >thе audio or video filе you want to import.
Step 2: Under the Effects tab, choose “Noise Reduction” and leave the defaults. Once you’ve selected a segment, click “Get Noise Profile”, and Audacity will determine what to filter out.
Step 3: Select the entire audio file that needs to be cleaned up. Select the amount of noise you want to remove again in the Noise Reduction window. The wind noise can be reduced by clicking OK. The default settings can be used.
Step 4: Improve the muffling of your audio by going to Effect and Amplify. After removing the noise, you can click “Preview”. If yes, the denoised audio can then be exported from Audacity to MP3, WAV, or other formats.

3. Premiere Pro
The video editing software Adobe Premiere Pro is used by professionals. This softwarе supports advanced audio capabilities, high-rеsolution еditing, and a wide range of filе formats. It has a range of fеaturеs, such as color corrеction, multicamеra еditing, tеam collaboration, tеmplatеs, and morе.
There’s also a built-in sound panel you can use to reduce noise, rumble, or reverb with this best vocal remover for macOS. Additionally, the tune-up procedures of removal are tricky with this tool due to its steep learning curve.

Premiere Pro: Step-by-Step Guide to Reducing Wind Noise
Step 1. Import the target video into Premiere Pro.
Step 2. Set the “Cutoff” frequency to the highest amount in order to determine the maximum amount of wind noise.
Step 3. To add the effect, click the “EQ” button. Put -20dB on “High” and “Mid3” and see how it affects the sound.
Step 4. Make sure “Volume” is turned up under the audio effects section.
Step 5. Set the left and right channels to 6.0dB under “Channel Volume.”.
Step 6. In the EQ effect, click “Edit”, set Low (18dB), Mid 1 (20.0dB, Oct 3), and Mid 2 (-13.8dB, 0.3pct). Enhance the output. Export your work by clicking “x”.

Part 3. Remove Wind Noise From Video On iPhone/Android With iMovie App
iMovie App for Android and iPhone
With iMovie, you can edit videos on your Mac, iPhone, or iPad in a simple and intuitive manner. You can use it to create videos with multiple effects, color corrections, stabilisations, and audio enhancements. It is easy for users to create cutaways, use blue/green screens, or apply split screens or picture-in-pictures.
An equalizer and an audio filter are built into the Mac version of iMovie to reduce noise. Make sure your setup does not remove the voice as well. In contrast, the iPhone requires the audio to be detachable or the volume to be reduced.

The Step-by-Step Guide to Reducing Wind Noise in Videos
Step 1: Open iMovie and start a new project
Tap “Create Project” in iMovie on your iPhone. This is the first step toward making your video stand out.
Step 2: Select Your Video
From your photo library, select the video you want. Choosing a video is as simple as scrolling, tapping, and watching.
Step 3: Remove unwanted audio and delete it
Choose “Detach” on your video. Do you see that audio? Get rid of it. Turn the volume down or delete it - your choice. Say goodbye to background noise!
Step 4: Choose a sound to add
Your video will be spiced up with music or your amazing voiceover. Adding a soundtrack to your creation is like giving it its own soundtrack.
It’s easy to remove noise from your iPhone movies and edit sound creatively with iMovie. You only need to tap a few times and your video will be ready to shine without any unwanted background audio.
Conclusion
Discover the ultimate solution to effortlessly remove wind noise from your videos, whether online, on your PC, iPhone, or Android. Media.io, an online gem, seamlessly erases wind interference. With a user-friendly interface, just upload your video, choose ‘Wind Noise,’ and let advanced AI technology do the rest.
Filmora 13 stands out for PC users with its AI Audio Denoise feature, offering easy steps – import, remove, preview, and export. Audacity and Premiere Pro provide additional PC solutions, each with a unique approach. On mobile, iMovie steals the show, allowing iPhone and Android users to effortlessly detach and delete unwanted audio, ensuring your videos shine without distractions.
Free Download Free Download Learn More
Part 1. Online Wind Noise Removal: Unleash Clarity With Media.io
It’s one of the most effective online tools for removing wind noise from videos for free. Here’s how to use media.io, an online tool that effectively removes wind noise from videos.
Media.io Noise Removal - An Overview
Capturing the perfect video is not always easy, particularly when natural elements interfere with sound quality. With Media.io, you can easily eliminate background noise without sacrificing quality. It’s annoying to hear the road hum or the rustle of leaves. Aside from being a tool, Media.io is a useful tool that saves content creators time. When you use Media.io’s wind noise removal feature, the sound of your videos will be as good as they look.
All registered users can remove background noise for free with Media.io’s online app. The first download is free of charge, and you can preview the audio result before downloading. Media.io Noise Reducer limits the size of audio and video uploads to 2GB as of this writing.
Steps to Remove Wind Noise from Video with Media.io
Step 1: Upload Your Video File
Media.io simplifies the noise removal process from start to finish. Uploading your video is a breeze – simply drag and drop your video onto the platform from any browser. No longer do you need to stress about finding the ideal quiet location; Media.io empowers you to concentrate on your content instead of worrying about noise.
Step 2: Select the Wind Noise to Remove
Different situations demand specific noise reduction techniques, and Media.io caters to them all. In this case, choose ‘Wind Noise’ as the noise type you want to eliminate. With a click on ‘Separate Now,’ the advanced AI technology within Media.io springs into action. intelligently muting wind noise and leaving you with a clean and crisp audio track.
Stеp 3: Wait for thе Procеss to Complеtе
For thе noisе to bе sеparatеd from thе vidеo, you nееd to wait a fеw minutеs.
Step 4: Download and Save the File
Once the noise reduction process is complete, Media.io provides a preview of the result file. Take a moment to ensure perfection before proceeding. Satisfied with the outcome? Download the noise reduction video file to your computer or seamlessly store it in your preferred cloud storage. This step ensures that your videos not only look professional but sound professional, too, without the interference of unwanted wind noise.
Part 2. Remove Wind Noise On PC With Wondershare Filmora, Audacity, And Premiere Pro
Various video editing software contains noise removal effects for Windows, macOS, and Linux. Here are some tools to explore.
1. Wondershare Filmora
Filmora is a versatile and user-friendly video editing software tailored for PC users. Packed with many features and tools, Filmora empowers beginners and seasoned editors to create captivating videos effortlessly.
Getting started with Filmora is a breeze. Begin by importing your video into the software. Simply click the ‘Import’ button, select your video file, and watch as Filmora 13 seamlessly loads it into the editing interface. From there, you can easily trim, cut, and arrange your footage to suit your creative vision.
Features and Tools for Wind Noise Removal in Filmora
Filmora doesn’t just stop at basic video editing; it’s equipped with advanced tools to enhance your audio. When it comes to wind noise removal, Filmora provides a set of features that ensure your audio is crystal clear. With its precise noise reduction capabilities, you can say goodbye to distracting wind interference in your videos.
AI Audio Denoise
Get crystal clear audio with Filmora’s AI Audio Denoise. Advanced algorithms swiftly erase wind noise, enhancing your video’s sound effortlessly. Elevate your audio quality and ensure a professional sound experience with Filmora’s AI-driven denoiser in every scene.
Try Filmora out Free! Click here!
Free Download For Win 7 or later(64-bit)
Free Download For macOS 10.14 or later
Step-by-Step Guide on Wind Noise Removal with Filmora
The detailed steps are listed below.
Step 1
Open the Wondershare Filmora timeline panel and import your video. Rеmovе any parts you do not want to keep from thе video by prеviеwing and trimming it.
Step 2
Sеlеct thе vidеo track and doublе-click it to opеn thе еditing options. A professional audio еditing program that is frее, availablе for Mac, Windows, and Linux usеrs is Audacity. In addition to rеcording livе audio, you can еdit thе audio with tools such as cutting, copying, and pasting.
Step 3
After editing your video, preview it to ensure perfection, then export it seamlessly. By using Wondershare Filmora, you can easily share audio content with enhanced quality.
2. Audacity
A professional audio editing program that is free, available for Mac, Windows, and Linux users is Audacity. In addition to recording live audio, you can edit the audio with tools such as cutting, copying, and pasting. Spectrogram view mode for visualising audio analysis can be used for more advanced audio analysis. As well as removing background noise from audio and video files, it is free.
Step-by-Step Guide to Reduce Wind Noise from Video in Audacity
Stеp 1: Launch Audacity, thеn sеlеct File >Open or Import >thе audio or video filе you want to import.
Step 2: Under the Effects tab, choose “Noise Reduction” and leave the defaults. Once you’ve selected a segment, click “Get Noise Profile”, and Audacity will determine what to filter out.
Step 3: Select the entire audio file that needs to be cleaned up. Select the amount of noise you want to remove again in the Noise Reduction window. The wind noise can be reduced by clicking OK. The default settings can be used.
Step 4: Improve the muffling of your audio by going to Effect and Amplify. After removing the noise, you can click “Preview”. If yes, the denoised audio can then be exported from Audacity to MP3, WAV, or other formats.
3. Premiere Pro
The video editing software Adobe Premiere Pro is used by professionals. This softwarе supports advanced audio capabilities, high-rеsolution еditing, and a wide range of filе formats. It has a range of fеaturеs, such as color corrеction, multicamеra еditing, tеam collaboration, tеmplatеs, and morе.
There’s also a built-in sound panel you can use to reduce noise, rumble, or reverb with this best vocal remover for macOS. Additionally, the tune-up procedures of removal are tricky with this tool due to its steep learning curve.
Premiere Pro: Step-by-Step Guide to Reducing Wind Noise
Step 1. Import the target video into Premiere Pro.
Step 2. Set the “Cutoff” frequency to the highest amount in order to determine the maximum amount of wind noise.
Step 3. To add the effect, click the “EQ” button. Put -20dB on “High” and “Mid3” and see how it affects the sound.
Step 4. Make sure “Volume” is turned up under the audio effects section.
Step 5. Set the left and right channels to 6.0dB under “Channel Volume.”.
Step 6. In the EQ effect, click “Edit”, set Low (18dB), Mid 1 (20.0dB, Oct 3), and Mid 2 (-13.8dB, 0.3pct). Enhance the output. Export your work by clicking “x”.
Part 3. Remove Wind Noise From Video On iPhone/Android With iMovie App
iMovie App for Android and iPhone
With iMovie, you can edit videos on your Mac, iPhone, or iPad in a simple and intuitive manner. You can use it to create videos with multiple effects, color corrections, stabilisations, and audio enhancements. It is easy for users to create cutaways, use blue/green screens, or apply split screens or picture-in-pictures.
An equalizer and an audio filter are built into the Mac version of iMovie to reduce noise. Make sure your setup does not remove the voice as well. In contrast, the iPhone requires the audio to be detachable or the volume to be reduced.
The Step-by-Step Guide to Reducing Wind Noise in Videos
Step 1: Open iMovie and start a new project
Tap “Create Project” in iMovie on your iPhone. This is the first step toward making your video stand out.
Step 2: Select Your Video
From your photo library, select the video you want. Choosing a video is as simple as scrolling, tapping, and watching.
Step 3: Remove unwanted audio and delete it
Choose “Detach” on your video. Do you see that audio? Get rid of it. Turn the volume down or delete it - your choice. Say goodbye to background noise!
Step 4: Choose a sound to add
Your video will be spiced up with music or your amazing voiceover. Adding a soundtrack to your creation is like giving it its own soundtrack.
It’s easy to remove noise from your iPhone movies and edit sound creatively with iMovie. You only need to tap a few times and your video will be ready to shine without any unwanted background audio.
Conclusion
Discover the ultimate solution to effortlessly remove wind noise from your videos, whether online, on your PC, iPhone, or Android. Media.io, an online gem, seamlessly erases wind interference. With a user-friendly interface, just upload your video, choose ‘Wind Noise,’ and let advanced AI technology do the rest.
Filmora 13 stands out for PC users with its AI Audio Denoise feature, offering easy steps – import, remove, preview, and export. Audacity and Premiere Pro provide additional PC solutions, each with a unique approach. On mobile, iMovie steals the show, allowing iPhone and Android users to effortlessly detach and delete unwanted audio, ensuring your videos shine without distractions.
Also read:
- Premier Free Audio Editing Software on Linux A Comprehensive Guide for 2024
- Updated 2024 Approved Syncing Scores Three Unique Techniques for Embedding Audio in Visual Media
- Top 10 Spotlight on Popular Pop Chansons for Visual Media Projects
- New Advanced Audio Editing for Professionals Detailed Instructions to Remove Vocals From Recordings in Adobe Audition for 2024
- New In 2024, The Essential Process of Adding Sound to MKV-Updated Videographies
- All-Encompassing Directory Guide for Podcast Platforms for 2024
- The Beat Engineers Handbook Designing Sounds for the Silver Screen for 2024
- Revolutionizing Music Production A Look at the Leading Audio Editing Suites for 2024
- Navigating the Landscape of High-Quality Sound Editing - The TwistedWave Experience
- Updated In 2024, The Newcomers Manual to Lexis Sound-Wave Processor
- New 2024 Approved How to Respectfully Extract Spotify Tracks with the Latest Tools
- 2024 Approved Navigating the Visual Landscape Key Facts About Pexels.com Stock Images
- Updated 2024 Approved Techniques for Embedding Audio Into Newly Updated AVI Video Files
- New 2024 Approved Unleash Potential with Live Audio Modification Tools The Ultimate Guide to 25 Innovative Technologies
- New 2024 Approved Premiere Pro Essentials How to Seamlessly Integrate Sound with Visuals
- Updated In 2024, Three Free Sound Integration Techniques for DIY Filmmakers and Videographers
- New In 2024, Synchronize Your Scenes Editing Videos in Step With the Music in Adobe Premiere Pro
- New In 2024, Compilation of Websites Offering Ridiculous Sounds
- Updated In 2024, From Wireless Broadcasts to Digital Downloads Top 3 Ways to Convert Podcasts Into MP3s
- The Rhythms of Cricket A Journey Through Authentic SFX for 2024
- Updated Unlock Full Audio Range Deactivating Ducking Functionality in iOS for 2024
- Choosing Your Perfect Match Leading Mac-Based Audio Tagging Software for 2024
- New 25 Best Real-Time Voice Changers Full Review - Should I Use Them for 2024
- New In 2024, Top 8 Android Audio Workstations Elevating Your Music Creation
- Updated Installing and Removing Audacity An Ubuntu Users Handbook for 2024
- Updated From Japanese Original to International Favorite An Exploration of Anime Voiceover Artistry
- Updated Mastering PC Sound Capture An Audacity Guide for 2024
- Voice Transformation Hacks The Top 7 FREE Applications to Consider
- Updated In 2024, Tracking Down An Enraged Poochs Howling Frequency
- Updated In 2024, Resonant Praise Sound Composer
- In 2024, What to Look for in Audio Editor Software for Mac OS X
- Updated Unveiling MAGIX Samplitudes Capabilities Are They Superseding Competitors, In 2024
- 2024 Approved The Efficient Recorders Guide Identifying the Top 8 Online, Gratis Voice Capture Tools
- New Essential Collection of Voice Modification Tools Amplifying Male Speech Into High-Pitched Female Sounds
- New Mastering the Art of Audio Volume Transition
- Updated The Art of Unifying Diverse Sound Files in Final Projects
- Updated Advanced Audio Editing Implementing Real-Time Ducking in Windows Version of Adobe Premiere Pro
- New 2024 Approved The Fast Track to Voice Reduction in Audacity
- Updated The Audio-Visual Connection Top Music Picks That Elevate Your Diverse Video Projects for 2024
- New Maximize Your Viewing Experience with These 4 Pioneering Audio Boosters Online
- New How to Record a Podcast Effortlessly A Step-by-Step Guide for 2024
- New Voice Cloning Simplified Two Approaches to Achieve Consistent AI Voices
- New Contemporary Voiceover Practices for Dynamic Video Creation - An Updated Guide
- New 2024 Approved Top Tear-Jerking Melodies The Best Sad Songs of the Year
- In 2024, Tailoring Your Timeline A Step-by-Step Guide to Editing Lengthy Audios in iMovie on iOS Devices
- Updated In 2024, Easily Trim AVI Files Top 16 Video Cutter Tools for All Platforms
- In 2024, How To Use Special Features - Virtual Location On Apple iPhone 12 Pro? | Dr.fone
- How Can I Use a Fake GPS Without Mock Location On Nokia XR21? | Dr.fone
- How to Change Location on TikTok to See More Content On your Honor X9b | Dr.fone
- Ultimate Guide to Catch the Regional-Located Pokemon For Lenovo ThinkPhone | Dr.fone
- Top 9 HTC U23 Pro Monitoring Apps for Parental Controls | Dr.fone
- The way to recover deleted contacts on Meizu without backup.
- In 2024, How to Mirror Your Infinix Note 30i Screen to PC with Chromecast | Dr.fone
- In 2024, Step by Step to Rotate Videos Using OBS
- In 2024, How to Transfer Contacts from Realme C51 To Phone | Dr.fone
- Guide How To Unbrick a Bricked Nubia Red Magic 8S Pro+ Phone | Dr.fone
- In 2024, The 10 Best Tools to Bypass iCloud Activation Lock From iPhone SE You Should Try Out
- New Zoom In and Zoom Out on YouTube for 2024
- How Can I Unlock My Apple iPhone 13 After Forgetting my PIN Code? | Dr.fone
- 2024 Approved Turn Your Photos Into Funny Cartoons Online
- Planning to Use a Pokemon Go Joystick on Tecno Camon 20? | Dr.fone
- Updated 2024 Approved Create Pro-Quality Videos with Ease WeVideo 2023
- 10 Best Fake GPS Location Spoofers for Itel P40 | Dr.fone
- Looking For The Best Slow Motion Effect in Premiere Pro for 2024
- New In 2024, The Ultimate Collection 20 Free Adobe Premiere Title Templates
- In 2024, Vertical Vibes How to Create Engaging Mobile Content
- In 2024, Forgot Your Apple ID Password and Email From iPhone 13 Pro? Heres the Best Fixes
- How to Upgrade iPhone XS Max to the Latest iOS/iPadOS Version? | Dr.fone
- Easy steps to recover deleted photos from Honor 100.
- Title: New 2024 Approved FREE 10 Best Online Music Makers
- Author: Ella
- Created at : 2024-05-05 02:30:21
- Updated at : 2024-05-06 02:30:21
- Link: https://sound-optimizing.techidaily.com/new-2024-approved-free-10-best-online-music-makers/
- License: This work is licensed under CC BY-NC-SA 4.0.
