
:max_bytes(150000):strip_icc():format(webp)/GettyImages-538600261-56c643115f9b5879cc3d6bde.jpg)
New Best 10 Voice Changer Apps Male to Female Powerful
Best 10 Voice Changer Apps Male to Female [Powerful]
If you’ve been searching for the best android and iOS voice-changing apps around the internet, you’re on the right spot. Voice-changing applications are always fun. They’re handy when you’re pulling a prank on a friend, or you want some amazing effects to test your voice. Thus, we provide you with all the best male to female voice changer apps in the list below.
Record & Edit Voice Fast before Changing Voice
Before changing your voice from male to female, I suggest you edit your voice first. Filmora is an easy-to-use yet powerful video editor helping you quickly edit voice no matter your voice or the audio extracted from videos. Explore Filmora’s audio editing features and get ready for changing voice!
For Win 7 or later (64-bit)
For macOS 10.12 or later


Part 1: Changing Voice Online for Free with Media.io
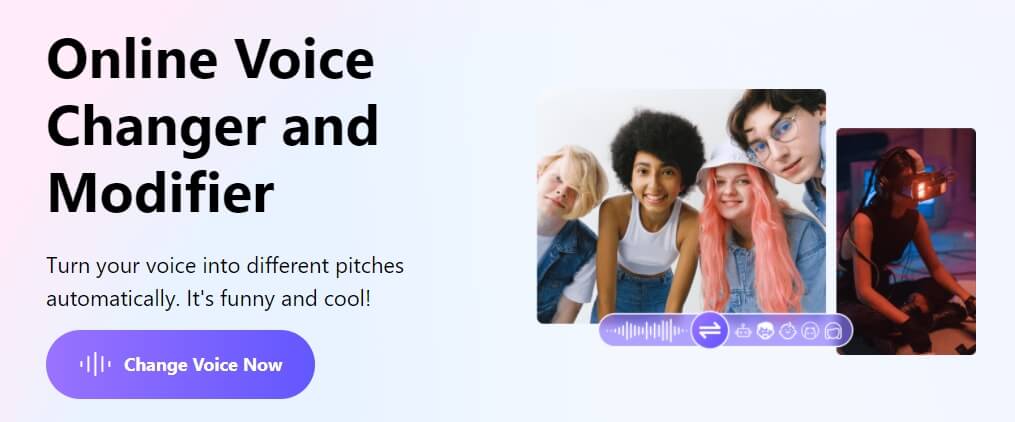
If you want to change voice without downloading and installing any app on your mobile phone, you can try some online solutions. Media.io is an all-in-one online video toolkit that allows you to edit, convert and compress video, audio and image files easily. The online voice changer from Media.io can transform your voice to a male voice, female voice, child voice, robot voice, and Donald Duck voice. If you wish to have voice filters, you won’t have any problems in the future with the Media.io voice changer.

This online voice changer works best on the Chrome browser, so you can utilize it whether using a Windows, Mac, Linux, or Chromebook device. As a result, you can deceive your family or friends by speaking in another people’s voice rather than your own. Doesn’t that sound like fun?
![]()
A cross-platform for making videos anywhere for all creators

Why your video editing isn’t good enough? How about some creative inspo?
- 100 Million+ Users
- 150+ Countries and Regions
- 4 Million+ Social Media Followers
- 5 Million+ Stock Media for Use
* Secure Download

Part 2: Best Male to Female Voice Changer Apps for iPhone and Android
- Girls Voice Changer
- Voice Changer Voice Recorder Editor & Effect
- VoiceFX
- Voice Changer
- Voice Changer - Audio effects
- Magic Call App
- Voice Changer and Sound Recorder
- Super Voice Editor
- Voice Changer with Effects
- Voice Changer - Girls Voice changer Male to Female
1. Girls Voice Changer
Available for: Android, iOS
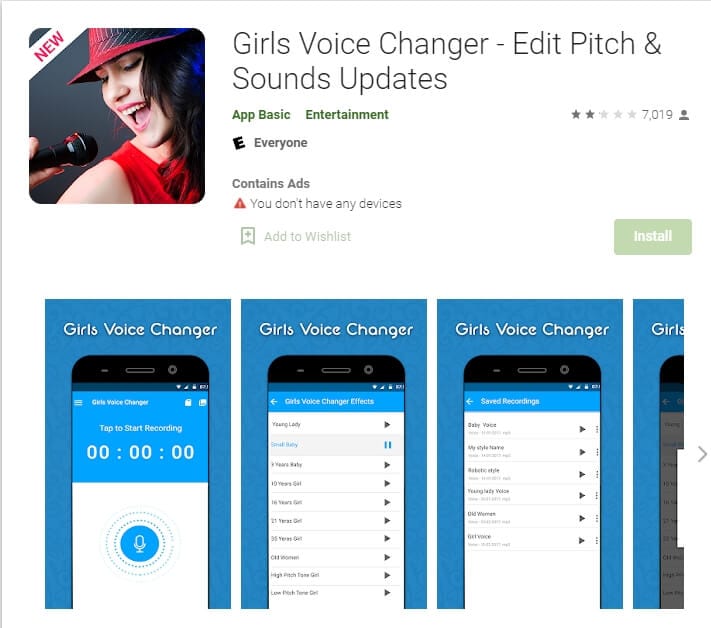
This girl voice changer app is highly portable and easy for any user to use comfortably. It is specifically more popular for changing male voice to female and for pitch adjustments. It’s completely free, so download on your android if you have a storage of about 8MB ready, and start using it!
This male-to-female voice changer app has several options in the library. Though the pitch adjustments are easy to make, some users have informed a lack of performance on very high-pitched settings. However, the smoothness of an android application also depends on how much space is readily available in the device. So next time you’re bored at a part, you have the perfect partner!
2. Voice Changer Voice Recorder Editor & Effect
Available for: Android
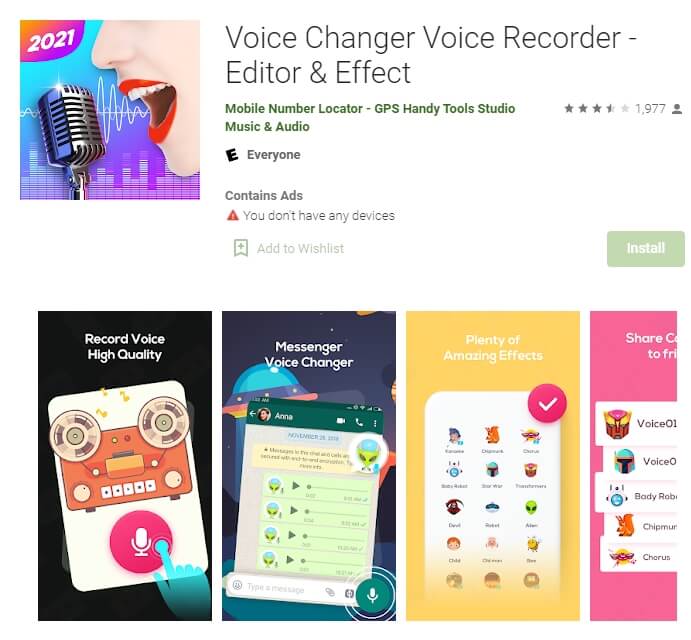
This voice changer application is for multi-purpose. Yes, you can use it as a girl voice changer smoothly and with ease. But apart from male to female voice changing, The “voice changer - voice editor application” can also be used to autotune your voice.
Now autotune is a big feature that every singer uses to make their voices tuned perfectly. With this app, you can also do the same to record your music or have fun while you are bored. The application is pretty to use and can be used as a girl voice changer not only for entertainment but also if you’re practicing. Many people who wish to seek a career in background voices might find this useful.
3. VoiceFX
Available for: Android

The VoiceFX application is filled with a lot of exciting options and features. If you are looking for an app that is more than just a male-to-female voice changer app, the voice fx is highly recommended.
You can also convert your voice into a robot or even an animal from male to female voice. Yes, you read it right. You can turn your manly voice into any of the fictional cartoons you want. This one’s a very easy and efficient way of filming a video with added effects or developing a mini-game with different voice characters. If you haven’t forgotten, there was a very big trend of converting famous music into chipmunk voices. With this app, you can convert your favorite songs into a chipmunk addition song without any problem.
4. Voice Changer
Available for: Android

The voice changer is a very famous male-to-female voice changer app. With over 10 million downloads on the google play store, the voice changer is highly recommended for users who have fun changing their voices from male to female. Compared to other voice changer applications, The Voice changer app has a very elegant and sleek design that makes it very easy to use.
Apart from the male to female voice change option, There are more than 50 other options that you can enjoy. Furthermore, you can share your creations with your friends through Bluetooth or other social media.
5. Voice Changer - Audio effects
Available for: Android

There are a lot of girl voice changer applications on the google play store. But not all of them are up to the mark. The Voice changer - audio effects is another highly recommended voice changer application.
The Voice Changer - Audio effects have a lot of other things to offer as well. Converting your voice from a male to a female has never been easier. Not only can you convert your voice into a girl, but you can also modify it. Furthermore, you can talk to your friends on the phone while you use the voice changer application. Moreover, the voices of animals and robots can also be an alternative to the female voice if you ever get bored of it.
6. Magic Call App
Available for: Android

The magic call is a real-time voice changer app that you can use for changing your voice during a call specifically. It is a really fun app which you can use with your friends to prank even your family!
This is a perfect option for people looking for a real-time girl voice changer app. The main purpose of this application is real-time calls. The magic call is ideal specifically for a male-to-female voice modification. And you can operate this application easily in call durations.
All you have to do is open the voice changer app and dial your call. Apart from Female voice, you can also convert your voice into a cartoon or an animal.
7. Voice Changer and Sound Recorder
Available for: iOS

If you are an iPhone user, then you must know that finding a voice changer on the apple store is like digging a diamond from the ground.
The Voice changer and sound recorder application is found exclusively on the apple store for people who love girl voice changer apps. It is a live call voice changer app, which means converting your voice from a male to a female in between the call. Furthermore, you can even add background voices such as traffic and echo to make your call even funnier. If you are looking for an excuse to get off from your call, then this application has got your back.
8. Super Voice Editor
Available for: Android
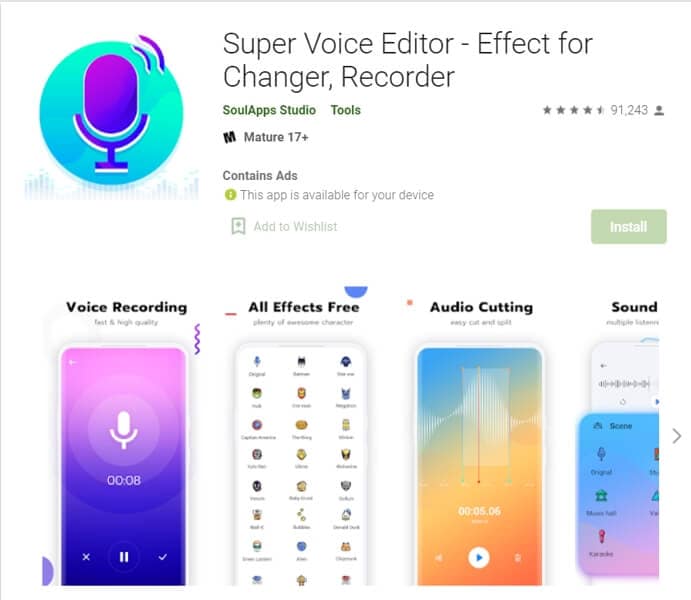
This one is a fun application for people searching for a voice changer app male to female. Not only can you record the audio that you edit, but also use it in real-time! Amazing right? Super voice editor enables you to add effects to your voice while you’re on a call as well. This feature means, next time you’re pulling a prank on the birthday boy, he won’t ever know! Sound like the wonder woman or dexter from his laboratory. The Super-Voice editor is perfect for kids playing in the house and even teenagers looking for something interesting. The SoulApps studio has made it easy for you to sound like your dream faces on the screen. With an MP3 cutter and Ringtone maker, this girl voice changer app is pure creativity.
9. Voice Changer with Effects
Available for: Android

Our list of girl voice changers, Voice changer with effects, is a very practical application that we highly recommend to our users.
With over 50 million downloads on google play, Voice changer with effects is highly suited for anyone looking for more than just a male-to-female voice changer. It has over 40 plus options such as helium, chipmunk, zombie, alien, and many more. With this application, you can even import a favorite audio clip of yours, and then you can easily convert it into a voice you like. If you want to modify your ringtone to an audio clip you just converted, then there is no better application than this one.
10. Voice Changer - Girls Voice changer Male to Female
Available for: Android

If you are looking for a girl voice changer app solely, this application perfectly fits you. The application is specifically designed only to change your voice from a male to a female. Although this application does provide options apart from female voice conversions, those features don’t function ideally. However, if you want a girl voice changer, you won’t have any trouble.
You can use this application while you are on a call. Hence, you can fool your family or friends by using a girl voice instead of your own. We recommend this as an average application that would fit your needs sufficiently.
In conclusion, you have now gone through the list of the perfect options for your android or iOS. Therefore, now you must be ready to choose the best girl voice changer app. So head on to your play store and search for your favorite app right now!
For Win 7 or later (64-bit)
For macOS 10.12 or later
Part 1: Changing Voice Online for Free with Media.io
If you want to change voice without downloading and installing any app on your mobile phone, you can try some online solutions. Media.io is an all-in-one online video toolkit that allows you to edit, convert and compress video, audio and image files easily. The online voice changer from Media.io can transform your voice to a male voice, female voice, child voice, robot voice, and Donald Duck voice. If you wish to have voice filters, you won’t have any problems in the future with the Media.io voice changer.
This online voice changer works best on the Chrome browser, so you can utilize it whether using a Windows, Mac, Linux, or Chromebook device. As a result, you can deceive your family or friends by speaking in another people’s voice rather than your own. Doesn’t that sound like fun?
![]()
A cross-platform for making videos anywhere for all creators
Why your video editing isn’t good enough? How about some creative inspo?
- 100 Million+ Users
- 150+ Countries and Regions
- 4 Million+ Social Media Followers
- 5 Million+ Stock Media for Use
* Secure Download
Part 2: Best Male to Female Voice Changer Apps for iPhone and Android
- Girls Voice Changer
- Voice Changer Voice Recorder Editor & Effect
- VoiceFX
- Voice Changer
- Voice Changer - Audio effects
- Magic Call App
- Voice Changer and Sound Recorder
- Super Voice Editor
- Voice Changer with Effects
- Voice Changer - Girls Voice changer Male to Female
1. Girls Voice Changer
Available for: Android, iOS
This girl voice changer app is highly portable and easy for any user to use comfortably. It is specifically more popular for changing male voice to female and for pitch adjustments. It’s completely free, so download on your android if you have a storage of about 8MB ready, and start using it!
This male-to-female voice changer app has several options in the library. Though the pitch adjustments are easy to make, some users have informed a lack of performance on very high-pitched settings. However, the smoothness of an android application also depends on how much space is readily available in the device. So next time you’re bored at a part, you have the perfect partner!
2. Voice Changer Voice Recorder Editor & Effect
Available for: Android
This voice changer application is for multi-purpose. Yes, you can use it as a girl voice changer smoothly and with ease. But apart from male to female voice changing, The “voice changer - voice editor application” can also be used to autotune your voice.
Now autotune is a big feature that every singer uses to make their voices tuned perfectly. With this app, you can also do the same to record your music or have fun while you are bored. The application is pretty to use and can be used as a girl voice changer not only for entertainment but also if you’re practicing. Many people who wish to seek a career in background voices might find this useful.
3. VoiceFX
Available for: Android
The VoiceFX application is filled with a lot of exciting options and features. If you are looking for an app that is more than just a male-to-female voice changer app, the voice fx is highly recommended.
You can also convert your voice into a robot or even an animal from male to female voice. Yes, you read it right. You can turn your manly voice into any of the fictional cartoons you want. This one’s a very easy and efficient way of filming a video with added effects or developing a mini-game with different voice characters. If you haven’t forgotten, there was a very big trend of converting famous music into chipmunk voices. With this app, you can convert your favorite songs into a chipmunk addition song without any problem.
4. Voice Changer
Available for: Android
The voice changer is a very famous male-to-female voice changer app. With over 10 million downloads on the google play store, the voice changer is highly recommended for users who have fun changing their voices from male to female. Compared to other voice changer applications, The Voice changer app has a very elegant and sleek design that makes it very easy to use.
Apart from the male to female voice change option, There are more than 50 other options that you can enjoy. Furthermore, you can share your creations with your friends through Bluetooth or other social media.
5. Voice Changer - Audio effects
Available for: Android
There are a lot of girl voice changer applications on the google play store. But not all of them are up to the mark. The Voice changer - audio effects is another highly recommended voice changer application.
The Voice Changer - Audio effects have a lot of other things to offer as well. Converting your voice from a male to a female has never been easier. Not only can you convert your voice into a girl, but you can also modify it. Furthermore, you can talk to your friends on the phone while you use the voice changer application. Moreover, the voices of animals and robots can also be an alternative to the female voice if you ever get bored of it.
6. Magic Call App
Available for: Android
The magic call is a real-time voice changer app that you can use for changing your voice during a call specifically. It is a really fun app which you can use with your friends to prank even your family!
This is a perfect option for people looking for a real-time girl voice changer app. The main purpose of this application is real-time calls. The magic call is ideal specifically for a male-to-female voice modification. And you can operate this application easily in call durations.
All you have to do is open the voice changer app and dial your call. Apart from Female voice, you can also convert your voice into a cartoon or an animal.
7. Voice Changer and Sound Recorder
Available for: iOS
If you are an iPhone user, then you must know that finding a voice changer on the apple store is like digging a diamond from the ground.
The Voice changer and sound recorder application is found exclusively on the apple store for people who love girl voice changer apps. It is a live call voice changer app, which means converting your voice from a male to a female in between the call. Furthermore, you can even add background voices such as traffic and echo to make your call even funnier. If you are looking for an excuse to get off from your call, then this application has got your back.
8. Super Voice Editor
Available for: Android
This one is a fun application for people searching for a voice changer app male to female. Not only can you record the audio that you edit, but also use it in real-time! Amazing right? Super voice editor enables you to add effects to your voice while you’re on a call as well. This feature means, next time you’re pulling a prank on the birthday boy, he won’t ever know! Sound like the wonder woman or dexter from his laboratory. The Super-Voice editor is perfect for kids playing in the house and even teenagers looking for something interesting. The SoulApps studio has made it easy for you to sound like your dream faces on the screen. With an MP3 cutter and Ringtone maker, this girl voice changer app is pure creativity.
9. Voice Changer with Effects
Available for: Android
Our list of girl voice changers, Voice changer with effects, is a very practical application that we highly recommend to our users.
With over 50 million downloads on google play, Voice changer with effects is highly suited for anyone looking for more than just a male-to-female voice changer. It has over 40 plus options such as helium, chipmunk, zombie, alien, and many more. With this application, you can even import a favorite audio clip of yours, and then you can easily convert it into a voice you like. If you want to modify your ringtone to an audio clip you just converted, then there is no better application than this one.
10. Voice Changer - Girls Voice changer Male to Female
Available for: Android
If you are looking for a girl voice changer app solely, this application perfectly fits you. The application is specifically designed only to change your voice from a male to a female. Although this application does provide options apart from female voice conversions, those features don’t function ideally. However, if you want a girl voice changer, you won’t have any trouble.
You can use this application while you are on a call. Hence, you can fool your family or friends by using a girl voice instead of your own. We recommend this as an average application that would fit your needs sufficiently.
In conclusion, you have now gone through the list of the perfect options for your android or iOS. Therefore, now you must be ready to choose the best girl voice changer app. So head on to your play store and search for your favorite app right now!
The Elite Free VST Plugin Catalogue: Top Picks and Downloading Platforms
10 Best Free VST Plugins 2024 (Free Download)

Benjamin Arango
Mar 27, 2024• Proven solutions
With the release of different VST plugins, it has become more convenient and inexpensive for a music producer to mix a track. Instead of buying expensive music instruments, they can install dedicated plugins and get the same results without any hassle.
Of course, with so many available options, it can get a bit hectic to evaluate which VST plugins are worth installing. That’s why we’ve put together a list of 10 best free VST plugins so that you can pick the best ones to fulfill your requirements.
So, without any further ado, let’s start the list.
You might also like: 8 Best DAW for Chromebook to Make Music
Best Free VST Plugins
1. Native Instruments
Native Instruments has done a remarkable job by releasing KOMPLETE START. It’s a complete audio-mixing bundle that contains a variety of VST plugins, virtual instruments, thousands of audio effects, and several other free resources for music production.
Earlier all these elements were available individually. However, music producers can now access all these elements with a single product bundle, making the entire audio-mixing process more convenient and quick.
You can use the KOMPLETE START audio bundle with any VST, AU, and AAX plugin compatible DAW (Digital Audio Workstation).
Features
- Get Access to 2,000 sounds and more than 6 GB of content
- Perfect for Beginners as KOMPLETE START has everything to step-up your music production game.
- Compatible With Windows as well as Mac OS.

2. Spitfire LABS
Spitfire Labs is yet another complete package if you’re looking for different types of sounds. It would have been an injustice to exclude Spitfire Labs’ audio project from the list of best free VST plugins as it contains some of the unique audio effects one can integrate into their audio track.
What separates Spitfire Labs from other VST plugins is that every sound is composed of musicians and sampling experts in London, which means there’s no compromise on the quality whatsoever. And, since it features a wide variety of sounds, ranging from drums to actual natural sounds from the Northern Hemisphere, you’ll have no limitations on expressing your creativity.
Features
- Get a Variety of instrumental and natural sounds in one package.
- Experts compose each audio effect/sound.

3. Sonatina Orchestra
Sonatina Orchestra is a suitable free VST plugin for people who have just started their career as a music composer and are looking for pretty necessary investment. It’s an orchestral sample library that contains pretty much all the elements you’ll need to create an orchestration virtually.
The library contains an array of audio samples, which have different amounts of stage ambiance, based on the placement of an instrument on the stage. It means you give your audio track a real orchestral vibe using different audio samples.
Features:
- Different Types of audio samples including strings, brass, keys & choir, etc.
- Perfect for Beginners as well as slightly experienced music composers

4. Keyzone Classic
Keyzone Classic is a piano-based plugin that provides acoustic samples from different pianos. The plugin can be installed on any operating system, be it Mac or Windows, and works with the majority of DAWs.
If you want to add a piece of soft piano music in the background of your audio track, Keyzone Classic is the perfect option. Unlike the previous best free VST plugins in our list, Keyzone Classic isn’t a complete bundle, which makes it lightweight and easy-to-use.
Features:
- Get a variety of presets including Yamaha Grand Piano, Steinway Grand Piano, Basic Electric Piano
- Lightweight and easy-to-install.

5. Plogue Sforzando
Sforzando is one of the most powerful sample players that’ll free you from relying on proprietary formats for creating your own SFZ file formats. With Sforzando, you can create and share instruments for free, as well as commercial purposes.
Although it might not be a suitable option for beginners or even intermediate composers. Why? Because there is no fancy UI that’ll help you navigate through different elements. Everything needs to be done from scratch, that too, at the SFZ file level itself. In a nutshell, you must be a skilled and highly experienced composer to operate Plogue Sforzando.
Features:
- Uses SFZ file format, which is royalty-free, which means you can create and distribute instruments without any restrictions.

6. Simple Sound Delay Plugin
As the name implies, Simple Sound Delay is a virtual signal delaying AAX and VST plugin. It can be used in any DAW to delay audio signals with extremely accurate precision. The plugin allows you to postpone time by setting a time-frame in milliseconds or using the samples.
However, being one of the standalone and free VST plugins, Sound Delay can only be used to delay audio signals. Apart from this, it doesn’t provide any functionality whatsoever. Sound Delay is an appropriate option for music composers who have already installed dozens of individual VST plugins and want a new one that’ll help them delay audio signals as well.
Features:
- Delay Audio Signals in milliseconds or using samples
- Delay mid & side-channels separately

7. Tube Amplifier Plugin
Tube Amplifier is a VST plugin that applies asymmetric tube triode overdrive to your project. By no means, TubeAmp is the right choice for a beginner as one must be familiar with tube-triode.
However, if you’re an experienced music composer, Tube Amplifier will fit your studio perfectly. As we mentioned earlier, it can be used to apply asymmetric tube triode overdrive, which is usually found in single-tube microphone preamp boxes. It also contains a low-pass filter that’ll help you imitate a low-quality tube-triode.
Features:
- Asymmetric tube triode overdrive
- Two processing modes
- Additional output saturation stage
- Stereo and multi-channel processing

8. Ozone Imager V2
Ozone Imager V2 is probably one of the best free VST plugins as it allows a music composer to have full control over the width of the sounds. The tool has three different vectorscope meters that instantly show the stereo width and help you widen or narrow the sounds precisely as per the project requirements.
Ozone Imager also has a dedicated “Stereoize” feature that’ll help you turn mono sounds into stereo without any reverb. This will make it easier to enhance the overall audio effects and give a professional touch to your tracks.
Features
- Stereoize the sounds with no need for doubling
- Visualize the sounds using vectorscope meters to precisely adjust their width

9. RS-W2395c by Fuse Audio Labs
RS-W2395c is a classic Baxandall equalizer that’s perfect for creating audio effects for your rock band. It offers an extremely straightforward UI, which will make it easier for all the hobbyist music composers to switch low and mid-bands without having to dive deeper into the “Settings” menu.
The dedicated high-shelf will give you the liberty to carve darkening instruments and voices. This will help you compose audio tracks that stand out in the crowd.
Features:
- Extremely Flexible UI
- Easily Control Mid & Low Bands for your track

10. Sound Recovery
Unlike other free VST plugins in our list, Sound Recovery is specifically tailored to repair low-quality audio tracks to make them sound better and reach the professional level. The plugin will help you adjust mid & high frequencies to an optimal level or add them if they’re missing in a soundtrack. So, if you have any tracks that require a slight polishing, Sound Recovery will help.
Features:
- Erase Unwanted Noises from an Audio Track
- After repairing a track, save the preset for future use

Benjamin Arango
Benjamin Arango is a writer and a lover of all things video.
Follow @Benjamin Arango
Benjamin Arango
Mar 27, 2024• Proven solutions
With the release of different VST plugins, it has become more convenient and inexpensive for a music producer to mix a track. Instead of buying expensive music instruments, they can install dedicated plugins and get the same results without any hassle.
Of course, with so many available options, it can get a bit hectic to evaluate which VST plugins are worth installing. That’s why we’ve put together a list of 10 best free VST plugins so that you can pick the best ones to fulfill your requirements.
So, without any further ado, let’s start the list.
You might also like: 8 Best DAW for Chromebook to Make Music
Best Free VST Plugins
1. Native Instruments
Native Instruments has done a remarkable job by releasing KOMPLETE START. It’s a complete audio-mixing bundle that contains a variety of VST plugins, virtual instruments, thousands of audio effects, and several other free resources for music production.
Earlier all these elements were available individually. However, music producers can now access all these elements with a single product bundle, making the entire audio-mixing process more convenient and quick.
You can use the KOMPLETE START audio bundle with any VST, AU, and AAX plugin compatible DAW (Digital Audio Workstation).
Features
- Get Access to 2,000 sounds and more than 6 GB of content
- Perfect for Beginners as KOMPLETE START has everything to step-up your music production game.
- Compatible With Windows as well as Mac OS.
2. Spitfire LABS
Spitfire Labs is yet another complete package if you’re looking for different types of sounds. It would have been an injustice to exclude Spitfire Labs’ audio project from the list of best free VST plugins as it contains some of the unique audio effects one can integrate into their audio track.
What separates Spitfire Labs from other VST plugins is that every sound is composed of musicians and sampling experts in London, which means there’s no compromise on the quality whatsoever. And, since it features a wide variety of sounds, ranging from drums to actual natural sounds from the Northern Hemisphere, you’ll have no limitations on expressing your creativity.
Features
- Get a Variety of instrumental and natural sounds in one package.
- Experts compose each audio effect/sound.
3. Sonatina Orchestra
Sonatina Orchestra is a suitable free VST plugin for people who have just started their career as a music composer and are looking for pretty necessary investment. It’s an orchestral sample library that contains pretty much all the elements you’ll need to create an orchestration virtually.
The library contains an array of audio samples, which have different amounts of stage ambiance, based on the placement of an instrument on the stage. It means you give your audio track a real orchestral vibe using different audio samples.
Features:
- Different Types of audio samples including strings, brass, keys & choir, etc.
- Perfect for Beginners as well as slightly experienced music composers
4. Keyzone Classic
Keyzone Classic is a piano-based plugin that provides acoustic samples from different pianos. The plugin can be installed on any operating system, be it Mac or Windows, and works with the majority of DAWs.
If you want to add a piece of soft piano music in the background of your audio track, Keyzone Classic is the perfect option. Unlike the previous best free VST plugins in our list, Keyzone Classic isn’t a complete bundle, which makes it lightweight and easy-to-use.
Features:
- Get a variety of presets including Yamaha Grand Piano, Steinway Grand Piano, Basic Electric Piano
- Lightweight and easy-to-install.
5. Plogue Sforzando
Sforzando is one of the most powerful sample players that’ll free you from relying on proprietary formats for creating your own SFZ file formats. With Sforzando, you can create and share instruments for free, as well as commercial purposes.
Although it might not be a suitable option for beginners or even intermediate composers. Why? Because there is no fancy UI that’ll help you navigate through different elements. Everything needs to be done from scratch, that too, at the SFZ file level itself. In a nutshell, you must be a skilled and highly experienced composer to operate Plogue Sforzando.
Features:
- Uses SFZ file format, which is royalty-free, which means you can create and distribute instruments without any restrictions.
6. Simple Sound Delay Plugin
As the name implies, Simple Sound Delay is a virtual signal delaying AAX and VST plugin. It can be used in any DAW to delay audio signals with extremely accurate precision. The plugin allows you to postpone time by setting a time-frame in milliseconds or using the samples.
However, being one of the standalone and free VST plugins, Sound Delay can only be used to delay audio signals. Apart from this, it doesn’t provide any functionality whatsoever. Sound Delay is an appropriate option for music composers who have already installed dozens of individual VST plugins and want a new one that’ll help them delay audio signals as well.
Features:
- Delay Audio Signals in milliseconds or using samples
- Delay mid & side-channels separately
7. Tube Amplifier Plugin
Tube Amplifier is a VST plugin that applies asymmetric tube triode overdrive to your project. By no means, TubeAmp is the right choice for a beginner as one must be familiar with tube-triode.
However, if you’re an experienced music composer, Tube Amplifier will fit your studio perfectly. As we mentioned earlier, it can be used to apply asymmetric tube triode overdrive, which is usually found in single-tube microphone preamp boxes. It also contains a low-pass filter that’ll help you imitate a low-quality tube-triode.
Features:
- Asymmetric tube triode overdrive
- Two processing modes
- Additional output saturation stage
- Stereo and multi-channel processing
8. Ozone Imager V2
Ozone Imager V2 is probably one of the best free VST plugins as it allows a music composer to have full control over the width of the sounds. The tool has three different vectorscope meters that instantly show the stereo width and help you widen or narrow the sounds precisely as per the project requirements.
Ozone Imager also has a dedicated “Stereoize” feature that’ll help you turn mono sounds into stereo without any reverb. This will make it easier to enhance the overall audio effects and give a professional touch to your tracks.
Features
- Stereoize the sounds with no need for doubling
- Visualize the sounds using vectorscope meters to precisely adjust their width
9. RS-W2395c by Fuse Audio Labs
RS-W2395c is a classic Baxandall equalizer that’s perfect for creating audio effects for your rock band. It offers an extremely straightforward UI, which will make it easier for all the hobbyist music composers to switch low and mid-bands without having to dive deeper into the “Settings” menu.
The dedicated high-shelf will give you the liberty to carve darkening instruments and voices. This will help you compose audio tracks that stand out in the crowd.
Features:
- Extremely Flexible UI
- Easily Control Mid & Low Bands for your track
10. Sound Recovery
Unlike other free VST plugins in our list, Sound Recovery is specifically tailored to repair low-quality audio tracks to make them sound better and reach the professional level. The plugin will help you adjust mid & high frequencies to an optimal level or add them if they’re missing in a soundtrack. So, if you have any tracks that require a slight polishing, Sound Recovery will help.
Features:
- Erase Unwanted Noises from an Audio Track
- After repairing a track, save the preset for future use
Benjamin Arango
Benjamin Arango is a writer and a lover of all things video.
Follow @Benjamin Arango
All You Need to Know About iMovie Audio Editing
All You Need to Know About iMovie Audio Editing

Marion Dubois
Oct 26, 2023• Proven solutions
iMovie offers a fantastic platform for video editing where you can merge multiple video clips to create something very phenomenal. Plus, it’s simply here to navigate between different scenes, edit video clips and save results directly to the digital format without making any videotape transformations.
It provides lots of things to beginners and professionals with its easy-to-use interface without any quality loss for your results even after adding lots of transitions, changes, and effects.
However, it is not accessible to master software, precisely when you’re not familiar with it, or you’re not its professional user. So today, we’d like to explore or pay attention to iMovie’s audio editing steps, tips, and tricks to help you become an iMovie master quickly.
What’s more, a practical yet professional iMovie alternative software is also advisable in this guide. So when the iMovie cannot fulfil your editing requirements, why don’t you hop on an iMovie alternative software?
Now, let’s get started!
Part 1: How to Edit Audio Clips in iMovie?
To learn how to edit audio clips in iMovie, you can use actions in the menu along with the quick shortcuts to make adjustments to your audio clips in iMovie on Mac. It’s a tip for your convenience!
Trim Audio Clips
There are a couple of options to trim an audio clip in iMovie.
#1. Trim to Playhead
You can place the playhead in your timeline. Now, trim an audio clip to that exact spot. Next, start moving the playhead and do one from the following.
- Select Modify > Trim to Playhead option in the menu bar.
- Right-click the audio clip and select the option of Trim to Playhead in the shortcut menu.
#2. Use the Clip Trimmer
You can use the Clip Trimmer to trim an exact section of the clip.
Step 1. Right-click the audio clip and select Show Clip Trimmer in the shortcut menu.
Step 2. After the Clip Trimmer shows, select a section you wish to trim by dragging the arrows right and left while holding the white lines. The area within those lines is what will get entirely deleted.
Move the entire clip but keep the trim area in place if arrows turn to a film strip icon.
Step 3. Click Close Clip Trimmer after you finish this section.
Shorten or Lengthen Audio Clips
You can easily shorten or lengthen an audio clip in iMovie. Just choose the pin in the timeline and drag one of its edges. The duration of the clip change will change as you carry. And a new course will be displayed after you finish in the upper left menu.
You can also set the clip’s duration to an exact time. Select the clip in the timeline and hit the Clip Information (small letter “i”) tab located above the Viewer. Put the value of the time you want in seconds in the Duration box on the right.
Change the Speed of an Audio Clip
You may want to speed up or slow down an audio clip while editing music in iMovie. So, here’s what you need to do!
Method 1. Click the Speed button above the Viewer. Next, select Custom in the Speed drop-down box and enter a percentage next to it. You can also set a different speed in that box if you prefer.
Method 2. Right-click the clip and select Show Speed Editor from the shortcut menu. A slider will then display at the top of the clip that you can move to change the speed.
Adjust the Volume of an Audio Clip
You can set the audio clip’s volume at higher or lower, or even mute it. Just select the clip and then do one of the following.
- Select the Volume tab above the Viewer option and move the slider to the percentage of volume. Hit the Mute button to mute the audio clip.
- Tap inside the clip, and when the two-sided arrow appears, drag up or down to adjust the volume.
Fade an Audio Clip
While editing audio in iMovie, you can also fade in or out the clip. Choose a clip in the timeline and then drag the fade handle (small circle) at either the ending or the beginning of the clip to make a fade-out or a fade-in effect.
As you drag, you will see the arcs displaying the shadow for the clips fade in or fade out.
How to Edit Audio Clips in iMovie on iOS?
The iMovie timeline is where you sort or organize all your audio clips, such as the special effects and background music. Audio clips are always present below the video clips in the timeline. To edit audio clips in iMovie on your iPhones or iPads, you can follow the guide belo
Move an Audio Clip
You can transfer the whole audio clip, except the background music, to another location.
- Touch and hold the purple or blue audio clip with your project open in the timeline until it comes over the timeline bar.
- Drag the clip to another place and release.
Adjust the Audio Clip’s Duration
Step 1. While the project is launched in the timeline, tap the audio clip (in blue or purple) or the background music clip you wish to adjust.
Step 2. Now, you can see the display of yellow trim handles. Drag them either at the end of the clip to the points where you wish the audio to start and end. If a trim handle won’t move left or right, it simply indicates there is no additional audio to work with on that clip’s end.
Step 3. Tap outside the audio clip and let the trim handles disappear.
Split an Audio Clip
There are around two options to split audio clips in iMovie. You can remove unwanted parts or adjust each section’s duration, volume, or speed while you split a clip.
Step 1. With your launched project in the timeline, scroll the timeline to the playhead’s position where you want to split the audio.
Step 2. Click the audio clip to display the inspector at the screen’s bottom.
Step 3. Now, click the Actions button, and select the Split tab.
Or, you can tap the clip (it becomes outlined in yellow), then swipe above the playhead as if you were placing your finger to slide over it.
Detach the Audio Part from a Video
You can detach the video clip’s audio to remove or edit it as a separate video clip.
Step 1. When the project is open in the timeline, select a video clip and display the inspector at the screen’s bottom.
Step 2. Tap the Actions button, then tap Detach.
Step 3. A new blue-colored audio clip will then appear below the video project. You can now move, edit, or delete the audio clip separately from its parent video clip.
Move Audio to the Foreground or Background
To ensure the sound in your video clips can listen above the background music, iMovie implies audio “ducking”. Ducking lowers the background music clips’ volume whenever there’s a video clip whose sound is playing simultaneously.
You can select which audio clips are in the foreground or the background.
Step 1. Select the timeline’s audio clip to display the inspector at the screen’s bottom.
Step 2. Hit the Actions tab and proceed with selecting the Foreground or Background.
The clip color changes to indicate whether it’s the background music (green) or foreground audio (blue or purple).
Part 2: An Easier Way to Edit Audio Clips
Windows users might be wandering for an alternative to iMovie as this software tool is only compatible with Mac and iOS devices. You will be thrilled to know that Wondershare Filmora can serve you with all synonymous and extra features more than the iMovie, and it works significantly in the Windows environment.


This latest software tool also assists users with easy video editing tricks and the intuitive interface that best serves quality editing to beginners and professionals.
Despite the basic video editing features, such as trimming, splitting, merging, cutting, and cropping, Filmora also offers various advanced editing elements that are far better than iMovie. And, with its video editing features, you can make a green screen effect, stabilize your video footage, reverse your video clip, and more.
Moreover, you can enjoy royalty-free music tracks for different themes, such as Young and Bright, Tender and Sentimental, Rock, Folk, Electronic Rock, and Hipster Folk, for selection.
All this will be available with a single program called Wondershare Filmora to take advantage of them for free. You do not have to search the background music files like a needle in a haystack. The program has nicely organized the music themes into six different folders. You can apply it for your video and make advanced editing, such as split/trim the clip, adjust the playback speed, pitch, volume, etc.
How to Edit Audio with Wondershare Filmora?
In Wondershare Filmora, you can insert background music and other files from the audio library or your computer. You can even record your voiceover using it.
Add Background Music
Filmora provides a royalty-free music library you can access or import your music within the program. You can select a song from the royalty-free audio library and use it for free.
The audio library has categorized into: YOUNG & BRIGHT, TENDER & SENTIMENTAL, ROCK, FOLK, and ELECTRONIC. The different kinds of sound effects are also available under the Sound Effects tab.
Once you find a sound effect or a song, either right-click on it and go with the Apply or drag and drop it into an audio track in the timeline.
Or, you can click the Import button above the Media Library panel to browse for audio files in your PC system. Then, select and import it into the Media Library when you find the song or other audio files you wish to add.
Once you place the song in the timeline, double-click to edit it in the Audio editing panel. You can apply fade-in or fade-out effects or adjust the pitch and volume. Filmora lets you add up to 100 audio tracks.
Split Audio Clips
Choose your audio clip and place the playhead where you want to split it, then right-click on the clip and choose the Split tab or click the Split icon right above on the toolbar.
Adjust Audio Settings
Double click on the audio clip to make adjustments to your audio. Open a panel with adjustment sliders in the timeline for pitch and volume.
Another element that you’ll find in this panel is Denoise, which is a feature that can remove background noise from your audio clips.
For a more professional audio editing experience, you can also access the Audio Equalizer from this panel. Select from presets or make manual adjustments by hitting the Customize tab.
Play it when you are done and, if you’re not happy with the results, tap the Reset button to start over.
Audio Equalizer (EQ)
All videos have plenty of sounds like speech, music, or sound effects. Changing the strength of sound waves will help you to mix these sounds within a coherent soundtrack.
Locate your audio clip in an audio track and double-click on it to open the Audio settings menu window. A drop-down menu next to the Equalizer feature will display presets such as Classic, Default, Rock’n’Roll, Techno, Sparkle, Bass, Hard Rock, Pop, Ska, Blues, Folk, Acoustic, Custom, or Country. Choose the preset that best fits your current needs and hit the OK tab to apply it.
Now, hit the Customize tab next to the drop-down bar to adjust the Audio Equalizer manually. Drag the sliders up or down and make the adjustments until you find their ideal value. Finally, hit OK and save your settings.
Besides the included music tracks and sound effects in Filmora initially, you can also find more audio files from Filmora’s effects store – Filmstock, and even get some free music and sound.
Part 3: iMovie Audio Editing Tips & Tricks
iMovie is a great video editor for Mac computers. After understanding the best alternative of iMovie sound editin g, let’s check out some tips on editing audio in iMovie best.
The explanations and screenshots below are for iMovie 10 only. However, the steps are a bit similar to older versions.
So, here we go!
1. Use Waveforms to See What You Hear
To properly edit the audio track in iMovie, you need a good pair of headphones and speakers to hear the sound, but you also need to check the sound.
You can check the sound in iMovie by considering the waveforms on each clip. If the waveforms can’t be seen, go to the View drop-down menu and choose the Show Waveforms option. The clip size for your project can also adjust to get an even better appearance for each video clip.
The waveforms will display the volume level of a clip and give you a good idea of what sections will require to turn up or down. You can also check how the levels of different clips compare to one another.
2. Audio Adjustments
With the help of Adjust tab in the top right, you can access some basic audio editing tools for changing your selected clip’s volume or changing the volume of other relative clips in the project.
The adjustment window of audio also provides basic audio equalization and noise reduction tools, along with a range of effects - from echo to robot - that will change the way people in your video sound.
3. Edit Audio with the Timeline
iMovie assists you in adjusting the audio within the clips themselves. Each pin has a volume bar, moving up and down to decrease or increase the audio level. The clips also contain Fade In and Fade Out tabs at the beginning and end, dragging to adjust the fade’s length.
By adding a short fade effect, whether in or out, the sound becomes relatively smoother and less conflicting to the ear when a new clip begins.
4. Detach the Audio
By default, iMovie keeps the video and audio sections of clips together for convenience. Yet, you want to use the video and audio sections of a clip separately sometimes.
For this purpose, choose your clip in the timeline, visit the Modify drop-down menu, and hit the Detach Audio button. You’ll now have two clips - one with the images and another with the sound.
A lot you can do with the detached audio. For instance, you could extend the audio clip to begin before the video plays, or so that it plays for a few seconds even after the video fades out. You could also cut out pieces from the audio’s middle portion while leaving the video intact.
Conclusion
Coming towards the end of the discussion, after understanding iMovie audio editingand going through an elaborated alternative of iMovie application, we decided that Wondershare Filmora sounds the best out of it. It allows you to flawlessly edit video and audio files on your desktop, with various inbuilt royalty-free music tracks to select from that can further improve your project’s presence.
Marion Dubois
Marion Dubois is a writer and a lover of all things video.
Follow @Marion Dubois
Marion Dubois
Oct 26, 2023• Proven solutions
iMovie offers a fantastic platform for video editing where you can merge multiple video clips to create something very phenomenal. Plus, it’s simply here to navigate between different scenes, edit video clips and save results directly to the digital format without making any videotape transformations.
It provides lots of things to beginners and professionals with its easy-to-use interface without any quality loss for your results even after adding lots of transitions, changes, and effects.
However, it is not accessible to master software, precisely when you’re not familiar with it, or you’re not its professional user. So today, we’d like to explore or pay attention to iMovie’s audio editing steps, tips, and tricks to help you become an iMovie master quickly.
What’s more, a practical yet professional iMovie alternative software is also advisable in this guide. So when the iMovie cannot fulfil your editing requirements, why don’t you hop on an iMovie alternative software?
Now, let’s get started!
Part 1: How to Edit Audio Clips in iMovie?
To learn how to edit audio clips in iMovie, you can use actions in the menu along with the quick shortcuts to make adjustments to your audio clips in iMovie on Mac. It’s a tip for your convenience!
Trim Audio Clips
There are a couple of options to trim an audio clip in iMovie.
#1. Trim to Playhead
You can place the playhead in your timeline. Now, trim an audio clip to that exact spot. Next, start moving the playhead and do one from the following.
- Select Modify > Trim to Playhead option in the menu bar.
- Right-click the audio clip and select the option of Trim to Playhead in the shortcut menu.
#2. Use the Clip Trimmer
You can use the Clip Trimmer to trim an exact section of the clip.
Step 1. Right-click the audio clip and select Show Clip Trimmer in the shortcut menu.
Step 2. After the Clip Trimmer shows, select a section you wish to trim by dragging the arrows right and left while holding the white lines. The area within those lines is what will get entirely deleted.
Move the entire clip but keep the trim area in place if arrows turn to a film strip icon.
Step 3. Click Close Clip Trimmer after you finish this section.
Shorten or Lengthen Audio Clips
You can easily shorten or lengthen an audio clip in iMovie. Just choose the pin in the timeline and drag one of its edges. The duration of the clip change will change as you carry. And a new course will be displayed after you finish in the upper left menu.
You can also set the clip’s duration to an exact time. Select the clip in the timeline and hit the Clip Information (small letter “i”) tab located above the Viewer. Put the value of the time you want in seconds in the Duration box on the right.
Change the Speed of an Audio Clip
You may want to speed up or slow down an audio clip while editing music in iMovie. So, here’s what you need to do!
Method 1. Click the Speed button above the Viewer. Next, select Custom in the Speed drop-down box and enter a percentage next to it. You can also set a different speed in that box if you prefer.
Method 2. Right-click the clip and select Show Speed Editor from the shortcut menu. A slider will then display at the top of the clip that you can move to change the speed.
Adjust the Volume of an Audio Clip
You can set the audio clip’s volume at higher or lower, or even mute it. Just select the clip and then do one of the following.
- Select the Volume tab above the Viewer option and move the slider to the percentage of volume. Hit the Mute button to mute the audio clip.
- Tap inside the clip, and when the two-sided arrow appears, drag up or down to adjust the volume.
Fade an Audio Clip
While editing audio in iMovie, you can also fade in or out the clip. Choose a clip in the timeline and then drag the fade handle (small circle) at either the ending or the beginning of the clip to make a fade-out or a fade-in effect.
As you drag, you will see the arcs displaying the shadow for the clips fade in or fade out.
How to Edit Audio Clips in iMovie on iOS?
The iMovie timeline is where you sort or organize all your audio clips, such as the special effects and background music. Audio clips are always present below the video clips in the timeline. To edit audio clips in iMovie on your iPhones or iPads, you can follow the guide belo
Move an Audio Clip
You can transfer the whole audio clip, except the background music, to another location.
- Touch and hold the purple or blue audio clip with your project open in the timeline until it comes over the timeline bar.
- Drag the clip to another place and release.
Adjust the Audio Clip’s Duration
Step 1. While the project is launched in the timeline, tap the audio clip (in blue or purple) or the background music clip you wish to adjust.
Step 2. Now, you can see the display of yellow trim handles. Drag them either at the end of the clip to the points where you wish the audio to start and end. If a trim handle won’t move left or right, it simply indicates there is no additional audio to work with on that clip’s end.
Step 3. Tap outside the audio clip and let the trim handles disappear.
Split an Audio Clip
There are around two options to split audio clips in iMovie. You can remove unwanted parts or adjust each section’s duration, volume, or speed while you split a clip.
Step 1. With your launched project in the timeline, scroll the timeline to the playhead’s position where you want to split the audio.
Step 2. Click the audio clip to display the inspector at the screen’s bottom.
Step 3. Now, click the Actions button, and select the Split tab.
Or, you can tap the clip (it becomes outlined in yellow), then swipe above the playhead as if you were placing your finger to slide over it.
Detach the Audio Part from a Video
You can detach the video clip’s audio to remove or edit it as a separate video clip.
Step 1. When the project is open in the timeline, select a video clip and display the inspector at the screen’s bottom.
Step 2. Tap the Actions button, then tap Detach.
Step 3. A new blue-colored audio clip will then appear below the video project. You can now move, edit, or delete the audio clip separately from its parent video clip.
Move Audio to the Foreground or Background
To ensure the sound in your video clips can listen above the background music, iMovie implies audio “ducking”. Ducking lowers the background music clips’ volume whenever there’s a video clip whose sound is playing simultaneously.
You can select which audio clips are in the foreground or the background.
Step 1. Select the timeline’s audio clip to display the inspector at the screen’s bottom.
Step 2. Hit the Actions tab and proceed with selecting the Foreground or Background.
The clip color changes to indicate whether it’s the background music (green) or foreground audio (blue or purple).
Part 2: An Easier Way to Edit Audio Clips
Windows users might be wandering for an alternative to iMovie as this software tool is only compatible with Mac and iOS devices. You will be thrilled to know that Wondershare Filmora can serve you with all synonymous and extra features more than the iMovie, and it works significantly in the Windows environment.
This latest software tool also assists users with easy video editing tricks and the intuitive interface that best serves quality editing to beginners and professionals.
Despite the basic video editing features, such as trimming, splitting, merging, cutting, and cropping, Filmora also offers various advanced editing elements that are far better than iMovie. And, with its video editing features, you can make a green screen effect, stabilize your video footage, reverse your video clip, and more.
Moreover, you can enjoy royalty-free music tracks for different themes, such as Young and Bright, Tender and Sentimental, Rock, Folk, Electronic Rock, and Hipster Folk, for selection.
All this will be available with a single program called Wondershare Filmora to take advantage of them for free. You do not have to search the background music files like a needle in a haystack. The program has nicely organized the music themes into six different folders. You can apply it for your video and make advanced editing, such as split/trim the clip, adjust the playback speed, pitch, volume, etc.
How to Edit Audio with Wondershare Filmora?
In Wondershare Filmora, you can insert background music and other files from the audio library or your computer. You can even record your voiceover using it.
Add Background Music
Filmora provides a royalty-free music library you can access or import your music within the program. You can select a song from the royalty-free audio library and use it for free.
The audio library has categorized into: YOUNG & BRIGHT, TENDER & SENTIMENTAL, ROCK, FOLK, and ELECTRONIC. The different kinds of sound effects are also available under the Sound Effects tab.
Once you find a sound effect or a song, either right-click on it and go with the Apply or drag and drop it into an audio track in the timeline.
Or, you can click the Import button above the Media Library panel to browse for audio files in your PC system. Then, select and import it into the Media Library when you find the song or other audio files you wish to add.
Once you place the song in the timeline, double-click to edit it in the Audio editing panel. You can apply fade-in or fade-out effects or adjust the pitch and volume. Filmora lets you add up to 100 audio tracks.
Split Audio Clips
Choose your audio clip and place the playhead where you want to split it, then right-click on the clip and choose the Split tab or click the Split icon right above on the toolbar.
Adjust Audio Settings
Double click on the audio clip to make adjustments to your audio. Open a panel with adjustment sliders in the timeline for pitch and volume.
Another element that you’ll find in this panel is Denoise, which is a feature that can remove background noise from your audio clips.
For a more professional audio editing experience, you can also access the Audio Equalizer from this panel. Select from presets or make manual adjustments by hitting the Customize tab.
Play it when you are done and, if you’re not happy with the results, tap the Reset button to start over.
Audio Equalizer (EQ)
All videos have plenty of sounds like speech, music, or sound effects. Changing the strength of sound waves will help you to mix these sounds within a coherent soundtrack.
Locate your audio clip in an audio track and double-click on it to open the Audio settings menu window. A drop-down menu next to the Equalizer feature will display presets such as Classic, Default, Rock’n’Roll, Techno, Sparkle, Bass, Hard Rock, Pop, Ska, Blues, Folk, Acoustic, Custom, or Country. Choose the preset that best fits your current needs and hit the OK tab to apply it.
Now, hit the Customize tab next to the drop-down bar to adjust the Audio Equalizer manually. Drag the sliders up or down and make the adjustments until you find their ideal value. Finally, hit OK and save your settings.
Besides the included music tracks and sound effects in Filmora initially, you can also find more audio files from Filmora’s effects store – Filmstock, and even get some free music and sound.
Part 3: iMovie Audio Editing Tips & Tricks
iMovie is a great video editor for Mac computers. After understanding the best alternative of iMovie sound editin g, let’s check out some tips on editing audio in iMovie best.
The explanations and screenshots below are for iMovie 10 only. However, the steps are a bit similar to older versions.
So, here we go!
1. Use Waveforms to See What You Hear
To properly edit the audio track in iMovie, you need a good pair of headphones and speakers to hear the sound, but you also need to check the sound.
You can check the sound in iMovie by considering the waveforms on each clip. If the waveforms can’t be seen, go to the View drop-down menu and choose the Show Waveforms option. The clip size for your project can also adjust to get an even better appearance for each video clip.
The waveforms will display the volume level of a clip and give you a good idea of what sections will require to turn up or down. You can also check how the levels of different clips compare to one another.
2. Audio Adjustments
With the help of Adjust tab in the top right, you can access some basic audio editing tools for changing your selected clip’s volume or changing the volume of other relative clips in the project.
The adjustment window of audio also provides basic audio equalization and noise reduction tools, along with a range of effects - from echo to robot - that will change the way people in your video sound.
3. Edit Audio with the Timeline
iMovie assists you in adjusting the audio within the clips themselves. Each pin has a volume bar, moving up and down to decrease or increase the audio level. The clips also contain Fade In and Fade Out tabs at the beginning and end, dragging to adjust the fade’s length.
By adding a short fade effect, whether in or out, the sound becomes relatively smoother and less conflicting to the ear when a new clip begins.
4. Detach the Audio
By default, iMovie keeps the video and audio sections of clips together for convenience. Yet, you want to use the video and audio sections of a clip separately sometimes.
For this purpose, choose your clip in the timeline, visit the Modify drop-down menu, and hit the Detach Audio button. You’ll now have two clips - one with the images and another with the sound.
A lot you can do with the detached audio. For instance, you could extend the audio clip to begin before the video plays, or so that it plays for a few seconds even after the video fades out. You could also cut out pieces from the audio’s middle portion while leaving the video intact.
Conclusion
Coming towards the end of the discussion, after understanding iMovie audio editingand going through an elaborated alternative of iMovie application, we decided that Wondershare Filmora sounds the best out of it. It allows you to flawlessly edit video and audio files on your desktop, with various inbuilt royalty-free music tracks to select from that can further improve your project’s presence.
Marion Dubois
Marion Dubois is a writer and a lover of all things video.
Follow @Marion Dubois
Also read:
- New 2024 Approved Audiocraft Unveiled Understanding Key Traits, Gathered Opinions & Looking Beyond AVS for Sound Mastery
- New 2024 Approved Top Strategies How To Remove Reverb From Audio With Precision
- Updated 2024 Approved The Most Suitable Chromebook-Friendly Audio Editing Software for Modern Musicians (Top 8 List, Updated )
- New From Full Song to Solo Groove Navigating Tools for Beats Extraction
- In 2024, Echoes Equalized Advanced Methods to Normalize Audio Quality in Film and Broadcast
- Updated 2024 Approved Cutting Edge 6 Internet Audio Divide and Conquer Software
- Alternatives and Step by Step Guide for Apowersoft Audio Recorder for 2024
- In 2024, Revealing the Invisible Sounds in Visual Media The Pinnacle of Technology
- Wondershare Filmora for Clean Audio A Guide to Banishing Background Sounds for 2024
- Updated 2024 Approved From Raw to Refined Mastering the Art of Professional MP3 File Adjustments
- Rapping Rhythms A Starters Manual for Selecting Beat Drops and Beats for 2024
- Tracking Down An Enraged Poochs Howling Frequency for 2024
- New 2024 Approved Cutting Through the Clutter A Step-by-Step Approach to Clearing Background Noise in Audio Using Filmora Tutorials
- New Find Terror-Eliciting Shout Synths
- In 2024, Seamless Sound Sync A Step-by-Step Guide to Premiere Pro Audio Management
- New Melody Matters Top-Ranked Linux Auditory Software - Evaluating Cost and Quality for 2024
- In 2024, Enhancing Vocal Expression An Intuitive Method for Audacity Users
- Updated 2024 Approved The Ultimate How-To Syncing Audio with Newly Updated AVI Content
- Updated Converting Audacity Projects to MP3 Format
- New In 2024, The Newbies Roadmap to Successful Podcast Editing
- New Virtual Vibrance Instructions for Weaving Echo Into the Fabric of Windows and Internet Audio Streams
- New Audio Eradication on iOS Devices A Complete Guide to Clearer Videos for 2024
- AudiSynchX Enhancing Audio Cohesion for Multimedia Projects Using Adobe Premiere Pro
- New Mastering Your Sound on the Go Best iOS Apps for Editing, 2023 Edition for 2024
- 2024 Approved Contemporary Techniques for Crafting Effective Audio Echoes
- 2024 Approved Debunking Digital Audio Studio Myths The Truth Behind DAW
- 2024 Approved Crafting Original Soundscapes A Guide to Producing Music Video Tracks
- New In 2024, Mastering the Art of Flawless Podcast Production Your Comprehensive Tutorial
- Updated Where to Download and Listen DJ Music for 2024
- In 2024, How to Choose the Best Sound Editor?
- Silent Sessions with Zoom Enabling Mute on Computers & Mobile Devices for 2024
- Updated 2024 Approved Ultimate Tips for Editing Audios Using Avidemux - 2023 Edition
- Updated 2024 Approved Audio Excellence Techniques for Clearer Sound in Video Editing Using Filmora
- New In 2024, Discovering the Top 5 Audio Mixers Perfect for Mac Users
- New Cutting-Edge Mobile Audio Tools Selecting the Top 10 for iOS and Android Devices - Updated
- 2024 Approved Audiophiles Guide Selecting the Best Soundtracks that Complement Visual Storytelling
- Updated Isolating the Aural Feedback Resulting From Button Engagement for 2024
- 2024 Approved Quietude Creators Guide Methods to Extract Silence From MP4, MKV, AVI, MOV, WMV Videos
- Why Does My Itel P55 Keep Turning Off By Itself? 6 Fixes Are Here | Dr.fone
- iSpoofer is not working On Xiaomi 14? Fixed | Dr.fone
- New In 2024, How to Resize and Crop Images in FCPX 2023 Update
- In 2024, 4 Most-Known Ways to Find Someone on Tinder For Vivo Y100 by Name | Dr.fone
- Lock Your Vivo S17 Phone in Style The Top 5 Gesture Lock Screen Apps
- How to Fake Snapchat Location without Jailbreak On Oppo A79 5G | Dr.fone
- Spotify Keeps Crashing A Complete List of Fixes You Can Use on Honor X50i+ | Dr.fone
- Which Pokémon can Evolve with a Moon Stone For Motorola Edge 2023? | Dr.fone
- Updated Create Viral Memes with These 10 Amazing Apps
- In 2024, How to Use Pokémon Emerald Master Ball Cheat On Nokia C12 | Dr.fone
- Updated 2024 Approved Best 6 Video Dubbing Software for PC
- 2024 Approved We Can Say that the Horror Movies of the 90S Laid the Foundation for Current Horror Movies. So, without Wasting Time, Lets Create a 1990S Horror Movie Similar to The Blair Witch Project
- How to Downgrade Apple iPhone 14 Plus to the Previous iOS/iPadOS Version? | Dr.fone
- Updated Smart Video Editing Solutions with One-Touch Reframing for 2024
- Updated 2024 Approved From Start to Finish How to Record and Edit Your Desktop with Filmora Scrn
- Fix Unfortunately Settings Has Stopped on Itel A60 Quickly | Dr.fone
- Apple ID Locked for Security Reasons On iPhone 11? Find the Best Solution Here
- How to Share/Fake Location on WhatsApp for Lava Blaze Curve 5G | Dr.fone
- Top 5 Lava Agni 2 5G Bypass FRP Tools for PC That Actually Work
- Trouble with iPhone 12 mini Swipe-Up? Try These 11 Solutions
- 4 Solutions to Fix Unfortunately Your App Has Stopped Error on Xiaomi Redmi 13C | Dr.fone
- 2024 Approved Top 10 Sound Extractors to Extract Sound From Video 2023
- How to Realme Note 50 Get Deleted Pictures Back with Ease and Safety?
- In 2024, How to Cast Google Pixel Fold Screen to PC Using WiFi | Dr.fone
- In 2024, Top 6 Apps/Services to Trace Any Xiaomi Redmi A2+ Location By Mobile Number | Dr.fone
- Title: New Best 10 Voice Changer Apps Male to Female Powerful
- Author: Ella
- Created at : 2024-05-19 06:26:00
- Updated at : 2024-05-20 06:26:00
- Link: https://sound-optimizing.techidaily.com/new-best-10-voice-changer-apps-male-to-female-powerful/
- License: This work is licensed under CC BY-NC-SA 4.0.
