
:max_bytes(150000):strip_icc():format(webp)/copilot-b197f8dd690845d5bf8ebbc082c89c20.jpg)
New Effortless Audio Extraction Discovering the Best Six Cost-Free Techniques to Transform Videos Into Audible Media for 2024
“Effortless Audio Extraction: Discovering the Best Six Cost-Free Techniques to Transform Videos Into Audible Media “
If you have the footage in which only the sound has all the meat, you might want to remove the visuals from the clip and keep only the audio track to save some space on your storage media. Because the videos nowadays are usually in MP4 format, and the most commonly used audio type is MP3, it becomes imperative to learn how to convert MP4 to MP3.
It is also important to know which tools are best for such kind of conversion and what benefits and downsides they come with if installed on your PC.
That said, here, you will learn how to convert video to audio using six extremely popular and widely used programs.
| 1 - Filmora | 2 - VLC media player | 3 - Audacity |
|---|---|---|
| 4 - QuickTime | 5 - Media Converter | 6 - Video to MP3 Converter |
Watch a Video First to Take a Quick View of These Programs
For Win 7 or later (64-bit)
For macOS 10.14 or later


1 Filmora - [Windows, Mac, iPhone & Android]
A product by Wondershare that is one of the most versatile development organizations, Filmora , is available for Windows and Mac platforms. The tool is a full-fledged post-production program that many professionals use because it is lightweight and due to its simple UI and not-so-steep learning curve.
The instructions given below explain how to convert video to audio with Filmora:
Step 1: Import Source Media
Launch Wondershare Filmora (a Windows computer here used here), click anywhere inside the Media window present at the upper-left section, and select and import a source video file to the program.
For Win 7 or later (64-bit)
For macOS 10.14 or later

Step 2: Add Media to Timeline
Drag the imported footage to the Timeline at the bottom of the window. Optionally, right-click the media in the Timeline itself, and click Detach Audio to separate the audio track from the video. Trim off the unwanted sections from the clip if need be.

Step 3: Convert Video to Audio
Click EXPORT from the top-center of the window, go to the Video tab on the Export box, select MP3 from the bottom of the Format list in the left pane, choose other preferences by clicking the SETTINGS button from the right, and click EXPORT from the bottom-right corner.

Benefits of Using Filmora
Some of the advantages of using Filmora to convert video clips to audio are:
- Easy audio separation from the video
- Ability to export videos directly to audio
- Ability to adjust the audio and remove the background noise
- Ability to record voice and integrate it into the audio clip
Disadvantages: Doesn’t have many audio formats for exporting.
Supported Audio Formats: At the time of this writing, Filmora supports only MP3 audio format while exporting directly.
For Win 7 or later (64-bit)
For macOS 10.14 or later
2 VLC Media Player [Windows, Mac & Linux]
A well-known application that supports almost all media formats and is available for Windows, Mac, and Linux platforms, the VLC media player has its built-in Converter that can transcode your video clips to audio for free.
The steps given below explain how to convert video to audio with VLC media player:
Step 1: Import Source Video

Launch VLC media player, click Media from the menu bar at the top, and click Convert / Save from the menu. Make sure that the File tab is selected on the Open Media box, click Add from the right side of the File Selection field, and click Convert / Save from the bottom.

Step 2: Select Output Format and Preferences
On the Convert box, make sure that the Convert radio button is selected, choose an audio format from the Profile drop-down list, optionally click the Settings (Wrench) icon present next to the drop-down list itself, choose other output preferences for the audio and click Save to get back to the Convert box.
Step 3: Choose Output Folder and Convert

Click Browse from the Destination section to select an output folder, enter a name for the exported file in the Destination file field, and click Start to convert audio to video with VLC media player.
Benefits of Using VLC media player
Some advantages that VLC offers include:
- Doesn’t require any other application to be installed for conversion
- Makes the process quite simple and absolutely free
Disadvantages: Doesn’t have editing tools to manipulate the clips before converting.
Supported Audio Formats: VLC media player supports OGG (Vorbis), MP3, and FLAC format while exporting.
3 Audacity [Windows, Mac & Linux]
Audacity is yet another cross-platform tool that is specifically dedicated to audio formats and is also used by many professionals to produce industry-standard audio clips. Even though Audacity is an open-source and free program, some new users may find it challenging to understand the interface.
The steps are given below explain the process of converting video to audio with Audacity:
Step 1: Install Supported Tools
Assuming that Audacity is already installed on your PC, to import video files to the program, go to https://lame.buanzo.org/#lamewindl and download and install ffmpeg for Windows for Audacity if it is not already installed. You can do a quick online search for other platforms and see if your copy of Audacity needs the tools or plugins required to import the videos.
Step 2: Import Source Video
Go to file> Open from the menu bar and select and import the video that you want to convert to audio.
Step 3: Convert Video to Audio

Make the required manipulations to the audio, go to file> Export, and choose your preferred audio format from the list. Choose a destination folder and other output preferences on the Export Audio box, and click Save to convert video to audio with Audacity.
Benefits of Using Audacity
Some benefits that Audacity offers include:
- Granular editing and fine-tuning of audio tracks
- Wide range of output preferences
- Ability to produce industry-standard outputs
- Offers plethora of options and tools to add various effects to the sounds
Disadvantages: Some new users may find it challenging to understand the interface. Audacity also needs additional tools to be installed to support video files as inputs.
Supported Audio Formats: Audacity supports almost all major audio formats including MP3, OGG, WAV, etc.
4 QuickTime [Mac]
QuickTime is the default media player that comes along with macOS and is installed automatically. Being a proprietary of Apple Inc., QuickTime natively supports all the formats developed by the company, along with some other most popular file types such as MP4, MP3, etc.
To convert a video file to audio with QuickTime on Mac, you can follow the instructions given below:
Step 1: Import Source Video
Launch QuickTime on your Mac computer, go to file from the menu bar, click Open File, use the box that opens to locate and select the video that you want to convert, and click Open from the bottom-right corner.
Step 2: Convert to Audio

Click file again, go to Export this time, and then click audio Only from the sub menu that appears. On the next box, enter a name for the output file in the Export As field, choose a destination folder from the Where drop-down list, optionally click the drop-down button from the right side of the Where field to configure other preferences, and click Save to convert video to audio with QuickTime.
Benefits of Using QuickTime
Some advantages of using QuickTime to convert video to audio include:
- Mac users don’t need to install any third-party conversion tool or additional plugin
- Conversion process is easy and almost seamless
Disadvantages: Doesn’t give any option to choose an output format and doesn’t allow editing the clips either.
Supported Audio Formats: By default, QuickTime player converts videos files to M4A audio format.
5 Media Converter – video to mp3 [iPhone]
Among several iOS apps that have been developed for video to audio conversion, Media Converter – video to mp3 is one of those that has decent star ratings and user reviews. The app is around 66MB in size and can be obtained from the App Store.
The process on how to convert video to audio with Media Converter is explained below:
- Launch Media Converter
- Import the source video to the app
- Choose Extract Audio from the Conversion Type menu
- Select your preferred output audio format
- Begin the conversion process

Benefits of Using Media Converter
A couple of advantages of using Media Converter to convert video to audio are listed below:
- Eliminates the use of PC or laptop
- Can be obtained easily
- Can be used even while moving
Disadvantages: Doesn’t have the flexibility of granular editing as it is there when using a computer program.
Supported Audio Formats: The audio formats that Media Converter supports include MP3, M4A, OGG, WAV, FLAC, etc.
6 Video to MP3 Converter [Android]
With around 4.5-star rating on Play Store, Video to MP3 Converter is another app that can convert your video files to audio right on your Android smartphone. In addition, the app also allows basic video trimming that may come in handy while making the entire clip more informative by removing unwanted sections from it.

You can learn how to convert video to audio with Video to MP3 Converter by following the instructions given below:
- Launch Video to MP3 Converter
- Import the source video clip from your Android smart device’s storage
- Trim the footage to keep only the important part
- Set output preferences
- Extract the audio from the video
Benefits of Using Video to MP3 Converter
Some advantages of using Video to MP3 Converter include:
- It supports every popular video format such as MP4, 3GP, WMV, etc.
- Has simple UI
- Offers various audio bitrates to choose from while exporting
- Allows basic trimming
Disadvantages: Doesn’t have many editing options thus, no granular manipulations can be done to the media files while using the app.
Supported Audio Formats: Video to MP3 Converter supports MP3 formats at this writing.
Conclusion
Learning how to convert MP4 to MP3 is a simple process, and as long as you have a decent computer or an iOS or Android smartphone, you can extract the audio in the format of your choice from the video clips almost instantly. Furthermore, if you are a professional and want to prepare media clips for the clients or your channel, using advanced tools like Wondershare Filmora or Audacity would give you the best conversion experience.
For Win 7 or later (64-bit)
For macOS 10.14 or later
Watch a Video First to Take a Quick View of These Programs
For Win 7 or later (64-bit)
For macOS 10.14 or later
1 Filmora - [Windows, Mac, iPhone & Android]
A product by Wondershare that is one of the most versatile development organizations, Filmora , is available for Windows and Mac platforms. The tool is a full-fledged post-production program that many professionals use because it is lightweight and due to its simple UI and not-so-steep learning curve.
The instructions given below explain how to convert video to audio with Filmora:
Step 1: Import Source Media
Launch Wondershare Filmora (a Windows computer here used here), click anywhere inside the Media window present at the upper-left section, and select and import a source video file to the program.
For Win 7 or later (64-bit)
For macOS 10.14 or later
Step 2: Add Media to Timeline
Drag the imported footage to the Timeline at the bottom of the window. Optionally, right-click the media in the Timeline itself, and click Detach Audio to separate the audio track from the video. Trim off the unwanted sections from the clip if need be.
Step 3: Convert Video to Audio
Click EXPORT from the top-center of the window, go to the Video tab on the Export box, select MP3 from the bottom of the Format list in the left pane, choose other preferences by clicking the SETTINGS button from the right, and click EXPORT from the bottom-right corner.
Benefits of Using Filmora
Some of the advantages of using Filmora to convert video clips to audio are:
- Easy audio separation from the video
- Ability to export videos directly to audio
- Ability to adjust the audio and remove the background noise
- Ability to record voice and integrate it into the audio clip
Disadvantages: Doesn’t have many audio formats for exporting.
Supported Audio Formats: At the time of this writing, Filmora supports only MP3 audio format while exporting directly.
For Win 7 or later (64-bit)
For macOS 10.14 or later
2 VLC Media Player [Windows, Mac & Linux]
A well-known application that supports almost all media formats and is available for Windows, Mac, and Linux platforms, the VLC media player has its built-in Converter that can transcode your video clips to audio for free.
The steps given below explain how to convert video to audio with VLC media player:
Step 1: Import Source Video
Launch VLC media player, click Media from the menu bar at the top, and click Convert / Save from the menu. Make sure that the File tab is selected on the Open Media box, click Add from the right side of the File Selection field, and click Convert / Save from the bottom.
Step 2: Select Output Format and Preferences
On the Convert box, make sure that the Convert radio button is selected, choose an audio format from the Profile drop-down list, optionally click the Settings (Wrench) icon present next to the drop-down list itself, choose other output preferences for the audio and click Save to get back to the Convert box.
Step 3: Choose Output Folder and Convert
Click Browse from the Destination section to select an output folder, enter a name for the exported file in the Destination file field, and click Start to convert audio to video with VLC media player.
Benefits of Using VLC media player
Some advantages that VLC offers include:
- Doesn’t require any other application to be installed for conversion
- Makes the process quite simple and absolutely free
Disadvantages: Doesn’t have editing tools to manipulate the clips before converting.
Supported Audio Formats: VLC media player supports OGG (Vorbis), MP3, and FLAC format while exporting.
3 Audacity [Windows, Mac & Linux]
Audacity is yet another cross-platform tool that is specifically dedicated to audio formats and is also used by many professionals to produce industry-standard audio clips. Even though Audacity is an open-source and free program, some new users may find it challenging to understand the interface.
The steps are given below explain the process of converting video to audio with Audacity:
Step 1: Install Supported Tools
Assuming that Audacity is already installed on your PC, to import video files to the program, go to https://lame.buanzo.org/#lamewindl and download and install ffmpeg for Windows for Audacity if it is not already installed. You can do a quick online search for other platforms and see if your copy of Audacity needs the tools or plugins required to import the videos.
Step 2: Import Source Video
Go to file> Open from the menu bar and select and import the video that you want to convert to audio.
Step 3: Convert Video to Audio
Make the required manipulations to the audio, go to file> Export, and choose your preferred audio format from the list. Choose a destination folder and other output preferences on the Export Audio box, and click Save to convert video to audio with Audacity.
Benefits of Using Audacity
Some benefits that Audacity offers include:
- Granular editing and fine-tuning of audio tracks
- Wide range of output preferences
- Ability to produce industry-standard outputs
- Offers plethora of options and tools to add various effects to the sounds
Disadvantages: Some new users may find it challenging to understand the interface. Audacity also needs additional tools to be installed to support video files as inputs.
Supported Audio Formats: Audacity supports almost all major audio formats including MP3, OGG, WAV, etc.
4 QuickTime [Mac]
QuickTime is the default media player that comes along with macOS and is installed automatically. Being a proprietary of Apple Inc., QuickTime natively supports all the formats developed by the company, along with some other most popular file types such as MP4, MP3, etc.
To convert a video file to audio with QuickTime on Mac, you can follow the instructions given below:
Step 1: Import Source Video
Launch QuickTime on your Mac computer, go to file from the menu bar, click Open File, use the box that opens to locate and select the video that you want to convert, and click Open from the bottom-right corner.
Step 2: Convert to Audio
Click file again, go to Export this time, and then click audio Only from the sub menu that appears. On the next box, enter a name for the output file in the Export As field, choose a destination folder from the Where drop-down list, optionally click the drop-down button from the right side of the Where field to configure other preferences, and click Save to convert video to audio with QuickTime.
Benefits of Using QuickTime
Some advantages of using QuickTime to convert video to audio include:
- Mac users don’t need to install any third-party conversion tool or additional plugin
- Conversion process is easy and almost seamless
Disadvantages: Doesn’t give any option to choose an output format and doesn’t allow editing the clips either.
Supported Audio Formats: By default, QuickTime player converts videos files to M4A audio format.
5 Media Converter – video to mp3 [iPhone]
Among several iOS apps that have been developed for video to audio conversion, Media Converter – video to mp3 is one of those that has decent star ratings and user reviews. The app is around 66MB in size and can be obtained from the App Store.
The process on how to convert video to audio with Media Converter is explained below:
- Launch Media Converter
- Import the source video to the app
- Choose Extract Audio from the Conversion Type menu
- Select your preferred output audio format
- Begin the conversion process
Benefits of Using Media Converter
A couple of advantages of using Media Converter to convert video to audio are listed below:
- Eliminates the use of PC or laptop
- Can be obtained easily
- Can be used even while moving
Disadvantages: Doesn’t have the flexibility of granular editing as it is there when using a computer program.
Supported Audio Formats: The audio formats that Media Converter supports include MP3, M4A, OGG, WAV, FLAC, etc.
6 Video to MP3 Converter [Android]
With around 4.5-star rating on Play Store, Video to MP3 Converter is another app that can convert your video files to audio right on your Android smartphone. In addition, the app also allows basic video trimming that may come in handy while making the entire clip more informative by removing unwanted sections from it.
You can learn how to convert video to audio with Video to MP3 Converter by following the instructions given below:
- Launch Video to MP3 Converter
- Import the source video clip from your Android smart device’s storage
- Trim the footage to keep only the important part
- Set output preferences
- Extract the audio from the video
Benefits of Using Video to MP3 Converter
Some advantages of using Video to MP3 Converter include:
- It supports every popular video format such as MP4, 3GP, WMV, etc.
- Has simple UI
- Offers various audio bitrates to choose from while exporting
- Allows basic trimming
Disadvantages: Doesn’t have many editing options thus, no granular manipulations can be done to the media files while using the app.
Supported Audio Formats: Video to MP3 Converter supports MP3 formats at this writing.
Conclusion
Learning how to convert MP4 to MP3 is a simple process, and as long as you have a decent computer or an iOS or Android smartphone, you can extract the audio in the format of your choice from the video clips almost instantly. Furthermore, if you are a professional and want to prepare media clips for the clients or your channel, using advanced tools like Wondershare Filmora or Audacity would give you the best conversion experience.
For Win 7 or later (64-bit)
For macOS 10.14 or later
Discover the Best Android Speech-to-Text Programs with No Monthly Fees
10 Best Voice Recording Apps for Android Devices [Free Included]

Benjamin Arango
Mar 27, 2024• Proven solutions
Memorizing every bit of information you need to perform your daily or weekly tasks becomes increasingly difficult as your workload rises. Students, journalists, and professionals from a wide array of industries can benefit from making audio notes or even recording entire conversations with their Smartphones.
A simple Android voice recorder can make this task easy since you can just tap on the Record button and create an audio note in seconds. However, with so many voice recorder apps for Android devices out there, finding the one best suited for your needs can be more complicated than it seems. So, in this article, we are going to help you discover some best free voice recorder for an Android device you are currently using.
Want to record voiceover and audio on iPhone? Check 10 Best Voice Recorder Apps for iPhones >>
10 Best Free Voice Recording Apps for Android Devices
Recording audio is no longer a highly technical process since now you can create an audio note or record an interview with an Android phone and a voice recorder app. The question is which voice recording app should you install on your device. So, let’s take a look at some of the most potent Android voice recorders you can find at Google Play Store.
1. Easy Voice Recorder Pro
Price: $3.99
Supported OS: Varies with the device
Best for: Students, musicians, and businessmen

App in Google Play
As the app’s name suggests making recordings for a broad range of purposes is easy. All you need to do is launch the app and start a new audio recording session. Easy Voice Recorder Pro doesn’t limit the duration of your recordings, and it also allows you to compress the recorded audio . That is perfect if you need to record long lectures or conversations. Besides, you can connect an external microphone with the app in case you want to increase the quality of the sound you are recording. The app also lets you store your recordings on Dropbox or Google Drive, while it also offers the possibility to send recordings via email.
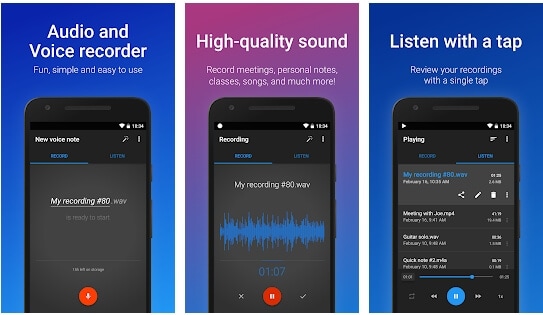
Easy Voice Recorder Pro Interface
Pros
- Allows users to manage and organize their recordings effortlessly
- Supports all standard output audio file formats
- Offers the option to record in stereo
- Recordings made with this app can be used as the ringtone
Cons
- Ads can be frustrating
- Limited basic audio editing tools
2. Smart Recorder – High-quality voice recorder
Price: Free, but contains ads and offers in-app purchases
Supported OS: Varies with the device
Best for: Students, musicians, and businessmen
App in Google Play
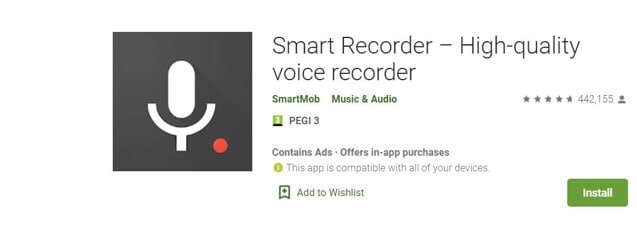
Capturing high-quality audio recordings effortlessly is the ultimate goal of all Android users who want to use voice recorders. As one of the best free voice recorders for Android, Smart Recorder app has a plethora of features that enable users to make high-quality audio recordings even in imperfect conditions. Options like Live Audio Spectrum Analyzer, microphone gain calibration or automatic and manual sensitivity control in Skip Silence mode are just a few reasons why this app has over 10 million installs. However, you should keep in mind that you cannot create audio files that are larger than 2 GB with this app.
Smart Recorder – High-quality voice recorder Interface
Pros
- Provides full control over the audio recording process
- Equipped with the Wave Lock feature that prevents the device from going into the sleep mode
- Features a live audio spectrum analyzer
- Preserves battery life
Cons
- No phone call recording options
- Limited file-sharing capabilities
3. RecForge II Audio Recorder
Price: Free, but contains ads
Supported OS: Android 4.0 and up
Best for: Musicians
RecForge-audio-recorder App in Google Play
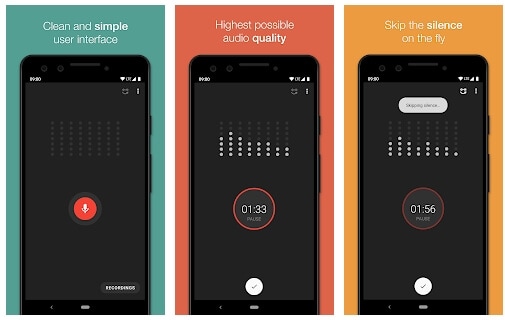
If you are looking for an Android voice recorder that allows you to customize bit rates, sample rates, choose codecs or record in mono or stereo mode, then you should consider installing RecForge II Audio Recorder on your device. The app allows you to schedule recordings, connect different types of external microphones or adjust the gain manually. In addition, you can also adjust the pitch , tempo and the playback rate of all audio files you record and edit with this app. RecForge II Audio Recorder continues working even while you are using other apps, and it keeps the battery consumption at the very minimum.
Pros
- Supports nearly all common audio file formats
- Offers a versatile set of audio editing tools
- Excellent file-sharing capabilities
- Allows users to increase the audio quality by disabling Automatic Gain Control
Cons
- The maximum duration of a recording is limited for some file formats
- Can be too complicated for inexperienced users
4. Hi-Q MP3 Voice Recorder
Price: Free
Supported OS: Varies with the device
Best for: Students, general use
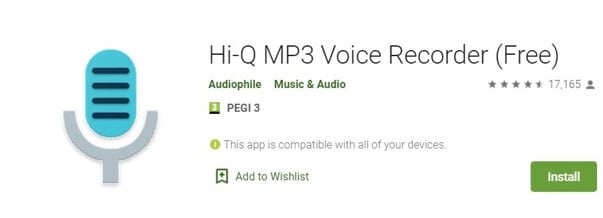
Hi-Q MP3 Voice Recorder App in Google Play
You don’t need any previous audio recording experience to record long lectures, interviews and all other types of voice recordings with Hi-Q MP3 Voice Recorder. The free version of the app limits the maximum duration of a recording you can make to just 10 minutes. That is why you must upgrade to the Pro version of Hi-Q MP3 Voice Recorder if you want to capture hours of material directly from your phone. The best part is that all versions of the app automatically upload recordings to Google Drive or Dropbox which frees up space on your device.
Pros
- Intuitive and modernly designed interface
- Simple audio recording session setup
- Customizable audio quality
- Excellent file management capabilities
Cons
- Recording with external microphones is not an option
- The free version of the app limits the maximum duration of recordings
5. Voice Recorder
Price: Free, but contains ads
Supported OS: Android 4.1 and up
Best for: Students, musicians, and businessmen
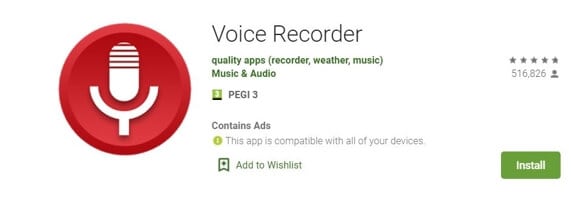
Voice Recorder App in Google Play
If you are looking for an app you can use to record an interview, a business meeting or a lecture, then Voice Recorder may be one of your best options. You can record audio files without any restrictions and visualize the sounds with the Audio Spectrum Analyzer. The app continues recording from the background even while the phone’s screen is off which preserves battery life and enables you to perform other tasks while the recording session is in progress. Voice Recorder offers a broad range of file-sharing capabilities so that you can easily send your audio recordings via SMS, email and the Messenger app or share them on Facebook and WhatsApp.
Pros
- Available for free to all Android users
- Stopping, pausing or resuming a recording session is easy
- Allows users to adjust the sample rate
- Offers the microphone gain calibration tool
Cons
- Audio recordings can only be saved in two different file formats
- Doesn’t provide audio editing options
6. Music Maker JAM
Price: Free, but contains ads and offers in-app purchases
Supported OS: Varies with the device
Best for: Musicians
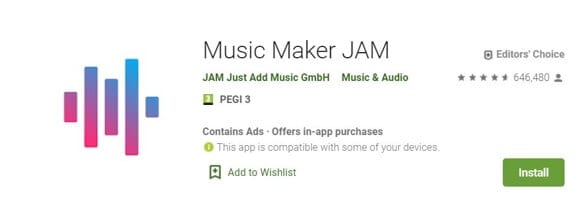
Music Maker JAM App in Google Play
With the selection of 300 mix packs, Music Maker JAM is one of the best android apps for aspiring musicians who want to compose their music even while they are on the go. You can choose from a variety of samples, audio loops and beats to create your next song or record live performances with the app’s 8-channel mixer. Music Maker JAM also enables you to record vocals, adjust the tempo of the audio files or apply effects to all recordings you edit with this app. Once your recording is ready, you can upload it to SoundCloud directly from the app or post it on Facebook and other social networks.
Pros
- Shake your Android phone to remix a song
- The app lets you choose from more than 300 mix packs
- Supports multi-channel recording
- Offers advanced audio editing options
Cons
- Music Maker JAM is not primarily a voice recorder
- No support for external microphones
7. LectureNotes
Price: Free
Supported OS: Android 3.0 and up
Best for: Students
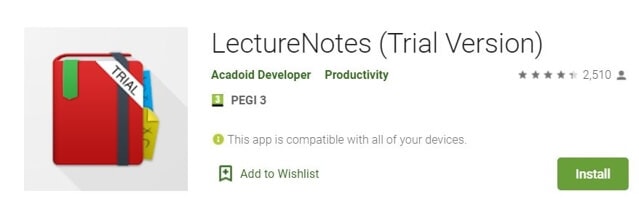
LectureNotes App in Google Play
In case you take notes often, then this app can be an excellent choice for you as it allows you to use a stylus to create notes. However, the trial version limits the number of notebooks to just two, and neither of the notebooks can have more than eight pages. Moreover, if you would like to utilize the app’s voice recording features, you must install LectureRecordings plugin on your device. To capture videos, you must first install the LectureVideos plugin. Another disappointing thing is that you won’t be able to adjust the settings for your audio recording sessions or edit the recording you create with this app.
Pros
- An efficient tool for creating hand-written notes
- The app can be used while your Android phone is offline
- Allows users to export PDF files
- Compatible with OneNote and Evernote apps
Cons
- Underwhelming voice recording options
- You must install a plugin to record audio files
8. ASR Voice Recorder
Price: Free, but contains ads
Supported OS: Android 5.0 and up
Best for: Journalists, musicians, students

ASR Voice Recorder App in Google Play
A brief look at the list of features this app offers, you will find this is a well-rounded voice recorder because it offers all the tools you are going to need to create high-quality recordings. You can choose from a variety of file formats, add notes to recordings at recording or control the playback speed of all audio files you listen to in AVR Voice Recorder. You can also skip silences, connect a headset microphone to the app via Bluetooth or arrange your voice recordings in any way you want. The app lets you upload your audio files to Dropbox, Google Drive, and other file-hosting platforms.
Pros
- Provides excellent audio recording options for free
- Allows users to save recordings in different file formats
- Equipped with an audio playback controller
- Sharing multiple files is easy
Cons
- Offers only basic audio editing tools
- No audio transcription options
9. Call Recorder
Price: Free, but contains ads
Supported OS: Android 4.0 and up
Best for: Marketing professionals
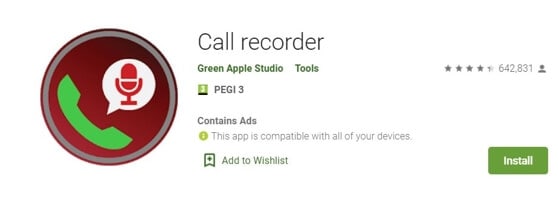
Call Recorder App in Google Play
If you would like to record all incoming and outgoing calls on your device, the Call Recorder app is one of the best options you have at your disposal. Besides recording all calls from whitelisted numbers automatically, this app also allows you to choose from a variety of different recording modes. Furthermore, Call Recorder lets you blacklist numbers from which you don’t want to receive calls and enables you to organize your recordings efficiently. All files created with this app can be sent via Skype, SMS, Dropbox and other messaging services, which makes Call Recorder app a perfect choice for marketing professionals.
Pros
- No previous experience required to start using the app
- Records an unlimited number of phone calls
- Simple audio file management
- Offers several recording modes
Cons
- No voice recording options
- Doesn’t provide audio editing tools
10. Otter Voice Meeting Notes
Price: Free, but offers in-app purchases
Supported OS: Android 5.0 and up
Best for: Large teams of professionals
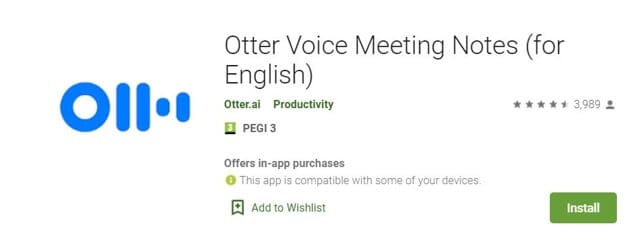
Otter Voice Meeting Notes App in Google Play
Besides being a powerful voice recorder, Otter Voice Meeting Notes is a collaborative tool that enables multiple team members to highlight and edit the transcripts this app generates in real-time. In addition to recording business meetings, you can also use Otter Voice Meeting Notes to record interviews, webinars or podcasts . Starting a new recording session takes only a second since you just have to tap on the Record button to capture the voices of all speakers in the room. What’s more, the app lets you add photos or slides to transcripts while the recording session is still in progress.
Pros
- Makes collaboration on a single transcript easier
- The app’s AI identifies different speakers automatically after the initial training
- Allows users to export MP3 audio files
- Compatible with the Call Recorder app
Cons
- In-app purchases are expensive
- Audio editing tools could be better
You may also like: 10 Best Free Discord Voice Changers
Conclusion
Creating an audio note or recording an entire interview with an Android device has never been easier. Each of the voice recorder apps we featured in this article enables you to create high-quality audio files you can share via email or store on the cloud.
Which of these Android voice recorders you are going to choose depends on a broad spectrum of factors, which range from the context in which you want to make the recording toaudio editing tools you want to use to process the audio files you created.
We’ve summarized the essential information in the table below. Hope that will help you to determine. What is your favorite Android voice recorder? Leave a comment and let us know.
| Voice recorder app | Price | Supported OS | User Rating | Best for |
|---|---|---|---|---|
| Easy Voice Recorder Pro | $3.99 | Varies with the device | 4.8 | Students, musicians, and businessmen |
| Smart Recorder – High-quality voice recorder | Free, but contains ads and offers in-app purchases | Varies with the device | 4.7 | Students, musicians, and businessmen |
| RecForge II Audio Recorder | Free, but contains ads | Android 4.0 and up | 4.0 | Musicians |
| Hi-Q MP3 Voice Recorder | Free | Varies with the device | 4.5 | Students |
| Voice Recorder | Free, but contains ads | Android 4.1 and up | 4.8 | Students, musicians, and businessmen |
| Music Maker JAM | Free, but contains ads and offers in-app purchases | Varies with the device | 4.6 | Musicians |
| LectureNotes | Free | Android 3.0 and up | 4.3 | Students |
| ASR Voice Recorder | Free, but contains ads | Android 5.0 and up | 4.4 | Journalists, musicians, students |
| Call Recorder | Free, but contains ads | Android 4.0 and up | 4.3 | Marketing professionals |
| Otter Voice Meeting Notes | Free, but offers in-app purchases | Android 5.0 and up | 4.5 | Large teams of professionals |
Benjamin Arango
Benjamin Arango is a writer and a lover of all things video.
Follow @Benjamin Arango
Benjamin Arango
Mar 27, 2024• Proven solutions
Memorizing every bit of information you need to perform your daily or weekly tasks becomes increasingly difficult as your workload rises. Students, journalists, and professionals from a wide array of industries can benefit from making audio notes or even recording entire conversations with their Smartphones.
A simple Android voice recorder can make this task easy since you can just tap on the Record button and create an audio note in seconds. However, with so many voice recorder apps for Android devices out there, finding the one best suited for your needs can be more complicated than it seems. So, in this article, we are going to help you discover some best free voice recorder for an Android device you are currently using.
Want to record voiceover and audio on iPhone? Check 10 Best Voice Recorder Apps for iPhones >>
10 Best Free Voice Recording Apps for Android Devices
Recording audio is no longer a highly technical process since now you can create an audio note or record an interview with an Android phone and a voice recorder app. The question is which voice recording app should you install on your device. So, let’s take a look at some of the most potent Android voice recorders you can find at Google Play Store.
1. Easy Voice Recorder Pro
Price: $3.99
Supported OS: Varies with the device
Best for: Students, musicians, and businessmen
App in Google Play
As the app’s name suggests making recordings for a broad range of purposes is easy. All you need to do is launch the app and start a new audio recording session. Easy Voice Recorder Pro doesn’t limit the duration of your recordings, and it also allows you to compress the recorded audio . That is perfect if you need to record long lectures or conversations. Besides, you can connect an external microphone with the app in case you want to increase the quality of the sound you are recording. The app also lets you store your recordings on Dropbox or Google Drive, while it also offers the possibility to send recordings via email.
Easy Voice Recorder Pro Interface
Pros
- Allows users to manage and organize their recordings effortlessly
- Supports all standard output audio file formats
- Offers the option to record in stereo
- Recordings made with this app can be used as the ringtone
Cons
- Ads can be frustrating
- Limited basic audio editing tools
2. Smart Recorder – High-quality voice recorder
Price: Free, but contains ads and offers in-app purchases
Supported OS: Varies with the device
Best for: Students, musicians, and businessmen
App in Google Play
Capturing high-quality audio recordings effortlessly is the ultimate goal of all Android users who want to use voice recorders. As one of the best free voice recorders for Android, Smart Recorder app has a plethora of features that enable users to make high-quality audio recordings even in imperfect conditions. Options like Live Audio Spectrum Analyzer, microphone gain calibration or automatic and manual sensitivity control in Skip Silence mode are just a few reasons why this app has over 10 million installs. However, you should keep in mind that you cannot create audio files that are larger than 2 GB with this app.
Smart Recorder – High-quality voice recorder Interface
Pros
- Provides full control over the audio recording process
- Equipped with the Wave Lock feature that prevents the device from going into the sleep mode
- Features a live audio spectrum analyzer
- Preserves battery life
Cons
- No phone call recording options
- Limited file-sharing capabilities
3. RecForge II Audio Recorder
Price: Free, but contains ads
Supported OS: Android 4.0 and up
Best for: Musicians
RecForge-audio-recorder App in Google Play
If you are looking for an Android voice recorder that allows you to customize bit rates, sample rates, choose codecs or record in mono or stereo mode, then you should consider installing RecForge II Audio Recorder on your device. The app allows you to schedule recordings, connect different types of external microphones or adjust the gain manually. In addition, you can also adjust the pitch , tempo and the playback rate of all audio files you record and edit with this app. RecForge II Audio Recorder continues working even while you are using other apps, and it keeps the battery consumption at the very minimum.
Pros
- Supports nearly all common audio file formats
- Offers a versatile set of audio editing tools
- Excellent file-sharing capabilities
- Allows users to increase the audio quality by disabling Automatic Gain Control
Cons
- The maximum duration of a recording is limited for some file formats
- Can be too complicated for inexperienced users
4. Hi-Q MP3 Voice Recorder
Price: Free
Supported OS: Varies with the device
Best for: Students, general use
Hi-Q MP3 Voice Recorder App in Google Play
You don’t need any previous audio recording experience to record long lectures, interviews and all other types of voice recordings with Hi-Q MP3 Voice Recorder. The free version of the app limits the maximum duration of a recording you can make to just 10 minutes. That is why you must upgrade to the Pro version of Hi-Q MP3 Voice Recorder if you want to capture hours of material directly from your phone. The best part is that all versions of the app automatically upload recordings to Google Drive or Dropbox which frees up space on your device.
Pros
- Intuitive and modernly designed interface
- Simple audio recording session setup
- Customizable audio quality
- Excellent file management capabilities
Cons
- Recording with external microphones is not an option
- The free version of the app limits the maximum duration of recordings
5. Voice Recorder
Price: Free, but contains ads
Supported OS: Android 4.1 and up
Best for: Students, musicians, and businessmen
Voice Recorder App in Google Play
If you are looking for an app you can use to record an interview, a business meeting or a lecture, then Voice Recorder may be one of your best options. You can record audio files without any restrictions and visualize the sounds with the Audio Spectrum Analyzer. The app continues recording from the background even while the phone’s screen is off which preserves battery life and enables you to perform other tasks while the recording session is in progress. Voice Recorder offers a broad range of file-sharing capabilities so that you can easily send your audio recordings via SMS, email and the Messenger app or share them on Facebook and WhatsApp.
Pros
- Available for free to all Android users
- Stopping, pausing or resuming a recording session is easy
- Allows users to adjust the sample rate
- Offers the microphone gain calibration tool
Cons
- Audio recordings can only be saved in two different file formats
- Doesn’t provide audio editing options
6. Music Maker JAM
Price: Free, but contains ads and offers in-app purchases
Supported OS: Varies with the device
Best for: Musicians
Music Maker JAM App in Google Play
With the selection of 300 mix packs, Music Maker JAM is one of the best android apps for aspiring musicians who want to compose their music even while they are on the go. You can choose from a variety of samples, audio loops and beats to create your next song or record live performances with the app’s 8-channel mixer. Music Maker JAM also enables you to record vocals, adjust the tempo of the audio files or apply effects to all recordings you edit with this app. Once your recording is ready, you can upload it to SoundCloud directly from the app or post it on Facebook and other social networks.
Pros
- Shake your Android phone to remix a song
- The app lets you choose from more than 300 mix packs
- Supports multi-channel recording
- Offers advanced audio editing options
Cons
- Music Maker JAM is not primarily a voice recorder
- No support for external microphones
7. LectureNotes
Price: Free
Supported OS: Android 3.0 and up
Best for: Students
LectureNotes App in Google Play
In case you take notes often, then this app can be an excellent choice for you as it allows you to use a stylus to create notes. However, the trial version limits the number of notebooks to just two, and neither of the notebooks can have more than eight pages. Moreover, if you would like to utilize the app’s voice recording features, you must install LectureRecordings plugin on your device. To capture videos, you must first install the LectureVideos plugin. Another disappointing thing is that you won’t be able to adjust the settings for your audio recording sessions or edit the recording you create with this app.
Pros
- An efficient tool for creating hand-written notes
- The app can be used while your Android phone is offline
- Allows users to export PDF files
- Compatible with OneNote and Evernote apps
Cons
- Underwhelming voice recording options
- You must install a plugin to record audio files
8. ASR Voice Recorder
Price: Free, but contains ads
Supported OS: Android 5.0 and up
Best for: Journalists, musicians, students
ASR Voice Recorder App in Google Play
A brief look at the list of features this app offers, you will find this is a well-rounded voice recorder because it offers all the tools you are going to need to create high-quality recordings. You can choose from a variety of file formats, add notes to recordings at recording or control the playback speed of all audio files you listen to in AVR Voice Recorder. You can also skip silences, connect a headset microphone to the app via Bluetooth or arrange your voice recordings in any way you want. The app lets you upload your audio files to Dropbox, Google Drive, and other file-hosting platforms.
Pros
- Provides excellent audio recording options for free
- Allows users to save recordings in different file formats
- Equipped with an audio playback controller
- Sharing multiple files is easy
Cons
- Offers only basic audio editing tools
- No audio transcription options
9. Call Recorder
Price: Free, but contains ads
Supported OS: Android 4.0 and up
Best for: Marketing professionals
Call Recorder App in Google Play
If you would like to record all incoming and outgoing calls on your device, the Call Recorder app is one of the best options you have at your disposal. Besides recording all calls from whitelisted numbers automatically, this app also allows you to choose from a variety of different recording modes. Furthermore, Call Recorder lets you blacklist numbers from which you don’t want to receive calls and enables you to organize your recordings efficiently. All files created with this app can be sent via Skype, SMS, Dropbox and other messaging services, which makes Call Recorder app a perfect choice for marketing professionals.
Pros
- No previous experience required to start using the app
- Records an unlimited number of phone calls
- Simple audio file management
- Offers several recording modes
Cons
- No voice recording options
- Doesn’t provide audio editing tools
10. Otter Voice Meeting Notes
Price: Free, but offers in-app purchases
Supported OS: Android 5.0 and up
Best for: Large teams of professionals
Otter Voice Meeting Notes App in Google Play
Besides being a powerful voice recorder, Otter Voice Meeting Notes is a collaborative tool that enables multiple team members to highlight and edit the transcripts this app generates in real-time. In addition to recording business meetings, you can also use Otter Voice Meeting Notes to record interviews, webinars or podcasts . Starting a new recording session takes only a second since you just have to tap on the Record button to capture the voices of all speakers in the room. What’s more, the app lets you add photos or slides to transcripts while the recording session is still in progress.
Pros
- Makes collaboration on a single transcript easier
- The app’s AI identifies different speakers automatically after the initial training
- Allows users to export MP3 audio files
- Compatible with the Call Recorder app
Cons
- In-app purchases are expensive
- Audio editing tools could be better
You may also like: 10 Best Free Discord Voice Changers
Conclusion
Creating an audio note or recording an entire interview with an Android device has never been easier. Each of the voice recorder apps we featured in this article enables you to create high-quality audio files you can share via email or store on the cloud.
Which of these Android voice recorders you are going to choose depends on a broad spectrum of factors, which range from the context in which you want to make the recording toaudio editing tools you want to use to process the audio files you created.
We’ve summarized the essential information in the table below. Hope that will help you to determine. What is your favorite Android voice recorder? Leave a comment and let us know.
| Voice recorder app | Price | Supported OS | User Rating | Best for |
|---|---|---|---|---|
| Easy Voice Recorder Pro | $3.99 | Varies with the device | 4.8 | Students, musicians, and businessmen |
| Smart Recorder – High-quality voice recorder | Free, but contains ads and offers in-app purchases | Varies with the device | 4.7 | Students, musicians, and businessmen |
| RecForge II Audio Recorder | Free, but contains ads | Android 4.0 and up | 4.0 | Musicians |
| Hi-Q MP3 Voice Recorder | Free | Varies with the device | 4.5 | Students |
| Voice Recorder | Free, but contains ads | Android 4.1 and up | 4.8 | Students, musicians, and businessmen |
| Music Maker JAM | Free, but contains ads and offers in-app purchases | Varies with the device | 4.6 | Musicians |
| LectureNotes | Free | Android 3.0 and up | 4.3 | Students |
| ASR Voice Recorder | Free, but contains ads | Android 5.0 and up | 4.4 | Journalists, musicians, students |
| Call Recorder | Free, but contains ads | Android 4.0 and up | 4.3 | Marketing professionals |
| Otter Voice Meeting Notes | Free, but offers in-app purchases | Android 5.0 and up | 4.5 | Large teams of professionals |
Benjamin Arango
Benjamin Arango is a writer and a lover of all things video.
Follow @Benjamin Arango
Echoing Quietness: A Guide to Purifying Your Podcasts From High-Frequency Humming
Creating content can be fun most of the time. The shoot is perfect and the scenes are spotless. You are confident that you got everything right. But then, when you listen to the recording, you notice a continuous hissing sound. This takes you back as you have to decide to remove hiss from audio before editing the video. Luckily, several hiss removal approaches will work just fine. In this article, we take you through the audio cleanup process to help you with your hiss reduction efforts.
AI Vocal Remover A cross-platform for facilitating your video editing process by offering valuable benefits!
Free Download Free Download Learn More

Part 1. Audio Hiss: What is it and Why Remove it
A hiss is a broadband noise across the audible spectrum of your audio. It becomes more intense in high frequencies, affecting the quality of the vocals and instrumentals in your audio. A hiss could sound like blue noise and is often caused by the electronic components themselves, which is referred to as self or inherent noise.

A hiss is measured by decibels and is usually difficult to avoid because it is produced by electronic components. You will usually hear the hiss as air that is getting out of a narrow passage. You may also hear a reverb, which is a sound that occurs in space and sends sound waves out in all directions. Since this is a component of the original recording, it is impossible to delete it. However, hiss reduction is possible with the right editing software.
Causes of Hiss in Audio Recordings
- Electronic components such as microphones, video cameras, and interfaces create self-noise because of the heat energy created by the moving parts
- Audio circuits generate self-noise, with the noise floor being the level of the inherent noise in the circuit
- Screening and quality of electronic components, which cheap and poorly made equipment producing more hiss
- Poor-quality audio cables contribute to hiss and hum when they are picked up during recording
Importance of Removing Hiss for a Professional Sound
Removing hiss from audio is important for a professional sound because it makes the sound clearer and polished. The polished sound leads to
- Improved clarity and focus on the main vocals or instruments in a recording sound
- A more professional and smooth sound
- Increases listener engagement
- More understandable vocals and more vibrant instrumentals
Part 2. Remove Hiss from Audio With Premiere Pro: Step-by-Step Guide
When you discover hiss or reverb sound in your recordings, you may use professional video editing software to reduce it. Audacity remove hiss is a good option when you are on a budget. However, it may take longer and require more effort to reduce hiss with the software. Another great and effective approach is to remove hiss Premiere Pro. The software removes hisses, background noises, and low ambient noises in your recording. Let’s explore the steps you need to take:
Step 1: Set Up Your Project
Once you have downloaded and installed Adobe Premiere Pro, launch it on your desktop. Import the audio files with background noise or hiss.

Go to File, then import and select the files you want from your computer. Another way is to drag and drop those files from your computer’s folder onto the Premiere Pro. Then create a new sequence by right-clicking on the files and selecting New Sequence or drag the files into the Timeline.
Step 2: Add the DeNoise Effect
Hiss removal on Premiere Pro is made possible by the denoise effect. On the Windows menu, find effects and make sure the DeNoise has a checkmark on it. All the effects available are accessible on the Effects tab from the project panel. Type DeNoise in the search box, click and drag it to the audio track, then play the audio to listen to the effect in action.

Step 3: Adjust Settings
When you add an effect to your clicks, it shows in the Effects Control panel. Adjust the custom settings of the DeNoise effect until it sounds just right. Open the Clip Fx Editor from the Custom Setup to modify the amount of DeNoise you want to apply. The Gain slider and presets allow you to make appropriate adjustments.

Step 4: Repair the Audio
Using the Essential Sound Panel, repair the audio appropriately. The panel offers tools for removing background hisses and noises affecting your recording. With those simple 4 steps, you will reduce hiss in your recording and make your audio clearer.
Part 3. Remove Hiss from Audio with Wondershare Filmora : Quick Alternative
Wondershare Filmora is a great video editing software with great audio capabilities. When removing reverb and hiss in your audio, the AI Audio DeNoise feature automates the process. Filmora combines AI algorithms, helping you to remove different kinds of background noises in video and audio files. There is also a wide range of features that make editing with Filmora a breeze. With the AI Copilot, you have a virtual friend to help you in every step of your editing journey.
Free Download For Win 7 or later(64-bit)
Free Download For macOS 10.14 or later
AI Audio Denoise
Removing hiss and other background noises with Filmora is quick and easy with the AI Audio DeNoise feature. The AI DeNoise features offer several benefits that automatically improve the quality of your audio:
- Removing Background Noise Accurately: Users have three noise reduction options to use separately or combined for accurate noise reduction. The first is AI Voice Enhancement which increases the voice in low volume, removing a small amount of background noise. Then you have Reverb Reduction which reduces audio reverberation to improve the clarity of voice in reverberant environments like empty halls. The other option is Hiss Reduction which removes electrical noise from audio transmission and recording devices.
- Clean up Audio: The AI-powered feature reduces background noise easily and efficiently. Save more time editing your files while improving the audio quality.
- Meet Needs of Multiple Scenes: By reducing or removing noise from your video, the AI Audio DeNoise feature helps you produce quality videos and audio for all scenarios. You can edit the audio specifically for a podcast, an online meeting, or even online courses.
To remove hiss and reverb from audio with Filmora, follow these simple steps:
Step 1Import and Select the Audio File
Once you launch Filmora, import your audio or video files to Filmora and add them to the Timeline. Then click on the clip you want to remove the noise and the audio settings window will appear.

Step 2Adjust Audio Appropriately
Adjust the audio denoise functions to improve the quality of the audio. This includes the hiss reduction, reverb reduction, and voice enhancement. This will improve the overall quality of your audio.

Part 4. Tips and Tricks to Avoid Hiss and Reverb Noise
The problem of hissing sound and reverb noise usually comes from the equipment itself. However, some background noise may add to the problem. Making a few adjustments to the recording stage may help in reducing hiss and background noise:
- Optimize the Recording Space
The noise-producing items in your recording space may add to the hissing noise in your audio. While most of the noise may seem innocent, they may amplify themselves when listening to the recorded footage. Optimizing your space before you start, such as closing the windows and doors or turning off your electronic devices will help to reduce the noise.
- Reduce Subject-to-Microphone Distance
Keeping the microphone as close as possible to the subject will drastically improve the speech-to-noise ratio. The microphone will record more of the subject’s voice than the background noise, giving you a clearer audio output.
- Use a Microphone with Gain-Boost
An enhanced gain microphone preamp helps to reduce hiss and notice from the audio in an incredible way. Specifically, the camera’s preamplifier does not add gain because the volume setting is kept low.
- Use Directional Microphones
Usually, microphones signal outside their axis. This is often the case for cardioid polar and short gun patterns. This quality is great for reducing noise when you use directional microphones. The microphone will only focus on what you are interested in, ignoring the background noise.
- Turn Off Camera’s Auto-Gain
The AGC or Auto Gain Control feature is popular in modern cameras. It automatically adjusts the gain for low- and high-volume sounds to make them even. However, it can enhance everything for a quiet setting, causing hissing background noise. Turning the feature off gives you more control over what sounds to focus on.
- Reduce the Number of Open Microphones
Open microphones will continue recording audio even when you are not interested in that sound. Keeping this number low will help reduce hissing sound by focusing only on what you are recording.
Conclusion
Hiss and reverb background noise is an annoying problem. The unwanted sounds affect the quality of your audio and the level of engagement in your footage. While eliminating causes of hiss when recording is the best way to reduce it, sometimes you may notice when it is too late. Using the right editing software will help you reduce the noise and improve the quality of your audio. Wondershare Filmora allows you to do this with the AI Audio Denoise feature. The AI-powered feature will automatically reduce hiss noise and reverb in your clips, giving you clearer and more engaging audio.
Free Download Free Download Learn More
Part 1. Audio Hiss: What is it and Why Remove it
A hiss is a broadband noise across the audible spectrum of your audio. It becomes more intense in high frequencies, affecting the quality of the vocals and instrumentals in your audio. A hiss could sound like blue noise and is often caused by the electronic components themselves, which is referred to as self or inherent noise.
A hiss is measured by decibels and is usually difficult to avoid because it is produced by electronic components. You will usually hear the hiss as air that is getting out of a narrow passage. You may also hear a reverb, which is a sound that occurs in space and sends sound waves out in all directions. Since this is a component of the original recording, it is impossible to delete it. However, hiss reduction is possible with the right editing software.
Causes of Hiss in Audio Recordings
- Electronic components such as microphones, video cameras, and interfaces create self-noise because of the heat energy created by the moving parts
- Audio circuits generate self-noise, with the noise floor being the level of the inherent noise in the circuit
- Screening and quality of electronic components, which cheap and poorly made equipment producing more hiss
- Poor-quality audio cables contribute to hiss and hum when they are picked up during recording
Importance of Removing Hiss for a Professional Sound
Removing hiss from audio is important for a professional sound because it makes the sound clearer and polished. The polished sound leads to
- Improved clarity and focus on the main vocals or instruments in a recording sound
- A more professional and smooth sound
- Increases listener engagement
- More understandable vocals and more vibrant instrumentals
Part 2. Remove Hiss from Audio With Premiere Pro: Step-by-Step Guide
When you discover hiss or reverb sound in your recordings, you may use professional video editing software to reduce it. Audacity remove hiss is a good option when you are on a budget. However, it may take longer and require more effort to reduce hiss with the software. Another great and effective approach is to remove hiss Premiere Pro. The software removes hisses, background noises, and low ambient noises in your recording. Let’s explore the steps you need to take:
Step 1: Set Up Your Project
Once you have downloaded and installed Adobe Premiere Pro, launch it on your desktop. Import the audio files with background noise or hiss.
Go to File, then import and select the files you want from your computer. Another way is to drag and drop those files from your computer’s folder onto the Premiere Pro. Then create a new sequence by right-clicking on the files and selecting New Sequence or drag the files into the Timeline.
Step 2: Add the DeNoise Effect
Hiss removal on Premiere Pro is made possible by the denoise effect. On the Windows menu, find effects and make sure the DeNoise has a checkmark on it. All the effects available are accessible on the Effects tab from the project panel. Type DeNoise in the search box, click and drag it to the audio track, then play the audio to listen to the effect in action.
Step 3: Adjust Settings
When you add an effect to your clicks, it shows in the Effects Control panel. Adjust the custom settings of the DeNoise effect until it sounds just right. Open the Clip Fx Editor from the Custom Setup to modify the amount of DeNoise you want to apply. The Gain slider and presets allow you to make appropriate adjustments.
Step 4: Repair the Audio
Using the Essential Sound Panel, repair the audio appropriately. The panel offers tools for removing background hisses and noises affecting your recording. With those simple 4 steps, you will reduce hiss in your recording and make your audio clearer.
Part 3. Remove Hiss from Audio with Wondershare Filmora : Quick Alternative
Wondershare Filmora is a great video editing software with great audio capabilities. When removing reverb and hiss in your audio, the AI Audio DeNoise feature automates the process. Filmora combines AI algorithms, helping you to remove different kinds of background noises in video and audio files. There is also a wide range of features that make editing with Filmora a breeze. With the AI Copilot, you have a virtual friend to help you in every step of your editing journey.
Free Download For Win 7 or later(64-bit)
Free Download For macOS 10.14 or later
AI Audio Denoise
Removing hiss and other background noises with Filmora is quick and easy with the AI Audio DeNoise feature. The AI DeNoise features offer several benefits that automatically improve the quality of your audio:
- Removing Background Noise Accurately: Users have three noise reduction options to use separately or combined for accurate noise reduction. The first is AI Voice Enhancement which increases the voice in low volume, removing a small amount of background noise. Then you have Reverb Reduction which reduces audio reverberation to improve the clarity of voice in reverberant environments like empty halls. The other option is Hiss Reduction which removes electrical noise from audio transmission and recording devices.
- Clean up Audio: The AI-powered feature reduces background noise easily and efficiently. Save more time editing your files while improving the audio quality.
- Meet Needs of Multiple Scenes: By reducing or removing noise from your video, the AI Audio DeNoise feature helps you produce quality videos and audio for all scenarios. You can edit the audio specifically for a podcast, an online meeting, or even online courses.
To remove hiss and reverb from audio with Filmora, follow these simple steps:
Step 1Import and Select the Audio File
Once you launch Filmora, import your audio or video files to Filmora and add them to the Timeline. Then click on the clip you want to remove the noise and the audio settings window will appear.
Step 2Adjust Audio Appropriately
Adjust the audio denoise functions to improve the quality of the audio. This includes the hiss reduction, reverb reduction, and voice enhancement. This will improve the overall quality of your audio.
Part 4. Tips and Tricks to Avoid Hiss and Reverb Noise
The problem of hissing sound and reverb noise usually comes from the equipment itself. However, some background noise may add to the problem. Making a few adjustments to the recording stage may help in reducing hiss and background noise:
- Optimize the Recording Space
The noise-producing items in your recording space may add to the hissing noise in your audio. While most of the noise may seem innocent, they may amplify themselves when listening to the recorded footage. Optimizing your space before you start, such as closing the windows and doors or turning off your electronic devices will help to reduce the noise.
- Reduce Subject-to-Microphone Distance
Keeping the microphone as close as possible to the subject will drastically improve the speech-to-noise ratio. The microphone will record more of the subject’s voice than the background noise, giving you a clearer audio output.
- Use a Microphone with Gain-Boost
An enhanced gain microphone preamp helps to reduce hiss and notice from the audio in an incredible way. Specifically, the camera’s preamplifier does not add gain because the volume setting is kept low.
- Use Directional Microphones
Usually, microphones signal outside their axis. This is often the case for cardioid polar and short gun patterns. This quality is great for reducing noise when you use directional microphones. The microphone will only focus on what you are interested in, ignoring the background noise.
- Turn Off Camera’s Auto-Gain
The AGC or Auto Gain Control feature is popular in modern cameras. It automatically adjusts the gain for low- and high-volume sounds to make them even. However, it can enhance everything for a quiet setting, causing hissing background noise. Turning the feature off gives you more control over what sounds to focus on.
- Reduce the Number of Open Microphones
Open microphones will continue recording audio even when you are not interested in that sound. Keeping this number low will help reduce hissing sound by focusing only on what you are recording.
Conclusion
Hiss and reverb background noise is an annoying problem. The unwanted sounds affect the quality of your audio and the level of engagement in your footage. While eliminating causes of hiss when recording is the best way to reduce it, sometimes you may notice when it is too late. Using the right editing software will help you reduce the noise and improve the quality of your audio. Wondershare Filmora allows you to do this with the AI Audio Denoise feature. The AI-powered feature will automatically reduce hiss noise and reverb in your clips, giving you clearer and more engaging audio.
Also read:
- Updated 2024 Approved Top-Ranked Ringtones to Enhance Your Call Experience
- Updated Discover the 10 Premier Music Editing Apps for iPhone and Android
- Updated 2024 Approved Maximizing Your Library A Detailed Walkthrough of Downloading Music From Spotify
- Discovering the Top 5 Audio Mixers Perfect for Mac Users for 2024
- Updated Enhancing Aural Experiences Implementing Progressive Volume Changes Today
- In 2024, Hearing Locations of Exasperated Dogs Communicating Through Bark
- New YouTube Audio Resource Hub for 2024
- Updated Premier Noise-Canceling Software for Enhancing Music and Speech Clarity
- New 2024 Approved Techniques for Sound Isolation Preventing Noise Contamination in Audio Capture
- 2024 Approved The Best in Live Sound Alteration Technology In-Depth Reviews to Guide Your Choices
- New Elevate Your Voice Notes with These Premier iPhone Applications for 2024
- User-Friendly Speech Transformation Elements Cataloging Tools, Guidelines, and Different Approaches for 2024
- New Elevating Windows Speaker Output Three Effective, Costless Strategies
- New 2024 Approved 3 Top-Ranked Online Tools for Enhancing Audio Clarity
- New 2024 Approved Top 10 Live Audio Transformers In-Depth Analysis and Recommendations
- In 2024, Essential Economical Mac Audiophiles Multitrack Mixer App
- 2024 Approved Ultimate Guide to the 5 Premium Car Audio Mixer Programs for Mac
- How Does Dynamic Range Processing Improve Audio Quality for 2024
- Updated Top 8 Essential Audio Treasures in the Gaming World for 2024
- New In 2024, 6 Best Voice Changer During Call Android & iPhone
- New Streamlining Your Mixes Normalizing Audio in DaVinci Resolve
- The Art of Low-Pitched Audio Transforming Your Voice in Filmora 2023 for 2024
- Updated In 2024, Premier Collection 11 Complimentary Mobile Audio Modification Tools for Both iOS and Android
- New Free & Frugal Mac MP3 Optimizer App
- Updated 2024 Approved Discover the Ultimate 10 Audio Tools for Professionals on Both OSes
- Free Film Production Integrating Soundtracks Into Your Workflow for 2024
- New 2024 Approved Level Up Your Recording 3 Simple and Effective Methods
- Three Ways to Sim Unlock Vivo S17 Pro
- Updated 8 Video Editing Software That Wont Slow You Down
- In 2024, 9 Best Phone Monitoring Apps for Lava Blaze Curve 5G | Dr.fone
- In 2024, Best Anti Tracker Software For OnePlus 12R | Dr.fone
- In 2024, Detailed guide of ispoofer for pogo installation On Vivo X90S | Dr.fone
- In 2024, Dose Life360 Notify Me When Someone Checks My Location On Lava Blaze Pro 5G? | Dr.fone
- How to Fake GPS on Android without Mock Location For your Samsung Galaxy A14 5G | Dr.fone
- New In 2024, Professional Audio Editing Essentials Top 10 Software Solutions
- Top IMEI Unlokers for Your Nokia XR21 Phone
- A How-To Guide on Bypassing Apple iPhone SE (2022) iCloud Activation Lock
- Updated 2024 Approved S Top Picks Free Online Video Invitation Software
- In 2024, The Ultimate Guide to Vivo S18 Pro Pattern Lock Screen Everything You Need to Know
- In 2024, Top 4 SIM Location Trackers To Easily Find Your Lost Xiaomi Redmi Note 12 4G Device
- How To Restore Missing Music Files from Blaze Pro 5G
- In 2024, Top 15 Apps To Hack WiFi Password On Samsung Galaxy A15 4G
- Updated In 2024, Best 7 Ways to Promote Twitch Stream
- Title: New Effortless Audio Extraction Discovering the Best Six Cost-Free Techniques to Transform Videos Into Audible Media for 2024
- Author: Ella
- Created at : 2024-05-05 02:28:08
- Updated at : 2024-05-06 02:28:08
- Link: https://sound-optimizing.techidaily.com/new-effortless-audio-extraction-discovering-the-best-six-cost-free-techniques-to-transform-videos-into-audible-media-for-2024/
- License: This work is licensed under CC BY-NC-SA 4.0.
