
:max_bytes(150000):strip_icc():format(webp)/GettyImages-1305200685-e977d0ca4e9a47e2b006e5b32a9922fd.jpg)
New In 2024, Tutorial on Audio Ducking in Adobe Premiere Pro on Mac
Silent Interludes, Harmonious Sounds: Expert Techniques for Audio Ducking in Adobe Premiere Pro on a Mac Computer
Tutorial on Audio Ducking in Adobe Premiere Pro on Mac

Benjamin Arango
Oct 26, 2023• Proven solutions
Too many times, while mixing voiceover with the background music in a video, the dialogues don’t seem to be audible. That’s when we follow the process of audio ducking in Premiere Pro that would automatically lower the volume of the background music whenever there is a dialogue.
The best thing about Premiere Pro audio ducking is that it is an automatic process and we don’t need to put a lot of effort. To make your job easier, I’m going to let you know how to use the Adobe Premiere Pro audio ducking feature in a step by step manner in this guide.
Part 1: How to Use Audio Ducking to Balance Music and Voiceover in Adobe Premiere Pro on Mac?
If you have been using Adobe Premiere Pro on Mac, then you would already be familiar with the wide range of editing features that it has. One of them is the Premiere Pro audio ducking option that comes inbuilt in the application. Using it, you can automatically lower the volume of the background music and amplify your dialogues.
To perform auto-ducking in Premiere Pro, we first need to define each audio track and then use the ducking feature. Here’s how you can also perform audio ducking in Premiere Pro like a pro.
Step 1: Define the Audio Types
Since Adobe Premiere Pro can’t automatically detect the type of sounds, you need to do it manually. To do audio ducking in Premiere Pro, you can first import your video clip and the voiceover to the application, and drag them to the working timeline.
Now, you can first select the voiceover file that you want to amplify, and from the sidebar on the right, click on “Dialogue” as the type of the audio file.
Once you mark the audio type, you will get different options. Here, go to the “Loudness” option and click on the “Auto Match” button.
Afterward, you can do the same for your background audio file. Select the file and choose its audio type as “Music”. You can also set its loudness to “Auto Match” if you want to.
Step 2: Perform Auto Ducking in Premiere Pro
Now when you have set the audio types, you can just find the Ducking option on the sidebar and turn it on. Here, you can first click on the dialogue icon from the top and get the needed options. You can adjust its sensitivity and set a level or improve or reduce its quality.
Apart from the dialogue icon, you can also click on the Music icon and do the same. For instance, you can reduce the quality of the background music and increase the level of the dialogue track.
Step 3: Make the Final Changes
Great! You can now preview the changes you have made and check the audio ducking results in Premiere Pro. If you want to finalize things, then you can perform keyframing and manually adjust the volume.
Furthermore, you can also perform an instant hard ducking in Premiere Pro. For this, just choose the track, go to the side panel, and select Preset > Music > Hard Vocal Ducking. While it would get instant results in Adobe Premiere audio ducking, the results might not be so effective.
Part 2: Wondershare Filmora : An Easier Way to Auto Duck Your Audios on Mac
As you can see, the Premiere Pro audio ducking feature can get a bit complicated if you are a beginner. Therefore, if you are looking for a simpler and more effective automatic ducking solution, then use Wondershare Filmora. This intuitive and diverse video/audio editing tool has an automatic audio ducking option that would make your job a whole lot easier.


To learn how to perform automatic audio ducking in your videos on Mac via Wondershare Filmora, one can follow these steps:
Step 1: Load the Video or Audio Files on Filmora
Firstly, you can just launch Wondershare Filmora on your Mac and import your videos/audios. You can drag and drop the files or just go to its Import Menu option to browse the files. Afterward, you can drag the files to the timeline at the bottom to work on them.
On the native interface of Filmora, you can also directly record voiceovers. Just click on the voiceover icon (below the preview window) and start recording any dialogue.
Not just that, you can also find a wide range of royalty-free music on Filmora that you can readily use in your projects without any copyright issues.
Step 2: Perform Automatic Audio Ducking on Filmora
Great! Now you can see your video and the audio track on the timeline of Filmora. At first, you need to select the voiceover (or any other track) that you want to amplify.
Once the desired audio track is selected, right-click it, and choose the “Adjust Audio” option.
As the dedicated Audio Editor will open, just go to the “Ducking” option at the bottom and turn on the “Lower the volume of other clips” feature. You can further select the level to lower the volume of other background clips in the video here.
Step 3: Save and Export Your Video
That’s it! After making the changes, just click on the “OK” button and Filmora would automatically adjust the volume of other clips. You can further make the needed changes in the video and click on the “Export” icon. This will let you save the project in the desired format and resolution on your computer.
Who knew it would be so easy to do auto-ducking in Premiere Pro, right? Though, if you are looking for even a simpler alternative to Adobe Premiere audio ducking, then consider using Wondershare Filmora. A user-friendly and resourceful video editor, it offers a wide range of features and other inbuilt tools that would meet every post-production requirement of yours in one place.
Benjamin Arango
Benjamin Arango is a writer and a lover of all things video.
Follow @Benjamin Arango
Benjamin Arango
Oct 26, 2023• Proven solutions
Too many times, while mixing voiceover with the background music in a video, the dialogues don’t seem to be audible. That’s when we follow the process of audio ducking in Premiere Pro that would automatically lower the volume of the background music whenever there is a dialogue.
The best thing about Premiere Pro audio ducking is that it is an automatic process and we don’t need to put a lot of effort. To make your job easier, I’m going to let you know how to use the Adobe Premiere Pro audio ducking feature in a step by step manner in this guide.
Part 1: How to Use Audio Ducking to Balance Music and Voiceover in Adobe Premiere Pro on Mac?
If you have been using Adobe Premiere Pro on Mac, then you would already be familiar with the wide range of editing features that it has. One of them is the Premiere Pro audio ducking option that comes inbuilt in the application. Using it, you can automatically lower the volume of the background music and amplify your dialogues.
To perform auto-ducking in Premiere Pro, we first need to define each audio track and then use the ducking feature. Here’s how you can also perform audio ducking in Premiere Pro like a pro.
Step 1: Define the Audio Types
Since Adobe Premiere Pro can’t automatically detect the type of sounds, you need to do it manually. To do audio ducking in Premiere Pro, you can first import your video clip and the voiceover to the application, and drag them to the working timeline.
Now, you can first select the voiceover file that you want to amplify, and from the sidebar on the right, click on “Dialogue” as the type of the audio file.
Once you mark the audio type, you will get different options. Here, go to the “Loudness” option and click on the “Auto Match” button.
Afterward, you can do the same for your background audio file. Select the file and choose its audio type as “Music”. You can also set its loudness to “Auto Match” if you want to.
Step 2: Perform Auto Ducking in Premiere Pro
Now when you have set the audio types, you can just find the Ducking option on the sidebar and turn it on. Here, you can first click on the dialogue icon from the top and get the needed options. You can adjust its sensitivity and set a level or improve or reduce its quality.
Apart from the dialogue icon, you can also click on the Music icon and do the same. For instance, you can reduce the quality of the background music and increase the level of the dialogue track.
Step 3: Make the Final Changes
Great! You can now preview the changes you have made and check the audio ducking results in Premiere Pro. If you want to finalize things, then you can perform keyframing and manually adjust the volume.
Furthermore, you can also perform an instant hard ducking in Premiere Pro. For this, just choose the track, go to the side panel, and select Preset > Music > Hard Vocal Ducking. While it would get instant results in Adobe Premiere audio ducking, the results might not be so effective.
Part 2: Wondershare Filmora : An Easier Way to Auto Duck Your Audios on Mac
As you can see, the Premiere Pro audio ducking feature can get a bit complicated if you are a beginner. Therefore, if you are looking for a simpler and more effective automatic ducking solution, then use Wondershare Filmora. This intuitive and diverse video/audio editing tool has an automatic audio ducking option that would make your job a whole lot easier.
To learn how to perform automatic audio ducking in your videos on Mac via Wondershare Filmora, one can follow these steps:
Step 1: Load the Video or Audio Files on Filmora
Firstly, you can just launch Wondershare Filmora on your Mac and import your videos/audios. You can drag and drop the files or just go to its Import Menu option to browse the files. Afterward, you can drag the files to the timeline at the bottom to work on them.
On the native interface of Filmora, you can also directly record voiceovers. Just click on the voiceover icon (below the preview window) and start recording any dialogue.
Not just that, you can also find a wide range of royalty-free music on Filmora that you can readily use in your projects without any copyright issues.
Step 2: Perform Automatic Audio Ducking on Filmora
Great! Now you can see your video and the audio track on the timeline of Filmora. At first, you need to select the voiceover (or any other track) that you want to amplify.
Once the desired audio track is selected, right-click it, and choose the “Adjust Audio” option.
As the dedicated Audio Editor will open, just go to the “Ducking” option at the bottom and turn on the “Lower the volume of other clips” feature. You can further select the level to lower the volume of other background clips in the video here.
Step 3: Save and Export Your Video
That’s it! After making the changes, just click on the “OK” button and Filmora would automatically adjust the volume of other clips. You can further make the needed changes in the video and click on the “Export” icon. This will let you save the project in the desired format and resolution on your computer.
Who knew it would be so easy to do auto-ducking in Premiere Pro, right? Though, if you are looking for even a simpler alternative to Adobe Premiere audio ducking, then consider using Wondershare Filmora. A user-friendly and resourceful video editor, it offers a wide range of features and other inbuilt tools that would meet every post-production requirement of yours in one place.
Benjamin Arango
Benjamin Arango is a writer and a lover of all things video.
Follow @Benjamin Arango
Ultimate List of Powerful Gender-Swapping Apps: Elevating Masculine Voices to Femininity
If you’ve been searching for the best android and iOS voice-changing apps around the internet, you’re on the right spot. Voice-changing applications are always fun. They’re handy when you’re pulling a prank on a friend, or you want some amazing effects to test your voice. Thus, we provide you with all the best male to female voice changer apps in the list below.
Record & Edit Voice Fast before Changing Voice
Before changing your voice from male to female, I suggest you edit your voice first. Filmora is an easy-to-use yet powerful video editor helping you quickly edit voice no matter your voice or the audio extracted from videos. Explore Filmora’s audio editing features and get ready for changing voice!
For Win 7 or later (64-bit)
For macOS 10.12 or later


Part 1: Changing Voice Online for Free with Media.io
If you want to change voice without downloading and installing any app on your mobile phone, you can try some online solutions. Media.io is an all-in-one online video toolkit that allows you to edit, convert and compress video, audio and image files easily. The online voice changer from Media.io can transform your voice to a male voice, female voice, child voice, robot voice, and Donald Duck voice. If you wish to have voice filters, you won’t have any problems in the future with the Media.io voice changer.

This online voice changer works best on the Chrome browser, so you can utilize it whether using a Windows, Mac, Linux, or Chromebook device. As a result, you can deceive your family or friends by speaking in another people’s voice rather than your own. Doesn’t that sound like fun?
![]()
A cross-platform for making videos anywhere for all creators

Why your video editing isn’t good enough? How about some creative inspo?
- 100 Million+ Users
- 150+ Countries and Regions
- 4 Million+ Social Media Followers
- 5 Million+ Stock Media for Use
* Secure Download

Part 2: Best Male to Female Voice Changer Apps for iPhone and Android
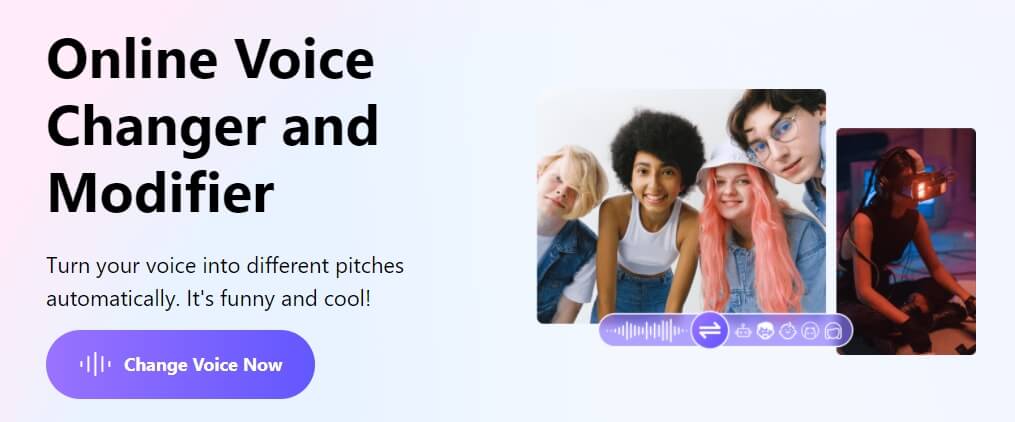
- Girls Voice Changer
- Voice Changer Voice Recorder Editor & Effect
- VoiceFX
- Voice Changer
- Voice Changer - Audio effects
- Magic Call App
- Voice Changer and Sound Recorder
- Super Voice Editor
- Voice Changer with Effects
- Voice Changer - Girls Voice changer Male to Female
1. Girls Voice Changer
Available for: Android, iOS
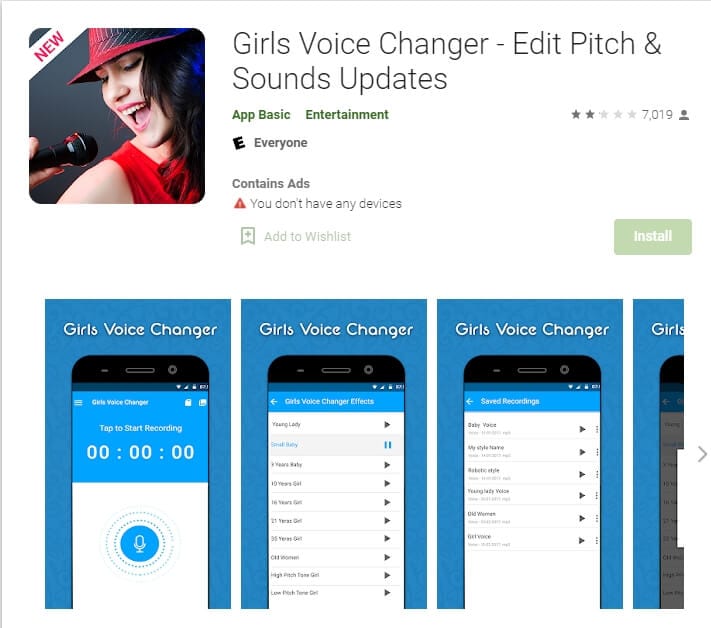
This girl voice changer app is highly portable and easy for any user to use comfortably. It is specifically more popular for changing male voice to female and for pitch adjustments. It’s completely free, so download on your android if you have a storage of about 8MB ready, and start using it!
This male-to-female voice changer app has several options in the library. Though the pitch adjustments are easy to make, some users have informed a lack of performance on very high-pitched settings. However, the smoothness of an android application also depends on how much space is readily available in the device. So next time you’re bored at a part, you have the perfect partner!
2. Voice Changer Voice Recorder Editor & Effect
Available for: Android
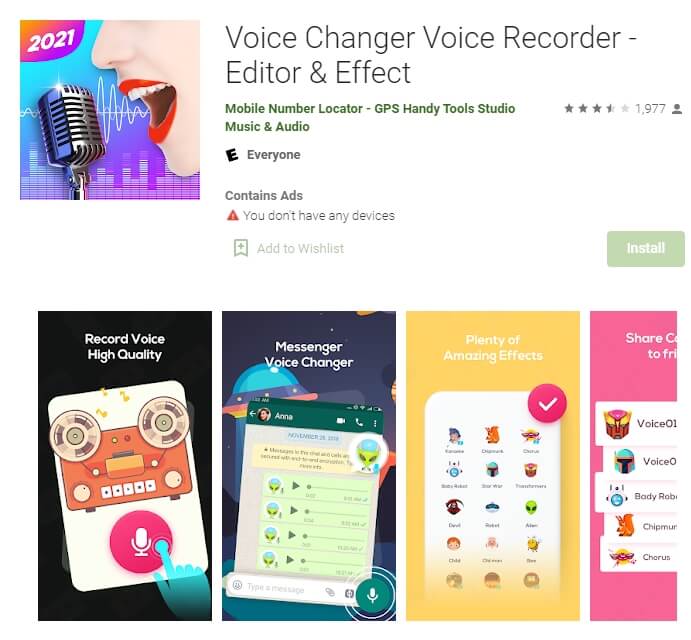
This voice changer application is for multi-purpose. Yes, you can use it as a girl voice changer smoothly and with ease. But apart from male to female voice changing, The “voice changer - voice editor application” can also be used to autotune your voice.
Now autotune is a big feature that every singer uses to make their voices tuned perfectly. With this app, you can also do the same to record your music or have fun while you are bored. The application is pretty to use and can be used as a girl voice changer not only for entertainment but also if you’re practicing. Many people who wish to seek a career in background voices might find this useful.
3. VoiceFX
Available for: Android

The VoiceFX application is filled with a lot of exciting options and features. If you are looking for an app that is more than just a male-to-female voice changer app, the voice fx is highly recommended.
You can also convert your voice into a robot or even an animal from male to female voice. Yes, you read it right. You can turn your manly voice into any of the fictional cartoons you want. This one’s a very easy and efficient way of filming a video with added effects or developing a mini-game with different voice characters. If you haven’t forgotten, there was a very big trend of converting famous music into chipmunk voices. With this app, you can convert your favorite songs into a chipmunk addition song without any problem.
4. Voice Changer
Available for: Android

The voice changer is a very famous male-to-female voice changer app. With over 10 million downloads on the google play store, the voice changer is highly recommended for users who have fun changing their voices from male to female. Compared to other voice changer applications, The Voice changer app has a very elegant and sleek design that makes it very easy to use.
Apart from the male to female voice change option, There are more than 50 other options that you can enjoy. Furthermore, you can share your creations with your friends through Bluetooth or other social media.
5. Voice Changer - Audio effects
Available for: Android

There are a lot of girl voice changer applications on the google play store. But not all of them are up to the mark. The Voice changer - audio effects is another highly recommended voice changer application.
The Voice Changer - Audio effects have a lot of other things to offer as well. Converting your voice from a male to a female has never been easier. Not only can you convert your voice into a girl, but you can also modify it. Furthermore, you can talk to your friends on the phone while you use the voice changer application. Moreover, the voices of animals and robots can also be an alternative to the female voice if you ever get bored of it.
6. Magic Call App
Available for: Android

The magic call is a real-time voice changer app that you can use for changing your voice during a call specifically. It is a really fun app which you can use with your friends to prank even your family!
This is a perfect option for people looking for a real-time girl voice changer app. The main purpose of this application is real-time calls. The magic call is ideal specifically for a male-to-female voice modification. And you can operate this application easily in call durations.
All you have to do is open the voice changer app and dial your call. Apart from Female voice, you can also convert your voice into a cartoon or an animal.
7. Voice Changer and Sound Recorder
Available for: iOS

If you are an iPhone user, then you must know that finding a voice changer on the apple store is like digging a diamond from the ground.
The Voice changer and sound recorder application is found exclusively on the apple store for people who love girl voice changer apps. It is a live call voice changer app, which means converting your voice from a male to a female in between the call. Furthermore, you can even add background voices such as traffic and echo to make your call even funnier. If you are looking for an excuse to get off from your call, then this application has got your back.
8. Super Voice Editor
Available for: Android
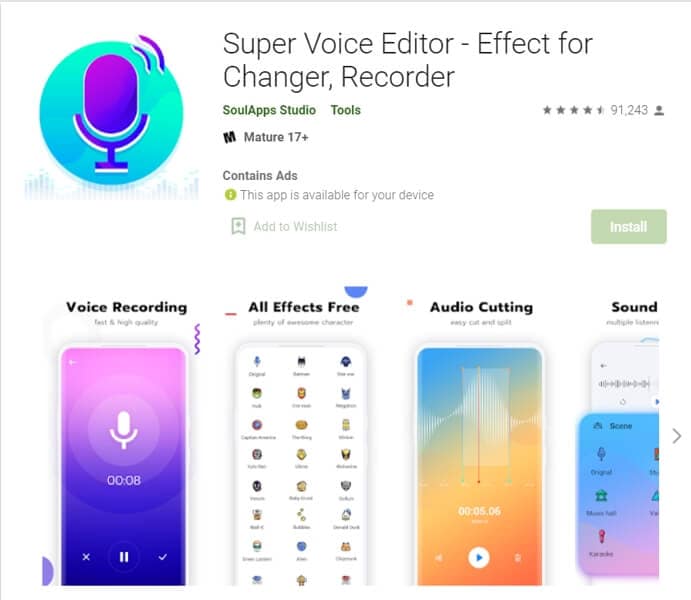
This one is a fun application for people searching for a voice changer app male to female. Not only can you record the audio that you edit, but also use it in real-time! Amazing right? Super voice editor enables you to add effects to your voice while you’re on a call as well. This feature means, next time you’re pulling a prank on the birthday boy, he won’t ever know! Sound like the wonder woman or dexter from his laboratory. The Super-Voice editor is perfect for kids playing in the house and even teenagers looking for something interesting. The SoulApps studio has made it easy for you to sound like your dream faces on the screen. With an MP3 cutter and Ringtone maker, this girl voice changer app is pure creativity.
9. Voice Changer with Effects
Available for: Android

Our list of girl voice changers, Voice changer with effects, is a very practical application that we highly recommend to our users.
With over 50 million downloads on google play, Voice changer with effects is highly suited for anyone looking for more than just a male-to-female voice changer. It has over 40 plus options such as helium, chipmunk, zombie, alien, and many more. With this application, you can even import a favorite audio clip of yours, and then you can easily convert it into a voice you like. If you want to modify your ringtone to an audio clip you just converted, then there is no better application than this one.
10. Voice Changer - Girls Voice changer Male to Female
Available for: Android

If you are looking for a girl voice changer app solely, this application perfectly fits you. The application is specifically designed only to change your voice from a male to a female. Although this application does provide options apart from female voice conversions, those features don’t function ideally. However, if you want a girl voice changer, you won’t have any trouble.
You can use this application while you are on a call. Hence, you can fool your family or friends by using a girl voice instead of your own. We recommend this as an average application that would fit your needs sufficiently.
In conclusion, you have now gone through the list of the perfect options for your android or iOS. Therefore, now you must be ready to choose the best girl voice changer app. So head on to your play store and search for your favorite app right now!
For Win 7 or later (64-bit)
For macOS 10.12 or later
Part 1: Changing Voice Online for Free with Media.io
If you want to change voice without downloading and installing any app on your mobile phone, you can try some online solutions. Media.io is an all-in-one online video toolkit that allows you to edit, convert and compress video, audio and image files easily. The online voice changer from Media.io can transform your voice to a male voice, female voice, child voice, robot voice, and Donald Duck voice. If you wish to have voice filters, you won’t have any problems in the future with the Media.io voice changer.
This online voice changer works best on the Chrome browser, so you can utilize it whether using a Windows, Mac, Linux, or Chromebook device. As a result, you can deceive your family or friends by speaking in another people’s voice rather than your own. Doesn’t that sound like fun?
![]()
A cross-platform for making videos anywhere for all creators
Why your video editing isn’t good enough? How about some creative inspo?
- 100 Million+ Users
- 150+ Countries and Regions
- 4 Million+ Social Media Followers
- 5 Million+ Stock Media for Use
* Secure Download
Part 2: Best Male to Female Voice Changer Apps for iPhone and Android
- Girls Voice Changer
- Voice Changer Voice Recorder Editor & Effect
- VoiceFX
- Voice Changer
- Voice Changer - Audio effects
- Magic Call App
- Voice Changer and Sound Recorder
- Super Voice Editor
- Voice Changer with Effects
- Voice Changer - Girls Voice changer Male to Female
1. Girls Voice Changer
Available for: Android, iOS
This girl voice changer app is highly portable and easy for any user to use comfortably. It is specifically more popular for changing male voice to female and for pitch adjustments. It’s completely free, so download on your android if you have a storage of about 8MB ready, and start using it!
This male-to-female voice changer app has several options in the library. Though the pitch adjustments are easy to make, some users have informed a lack of performance on very high-pitched settings. However, the smoothness of an android application also depends on how much space is readily available in the device. So next time you’re bored at a part, you have the perfect partner!
2. Voice Changer Voice Recorder Editor & Effect
Available for: Android
This voice changer application is for multi-purpose. Yes, you can use it as a girl voice changer smoothly and with ease. But apart from male to female voice changing, The “voice changer - voice editor application” can also be used to autotune your voice.
Now autotune is a big feature that every singer uses to make their voices tuned perfectly. With this app, you can also do the same to record your music or have fun while you are bored. The application is pretty to use and can be used as a girl voice changer not only for entertainment but also if you’re practicing. Many people who wish to seek a career in background voices might find this useful.
3. VoiceFX
Available for: Android
The VoiceFX application is filled with a lot of exciting options and features. If you are looking for an app that is more than just a male-to-female voice changer app, the voice fx is highly recommended.
You can also convert your voice into a robot or even an animal from male to female voice. Yes, you read it right. You can turn your manly voice into any of the fictional cartoons you want. This one’s a very easy and efficient way of filming a video with added effects or developing a mini-game with different voice characters. If you haven’t forgotten, there was a very big trend of converting famous music into chipmunk voices. With this app, you can convert your favorite songs into a chipmunk addition song without any problem.
4. Voice Changer
Available for: Android
The voice changer is a very famous male-to-female voice changer app. With over 10 million downloads on the google play store, the voice changer is highly recommended for users who have fun changing their voices from male to female. Compared to other voice changer applications, The Voice changer app has a very elegant and sleek design that makes it very easy to use.
Apart from the male to female voice change option, There are more than 50 other options that you can enjoy. Furthermore, you can share your creations with your friends through Bluetooth or other social media.
5. Voice Changer - Audio effects
Available for: Android
There are a lot of girl voice changer applications on the google play store. But not all of them are up to the mark. The Voice changer - audio effects is another highly recommended voice changer application.
The Voice Changer - Audio effects have a lot of other things to offer as well. Converting your voice from a male to a female has never been easier. Not only can you convert your voice into a girl, but you can also modify it. Furthermore, you can talk to your friends on the phone while you use the voice changer application. Moreover, the voices of animals and robots can also be an alternative to the female voice if you ever get bored of it.
6. Magic Call App
Available for: Android
The magic call is a real-time voice changer app that you can use for changing your voice during a call specifically. It is a really fun app which you can use with your friends to prank even your family!
This is a perfect option for people looking for a real-time girl voice changer app. The main purpose of this application is real-time calls. The magic call is ideal specifically for a male-to-female voice modification. And you can operate this application easily in call durations.
All you have to do is open the voice changer app and dial your call. Apart from Female voice, you can also convert your voice into a cartoon or an animal.
7. Voice Changer and Sound Recorder
Available for: iOS
If you are an iPhone user, then you must know that finding a voice changer on the apple store is like digging a diamond from the ground.
The Voice changer and sound recorder application is found exclusively on the apple store for people who love girl voice changer apps. It is a live call voice changer app, which means converting your voice from a male to a female in between the call. Furthermore, you can even add background voices such as traffic and echo to make your call even funnier. If you are looking for an excuse to get off from your call, then this application has got your back.
8. Super Voice Editor
Available for: Android
This one is a fun application for people searching for a voice changer app male to female. Not only can you record the audio that you edit, but also use it in real-time! Amazing right? Super voice editor enables you to add effects to your voice while you’re on a call as well. This feature means, next time you’re pulling a prank on the birthday boy, he won’t ever know! Sound like the wonder woman or dexter from his laboratory. The Super-Voice editor is perfect for kids playing in the house and even teenagers looking for something interesting. The SoulApps studio has made it easy for you to sound like your dream faces on the screen. With an MP3 cutter and Ringtone maker, this girl voice changer app is pure creativity.
9. Voice Changer with Effects
Available for: Android
Our list of girl voice changers, Voice changer with effects, is a very practical application that we highly recommend to our users.
With over 50 million downloads on google play, Voice changer with effects is highly suited for anyone looking for more than just a male-to-female voice changer. It has over 40 plus options such as helium, chipmunk, zombie, alien, and many more. With this application, you can even import a favorite audio clip of yours, and then you can easily convert it into a voice you like. If you want to modify your ringtone to an audio clip you just converted, then there is no better application than this one.
10. Voice Changer - Girls Voice changer Male to Female
Available for: Android
If you are looking for a girl voice changer app solely, this application perfectly fits you. The application is specifically designed only to change your voice from a male to a female. Although this application does provide options apart from female voice conversions, those features don’t function ideally. However, if you want a girl voice changer, you won’t have any trouble.
You can use this application while you are on a call. Hence, you can fool your family or friends by using a girl voice instead of your own. We recommend this as an average application that would fit your needs sufficiently.
In conclusion, you have now gone through the list of the perfect options for your android or iOS. Therefore, now you must be ready to choose the best girl voice changer app. So head on to your play store and search for your favorite app right now!
“Master the Process of Installing/Uninstalling Audacity on Your Chromebook”
Audacity has emerged as one of the greatest free audio editing tools for Mac, Linux, & Windows operating systems. With a wide range of capabilities and quality attributes, it is a basic and straightforward audio editing application. While Audacity for Chromebook and Chrome OS isn’t supported, does it imply you won’t be utilizing them in the future? Not at all.
A few simple steps are all that is needed to have Audacity for Chromebook installed on your Chromebook. First, let’s have a look at some of the features this device has to offer.
Features of Audacity for Chromebook
Audacity offers a wide range of editing features right inside its user-friendly interface, and it won’t hold back when it comes to personalization even if it costs nothing. Because it has built-in dithering and is superbly compatible with 32-bit/384kHz audio, it’s difficult to ignore this really effective open-source utility. Importing & mixing audio files is a breeze using Audacity, allowing you to combine stereo, mono, and even multitrack recordings. However, it’s worth noting that there are now just a few possibilities for the latter.
In addition, Audacity for Chromebook has low system requirements, to the point where it works even if your PC is able to power on. Using this editing program, you may mix and match multiple audio formats and sample rates to create a single, cohesive piece of work. In addition, when it comes to editing, you’ll enjoy the unparalleled ease of cutting, copying, and pasting, trimming to the sample level, duplicating, and even adding bespoke fades with the discretely introduced envelope tool.
Audacity seems to have all of the essential impacts. Whether you’re looking for preset EQ curves like those found on a telephone or an AM radio, or Bass and Treble improvements, this versatile program has you covered. With the Auto-Duck tool, you may add a voiceover and other essential features to a podcast, such as a compressor, limiter reverb, and phaser reverb. It’s an excellent choice if you don’t have a lot of extra requirements. Even if you don’t use it often, Audacity will be the last piece of editing software you ever buy.
Installing Audacity for Chromebook
Apps for Chromebooks are often downloaded through the Google Play Store approach. However, sinceAudacity for Chromebook does not support our low-power systems, we must go the other route. To put it another way, you’ll have to use Linux to get Audacity.
Linux is pre-installed on most Chromebooks, however, it is still in Beta. Go to the Settings menu and choose Enable from the drop-down menu to use this feature. Please go here for further information on how to enable Linux on your Chromebook. If your device has this wonderful function, you may follow the instructions below to properly install Audacity for Chromebook.
- Open the Linux Terminal in the Launcher.

This is what you’ll see when you click on the Terminal.
- To begin installing Audacity, enter the following command in the Terminal window that has already opened.

- If you’ve done everything correctly up to this point, you’ll be able to enjoy the full benefits of the Linux operating system. What follows instead is a bewildering cacophony of bluster.

- It seems that Linux is questioning whether or not you wish to proceed. To respond, use the “y” key on your keyboard.

This screenshot shows how the installation process is progressing.
- Finally, you’ll notice the green-colored text at the finish of the orders. Your program has been successfully installed, as shown by this message.

- It’s only a matter of selecting Audacity from the Launcher.

How to Uninstall Audacity
Just like installing it, Audacity can be uninstalled with a few clicks. For this, execute the command below in the Linux Terminal (and you can copy & paste it).
sudo apt remove audacity
When this is done on Linux, you’ll be asked whether you want to proceed with the uninstalling procedure or not. If you hit “y” the same way as previously, Audacity will be removed from your Chromebook in a matter of seconds.
A screenshot of Audacity in operation is here.

While recording your podcast using the built-in microphone on your Chromebook is a great way to start, it’s not the only way to fine-tune the final product. You must drag the track and sound to the center of the screen in order to begin the magic with this program. Once you’ve done this, you’ll be offered a variety of alternatives to get the editing process started.
Using Audacity for multitrack recording & editing is doable, but it’s best to use non-linear tools if primary focus is on that element. Apart from that, Audacity is widely regarded as one of the best audio editors on the market.
Conclusion
Your Chromebook may be able to run a variety of audio recording applications. As with Audacity, you won’t be limited in your ability to produce high-quality music with a wide range of unique effects. We also go through Filmora’s voice effects & how users may use them to change and improve their voices. Filmora allows you to re-voice video/audio & previously recorded voiceovers. For video/audio & voiceover files, the Pitch option on the Timeline may be used. Change the tone of a video and recording to make it sound different. You can quickly alter the voices in the videos using Filmora. Your viral should be accompanied by a story or a video. Using the Changing Pitch option, you may change the pitch of your voice. You may modify the pace of the video to change your voice (Optional). Make a duplicate of the video or audio that has been altered.
For Win 7 or later (64-bit)
For macOS 10.12 or later
This is what you’ll see when you click on the Terminal.
- To begin installing Audacity, enter the following command in the Terminal window that has already opened.
- If you’ve done everything correctly up to this point, you’ll be able to enjoy the full benefits of the Linux operating system. What follows instead is a bewildering cacophony of bluster.
- It seems that Linux is questioning whether or not you wish to proceed. To respond, use the “y” key on your keyboard.
This screenshot shows how the installation process is progressing.
- Finally, you’ll notice the green-colored text at the finish of the orders. Your program has been successfully installed, as shown by this message.
- It’s only a matter of selecting Audacity from the Launcher.
How to Uninstall Audacity
Just like installing it, Audacity can be uninstalled with a few clicks. For this, execute the command below in the Linux Terminal (and you can copy & paste it).
sudo apt remove audacity
When this is done on Linux, you’ll be asked whether you want to proceed with the uninstalling procedure or not. If you hit “y” the same way as previously, Audacity will be removed from your Chromebook in a matter of seconds.
A screenshot of Audacity in operation is here.
While recording your podcast using the built-in microphone on your Chromebook is a great way to start, it’s not the only way to fine-tune the final product. You must drag the track and sound to the center of the screen in order to begin the magic with this program. Once you’ve done this, you’ll be offered a variety of alternatives to get the editing process started.
Using Audacity for multitrack recording & editing is doable, but it’s best to use non-linear tools if primary focus is on that element. Apart from that, Audacity is widely regarded as one of the best audio editors on the market.
Conclusion
Your Chromebook may be able to run a variety of audio recording applications. As with Audacity, you won’t be limited in your ability to produce high-quality music with a wide range of unique effects. We also go through Filmora’s voice effects & how users may use them to change and improve their voices. Filmora allows you to re-voice video/audio & previously recorded voiceovers. For video/audio & voiceover files, the Pitch option on the Timeline may be used. Change the tone of a video and recording to make it sound different. You can quickly alter the voices in the videos using Filmora. Your viral should be accompanied by a story or a video. Using the Changing Pitch option, you may change the pitch of your voice. You may modify the pace of the video to change your voice (Optional). Make a duplicate of the video or audio that has been altered.
For Win 7 or later (64-bit)
For macOS 10.12 or later
Also read:
- Visual Harmony Integrating Dynamic Beats Into Your Filmic Expressions
- Updated The Ultimate Guide 10 Must-Have Extractors in Post-Production Software for 2024
- 2024 Approved Virtual Sound Crafting Platform Split & Stitch MP3s
- Rapid Method for Silencing Audio in Audacity Essential Tips
- An Android Users Journey to Flawless Audio-Visual Integration
- Updated YouTube Audio Resource Hub for 2024
- New 2024 Approved Mastering Tempo Adjustment in Songs without Shifting Tonal Accuracy
- Identifying Whistle Tones and Their Impacts for 2024
- New The Ultimate Guide to Syncing Audio and Video in Adobe Premiere Pro for 2024
- 2024 Approved Blending Melodies Into Motion Pictures
- Updated 2024 Approved A Strategic Approach to Enhancing Your In-Game Vocal Identity
- Updated Mastering Audio Integration Combining Sounds for Your Videography Project for 2024
- New 2024 Approved Mastering Sound Manipulation with Clownfish Voice Transformation Tools for Better Interaction on Discord/Fortnite/Skype Platforms
- In 2024, Revolutionary Tools The Top 5 Breakthroughs in Live Speech Manipulation Technologies
- In 2024, Streamlining Audio Integration Syncing AirPods to PCs Today (Windows & macOS)
- Updated 2024 Approved Top 10 Mobile Tools for Mastering Melodies IOS Vs. Android Edition
- New 2024 Approved Top Voice Transformation Tools for Instant Communication
- New Top 7 Underrated Transition Sounds for Enhanced Audio Experience (Download Now!)
- New In 2024, Revolutionize Your Online Gaming with Morphvox – A Voice Changers Handbook
- New In 2024, 6 Best Voice Changer During Call Android & iPhone
- In 2024, Pokemon Go No GPS Signal? Heres Every Possible Solution On Poco C51 | Dr.fone
- In 2024, How Do I Stop Someone From Tracking My Vivo S17 Pro? | Dr.fone
- New In 2024, Windows 10 Video Production The Best Software Options
- How To Do Samsung Galaxy S23 Screen Sharing | Dr.fone
- Updated A Review On 3D LUT Creator for 2024
- Updated Live Chat With WooCommerce Your Gateway to Successful Live Selling for 2024
- In 2024, Two Ways to Track My Boyfriends Poco X6 Pro without Him Knowing | Dr.fone
- In 2024, 3 Effective Ways to Unlock iCloud Account Without Password On Apple iPhone 13 Pro Max
- Top Best Free LUTs For Premiere Pro
- A Complete Guide To OEM Unlocking on Google Pixel 7a
- In 2024, The 6 Best SIM Unlock Services That Actually Work On Your Samsung Galaxy M34 5G Device
- Title: New In 2024, Tutorial on Audio Ducking in Adobe Premiere Pro on Mac
- Author: Ella
- Created at : 2024-05-05 02:42:26
- Updated at : 2024-05-06 02:42:26
- Link: https://sound-optimizing.techidaily.com/new-in-2024-tutorial-on-audio-ducking-in-adobe-premiere-pro-on-mac/
- License: This work is licensed under CC BY-NC-SA 4.0.
