

Pioneering Audio-Visual Synergy A Comprehensive Guide to Adding Soundtracks in Premiere Pro
Pioneering Audio-Visual Synergy: A Comprehensive Guide to Adding Soundtracks in Premiere Pro
Versatile Video Editor - Wondershare Filmora
An easy yet powerful editor
Numerous effects to choose from
Detailed tutorials provided by the official channel
Look at any of the spot commercials, wedding videos, or even some family candid videos. Adding audio makes them appealing and likable. To catch a potential customer or create an emotional connection with the viewer combination of audio and video is a must. This makes the footage attractive and exceptional.
Read on to know more about the step-by-step approach how to add audio to video in Adobe Premiere Pro.
In this article
01 [How to add audio to video in Premiere Pro](#Part 1)
02 [How to adjust audio in Premiere Pro](#Part 2)
03 [Adding Audio to Video files](#Part 3)
Part 1 How to add audio to video in Premiere Pro
Some essential pointers for all would-be videographers are:
● Before you add audio to video in Premiere Pro, be ready to see your file size increase to a large extent. If you add a background score of 15MB, your total video file size will increase by the same amount of 15MB. The best way to take care of such a problem is to use additional compression techniques to get a suitable file size.
● Most videographers use lots of software tools to add audio to video professionally. One such trending software tool is the Adobe Premiere Pro. Its simple to add audio to video in Premiere Pro, edit your audio and video, and fine-tune the audio volume of each video project.
Let’s learn how.

Step1 Find out the Audio option
Navigate to the Audio workspace, select Audio at the top on the tools bar
Step2 Choose the Workspace
Click Window select Workspace click on Audio
Step3 Check toolbar
Within Audio, click on Choose Window Media Browser to show the Media Browser toolbar.
Step4 Select audio files
Go to your audio file; for Windows OS, right-click or control-click the selected audio file for macOS.
Step5 Import and add
Please select the desired audio file, then click import to add it to your Project.
An important tip is to keep the Ingest box selected if you want to copy your audio file concurrently to your project folder.
Adding audio to your series

Step1 Go to the Project panel
Select Window, click on Project to open the Project panel.
Step2 Select audio file
Click on the audio file you imported to select it.
Step3 Check the waveform
Double click the file to open it in the Source panel to check the sound and waveform.
Step4 Check sounds
Play the audio file if you want to check the audio quality, volume, and overall sound.
Step5 Add audio to the video track
Hold the left click on your mouse to drag the audio file to the series in the Timeline panel. You can add any audio file to the video track listed in the panel window in this step.
Step6 Trim audio file
Select the Trim option to trim your audio file the same way you will edit the video file in the final step.
Part 2 How to adjust audio in Premiere Pro
Now that you have understood how to add audio to video in Adobe Premier Pro. Let’s know how to adjust audio in Premier Pro.

Step1 Activate the series
Press on the spacebar to activate your series in the Program panel (appears in the top right of the panel)
Step2 Stop playback
To stop the playback, press the space bar again.
Step3 Choose starting point of playback
Press down the left mouse button to hold and drag the Blue colored play head to wherever you desire the playback to start.
If you feel the audio track is mild or too harsh compared to the rest of the audio series, change each audio track’s volume separately.
Step1 Select Audio Track Mixer
Click Window selects Audio Track Mixer from the menu.
Step2 Click the series name to see the audio mixer
Click the series name of your audio file to show the audio mixer for your series.
Step3 Choose playback to play the audio
At the bottom of the panel is the Audio Track Mixer. Click on playback to star, pause or play your audio in-ring sequence.
Step4 Click on the slider
When your audio file plays or loops, click on the slider to move up or down. It will increase or reduce the volume of each separate audio track in your audio series.
Step5 Adjust the volume
Use the slider to adjust the overall audio volume
Tips
Always keep the audio projects within the -6 to 3 dB volume range to get the best quality of the audio effect. Any lower you won’t be able to hear the sound, or if it’s higher, the sound will hurt the listeners’ ears.
Professional advice to all beginner-level videographers is that as Premiere Pro is complex so you need more straightforward tools like Filmora for all your video editing work. Filmora is easy to use and much cheaper than Premiere Pro.
You may think now why or how Filmora can be the best as an alternative on how to add audio to video using Premiere Pro. Well! It will help you to transform your video into a piece of art incredibly by offering simple drag and drop options, including an easy-to-use interface and powerful editing tools. You can:
● Edit and create your videos with minimal effort
● Get a Music Library to add comedy, fear, tension, and love to every scene
● Get several royalty-free songs and sound effects
● Create videos with up to 800 stunning effects
● Unleash your creativity with its offered Hollywood effects
● Import and export in almost any type of video format
How to use Filmora to add audio to video
Adding sound to any video file enhances its viewability and the whole experience of watching any video. To do this, you need to add audio to video. The same can be done quickly in Filmora, a 3rd-party video editing software tool now the hot favorite of amateur and professional video editors. Below we describe how to add audio to video in Filmora.
Import Media
To start the process of adding audio to video follow these steps.
Step1 Select the audio, add using the Import option or drag and select
Import selected audio using the Filmora Media Panel and add it to your timeline. You can also choose and drag the audio file from the source folder to the Media Panel. Filmora supports multiple audio file formats to ease adding audio to video. The supported audio files are MP3, M4V, MPA, WAV, WMA.

Step2 Add and make the audio file
Adding the audio file to Filmora Media Panel makes it a media asset and can now be used multiple times in future projects. The original file remains as Filmora doesn’t change the original audio file.
Step3 Copying or deleting an audio file
In Filmora, using the feature of copying or deleting an audio file, you can work on the audio and video from any computer or remote PC.
Part 3 Adding Audio to Video files
Using Filmora, it is easy to sync or add audio to the video, which is separately recorded and stored on your device.
Using Filmora, it is easy to sync or add audio to the video, which is separately recorded and stored on your device.
Step1 Click on Import in the Media Panel
Select the audio and video files to import them into Filmora.
Step2 Click on the video file to add audio
Press the Ctrl key (Windows) or Cmd key (Mac OS) and click on the audio file.
Step3 Add audio to video
Right-click on the files selected and choose the Merge audio & video option to add audio to the video.
Filmora analyzes audio and video files and replaces the existing audio with the newly selected audio file. Once the synchronization process is over, the new merged file will be available in the Media Panel for future processing.
The synchronized file will have the same terminology as the original video file with a difference. It will get an extension Merged to its name.
The original file will not get affected in Filmora. This software tool only references the files to generate a new file. The new file created when you add audio to the video can now be added to the timeline and exported.
Wondershare Filmora
Get started easily with Filmora’s powerful performance, intuitive interface, and countless effects!
Try It Free Try It Free Try It Free Learn More about Filmora>

Conclusion
So, this article listed how to add audio to video in Premiere Pro via a step-by-step guide. The guide lets you know the easy method of adding audio to video in Adobe Premiere Pro to all potential videographers. Thus, you can now start your journey of video edition by putting your best click forward!
Look at any of the spot commercials, wedding videos, or even some family candid videos. Adding audio makes them appealing and likable. To catch a potential customer or create an emotional connection with the viewer combination of audio and video is a must. This makes the footage attractive and exceptional.
Read on to know more about the step-by-step approach how to add audio to video in Adobe Premiere Pro.
In this article
01 [How to add audio to video in Premiere Pro](#Part 1)
02 [How to adjust audio in Premiere Pro](#Part 2)
03 [Adding Audio to Video files](#Part 3)
Part 1 How to add audio to video in Premiere Pro
Some essential pointers for all would-be videographers are:
● Before you add audio to video in Premiere Pro, be ready to see your file size increase to a large extent. If you add a background score of 15MB, your total video file size will increase by the same amount of 15MB. The best way to take care of such a problem is to use additional compression techniques to get a suitable file size.
● Most videographers use lots of software tools to add audio to video professionally. One such trending software tool is the Adobe Premiere Pro. Its simple to add audio to video in Premiere Pro, edit your audio and video, and fine-tune the audio volume of each video project.
Let’s learn how.
Step1 Find out the Audio option
Navigate to the Audio workspace, select Audio at the top on the tools bar
Step2 Choose the Workspace
Click Window select Workspace click on Audio
Step3 Check toolbar
Within Audio, click on Choose Window Media Browser to show the Media Browser toolbar.
Step4 Select audio files
Go to your audio file; for Windows OS, right-click or control-click the selected audio file for macOS.
Step5 Import and add
Please select the desired audio file, then click import to add it to your Project.
An important tip is to keep the Ingest box selected if you want to copy your audio file concurrently to your project folder.
Adding audio to your series
Step1 Go to the Project panel
Select Window, click on Project to open the Project panel.
Step2 Select audio file
Click on the audio file you imported to select it.
Step3 Check the waveform
Double click the file to open it in the Source panel to check the sound and waveform.
Step4 Check sounds
Play the audio file if you want to check the audio quality, volume, and overall sound.
Step5 Add audio to the video track
Hold the left click on your mouse to drag the audio file to the series in the Timeline panel. You can add any audio file to the video track listed in the panel window in this step.
Step6 Trim audio file
Select the Trim option to trim your audio file the same way you will edit the video file in the final step.
Part 2 How to adjust audio in Premiere Pro
Now that you have understood how to add audio to video in Adobe Premier Pro. Let’s know how to adjust audio in Premier Pro.
Step1 Activate the series
Press on the spacebar to activate your series in the Program panel (appears in the top right of the panel)
Step2 Stop playback
To stop the playback, press the space bar again.
Step3 Choose starting point of playback
Press down the left mouse button to hold and drag the Blue colored play head to wherever you desire the playback to start.
If you feel the audio track is mild or too harsh compared to the rest of the audio series, change each audio track’s volume separately.
Step1 Select Audio Track Mixer
Click Window selects Audio Track Mixer from the menu.
Step2 Click the series name to see the audio mixer
Click the series name of your audio file to show the audio mixer for your series.
Step3 Choose playback to play the audio
At the bottom of the panel is the Audio Track Mixer. Click on playback to star, pause or play your audio in-ring sequence.
Step4 Click on the slider
When your audio file plays or loops, click on the slider to move up or down. It will increase or reduce the volume of each separate audio track in your audio series.
Step5 Adjust the volume
Use the slider to adjust the overall audio volume
Tips
Always keep the audio projects within the -6 to 3 dB volume range to get the best quality of the audio effect. Any lower you won’t be able to hear the sound, or if it’s higher, the sound will hurt the listeners’ ears.
Professional advice to all beginner-level videographers is that as Premiere Pro is complex so you need more straightforward tools like Filmora for all your video editing work. Filmora is easy to use and much cheaper than Premiere Pro.
You may think now why or how Filmora can be the best as an alternative on how to add audio to video using Premiere Pro. Well! It will help you to transform your video into a piece of art incredibly by offering simple drag and drop options, including an easy-to-use interface and powerful editing tools. You can:
● Edit and create your videos with minimal effort
● Get a Music Library to add comedy, fear, tension, and love to every scene
● Get several royalty-free songs and sound effects
● Create videos with up to 800 stunning effects
● Unleash your creativity with its offered Hollywood effects
● Import and export in almost any type of video format
How to use Filmora to add audio to video
Adding sound to any video file enhances its viewability and the whole experience of watching any video. To do this, you need to add audio to video. The same can be done quickly in Filmora, a 3rd-party video editing software tool now the hot favorite of amateur and professional video editors. Below we describe how to add audio to video in Filmora.
Import Media
To start the process of adding audio to video follow these steps.
Step1 Select the audio, add using the Import option or drag and select
Import selected audio using the Filmora Media Panel and add it to your timeline. You can also choose and drag the audio file from the source folder to the Media Panel. Filmora supports multiple audio file formats to ease adding audio to video. The supported audio files are MP3, M4V, MPA, WAV, WMA.
Step2 Add and make the audio file
Adding the audio file to Filmora Media Panel makes it a media asset and can now be used multiple times in future projects. The original file remains as Filmora doesn’t change the original audio file.
Step3 Copying or deleting an audio file
In Filmora, using the feature of copying or deleting an audio file, you can work on the audio and video from any computer or remote PC.
Part 3 Adding Audio to Video files
Using Filmora, it is easy to sync or add audio to the video, which is separately recorded and stored on your device.
Using Filmora, it is easy to sync or add audio to the video, which is separately recorded and stored on your device.
Step1 Click on Import in the Media Panel
Select the audio and video files to import them into Filmora.
Step2 Click on the video file to add audio
Press the Ctrl key (Windows) or Cmd key (Mac OS) and click on the audio file.
Step3 Add audio to video
Right-click on the files selected and choose the Merge audio & video option to add audio to the video.
Filmora analyzes audio and video files and replaces the existing audio with the newly selected audio file. Once the synchronization process is over, the new merged file will be available in the Media Panel for future processing.
The synchronized file will have the same terminology as the original video file with a difference. It will get an extension Merged to its name.
The original file will not get affected in Filmora. This software tool only references the files to generate a new file. The new file created when you add audio to the video can now be added to the timeline and exported.
Wondershare Filmora
Get started easily with Filmora’s powerful performance, intuitive interface, and countless effects!
Try It Free Try It Free Try It Free Learn More about Filmora>
Conclusion
So, this article listed how to add audio to video in Premiere Pro via a step-by-step guide. The guide lets you know the easy method of adding audio to video in Adobe Premiere Pro to all potential videographers. Thus, you can now start your journey of video edition by putting your best click forward!
Top Ten AI-Driven Melodic Architects: The Prelude to 2024’S Musical Maestros
Top Best 10 AI Music Composers in 2024

Benjamin Arango
Mar 27, 2024• Proven solutions
Robots can’t be creative, right? A number of startups that focus on the development of artificial intelligence that is capable of composing music have proved this statement wrong. AI music composers generate original, copyright-free music you can use in your latest YouTube video or social media video ad. You don’t even have to be a sound designer or a musician to produce soundtracks for your videos with AI Music Composers, because you can upload the music that has already been recorded and create variations of it. So, let’s take a look at what AI music composers have to offer in 2024.
| 1 - Amper Music | 2 - AIVA |
|---|---|
| 3 - Jukedeck | 4 - Ecrett Music |
| 5 - Melodrive | 6 - ORB Composer |
| 7 - Amadeus Code | 8 - Humtap |
| 9 - Muzeek | 10 - Brain.fm |
Ten Best AI Music Composers You Should Know About
The AI technologies that can compose music are still relatively novel, and as time passes, they can only develop and grow further. Consequently, each of the AI music composers we featured in this article offers a different range of possibilities. Here are the ten best AI music composers you shouldn’t miss out on in 2024.

Filmora AI Music Editor
Edit Audio with AI Music Editor
Experience the power of Filmora’s AI tools and make your audio or music stand out like never before! Audio Denoise, Audio Ducking, Audio Synchronization, Audio Stretch, etc…
Try It Free Try It Free Try It Free Learn More >
1. Amper Music
Price: Available upon request
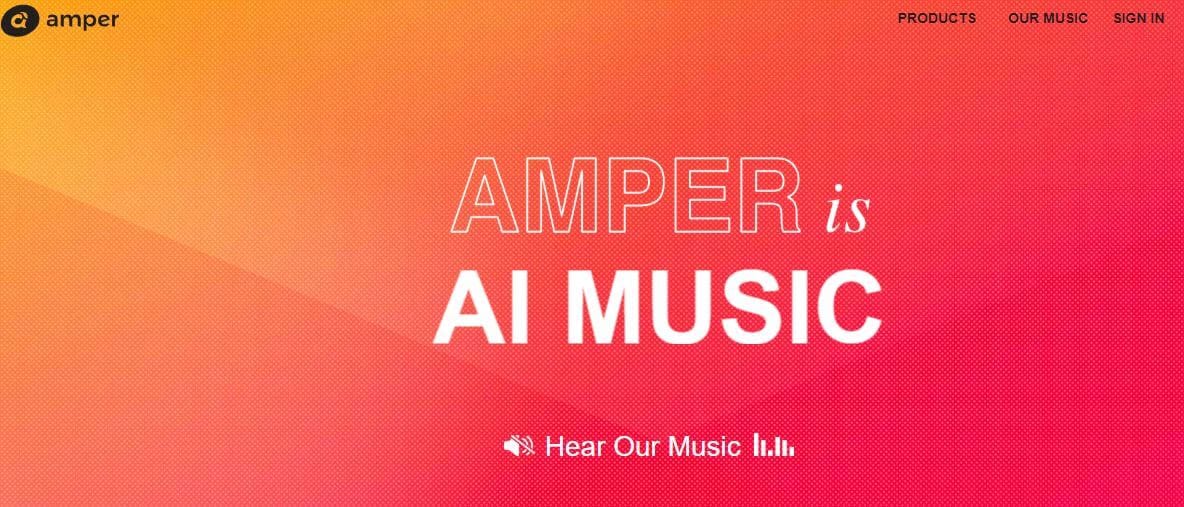
Industry professionals know just how frustrating the music licensing process can be. Amper Music is a cloud-based platform designed to simplify the process of creating soundtracks for movies and video games, as it produces AI generated algorithms that help users create music in a variety of music genres. You must first create an account on this platform, in order to be able to use the free version of Amper Music that provides only a limited amount of features. Upgrading to the pro version of Amper Music will enable you to enjoy the full potential of this rapidly growing AI Music Composer.
2. AIVA
Price: Free version available, subscription plans start from €14 p/month
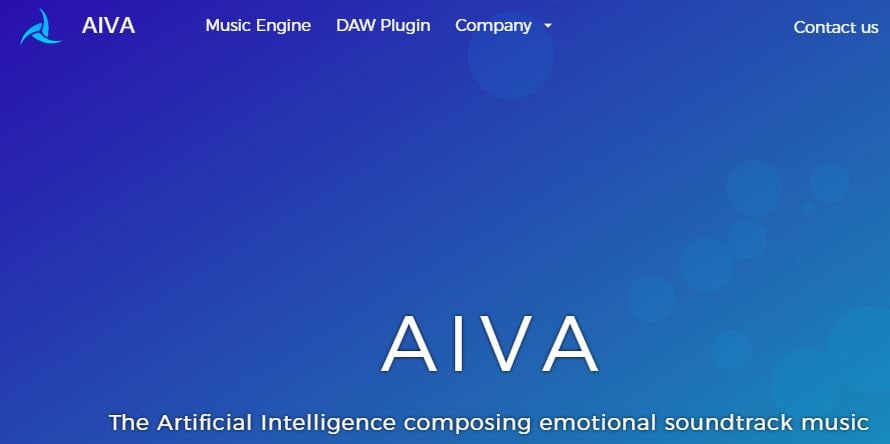
Since 2016, when AIVA Technologies was founded, its team has worked on developing an AI script that can compose emotional soundtracks for ads, video games, or movies. Soon after, the AI published its first oeuvre titled ‘Opus 1 for Piano Solo and in the subsequent years, AIVA released an album and composed music for a video game. Besides enabling its users to create music from scratch, AIVA can also be used to produce variations of existing songs. The music engine that powers this AI music composer makes the production of corporate or social media videos much easier, as it eliminates the need to go through the music licensing process.
3. Jukedeck
Price: Free version available, Pricing plans start from $0.99 per download
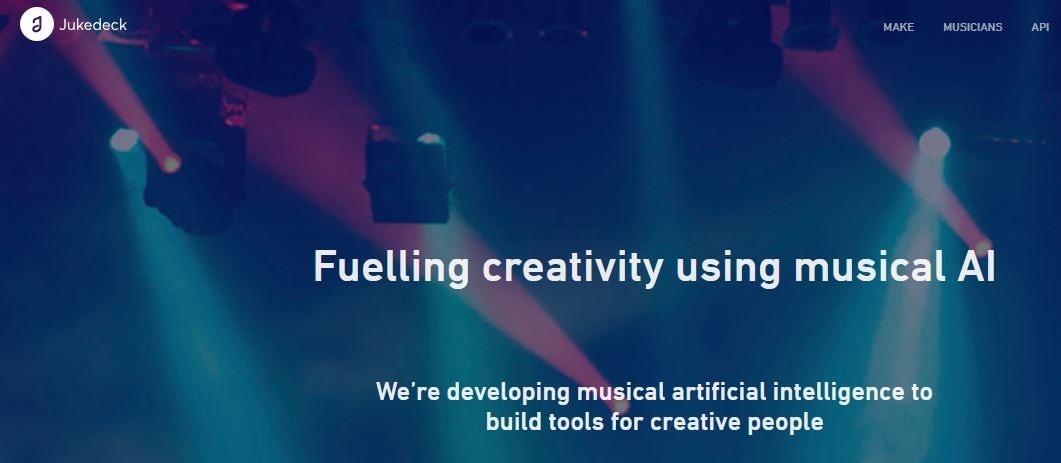
The AI music composer developed by the Jukedeck startup resembles the Amper’s music composer because they both rely on neural networks to analyze music data, that is then used by the AI to learn how to compose original music. Each track that is available through this AI music composer can be edited, so you can change its length or its tempo. You can create music with Jukedeck for free if you decide to give all the rights to the AI composer, while both individuals and small businesses can purchase the license to use the song created with Jukedeck for just $0.99.
Note: Jukedeck has been acquired by TikTok, and we are waiting for a new Jukedeck.
![]()
A cross-platform for making videos anywhere for all creators

Why your video editing isn’t good enough? How about some creative inspo?
- 100 Million+ Users
- 150+ Countries and Regions
- 4 Million+ Social Media Followers
- 5 Million+ Stock Media for Use
* Secure Download

4. Ecrett Music
Price: Subscription plans start at $5
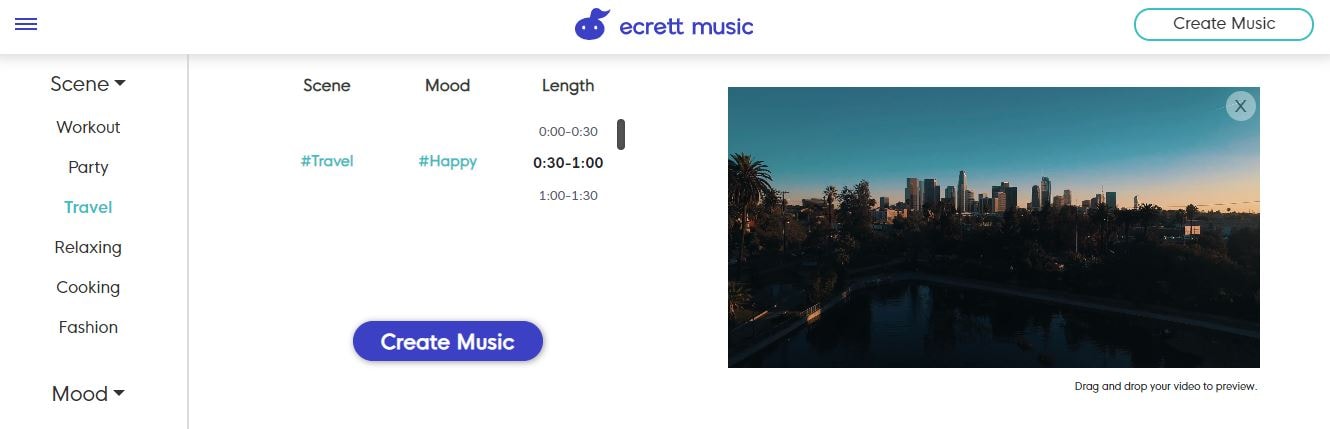
This online AI music composer makes creating stunning soundtracks for videos look easy. You just have to upload a video for which you want to generate music and select the type of scene and the mood of that scene. Party, Travel or Fashion are among the types of scenes you can choose from, while moods range from happy to serious. When done, simply click on the Create Music button, and the platform will automatically generate the soundtrack for your video. In case you are producing videos on a constant basis, you should consider purchasing one of the available subscription plans.
5. Melodrive
Price: Free
Compatibility: iOS, Windows
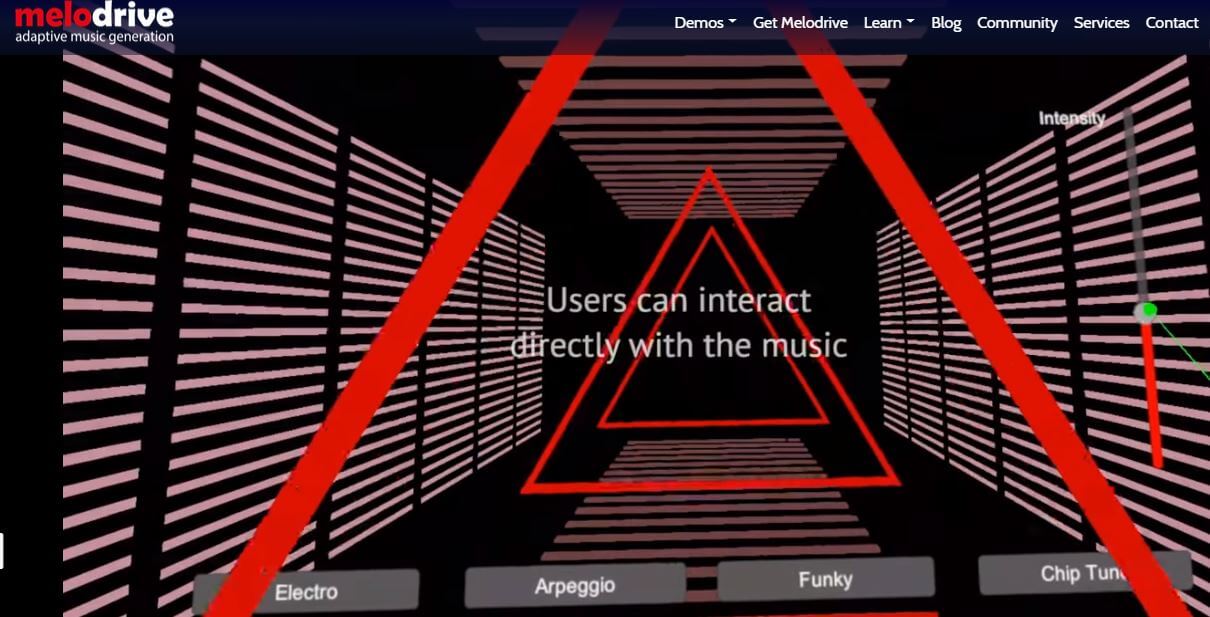
At the moment, the Lite and Indie versions of Melodrive are available for download free of charge, but the Indie version of this AI music composer still offers more options. Melodrive is one of the first AI systems that can compose emotional and unique music in real time. The AI generates music by adapting to the media environment and aims to match the mood and the style of the video. It is worth noting that Melodrive is still under development and that through time its capabilities to compose music are going to become even more refined than they already are.
6. ORB Composer
Price: Pricing plans start at $149,00
Compatibility: macOS, Windows

You can’t generate music automatically with ORB Composer, because the AI creates music based on your choices. That’s why you need to know at least the basic rules of music composition in order to be able to use the ORB Composer properly. The AI music composer comes bundled with a rich collection of chord progressions, that contains almost all chords used in popular music. This tool is aimed at artists who are interested in experimenting with the possibilities of creating music with artificial intelligence and discovering new styles of music. There are six music templates you can choose from, and you can create compositions by simply organizing different blocks of music.

Filmora AI Audio Stretcher
Wondershare Filmora - AI Audio Stretcher
• Retime any audio track to fit the duration of your video almost instantly.
• Rearrange songs without quality loss.
• Cross-platform supported - (Windows, Mac, iOS, Android)
Start Audio Stretch Start Audio Stretch Start Audio Stretch Learn More >
7. Amadeus Code
Price: Free, but the app offers in-app purchases
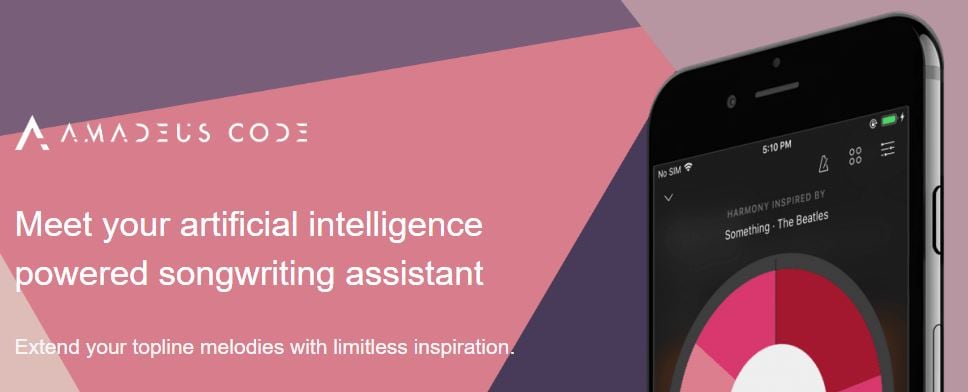
Compatibility: iOS
Both skilled musicians and music enthusiast can use this iOS-based app to create new melodies in just a few minutes. The AI engine that the Amadeus Code uses contains chord progressions of some of the most famous songs ever created and it let you use them to create new and innovative structures of music compositions. Moreover, you can use gestures to create new songs or recreate specific segments of songs you composed earlier. Even though Amadeus Code lets its users export audio and MIDI files to audio editing software, you still have to purchase all songs you want to keep.
8. Humtap
Price: Free
Compatibility: iOS
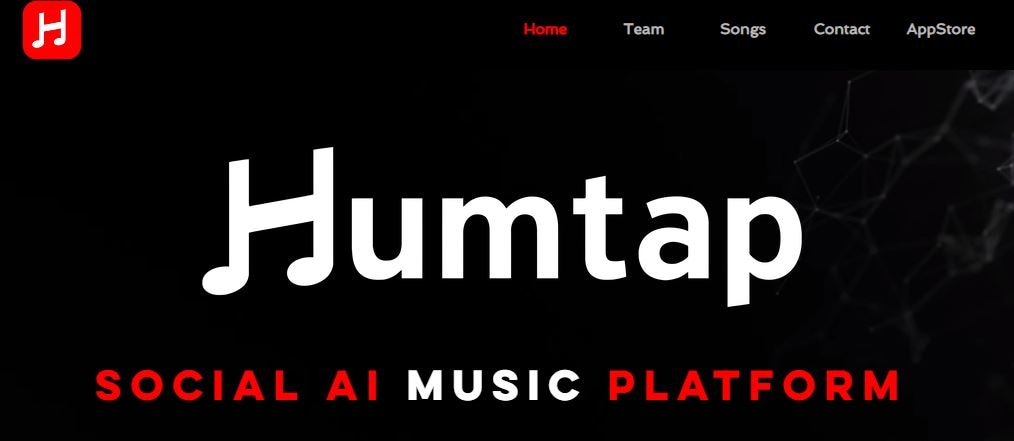
Musicians who have a tough time remembering their own ideas are going to love using Humtap because they can just hum a melody and the app will automatically generate an entire song using different instruments. What’s more, beats can be added with a single tap, and after the music is generated you can proceed to add the vocals as well. Humptap also has video making capabilities, so you can create videos for all songs you compose with this app. All tracks and videos generated with the Humtap AI music composer can be saved to your phone, but you can’t share your new creations to social media directly from the app.
9. Muzeek
Price: Free trial available, pricing plans start from $19 per month
Compatibility: macOS
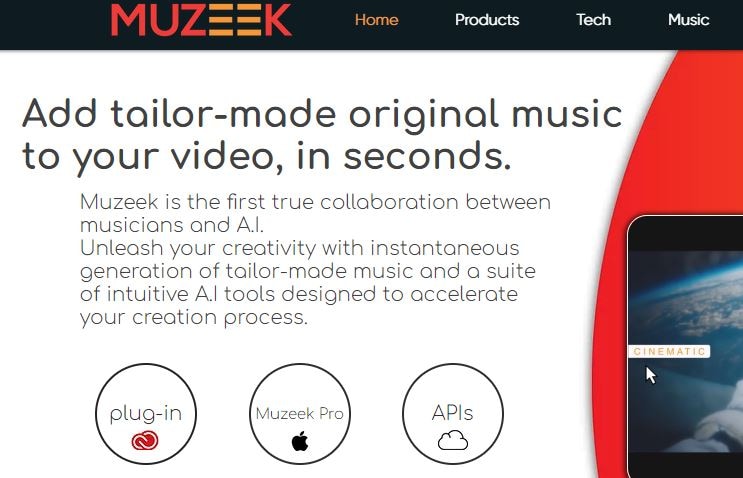
If you are in need of licensed music for the video you’re planning on sharing to social media networks, then Muzeek is one of the best choices you can make. The AI algorithm Muzeek uses analyzes the videos for which you are generating music and it creates soundtracks that perfectly fit the rhythm of the video. All content creators, including online marketing agencies or video game developers, can rely on Muzeek AI music composer to create authentic music in high quality. Moreover, Muzeek can also analyze the video’s original audio and create subtitles from it or adjust its volume automatically.
10. Brain.fm
Price: Subscription plans start from $6,95 per month
Compatibility: Android, online
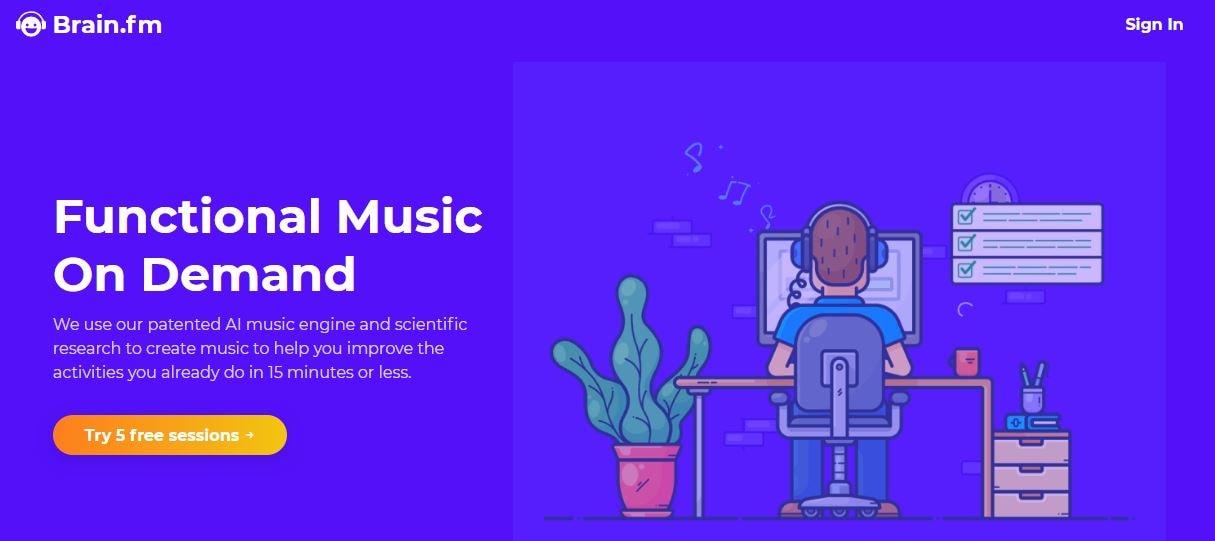
The idea that music can make our brains more productive is at the very core of what Brain.fm platform is all about. A team of scientists, musicians and engineers uses artificial intelligence to generate music designed to make your brain more productive and focused. They claim that the music created with their AI music composer achieve its effects in just ten to fifteen minutes. However, you can’t use Brain.fm to create your own music, as this platform is better suited for people who spend a lot of time at work and have a tough time maintaining their focus while performing important tasks.
Conclusion
The opportunities AI music composers offer are still not properly explored, because most of these technologies are still under development. The results AI music composers we included in this article have managed to achieve so far are impressive because each of them can produce high-quality audio files for all sorts of video content. Which AI music composer do you like to use the most? Leave a comment, and let us know.
Benjamin Arango
Benjamin Arango is a writer and a lover of all things video.
Follow @Benjamin Arango
Benjamin Arango
Mar 27, 2024• Proven solutions
Robots can’t be creative, right? A number of startups that focus on the development of artificial intelligence that is capable of composing music have proved this statement wrong. AI music composers generate original, copyright-free music you can use in your latest YouTube video or social media video ad. You don’t even have to be a sound designer or a musician to produce soundtracks for your videos with AI Music Composers, because you can upload the music that has already been recorded and create variations of it. So, let’s take a look at what AI music composers have to offer in 2024.
| 1 - Amper Music | 2 - AIVA |
|---|---|
| 3 - Jukedeck | 4 - Ecrett Music |
| 5 - Melodrive | 6 - ORB Composer |
| 7 - Amadeus Code | 8 - Humtap |
| 9 - Muzeek | 10 - Brain.fm |
Ten Best AI Music Composers You Should Know About
The AI technologies that can compose music are still relatively novel, and as time passes, they can only develop and grow further. Consequently, each of the AI music composers we featured in this article offers a different range of possibilities. Here are the ten best AI music composers you shouldn’t miss out on in 2024.
Filmora AI Music Editor
Edit Audio with AI Music Editor
Experience the power of Filmora’s AI tools and make your audio or music stand out like never before! Audio Denoise, Audio Ducking, Audio Synchronization, Audio Stretch, etc…
Try It Free Try It Free Try It Free Learn More >
1. Amper Music
Price: Available upon request
Industry professionals know just how frustrating the music licensing process can be. Amper Music is a cloud-based platform designed to simplify the process of creating soundtracks for movies and video games, as it produces AI generated algorithms that help users create music in a variety of music genres. You must first create an account on this platform, in order to be able to use the free version of Amper Music that provides only a limited amount of features. Upgrading to the pro version of Amper Music will enable you to enjoy the full potential of this rapidly growing AI Music Composer.
2. AIVA
Price: Free version available, subscription plans start from €14 p/month
Since 2016, when AIVA Technologies was founded, its team has worked on developing an AI script that can compose emotional soundtracks for ads, video games, or movies. Soon after, the AI published its first oeuvre titled ‘Opus 1 for Piano Solo and in the subsequent years, AIVA released an album and composed music for a video game. Besides enabling its users to create music from scratch, AIVA can also be used to produce variations of existing songs. The music engine that powers this AI music composer makes the production of corporate or social media videos much easier, as it eliminates the need to go through the music licensing process.
3. Jukedeck
Price: Free version available, Pricing plans start from $0.99 per download
The AI music composer developed by the Jukedeck startup resembles the Amper’s music composer because they both rely on neural networks to analyze music data, that is then used by the AI to learn how to compose original music. Each track that is available through this AI music composer can be edited, so you can change its length or its tempo. You can create music with Jukedeck for free if you decide to give all the rights to the AI composer, while both individuals and small businesses can purchase the license to use the song created with Jukedeck for just $0.99.
Note: Jukedeck has been acquired by TikTok, and we are waiting for a new Jukedeck.
![]()
A cross-platform for making videos anywhere for all creators
Why your video editing isn’t good enough? How about some creative inspo?
- 100 Million+ Users
- 150+ Countries and Regions
- 4 Million+ Social Media Followers
- 5 Million+ Stock Media for Use
* Secure Download
4. Ecrett Music
Price: Subscription plans start at $5

This online AI music composer makes creating stunning soundtracks for videos look easy. You just have to upload a video for which you want to generate music and select the type of scene and the mood of that scene. Party, Travel or Fashion are among the types of scenes you can choose from, while moods range from happy to serious. When done, simply click on the Create Music button, and the platform will automatically generate the soundtrack for your video. In case you are producing videos on a constant basis, you should consider purchasing one of the available subscription plans.
5. Melodrive
Price: Free
Compatibility: iOS, Windows
At the moment, the Lite and Indie versions of Melodrive are available for download free of charge, but the Indie version of this AI music composer still offers more options. Melodrive is one of the first AI systems that can compose emotional and unique music in real time. The AI generates music by adapting to the media environment and aims to match the mood and the style of the video. It is worth noting that Melodrive is still under development and that through time its capabilities to compose music are going to become even more refined than they already are.
6. ORB Composer
Price: Pricing plans start at $149,00
Compatibility: macOS, Windows

You can’t generate music automatically with ORB Composer, because the AI creates music based on your choices. That’s why you need to know at least the basic rules of music composition in order to be able to use the ORB Composer properly. The AI music composer comes bundled with a rich collection of chord progressions, that contains almost all chords used in popular music. This tool is aimed at artists who are interested in experimenting with the possibilities of creating music with artificial intelligence and discovering new styles of music. There are six music templates you can choose from, and you can create compositions by simply organizing different blocks of music.
Filmora AI Audio Stretcher
Wondershare Filmora - AI Audio Stretcher
• Retime any audio track to fit the duration of your video almost instantly.
• Rearrange songs without quality loss.
• Cross-platform supported - (Windows, Mac, iOS, Android)
Start Audio Stretch Start Audio Stretch Start Audio Stretch Learn More >
7. Amadeus Code
Price: Free, but the app offers in-app purchases
Compatibility: iOS
Both skilled musicians and music enthusiast can use this iOS-based app to create new melodies in just a few minutes. The AI engine that the Amadeus Code uses contains chord progressions of some of the most famous songs ever created and it let you use them to create new and innovative structures of music compositions. Moreover, you can use gestures to create new songs or recreate specific segments of songs you composed earlier. Even though Amadeus Code lets its users export audio and MIDI files to audio editing software, you still have to purchase all songs you want to keep.
8. Humtap
Price: Free
Compatibility: iOS
Musicians who have a tough time remembering their own ideas are going to love using Humtap because they can just hum a melody and the app will automatically generate an entire song using different instruments. What’s more, beats can be added with a single tap, and after the music is generated you can proceed to add the vocals as well. Humptap also has video making capabilities, so you can create videos for all songs you compose with this app. All tracks and videos generated with the Humtap AI music composer can be saved to your phone, but you can’t share your new creations to social media directly from the app.
9. Muzeek
Price: Free trial available, pricing plans start from $19 per month
Compatibility: macOS
If you are in need of licensed music for the video you’re planning on sharing to social media networks, then Muzeek is one of the best choices you can make. The AI algorithm Muzeek uses analyzes the videos for which you are generating music and it creates soundtracks that perfectly fit the rhythm of the video. All content creators, including online marketing agencies or video game developers, can rely on Muzeek AI music composer to create authentic music in high quality. Moreover, Muzeek can also analyze the video’s original audio and create subtitles from it or adjust its volume automatically.
10. Brain.fm
Price: Subscription plans start from $6,95 per month
Compatibility: Android, online
The idea that music can make our brains more productive is at the very core of what Brain.fm platform is all about. A team of scientists, musicians and engineers uses artificial intelligence to generate music designed to make your brain more productive and focused. They claim that the music created with their AI music composer achieve its effects in just ten to fifteen minutes. However, you can’t use Brain.fm to create your own music, as this platform is better suited for people who spend a lot of time at work and have a tough time maintaining their focus while performing important tasks.
Conclusion
The opportunities AI music composers offer are still not properly explored, because most of these technologies are still under development. The results AI music composers we included in this article have managed to achieve so far are impressive because each of them can produce high-quality audio files for all sorts of video content. Which AI music composer do you like to use the most? Leave a comment, and let us know.
Benjamin Arango
Benjamin Arango is a writer and a lover of all things video.
Follow @Benjamin Arango
The Ultimate Methods for Crafting Lifelike AI Speech Patterns
How to Clone Voice in 2 Ways-Create AI Voices

Richard Bennett
Mar 27, 2024• Proven solutions
Artificial intelligence has given us a lot of new creations in this digital world. Voice cloning is another creation that uses deep-learning algorithms to generate synthetic speech and clone voice that is nearly impossible for any human to recognize between the real and the fake voice.
Voice cloning can be used for numerous reasons, such as narrating audiobooks to catch an audience and increase the listening experience. It can be used for making digital videos and dubbing celebrity voices. Moreover, it can be used to help communicate with disabled and visually impaired people.
In this article, we are going to talk about 2 ways to clone voice and the steps to produce real-time voice cloning.
- Method 1: Clone Voice Online with Resemble.ai
- Method 2: Clone Voice with Respeecher Software
- Bonus Tip: How to Change Voice in Video Editing - [Video Tutorial]
Finding a Way of Changing Voice while Making Video? Try This Out!
Filmora Voice Changer offers multiple sound effects for voice changing. You can easily turn your voice to another character, or easily switch your voice between female and male. What’s more, it offers various video and audio effects to bring your video more fun! Watch a video tutorial first to see how it works!
Changing Voice in Video Changing Voice in Video Changing Voice in Video Learn More >
Method 1: Clone Voice Online with Resemble.ai
Resemble.ai is a free voice clone software that uses artificial intelligence technology for real-time voice cloning as well as generating synthetic voice from text-to-speech generators. You can create your own custom brand voices for Alexa and Google Assistant. Besides that, you can even integrate your synthetic voice in various games, but some of these features are accessible for the paid version. It also provides instant dubbing in any language. It is effortless to use as you just need to write the text and select your desired voice or can even just upload your own raw voice and acquire real-time voice cloning instantly.
STEP 1: Signup and get to the home screen
Open https://www.resemble.ai/ on your browser, select an option to clone your voice.

STEP 2: Enter your project name and text
Now enter your project name and the desired text and click the play button to get instant and real-time voice cloning.

STEP 3: Select the voice option to add your own voice
Go to the left-hand menu and select the voices option to record your own raw voice to use as a text-to-speech generation.

Method 2: Clone Voice with Respeecher Software
Respeecher is an online tool that applies deep learning and artificial intelligence technology for real-time voice cloning from the speaker’s voice into a famous person. This technology can be very effective for Filmmakers, game developers, and for organization’s advertisement purposes. It works perfectly and gives and high-quality result with passing on human emotion in the speech. This voice clone software works on speech-to-speech technology. This real-time voice cloning software is very professional and keeps its sensitive data secure so that it cannot be breached and used for negative purposes. Some steps of using this voice clone software are:
Step 1: For cloning or dubbing a voice, the client needs special permission from the individual whose voice is going to be targeted.
Step 2: After getting permission, some high-quality voice recording of the target is required.
Step 3: Next is to record the same lines as the target to collect source data with more accuracy.
Step 4: Voice clone software will apply artificial intelligence to get models ready to clone voice.
Step 5: Now, just use the microphone to record your voice, and we will perform a real-time voice clone and will return a high-quality cloned voice.
Bonus Tip: How to Change Voice with Filmora
Filmora is one of the best video and audio editing software that allows you to change the voice of audio/video or recorded voice-over. It is very easy to use and does not add any watermark like some of the other software. Users such as digital content creators use Filmora for their video and audio editing.
For Win 7 or later (64-bit)
 Secure Download
For macOS 10.14 or later
Secure Download
To change your voice, follow the steps below:
Step 1: You need to import the audio or recorded voice-over file, or you can even record your voice. Filmora also has the option to change the pitch of the voice. There are four different options for changing the speed of your desired voice.
Step 2: After you are finished editing your video or audio, you can save it in multiple videos and MP3 audio format and can also export the file to your computer.
An additional feature of Filmora is that it allows you to upload to social media in high quality and can compress the videos to different Android and iOS devices.
Final Thoughts
With all the advancements in the field of technology, artificial intelligence has given rise to a lot of creations, such as real-time voice cloning and making the original voice sound like someone else’s. It aims to help and contribute to the community by several means, like assisting disabled persons and increasing audience visibility and reach. You can clone your voice or can convert your text-to-speech into another person’s voice of your choice easily with some of the best voice clone software available. So stop wasting time and try these real-time voice cloning software according to your needs.
Also, try giving a shot to Filmora Video Voice Changer, and who knows, it might be your perfect fit.
Richard Bennett
Richard Bennett is a writer and a lover of all things video.
Follow @Richard Bennett
Richard Bennett
Mar 27, 2024• Proven solutions
Artificial intelligence has given us a lot of new creations in this digital world. Voice cloning is another creation that uses deep-learning algorithms to generate synthetic speech and clone voice that is nearly impossible for any human to recognize between the real and the fake voice.
Voice cloning can be used for numerous reasons, such as narrating audiobooks to catch an audience and increase the listening experience. It can be used for making digital videos and dubbing celebrity voices. Moreover, it can be used to help communicate with disabled and visually impaired people.
In this article, we are going to talk about 2 ways to clone voice and the steps to produce real-time voice cloning.
- Method 1: Clone Voice Online with Resemble.ai
- Method 2: Clone Voice with Respeecher Software
- Bonus Tip: How to Change Voice in Video Editing - [Video Tutorial]
Finding a Way of Changing Voice while Making Video? Try This Out!
Filmora Voice Changer offers multiple sound effects for voice changing. You can easily turn your voice to another character, or easily switch your voice between female and male. What’s more, it offers various video and audio effects to bring your video more fun! Watch a video tutorial first to see how it works!
Changing Voice in Video Changing Voice in Video Changing Voice in Video Learn More >
Method 1: Clone Voice Online with Resemble.ai
Resemble.ai is a free voice clone software that uses artificial intelligence technology for real-time voice cloning as well as generating synthetic voice from text-to-speech generators. You can create your own custom brand voices for Alexa and Google Assistant. Besides that, you can even integrate your synthetic voice in various games, but some of these features are accessible for the paid version. It also provides instant dubbing in any language. It is effortless to use as you just need to write the text and select your desired voice or can even just upload your own raw voice and acquire real-time voice cloning instantly.
STEP 1: Signup and get to the home screen
Open https://www.resemble.ai/ on your browser, select an option to clone your voice.
STEP 2: Enter your project name and text
Now enter your project name and the desired text and click the play button to get instant and real-time voice cloning.
STEP 3: Select the voice option to add your own voice
Go to the left-hand menu and select the voices option to record your own raw voice to use as a text-to-speech generation.
Method 2: Clone Voice with Respeecher Software
Respeecher is an online tool that applies deep learning and artificial intelligence technology for real-time voice cloning from the speaker’s voice into a famous person. This technology can be very effective for Filmmakers, game developers, and for organization’s advertisement purposes. It works perfectly and gives and high-quality result with passing on human emotion in the speech. This voice clone software works on speech-to-speech technology. This real-time voice cloning software is very professional and keeps its sensitive data secure so that it cannot be breached and used for negative purposes. Some steps of using this voice clone software are:
Step 1: For cloning or dubbing a voice, the client needs special permission from the individual whose voice is going to be targeted.
Step 2: After getting permission, some high-quality voice recording of the target is required.
Step 3: Next is to record the same lines as the target to collect source data with more accuracy.
Step 4: Voice clone software will apply artificial intelligence to get models ready to clone voice.
Step 5: Now, just use the microphone to record your voice, and we will perform a real-time voice clone and will return a high-quality cloned voice.
Bonus Tip: How to Change Voice with Filmora
Filmora is one of the best video and audio editing software that allows you to change the voice of audio/video or recorded voice-over. It is very easy to use and does not add any watermark like some of the other software. Users such as digital content creators use Filmora for their video and audio editing.
For Win 7 or later (64-bit)
Secure Download
For macOS 10.14 or later
Secure Download
To change your voice, follow the steps below:
Step 1: You need to import the audio or recorded voice-over file, or you can even record your voice. Filmora also has the option to change the pitch of the voice. There are four different options for changing the speed of your desired voice.
Step 2: After you are finished editing your video or audio, you can save it in multiple videos and MP3 audio format and can also export the file to your computer.
An additional feature of Filmora is that it allows you to upload to social media in high quality and can compress the videos to different Android and iOS devices.
Final Thoughts
With all the advancements in the field of technology, artificial intelligence has given rise to a lot of creations, such as real-time voice cloning and making the original voice sound like someone else’s. It aims to help and contribute to the community by several means, like assisting disabled persons and increasing audience visibility and reach. You can clone your voice or can convert your text-to-speech into another person’s voice of your choice easily with some of the best voice clone software available. So stop wasting time and try these real-time voice cloning software according to your needs.
Also, try giving a shot to Filmora Video Voice Changer, and who knows, it might be your perfect fit.
Richard Bennett
Richard Bennett is a writer and a lover of all things video.
Follow @Richard Bennett
Also read:
- New 2024 Approved Master Your Sound on Mac The Top 5 Audio Mixer Selections
- New 2024 Approved Curated Collection Unrestricted Melodies Ideal for Visual Storytelling
- In 2024, Mastering Auditory Narratives The Ultimate List of Where to Find Premium Podcast Sound Effects
- In 2024, Hear the Difference Effective Strategies for Silencing Background Chatter Online
- Updated Quiet the Room with a Boosted Windows Volume - Free Solutions for All Users
- Updated From Japanese Original to International Favorite An Exploration of Anime Voiceover Artistry
- New In 2024, Show Audio Waveform and Add Waveform Animation in Premiere ProTutorial
- Updated In 2024, The Ultimate Encyclopedia of Affordable Audio Recorder Applications
- Updated Simplifying Vocal Alterations The Audacity Technique for 2024
- 2024 Approved Quick Fixes to Keep TikTok Sound Off A Step-by-Step Approach
- Auditory Delights in Cinema - Celebrating the Best 8 Film Soundscapes for 2024
- New Best Lyric Video Templates for After Effects
- New Gather Groaning Sound Tokens
- Can Advanced Audio Equalization Make a Difference in Sound Quality, In 2024
- Updated 2024 Approved From Beats to Pages The Ultimate Guide to Online MP3 Conversion to Text
- New In 2024, The Artistic Edge of Professional Sound Editing Software Analyzing Features, Advantages, Limitations, and Competitive Overview
- Updated 2024 Approved Quietude Achieved Advanced Video Editing for Peaceful Soundscapes Using Premiere Pro
- Finding Software that Simulates Varied Stomach Gas Emissions
- Updated 2024 Approved The Easy Way to Remove Vocals From an Audio Track in Audacity
- 2024 Approved Mastering Rapid Audio Playback Adjusting Pace with Ease
- New 2024 Approved Add Soundtrack Segment to iMovie Project Layout
- Tailoring Audacitys Volume Settings for Optimal Listening Experience for 2024
- Updated Guide to Achieving Soundless Visual Content for 2024
- Essential MP3 Recording Apps A List of the Top 5 Best on Todays Market for 2024
- Updated 2024 Approved Selecting Excellent Audio Mixers Specifically Designed for Mac Platforms
- Updated In 2024, A Symphony for the Ears Ranking the Top 8 Filmmaking Sonic Experiences
- Updated In 2024, These Titles Are Designed to Convey a Similar Message About Using Autotune Plugins Within Audacity, Targeting Users Interested in Vocal Processing and Sound Editing Enhancements
- New Purr-Fect Tone Simulation for 2024
- New The Ultimate Guide to Tweaking Siris Sound Palette on iPhone, iPad, and Mac
- New In 2024, Virtual Error Sounds Library 2023 – Complimentary Access and Downloads
- In 2024, Step-By-Step Techniques for Embedding Audio Into Videos
- Updated In 2024, Unplugging the Soundtrack An Incremental Guide to Silencing Surrounding Tunes
- Updated 2024 Approved The Ultimate iMovie Soundtrack Tips to Create Immersive Audio Landscapes
- Discover the Premier 5 Audio Cutting Software on Android Devices for 2024
- Trace the Tonal Embodiment of an Ancient Bell
- Updated In 2024, Streamlining Silence Simplified Guide to Extracting Background Noise From Music Tracks Using Audacity
- 2024 Approved Discover Auditory Wolf Screams
- Updated Unveiling the Artistic Audio Editor A Comprehensive Review with Pros, Cons, and Alternatives for 2024
- New In 2024, The Complete Process Installing Lame on Audacity
- 2024 Approved Mastering Multimedia Production on Chromebook with Audacity - Setup & Uninstall Guide
- In 2024, Top Background Music Remover App For Android And iPhone
- In 2024, The Hidden Gems for Free Download Guitar Visuals and Acoustic Pieces
- New 2024 Approved Review of LazLive Live Selling Platform With Guide
- Easy Guide How To Bypass Vivo Y78+ FRP Android 10/11/12/13
- Unlock android phone if you forget the Lava Yuva 3 Pro password or pattern lock
- In 2024, How Do I SIM Unlock My Apple iPhone 13 mini?
- Updated Best 5 AI Voice Generators Online (Supports All Browsers) for 2024
- How To Recover Data From Lost or Stolen iPhone 14 In Easy Steps | Stellar
- In 2024, The Ultimate Guide to Generating Speech in Different Languages With the Best Tools
- 3 Solutions to Find Your Honor 100 Current Location of a Mobile Number | Dr.fone
- In 2024, A Step-by-Step Guide on Using ADB and Fastboot to Remove FRP Lock on your Infinix Smart 8 HD
- How to Track Xiaomi 14 by Phone Number | Dr.fone
- Mastering Lock Screen Settings How to Enable and Disable on Poco M6 Pro 4G
- In 2024, Guide on How To Change Your Apple ID Email Address On iPhone 8 | Dr.fone
- 5 Ways to Track Oppo A78 5G without App | Dr.fone
- New 2024 Approved Tips That Show Anybody How to Get Awesome Background for Slideshow in PowerPoint
- How to Fix My Apple iPhone 6 Location Is Wrong | Dr.fone
- New In 2024, MKVtoolnix for Mac The Easiest Way to Edit Videos
- Updated OS X Mavericks MP4 Editing Software Convert, Trim, and More for 2024
- Updated Discover the Best Free Video Editors for 4K Footage for 2024
- In 2024, Do You Want to Know About Efficient Motion Blur Plugins for Adobe Effects? Read This Article to Find Out How to Use Motion Blur Plugins for Enhanced Results
- In 2024, 8 Safe and Effective Methods to Unlock Your Apple iPhone 6 Without a Passcode
- Top 9 Asus ROG Phone 7 Ultimate Monitoring Apps for Parental Controls | Dr.fone
- How to Use Phone Clone to Migrate Your Samsung Galaxy S24 Ultra Data? | Dr.fone
- New Unlock Amazing Animations 10 Essential Online Tools for 2024
- A Step-by-Step Guide on Using ADB and Fastboot to Remove FRP Lock from your OnePlus 11 5G
- 7 Fixes for Unfortunately, Phone Has Stopped on Realme Narzo N53 | Dr.fone
- In 2024, How to Fix Pokemon Go Route Not Working On Apple iPhone 12 Pro? | Dr.fone
- How To Restore Missing Pictures Files from Infinix Hot 40.
- 4 Ways to Unlock Apple iPhone 15 Plus to Use USB Accessories Without Passcode
- In 2024, How Can I Use a Fake GPS Without Mock Location On Apple iPhone 6? | Dr.fone
- Discover the Best Ways to Convert YouTube Videos to MP3 Files for 2024
- In 2024, 3 Effective Methods to Fake GPS location on Android For your Samsung Galaxy S23+ | Dr.fone
- Why does the pokemon go battle league not available On Xiaomi Redmi A2+ | Dr.fone
- In 2024, How to Fake GPS on Android without Mock Location For your Honor 80 Pro Straight Screen Edition | Dr.fone
- New Expert Recommendations Best Video Editors for Windows for 2024
- Updated In 2024, Best Free MPEG Video Joiner Software Top 5 List
- In 2024, Guide to Mirror Your Tecno Camon 20 Premier 5G to Other Android devices | Dr.fone
- updated 2024 Approved Create Lip Sync TikTok Videos Without Installing Any App
- How to recover old music from your GT 5 (240W)
- How to Perform Hard Reset on Infinix Note 30 Pro? | Dr.fone
- How To Repair Apple iPhone 12 Pro iOS? | Dr.fone
- In 2024, A Working Guide For Pachirisu Pokemon Go Map On Motorola Razr 40 Ultra | Dr.fone
- Title: Pioneering Audio-Visual Synergy A Comprehensive Guide to Adding Soundtracks in Premiere Pro
- Author: Ella
- Created at : 2024-06-15 16:56:08
- Updated at : 2024-06-16 16:56:08
- Link: https://sound-optimizing.techidaily.com/pioneering-audio-visual-synergy-a-comprehensive-guide-to-adding-soundtracks-in-premiere-pro/
- License: This work is licensed under CC BY-NC-SA 4.0.
