
:max_bytes(150000):strip_icc():format(webp)/should-you-buy-an-apple-tv-5248431-f35331ef36b749b9895a2c1e3705cf22.jpg)
Pioneering Digital Maestros A Comprehensive List of AIs Finest Composers for 2024
Pioneering Digital Maestros: A Comprehensive List of AI’s Finest Composers (2024 Edition)
Top Best 10 AI Music Composers in 2024

Benjamin Arango
Mar 27, 2024• Proven solutions
Robots can’t be creative, right? A number of startups that focus on the development of artificial intelligence that is capable of composing music have proved this statement wrong. AI music composers generate original, copyright-free music you can use in your latest YouTube video or social media video ad. You don’t even have to be a sound designer or a musician to produce soundtracks for your videos with AI Music Composers, because you can upload the music that has already been recorded and create variations of it. So, let’s take a look at what AI music composers have to offer in 2024.
| 1 - Amper Music | 2 - AIVA |
|---|---|
| 3 - Jukedeck | 4 - Ecrett Music |
| 5 - Melodrive | 6 - ORB Composer |
| 7 - Amadeus Code | 8 - Humtap |
| 9 - Muzeek | 10 - Brain.fm |
Ten Best AI Music Composers You Should Know About
The AI technologies that can compose music are still relatively novel, and as time passes, they can only develop and grow further. Consequently, each of the AI music composers we featured in this article offers a different range of possibilities. Here are the ten best AI music composers you shouldn’t miss out on in 2024.

Filmora AI Music Editor
Edit Audio with AI Music Editor
Experience the power of Filmora’s AI tools and make your audio or music stand out like never before! Audio Denoise, Audio Ducking, Audio Synchronization, Audio Stretch, etc…
Try It Free Try It Free Try It Free Learn More >
1. Amper Music
Price: Available upon request
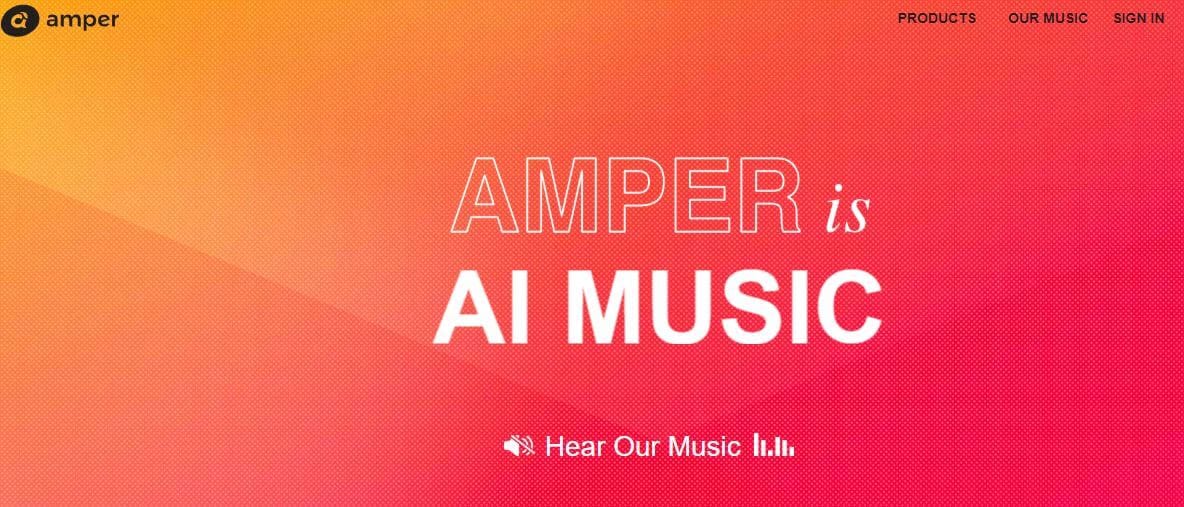
Industry professionals know just how frustrating the music licensing process can be. Amper Music is a cloud-based platform designed to simplify the process of creating soundtracks for movies and video games, as it produces AI generated algorithms that help users create music in a variety of music genres. You must first create an account on this platform, in order to be able to use the free version of Amper Music that provides only a limited amount of features. Upgrading to the pro version of Amper Music will enable you to enjoy the full potential of this rapidly growing AI Music Composer.
2. AIVA
Price: Free version available, subscription plans start from €14 p/month
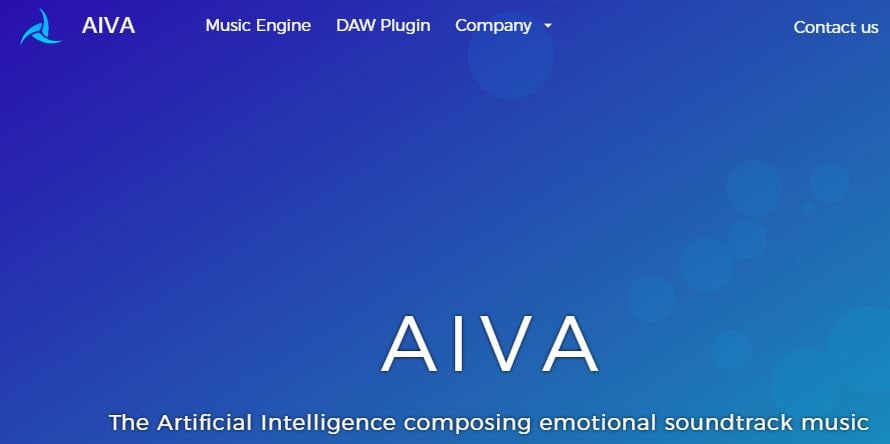
Since 2016, when AIVA Technologies was founded, its team has worked on developing an AI script that can compose emotional soundtracks for ads, video games, or movies. Soon after, the AI published its first oeuvre titled ‘Opus 1 for Piano Solo and in the subsequent years, AIVA released an album and composed music for a video game. Besides enabling its users to create music from scratch, AIVA can also be used to produce variations of existing songs. The music engine that powers this AI music composer makes the production of corporate or social media videos much easier, as it eliminates the need to go through the music licensing process.
3. Jukedeck
Price: Free version available, Pricing plans start from $0.99 per download

The AI music composer developed by the Jukedeck startup resembles the Amper’s music composer because they both rely on neural networks to analyze music data, that is then used by the AI to learn how to compose original music. Each track that is available through this AI music composer can be edited, so you can change its length or its tempo. You can create music with Jukedeck for free if you decide to give all the rights to the AI composer, while both individuals and small businesses can purchase the license to use the song created with Jukedeck for just $0.99.
Note: Jukedeck has been acquired by TikTok, and we are waiting for a new Jukedeck.
![]()
A cross-platform for making videos anywhere for all creators

Why your video editing isn’t good enough? How about some creative inspo?
- 100 Million+ Users
- 150+ Countries and Regions
- 4 Million+ Social Media Followers
- 5 Million+ Stock Media for Use
* Secure Download

4. Ecrett Music
Price: Subscription plans start at $5
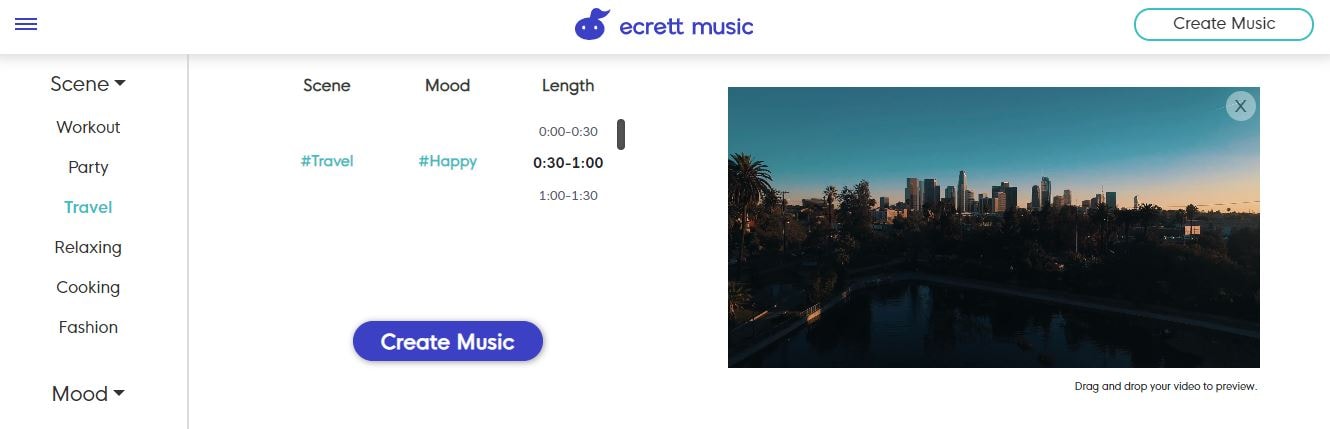
This online AI music composer makes creating stunning soundtracks for videos look easy. You just have to upload a video for which you want to generate music and select the type of scene and the mood of that scene. Party, Travel or Fashion are among the types of scenes you can choose from, while moods range from happy to serious. When done, simply click on the Create Music button, and the platform will automatically generate the soundtrack for your video. In case you are producing videos on a constant basis, you should consider purchasing one of the available subscription plans.
5. Melodrive
Price: Free
Compatibility: iOS, Windows
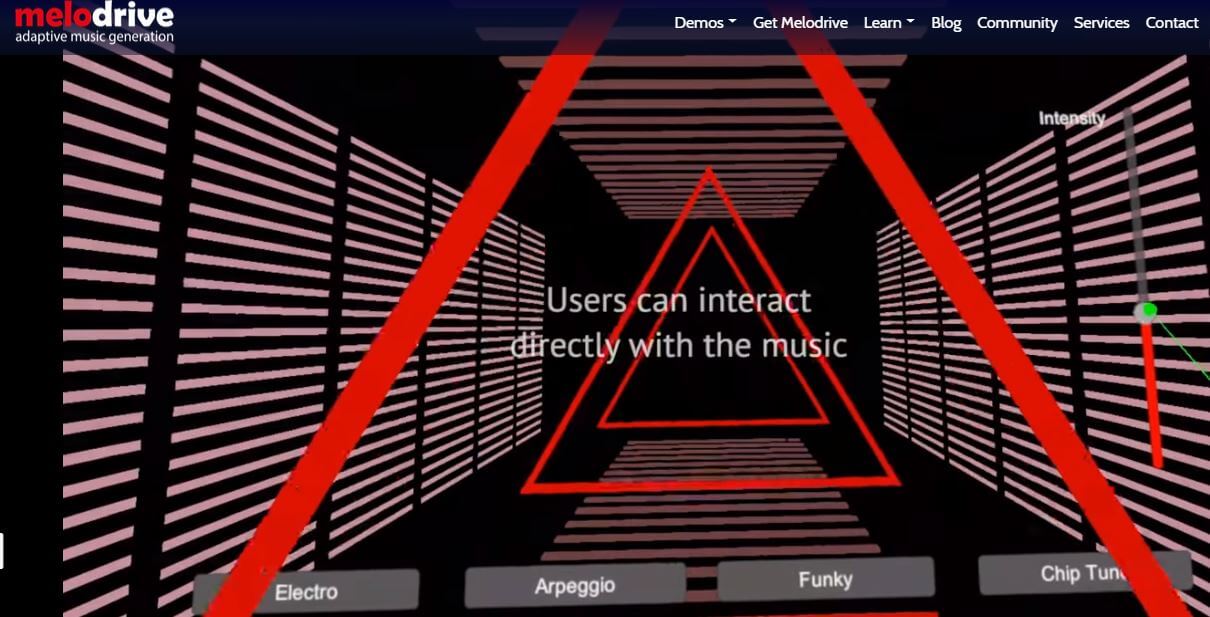
At the moment, the Lite and Indie versions of Melodrive are available for download free of charge, but the Indie version of this AI music composer still offers more options. Melodrive is one of the first AI systems that can compose emotional and unique music in real time. The AI generates music by adapting to the media environment and aims to match the mood and the style of the video. It is worth noting that Melodrive is still under development and that through time its capabilities to compose music are going to become even more refined than they already are.
6. ORB Composer
Price: Pricing plans start at $149,00
Compatibility: macOS, Windows

You can’t generate music automatically with ORB Composer, because the AI creates music based on your choices. That’s why you need to know at least the basic rules of music composition in order to be able to use the ORB Composer properly. The AI music composer comes bundled with a rich collection of chord progressions, that contains almost all chords used in popular music. This tool is aimed at artists who are interested in experimenting with the possibilities of creating music with artificial intelligence and discovering new styles of music. There are six music templates you can choose from, and you can create compositions by simply organizing different blocks of music.

Filmora AI Audio Stretcher
Wondershare Filmora - AI Audio Stretcher
• Retime any audio track to fit the duration of your video almost instantly.
• Rearrange songs without quality loss.
• Cross-platform supported - (Windows, Mac, iOS, Android)
Start Audio Stretch Start Audio Stretch Start Audio Stretch Learn More >
7. Amadeus Code
Price: Free, but the app offers in-app purchases
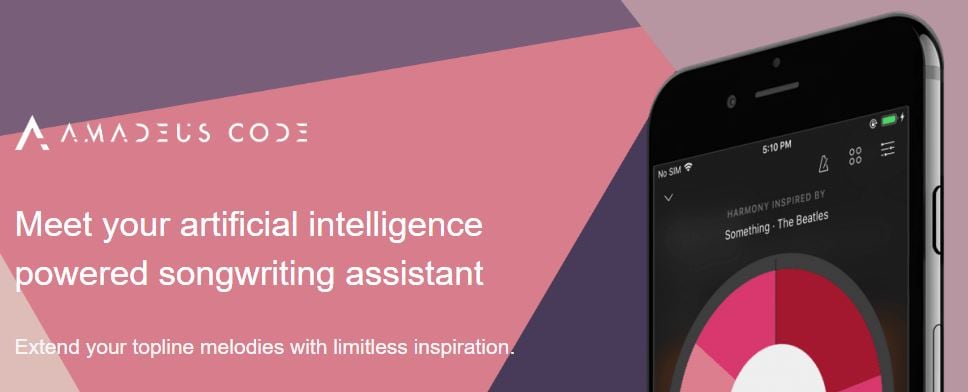
Compatibility: iOS
Both skilled musicians and music enthusiast can use this iOS-based app to create new melodies in just a few minutes. The AI engine that the Amadeus Code uses contains chord progressions of some of the most famous songs ever created and it let you use them to create new and innovative structures of music compositions. Moreover, you can use gestures to create new songs or recreate specific segments of songs you composed earlier. Even though Amadeus Code lets its users export audio and MIDI files to audio editing software, you still have to purchase all songs you want to keep.
8. Humtap
Price: Free
Compatibility: iOS
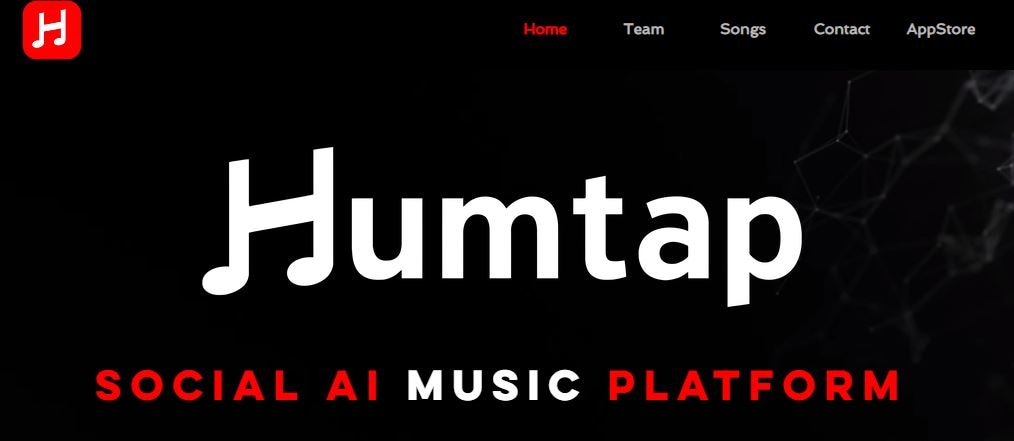
Musicians who have a tough time remembering their own ideas are going to love using Humtap because they can just hum a melody and the app will automatically generate an entire song using different instruments. What’s more, beats can be added with a single tap, and after the music is generated you can proceed to add the vocals as well. Humptap also has video making capabilities, so you can create videos for all songs you compose with this app. All tracks and videos generated with the Humtap AI music composer can be saved to your phone, but you can’t share your new creations to social media directly from the app.
9. Muzeek
Price: Free trial available, pricing plans start from $19 per month
Compatibility: macOS
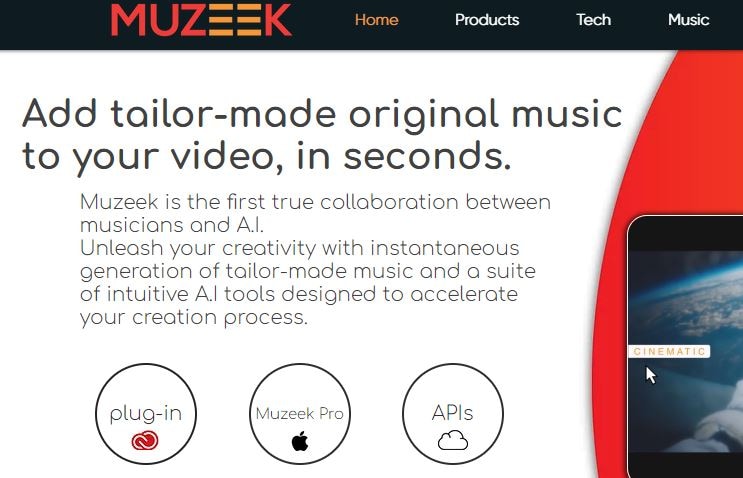
If you are in need of licensed music for the video you’re planning on sharing to social media networks, then Muzeek is one of the best choices you can make. The AI algorithm Muzeek uses analyzes the videos for which you are generating music and it creates soundtracks that perfectly fit the rhythm of the video. All content creators, including online marketing agencies or video game developers, can rely on Muzeek AI music composer to create authentic music in high quality. Moreover, Muzeek can also analyze the video’s original audio and create subtitles from it or adjust its volume automatically.
10. Brain.fm
Price: Subscription plans start from $6,95 per month
Compatibility: Android, online
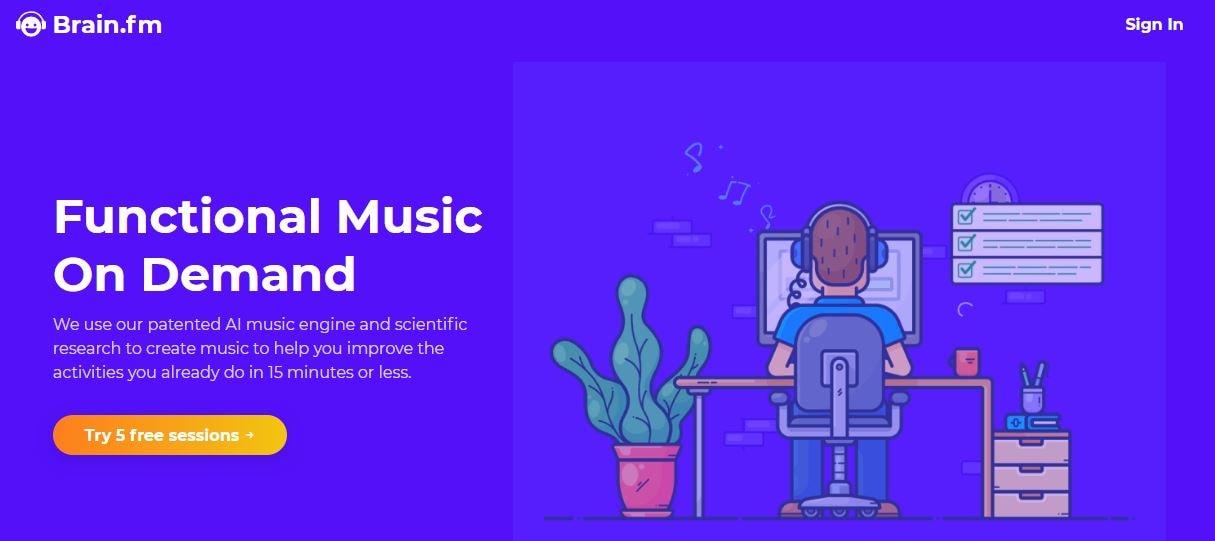
The idea that music can make our brains more productive is at the very core of what Brain.fm platform is all about. A team of scientists, musicians and engineers uses artificial intelligence to generate music designed to make your brain more productive and focused. They claim that the music created with their AI music composer achieve its effects in just ten to fifteen minutes. However, you can’t use Brain.fm to create your own music, as this platform is better suited for people who spend a lot of time at work and have a tough time maintaining their focus while performing important tasks.
Conclusion
The opportunities AI music composers offer are still not properly explored, because most of these technologies are still under development. The results AI music composers we included in this article have managed to achieve so far are impressive because each of them can produce high-quality audio files for all sorts of video content. Which AI music composer do you like to use the most? Leave a comment, and let us know.
Benjamin Arango
Benjamin Arango is a writer and a lover of all things video.
Follow @Benjamin Arango
Benjamin Arango
Mar 27, 2024• Proven solutions
Robots can’t be creative, right? A number of startups that focus on the development of artificial intelligence that is capable of composing music have proved this statement wrong. AI music composers generate original, copyright-free music you can use in your latest YouTube video or social media video ad. You don’t even have to be a sound designer or a musician to produce soundtracks for your videos with AI Music Composers, because you can upload the music that has already been recorded and create variations of it. So, let’s take a look at what AI music composers have to offer in 2024.
| 1 - Amper Music | 2 - AIVA |
|---|---|
| 3 - Jukedeck | 4 - Ecrett Music |
| 5 - Melodrive | 6 - ORB Composer |
| 7 - Amadeus Code | 8 - Humtap |
| 9 - Muzeek | 10 - Brain.fm |
Ten Best AI Music Composers You Should Know About
The AI technologies that can compose music are still relatively novel, and as time passes, they can only develop and grow further. Consequently, each of the AI music composers we featured in this article offers a different range of possibilities. Here are the ten best AI music composers you shouldn’t miss out on in 2024.
Filmora AI Music Editor
Edit Audio with AI Music Editor
Experience the power of Filmora’s AI tools and make your audio or music stand out like never before! Audio Denoise, Audio Ducking, Audio Synchronization, Audio Stretch, etc…
Try It Free Try It Free Try It Free Learn More >
1. Amper Music
Price: Available upon request
Industry professionals know just how frustrating the music licensing process can be. Amper Music is a cloud-based platform designed to simplify the process of creating soundtracks for movies and video games, as it produces AI generated algorithms that help users create music in a variety of music genres. You must first create an account on this platform, in order to be able to use the free version of Amper Music that provides only a limited amount of features. Upgrading to the pro version of Amper Music will enable you to enjoy the full potential of this rapidly growing AI Music Composer.
2. AIVA
Price: Free version available, subscription plans start from €14 p/month
Since 2016, when AIVA Technologies was founded, its team has worked on developing an AI script that can compose emotional soundtracks for ads, video games, or movies. Soon after, the AI published its first oeuvre titled ‘Opus 1 for Piano Solo and in the subsequent years, AIVA released an album and composed music for a video game. Besides enabling its users to create music from scratch, AIVA can also be used to produce variations of existing songs. The music engine that powers this AI music composer makes the production of corporate or social media videos much easier, as it eliminates the need to go through the music licensing process.
3. Jukedeck
Price: Free version available, Pricing plans start from $0.99 per download
The AI music composer developed by the Jukedeck startup resembles the Amper’s music composer because they both rely on neural networks to analyze music data, that is then used by the AI to learn how to compose original music. Each track that is available through this AI music composer can be edited, so you can change its length or its tempo. You can create music with Jukedeck for free if you decide to give all the rights to the AI composer, while both individuals and small businesses can purchase the license to use the song created with Jukedeck for just $0.99.
Note: Jukedeck has been acquired by TikTok, and we are waiting for a new Jukedeck.
![]()
A cross-platform for making videos anywhere for all creators
Why your video editing isn’t good enough? How about some creative inspo?
- 100 Million+ Users
- 150+ Countries and Regions
- 4 Million+ Social Media Followers
- 5 Million+ Stock Media for Use
* Secure Download
4. Ecrett Music
Price: Subscription plans start at $5

This online AI music composer makes creating stunning soundtracks for videos look easy. You just have to upload a video for which you want to generate music and select the type of scene and the mood of that scene. Party, Travel or Fashion are among the types of scenes you can choose from, while moods range from happy to serious. When done, simply click on the Create Music button, and the platform will automatically generate the soundtrack for your video. In case you are producing videos on a constant basis, you should consider purchasing one of the available subscription plans.
5. Melodrive
Price: Free
Compatibility: iOS, Windows
At the moment, the Lite and Indie versions of Melodrive are available for download free of charge, but the Indie version of this AI music composer still offers more options. Melodrive is one of the first AI systems that can compose emotional and unique music in real time. The AI generates music by adapting to the media environment and aims to match the mood and the style of the video. It is worth noting that Melodrive is still under development and that through time its capabilities to compose music are going to become even more refined than they already are.
6. ORB Composer
Price: Pricing plans start at $149,00
Compatibility: macOS, Windows

You can’t generate music automatically with ORB Composer, because the AI creates music based on your choices. That’s why you need to know at least the basic rules of music composition in order to be able to use the ORB Composer properly. The AI music composer comes bundled with a rich collection of chord progressions, that contains almost all chords used in popular music. This tool is aimed at artists who are interested in experimenting with the possibilities of creating music with artificial intelligence and discovering new styles of music. There are six music templates you can choose from, and you can create compositions by simply organizing different blocks of music.
Filmora AI Audio Stretcher
Wondershare Filmora - AI Audio Stretcher
• Retime any audio track to fit the duration of your video almost instantly.
• Rearrange songs without quality loss.
• Cross-platform supported - (Windows, Mac, iOS, Android)
Start Audio Stretch Start Audio Stretch Start Audio Stretch Learn More >
7. Amadeus Code
Price: Free, but the app offers in-app purchases
Compatibility: iOS
Both skilled musicians and music enthusiast can use this iOS-based app to create new melodies in just a few minutes. The AI engine that the Amadeus Code uses contains chord progressions of some of the most famous songs ever created and it let you use them to create new and innovative structures of music compositions. Moreover, you can use gestures to create new songs or recreate specific segments of songs you composed earlier. Even though Amadeus Code lets its users export audio and MIDI files to audio editing software, you still have to purchase all songs you want to keep.
8. Humtap
Price: Free
Compatibility: iOS
Musicians who have a tough time remembering their own ideas are going to love using Humtap because they can just hum a melody and the app will automatically generate an entire song using different instruments. What’s more, beats can be added with a single tap, and after the music is generated you can proceed to add the vocals as well. Humptap also has video making capabilities, so you can create videos for all songs you compose with this app. All tracks and videos generated with the Humtap AI music composer can be saved to your phone, but you can’t share your new creations to social media directly from the app.
9. Muzeek
Price: Free trial available, pricing plans start from $19 per month
Compatibility: macOS
If you are in need of licensed music for the video you’re planning on sharing to social media networks, then Muzeek is one of the best choices you can make. The AI algorithm Muzeek uses analyzes the videos for which you are generating music and it creates soundtracks that perfectly fit the rhythm of the video. All content creators, including online marketing agencies or video game developers, can rely on Muzeek AI music composer to create authentic music in high quality. Moreover, Muzeek can also analyze the video’s original audio and create subtitles from it or adjust its volume automatically.
10. Brain.fm
Price: Subscription plans start from $6,95 per month
Compatibility: Android, online
The idea that music can make our brains more productive is at the very core of what Brain.fm platform is all about. A team of scientists, musicians and engineers uses artificial intelligence to generate music designed to make your brain more productive and focused. They claim that the music created with their AI music composer achieve its effects in just ten to fifteen minutes. However, you can’t use Brain.fm to create your own music, as this platform is better suited for people who spend a lot of time at work and have a tough time maintaining their focus while performing important tasks.
Conclusion
The opportunities AI music composers offer are still not properly explored, because most of these technologies are still under development. The results AI music composers we included in this article have managed to achieve so far are impressive because each of them can produce high-quality audio files for all sorts of video content. Which AI music composer do you like to use the most? Leave a comment, and let us know.
Benjamin Arango
Benjamin Arango is a writer and a lover of all things video.
Follow @Benjamin Arango
“Detaching Sound Effects From Videos Using Adobe Premiere Pro – Step by Step”
Are you into the creative industry? Do you need to detach audio from a video? Are you a fan of Premiere Pro?
With the media industry progressing, advanced features are on the rise. Each upgrade is for the creator’s ease. The well-developed functions limit the stress at the workplace. Don’t you agree? The media production needs to detach audio from video. It is essential to censor audio out or eliminate unwanted background noise.
Most often, audio has to be detached for B-roll. One can detach audio Premiere Pro effortlessly. The article covers the procedure to extract and separate audio from a video. We shall also have a preview of Filmora. So, what are we waiting for? Let us commence this!
In this article
01 How Can You Extract, Separate, or Detach Audio from Video? [Premiere Pro]
02 Tips to Detach or Remove Audio From Video in Filmora
Part 1: How Can You Extract, Separate, or Detach Audio from Video? [Premiere Pro]
Premiere Pro detaches audio flawlessly. Adobe Premiere Pro is a video editing software. With creative tools, a flexible interface, and powerful capabilities, Premiere Pro turns your raw footage into something extraordinary. It enables you to perform color grading, color correction, and transitions effectively. The largest toolset has made life bearable for creators.
Additionally, Adobe Premiere Pro has an excellent range of collaboration tools. There are learning tools to guide the beginner towards a successful process. These tutorials have assisted the user in performing basic operations productively. The refined video editing tools have created a revolution in the market. The Auto Reframe feature changes the crop selection by keeping the attention where it is due.
Are you invested in detaching the audio process? Worry no more as we have got you. Premiere Pro doesn’t leave its users empty-handed. Audio extraction and separation both would be included in this section.
Audio Extraction Process
The audio extraction procedure is a great way to lubricate the editing process. The audio is extracted to add new audio master clips in this phenomenon. The channel mapping, duration, gain, speed, and footage adjustment are applied to the extracted clips. The original content remains preserved.
Before detaching audio, let us shift our focus to extracting it. So, are you with us? Follow the step-by-step below to extract audio from the video.
Step 1: Launching Premiere Pro
Open Adobe Premiere Pro. Press ‘New Project’ from the interface that appears. The default settings are good to go. However, make sure that the output location is appropriate. Hit ‘OK.’

Step 2: Importing the Clips
Now, click on ‘Media Browser’ from the middle panel. Import the targeted video clips to initiate the process. Select the videos whose audio has to be extracted. Head to the ‘Clip’ section and choose ‘Audio Options.’ Hit ‘Extract Audio’ afterward.

Step 3: File Extraction
In a couple of seconds, Premiere Pro creates duplicate audio files. The original video clips are not affected in any way. Moving on, let us move on to export the extracted audio clips.

Step 4: Exporting Process
Mark in and out points on your sequence for the session you wish to export. Mute the rest of the tracks. Now, navigate to the ‘File,’ press ‘Export,’ and then ‘Media.’ For encoding format, choose between MP3 and WAV form audio based on the original file format. Choose the output location. Hit ‘Export,’ and you are done.

Audio Detaching Process
Similarly, audio separation is another way to access a part of the audio. It permits you to use any audio section and make necessary edits to it. To detach audio in Premiere Pro, kindly follow the guidelines below.
Step 1: Importing the Media Files
Launch Premiere Pro from your computer. The interface opens up in seconds. The user is recommended to browse the targeted video with attached audio. Add it to the timeline of the Premiere Pro.

Step 2: Unlinking Process
After that, right-click on the clip. Choose ‘Unlink’ from the list of options that appear. The user can easily select and edit both the audio and video content. However, you can also separate audio using another faster process.

Step 3: Deleting Process
Hold down the ALT key from your keyboard and click on the audio clip to do this more effectively. Use the ‘Delete’ button and get rid of it once and for all. Now, make necessary edits, and you are done for the day!

Part 2: Tips to Detach or Remove Audio From Video in Filmora
Wondershare Filmora needs no introduction. Filmora has always had something refined to offer in a world full of video editors. Wouldn’t you agree? A content creator needs a video editing tool with an interactive interface with balanced functions.
Filmora knows different tricks to keep creative professionals invested in it. From keyframing to motion tracking and green screen to color matching, Wondershare Filmora wouldn’t disappoint you. The optimized GPU detection brings productivity to work. As far as audio editing is concerned, Filmora has advanced tools on the go.
The audio equalizer and audio mixer fine-tune the music and adjust the audio of separate tracks, respectively. You can split audio, adjust the audio volume, and perform audio ducking. The creative creators can also add a voiceover and trim the clips. The original audio of the video can also be replaced technically. Isn’t that the whole dream?
In short, Filmora has everything under one platform. There is no need to download extensive video editors for each functionality.
Moving on to the section, we shall discuss the procedure to detach or remove audio using this exceptional tool. So, let us try this!
For Win 7 or later (64-bit)
For macOS 10.12 or later
Step 1: Browsing the Video
Download Wondershare Filmora in your system. Launch it as soon as the process is concluded. Import the targeted video files into the program. Drag the video from the library onto the timeline.

Step 2: Removing Audio
To remove the audio, right-click on the video file from the timeline. Click on ‘Detach audio’ from the options that appear. The audio file is separated from the video file. It is displayed in another track below the video track.

Step 3: Final Process
Now, the user is free to make edits to the audio and perform modifications as deemed necessary. Delete the separated audio track if you wish to add a new voiceover or audio in the background. You can do so by clicking on the trash button above the timeline.

Conclusion
The raw videos undergo treatment to look ravishing. Don’t you think? Without the needed editing, these videos wouldn’t stand anywhere. After the original audio is detached, a better message is expressed to replace it with promising content.
The article introduced Premiere Pro. Moreover, how to detach audio from video Premiere Pro was also discussed in detail. If you want to extract audio from video, this write-up will help you. Wondershare Filmora is a video editing software with great tools to get the trick done in seconds.
Versatile Video Editor - Wondershare Filmora
An easy yet powerful editor
Numerous effects to choose from
Detailed tutorials provided by the official channel
02 Tips to Detach or Remove Audio From Video in Filmora
Part 1: How Can You Extract, Separate, or Detach Audio from Video? [Premiere Pro]
Premiere Pro detaches audio flawlessly. Adobe Premiere Pro is a video editing software. With creative tools, a flexible interface, and powerful capabilities, Premiere Pro turns your raw footage into something extraordinary. It enables you to perform color grading, color correction, and transitions effectively. The largest toolset has made life bearable for creators.
Additionally, Adobe Premiere Pro has an excellent range of collaboration tools. There are learning tools to guide the beginner towards a successful process. These tutorials have assisted the user in performing basic operations productively. The refined video editing tools have created a revolution in the market. The Auto Reframe feature changes the crop selection by keeping the attention where it is due.
Are you invested in detaching the audio process? Worry no more as we have got you. Premiere Pro doesn’t leave its users empty-handed. Audio extraction and separation both would be included in this section.
Audio Extraction Process
The audio extraction procedure is a great way to lubricate the editing process. The audio is extracted to add new audio master clips in this phenomenon. The channel mapping, duration, gain, speed, and footage adjustment are applied to the extracted clips. The original content remains preserved.
Before detaching audio, let us shift our focus to extracting it. So, are you with us? Follow the step-by-step below to extract audio from the video.
Step 1: Launching Premiere Pro
Open Adobe Premiere Pro. Press ‘New Project’ from the interface that appears. The default settings are good to go. However, make sure that the output location is appropriate. Hit ‘OK.’
Step 2: Importing the Clips
Now, click on ‘Media Browser’ from the middle panel. Import the targeted video clips to initiate the process. Select the videos whose audio has to be extracted. Head to the ‘Clip’ section and choose ‘Audio Options.’ Hit ‘Extract Audio’ afterward.
Step 3: File Extraction
In a couple of seconds, Premiere Pro creates duplicate audio files. The original video clips are not affected in any way. Moving on, let us move on to export the extracted audio clips.
Step 4: Exporting Process
Mark in and out points on your sequence for the session you wish to export. Mute the rest of the tracks. Now, navigate to the ‘File,’ press ‘Export,’ and then ‘Media.’ For encoding format, choose between MP3 and WAV form audio based on the original file format. Choose the output location. Hit ‘Export,’ and you are done.
Audio Detaching Process
Similarly, audio separation is another way to access a part of the audio. It permits you to use any audio section and make necessary edits to it. To detach audio in Premiere Pro, kindly follow the guidelines below.
Step 1: Importing the Media Files
Launch Premiere Pro from your computer. The interface opens up in seconds. The user is recommended to browse the targeted video with attached audio. Add it to the timeline of the Premiere Pro.
Step 2: Unlinking Process
After that, right-click on the clip. Choose ‘Unlink’ from the list of options that appear. The user can easily select and edit both the audio and video content. However, you can also separate audio using another faster process.
Step 3: Deleting Process
Hold down the ALT key from your keyboard and click on the audio clip to do this more effectively. Use the ‘Delete’ button and get rid of it once and for all. Now, make necessary edits, and you are done for the day!
Part 2: Tips to Detach or Remove Audio From Video in Filmora
Wondershare Filmora needs no introduction. Filmora has always had something refined to offer in a world full of video editors. Wouldn’t you agree? A content creator needs a video editing tool with an interactive interface with balanced functions.
Filmora knows different tricks to keep creative professionals invested in it. From keyframing to motion tracking and green screen to color matching, Wondershare Filmora wouldn’t disappoint you. The optimized GPU detection brings productivity to work. As far as audio editing is concerned, Filmora has advanced tools on the go.
The audio equalizer and audio mixer fine-tune the music and adjust the audio of separate tracks, respectively. You can split audio, adjust the audio volume, and perform audio ducking. The creative creators can also add a voiceover and trim the clips. The original audio of the video can also be replaced technically. Isn’t that the whole dream?
In short, Filmora has everything under one platform. There is no need to download extensive video editors for each functionality.
Moving on to the section, we shall discuss the procedure to detach or remove audio using this exceptional tool. So, let us try this!
For Win 7 or later (64-bit)
For macOS 10.12 or later
Step 1: Browsing the Video
Download Wondershare Filmora in your system. Launch it as soon as the process is concluded. Import the targeted video files into the program. Drag the video from the library onto the timeline.
Step 2: Removing Audio
To remove the audio, right-click on the video file from the timeline. Click on ‘Detach audio’ from the options that appear. The audio file is separated from the video file. It is displayed in another track below the video track.
Step 3: Final Process
Now, the user is free to make edits to the audio and perform modifications as deemed necessary. Delete the separated audio track if you wish to add a new voiceover or audio in the background. You can do so by clicking on the trash button above the timeline.
Conclusion
The raw videos undergo treatment to look ravishing. Don’t you think? Without the needed editing, these videos wouldn’t stand anywhere. After the original audio is detached, a better message is expressed to replace it with promising content.
The article introduced Premiere Pro. Moreover, how to detach audio from video Premiere Pro was also discussed in detail. If you want to extract audio from video, this write-up will help you. Wondershare Filmora is a video editing software with great tools to get the trick done in seconds.
Versatile Video Editor - Wondershare Filmora
An easy yet powerful editor
Numerous effects to choose from
Detailed tutorials provided by the official channel
The Cutting-Edge of Audio Production: Adding Professional Voiceovers to Your Vids
How to Record & Add Voiceover to Videos

Liza Brown
Mar 27, 2024• Proven solutions
Have you ever wanna add your own voice to video , make a voice over demo for uploading and sharing on social network sites or create a documentary for some important stuff? You can do this as long as you have nice video editing software like Wondershare Filmora Video Editor .
The voiceover function in Filmora video editing software allows you to record your own voice or add voice over file to video easily. You can custom the pitch, speed, and volume of the recorded voiceover, apply fade in and fade out effects as well. In this post, I’ll share how to record and add voiceover to a video with Filmora on your computer.


In Filmora, you can edit your video first and then record the voiceover after. Or, you can record the voiceover first and then edit the video around. In either way, you may need to prepare the script or an outline for smother recording.
Check the tutorial about How to Edit Audio in Filmora
Part 1: Record Voiceover and Add it to Video
In most cases, we recommend you to record the voiceover first so the sound will be more natural. In the following part, I’ll show you how to record Voiceover in Filmora.
1. Connect Microphone to Computer
Plug the microphone into your computer when you’re ready to get started. It’s better to use some professional external microphones to capture high quality sound.
2. Record voiceover
Installing Filmora on your computer, click the Wondershare Filmora icon to launch it. In the starting interface, click New Project to create a new one. Go to the Record tab, and then click “Record a Voiceover ” option to arouse the Record Audio windows.
Installing Filmora on your computer, click the Wondershare Filmora icon to launch it. In the starting interface, click New Project to create a new one. Go to the Record tab, and then click “Record a Voiceover ” option to arouse the Record Audio windows.

Or simply click the microphone icon and you will have 3 seconds of countdown to start speaking. When finished, click the microphone icon again. Then you will see a new Record file appearing on the audio track automatically.
3. Edit Recorded Voiceover to Video
To edit the recorded voiceover, click the it in the audio track and a new window will pop up for you to adjust audio settings, such as change the Speed, Volume, Pitch, etc. of the voiceover.

You can trim, cut out unwanted sound section from the recorded voiceover, or apply the fade in and fade out effect to the voiceover for smother transition.
Creative Audio Editing: How to Change the Recorded Voice
4. Sync Voiceover to Video
Now, it’s time to sync the recorded voiceover to video to make a video. Since Filmora supports up to 100 audio tracks, you can now add some background music to the voiceover as well.
Then import and drag-n-drop the video footage to the video track, drag and drop the sound track to the right position to fit your video. You can keep the audio and video track in the same length if needed.

Note: If you’ve recorded the voiceover on your iPhone or other device already, and want to add it to the video, you can import it in the Project Library and then sync it to video.
To attract viewer’s attention, sometimes, you may need to add some titles or subtitles to emphasis the key points. Here is the detailed steps about how to add titles to video.

5. Export and save the new file
Check your video in the right previewing window. If you’re satisfied, click “Export” to export your new video file. You can either save the video to various formats or directly share it on YouTube and other social media platform. Moreover, you can even burn a DVD disk in minutes to watch it on TV.

You see, with Wondershare Filmora video editor, it’s that easy to add a custom voiceover to video. Now master this feature and open a world of new possibilities for your video making!
Part 2: How to Record and Add Voiceover File during Video editing in Filmora
If you’ve recorded the voiceover on your iPhone or other device already, and want to add it to the video, you can follow the steps below:
1. Import the video to Filmora
After entering the Filmora main editing interface, click “Import” or drag and drop your video and voiceover file to the project library.

Filmora video editing software supports a vast range of formats, so you do not have to convert the files before importing. When all the files are imported, drag and drop them to the Video Timeline.
2. Record Voiceover in Video Editing
If you’re editng video and want to record voiceover in real time, you can also click the Record icon to start the recording.
Place the Playhead to the position where you need a voiceover, and then click the Microphone icon in the toolbar to start.
As before, the recorded voiceover will be added to the audio track automatically.
Note: To start a new record on the Timeline, you don’t need to close the dialog, just move the Time Indicator to another position and record a new voiceover.
3. Edit voiceover and Export
Just like what we said before, you can then edit the recorded voiceover to fit the video perfectly and then export it to your computer or upload to YouTube directly.
Filmora features more audio editing tools for improving the sound. Below is a video tutorial for applying fade in and out transition in Filmora. Download the trial version to test yourself.
Liza Brown
Liza Brown is a writer and a lover of all things video.
Follow @Liza Brown
Liza Brown
Mar 27, 2024• Proven solutions
Have you ever wanna add your own voice to video , make a voice over demo for uploading and sharing on social network sites or create a documentary for some important stuff? You can do this as long as you have nice video editing software like Wondershare Filmora Video Editor .
The voiceover function in Filmora video editing software allows you to record your own voice or add voice over file to video easily. You can custom the pitch, speed, and volume of the recorded voiceover, apply fade in and fade out effects as well. In this post, I’ll share how to record and add voiceover to a video with Filmora on your computer.
In Filmora, you can edit your video first and then record the voiceover after. Or, you can record the voiceover first and then edit the video around. In either way, you may need to prepare the script or an outline for smother recording.
Check the tutorial about How to Edit Audio in Filmora
Part 1: Record Voiceover and Add it to Video
In most cases, we recommend you to record the voiceover first so the sound will be more natural. In the following part, I’ll show you how to record Voiceover in Filmora.
1. Connect Microphone to Computer
Plug the microphone into your computer when you’re ready to get started. It’s better to use some professional external microphones to capture high quality sound.
2. Record voiceover
Installing Filmora on your computer, click the Wondershare Filmora icon to launch it. In the starting interface, click New Project to create a new one. Go to the Record tab, and then click “Record a Voiceover ” option to arouse the Record Audio windows.
Installing Filmora on your computer, click the Wondershare Filmora icon to launch it. In the starting interface, click New Project to create a new one. Go to the Record tab, and then click “Record a Voiceover ” option to arouse the Record Audio windows.
Or simply click the microphone icon and you will have 3 seconds of countdown to start speaking. When finished, click the microphone icon again. Then you will see a new Record file appearing on the audio track automatically.
3. Edit Recorded Voiceover to Video
To edit the recorded voiceover, click the it in the audio track and a new window will pop up for you to adjust audio settings, such as change the Speed, Volume, Pitch, etc. of the voiceover.
You can trim, cut out unwanted sound section from the recorded voiceover, or apply the fade in and fade out effect to the voiceover for smother transition.
Creative Audio Editing: How to Change the Recorded Voice
4. Sync Voiceover to Video
Now, it’s time to sync the recorded voiceover to video to make a video. Since Filmora supports up to 100 audio tracks, you can now add some background music to the voiceover as well.
Then import and drag-n-drop the video footage to the video track, drag and drop the sound track to the right position to fit your video. You can keep the audio and video track in the same length if needed.
Note: If you’ve recorded the voiceover on your iPhone or other device already, and want to add it to the video, you can import it in the Project Library and then sync it to video.
To attract viewer’s attention, sometimes, you may need to add some titles or subtitles to emphasis the key points. Here is the detailed steps about how to add titles to video.
5. Export and save the new file
Check your video in the right previewing window. If you’re satisfied, click “Export” to export your new video file. You can either save the video to various formats or directly share it on YouTube and other social media platform. Moreover, you can even burn a DVD disk in minutes to watch it on TV.
You see, with Wondershare Filmora video editor, it’s that easy to add a custom voiceover to video. Now master this feature and open a world of new possibilities for your video making!
Part 2: How to Record and Add Voiceover File during Video editing in Filmora
If you’ve recorded the voiceover on your iPhone or other device already, and want to add it to the video, you can follow the steps below:
1. Import the video to Filmora
After entering the Filmora main editing interface, click “Import” or drag and drop your video and voiceover file to the project library.
Filmora video editing software supports a vast range of formats, so you do not have to convert the files before importing. When all the files are imported, drag and drop them to the Video Timeline.
2. Record Voiceover in Video Editing
If you’re editng video and want to record voiceover in real time, you can also click the Record icon to start the recording.
Place the Playhead to the position where you need a voiceover, and then click the Microphone icon in the toolbar to start.
As before, the recorded voiceover will be added to the audio track automatically.
Note: To start a new record on the Timeline, you don’t need to close the dialog, just move the Time Indicator to another position and record a new voiceover.
3. Edit voiceover and Export
Just like what we said before, you can then edit the recorded voiceover to fit the video perfectly and then export it to your computer or upload to YouTube directly.
Filmora features more audio editing tools for improving the sound. Below is a video tutorial for applying fade in and out transition in Filmora. Download the trial version to test yourself.
Liza Brown
Liza Brown is a writer and a lover of all things video.
Follow @Liza Brown
Also read:
- Incorporate Soundtracks Into The Boomerang Editing Suite for 2024
- Updated In 2024, Exclusive Guide Choosing the Ultimate Pop Music Tracks for Video Backgrounds
- New 2024 Approved How To Add Music To Gif On Win
- Updated Seek Out the Bell Echo Simulation Soundtrack for 2024
- In 2024, How to Choose the Best Sound Editor?
- Updated 2024 Approved Strategies for High-Quality Pitch Transformation Within Audacity
- New Contemporary Voiceover Practices for Dynamic Video Creation - An Updated Guide
- New Exploring the Best Voice Mimicry Applications of the Year for 2024
- Open Source Audio Sources A Filmmakers Resource List
- New 2024 Approved The Premium Collection Top 3 Online Platforms for Lifting MP3 Volume Levels
- Explore the Finest 6 Mobile Applications for Instantaneous Voice Change
- New In 2024, Procuring Premium Sound Extras The Best 8 Free Websites
- New Soundless Streamlining Techniques for Audio Extraction in MP4, MKV, AVI, MOV, WMV Videos for 2024
- 2024 Approved Top 7 Converting Audio to Text Tools
- 2024 Approved Vanguard Womans Phonetic Alteration Service Online - Free Edition
- In 2024, Essential Tips for Free Voice and Audio Recording in Audacity on Computers
- In 2024, Mastering Video Editing Replacing Audio Tracks - A Comprehensive Guide (Part 1)
- In 2024, Echoing Change The Complete Process of Substituting Auditory Elements in Filmmaking
- Controlling Auditory Flow Windows Edition with Adobe Premiere for 2024
- Film Set Harmony Exploring Every Members Critical Function in Movie-Making
- Updated Mastering Podcasting A Look at the Premier Hosting Services for 2024
- New In 2024, VoiceMod Enhancing Your Skype Call with Personalized Accents
- New 2024 Approved Introduction Guide Mastering Wave Editor Tools and Techniques
- Updated The Best Audio Capture Solutions That Are Changing Podcasters Lives
- Syncing Sound A Comprehensive Approach to Matching Timelines of Audio and Video in FCPX for 2024
- Future-Proofing Your Productions Innovative Audio Editing Software Roundup
- Updated 2024 Approved Maximizing Speaker Output Cost-Free Tips for Windows Users
- Updated Tail Wags & Whispers Dognoise Auditory Experience
- 3 Ways to Track Vivo Y27 5G without Them Knowing | Dr.fone
- In 2024, Things You Should Know When Unlocking Total Wireless Of iPhone 15 Pro
- In 2024, 3 Ways to Export Contacts from Apple iPhone 14 Plus to Excel CSV & vCard Easily | Dr.fone
- How to Infinix Note 30 Get Deleted Phone Number Back with Ease and Safety
- In 2024, Top 5 Car Locator Apps for Vivo Y27 4G | Dr.fone
- 9 Solutions to Fix Process System Isnt Responding Error on Xiaomi Mix Fold 3 | Dr.fone
- Lock Your Infinix Hot 40i Phone in Style The Top 5 Gesture Lock Screen Apps
- New Top 10 Old Cartoons From Cartoon Network That You Miss for 2024
- 2024 Approved How to Make Discord GIF Avatar in Depth Guide
- Complete guide for recovering photos files on Infinix Note 30 Pro.
- How to Update Apple iPhone 8 Plus without iTunes? | Dr.fone
- In 2024, Quick Fix How to Adjust Video Dimensions with Ease
- How to Restore Deleted Honor Play 8T Contacts An Easy Method Explained.
- Full Guide to Hard Reset Your Xiaomi 13T Pro | Dr.fone
- Unlock Apple ID without Phone Number From Apple iPhone 11
- In 2024, How to Change Your Poco C51 Location on life360 Without Anyone Knowing? | Dr.fone
- How to Reset Gmail Password on Xiaomi Redmi A2+ Devices
- In 2024, How to Unlock Apple iPhone 15 Plus With an Apple Watch & What to Do if It Doesnt Work
- How to Detect and Stop mSpy from Spying on Your Samsung Galaxy F54 5G | Dr.fone
- New 2024 Approved Flip It! A Step-by-Step Guide to Rotating Clips in FCP
- In 2024, 6 Solutions to Unlock Xiaomi Phones If You Forgot Password, PIN, Pattern
- How to Change GPS Location on Vivo S18 Easily & Safely | Dr.fone
- Title: Pioneering Digital Maestros A Comprehensive List of AIs Finest Composers for 2024
- Author: Ella
- Created at : 2024-05-19 06:26:24
- Updated at : 2024-05-20 06:26:24
- Link: https://sound-optimizing.techidaily.com/pioneering-digital-maestros-a-comprehensive-list-of-ais-finest-composers-for-2024/
- License: This work is licensed under CC BY-NC-SA 4.0.
