
:max_bytes(150000):strip_icc():format(webp)/Horserace-56ca33a85f9b5879cc4bcc6e.jpg)
Updated Comprehensive Guide to Accessible, No-Cost Speech Recognition Apps and Services for 2024
“Comprehensive Guide to Accessible, No-Cost Speech Recognition Apps and Services”
10+ Free Online Audio to Text Converters

Shanoon Cox
Mar 27, 2024• Proven solutions
An audio-to-text converter is a tool that can convert audio files to texts or even record any audio and produce the text of it simultaneously. Audio files are one of the most used methods of storing information. From online classes and long lectures to big business meetings and product information, audio is being shared a lot across the world.
But accessing information from a long audio file can be difficult and time-consuming, which is why there is a need to convert audio to text. Information in the form of text can easily be fully or partly accessed and edited whenever needed. And texts can also easily be shared with whomever you want.
So let’s have a look at some of the best audio-to-text converters that might be of use to you.


10+ Free Online Audio to Text Converters
There is number of audio text converters available in the online market that can help you while studying, researching, or even in your business. Some of these recorders can convert any audio file to texts while some others can record and convert to text at the same time. Here we will talk about the top 11 free applications that can be used to convert audio to text.
| 1 - Filmora | 2 - Audext | 3 - Sonix.ai |
|---|---|---|
| 4 - Virtualspeech.com | 5 - Speechnotes | 6 - SpeechTexter |
| 7 - Textfromtospeech.com | 8 - Dictation.io | 9 - Voice Note |
| 10 - Voice Notebook | 11 - NaturalReaders |
1. Wondershare Filmora
Filmora’s Speech To Text (STT) function allows you to transcript audio/voice to subtitles/text in one click. it can save your plenty of time on transcribing subtitles and boost your editing efficiency by applying speech-to-text.
What you need to do is download the software and subsribe for its plan.
Features
- Built-in function to transcribe subtitles and captions for your video
- High accuracy in generating text, allows you to edit text by yourself
- Supports up to 26 languages of transcription to engage more users all around the world
- Offers various tools for editing your videos and audio
2. Audext
Audext is a free online application that can help you to save a lot of time while transcribing any audio to text. The transcription to text is done with the use of an advanced AI and hence produces faster and more accurate results.
Audext is used by people from different sectors like education, marketing, media, consulting, healthcare, etc. for their work purposes.

Features
- An inbuilt editor for editing the text while transcribing
- Identifies the speaker easily
- Supports a variety of audio and video formats like MP3, WAV, MP4, etc.
- Offers an option of easy upload and export of files
Pricing
- Free
- Transcription costs for one hour are $12
- Or with the subscription $5
3. Sonix.ai
Sonix is a fast and accurate application that can be used to convert audio to text for any purpose. This application offers a 30-minute free transcription after which an affordable amount may be charged.
Features
- Automatic transcription of files and accessibility of these files from any device
- Advanced translation of these devices into 30 different languages
- Addition of subtitles into any video for easy understanding
- A Sonix media player that allows to share and publish files easily
Pricing
- Free
- Standard subscription - $10 per hour
- Premium subscription - $5 per hour, and an addition of $22 per month
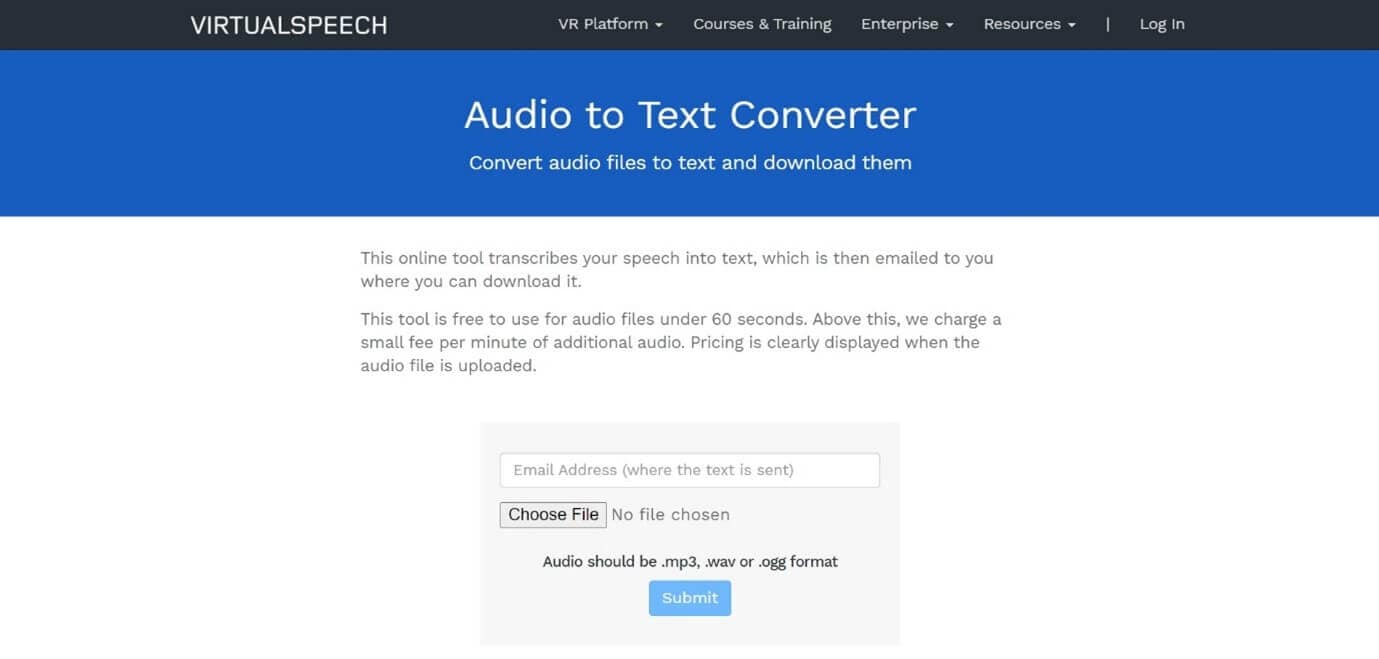
4. Virtualspeech.com
Virtualspeech is an online tool that can transcribe audio to text free. It is a very simple application that allows fats conversion of audio files to texts. After conversion, the file will be emailed to the user from where it can be downloaded and saved.
Features
- Free conversion of any audio files under 1 minute.
- Conversion of audio files of formats Mp3, Wav, or Ogg.
- Provides security as the no files are stored on the server and the site is secured with a b SSL
- Speech to text converter within the site
Pricing
- $0.50 per minute after the free minute

Filmora Audio to Text Converter
Filmora - Audio to Text Converter
• Enables you to convert video speech to text in one click
• Extremely accurate in video speech recognition
• Cross-platform supported - (Windows, Mac, iOS, Android)
Transcribe Audio to Text Free Transcribe Audio to Text Free Transcribe Audio to Text Free Learn More >
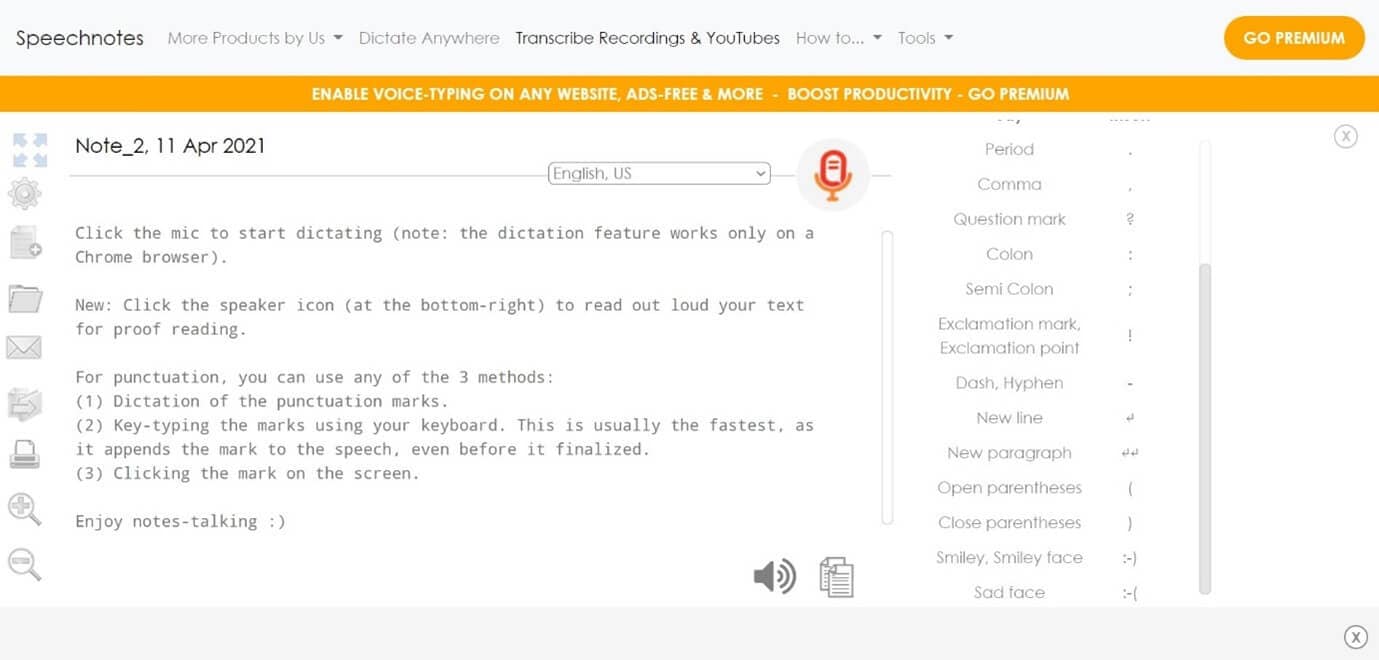
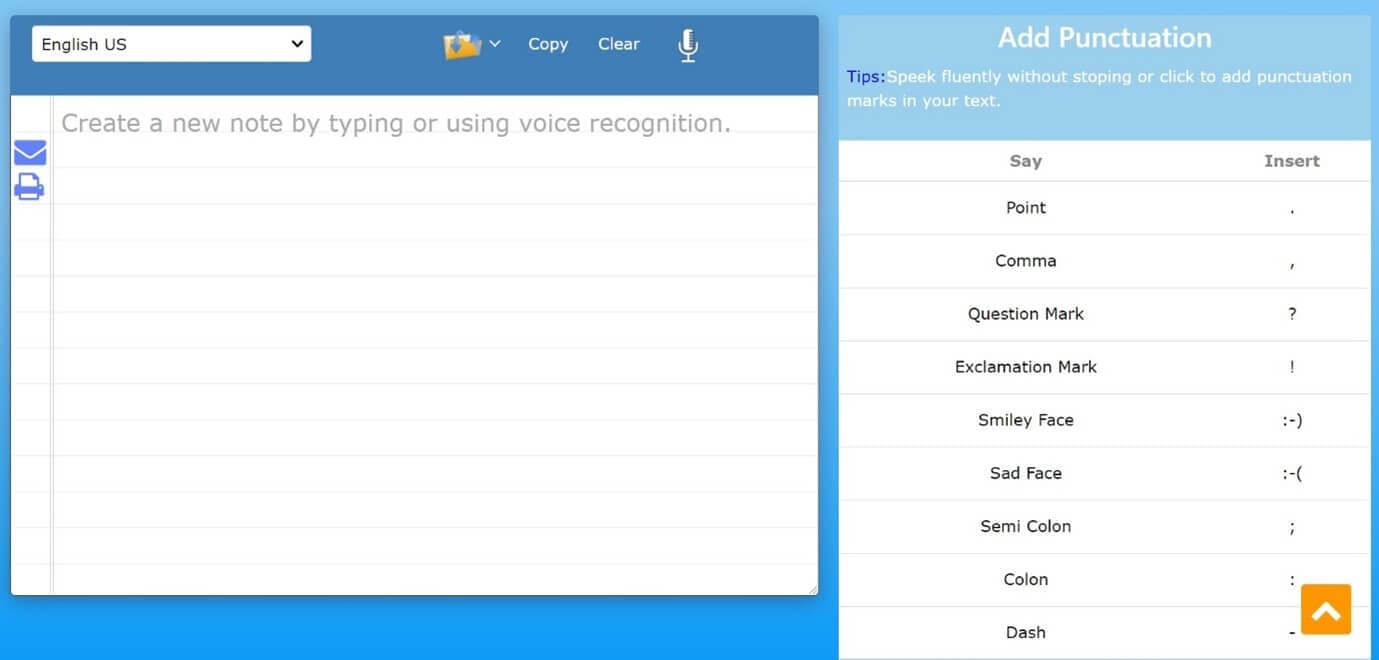
5. Speechnotes
Speechnotes is a powerful online notepad that can easily convert audio to text. This tool has implemented an efficient and clean design that makes conversion and editing very easy.
Features
- Best results with an advanced speech recognition technology
- Built-in tools that allow easy editing and correction of the converted text
- Fast working on any web browser and no installation apps required
- Autosave feature that ensures that your data is not lost
- Export to Google Drive option for easy accessibility from any device
Pricing
- Free
- Premium version with the addition of some extra features
6. SpeechTexter
SpeechTexter is a multilingual application that can help you transcribe any type of book, document, blog posts, etc. by using your audio. This tool has a custom dictionary that allows adding short commands for adding frequently used data like phone numbers, punctuation marks, addresses, etc.

Features
- Offers accuracy rate of 90 to 95% percent
- Can be used to increase your fluency in English
- Offers powerful real-time speech recognition
- Easy creation of emails, text notes, blog posts, etc.
- A custom dictionary that can be customized according to the individual use
- Supports more than 60 languages
- Available on both chrome browser and android
Pricing
- Free
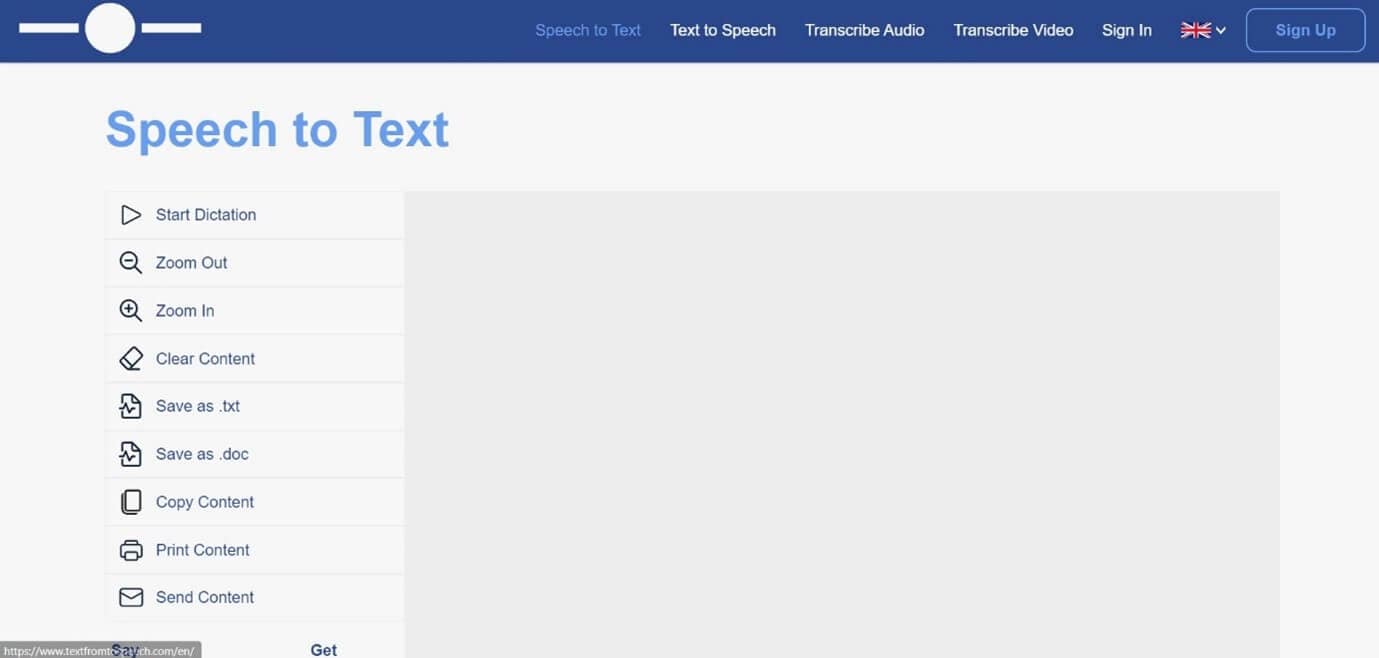
7. Textfromtospeech.com
Textfromtospeech is a free online tool that allows you to easily convert audio to text without the need for registration downloading or installation. It has a very simple interface that can record and convert your speech into text with a single click.
Features
- Free and online text recognition and transcription
- Supports many languages
- Pause and record option while converting large files
- Can use voice commands for insertion of symbols like “comma”, “full stop”, etc.
- Smart capitalization
- Easy saving, copying, and sharing of the dictated text
- Available on mobile devices, tablet, and computer
Pricing
- Free
![]()
A cross-platform for making videos anywhere for all creators

Why your video editing isn’t good enough? How about some creative inspo?
- 100 Million+ Users
- 150+ Countries and Regions
- 4 Million+ Social Media Followers
- 5 Million+ Stock Media for Use
* Secure Download

8. Dictation.io
Dictation is a free and simple tool that offers fast conversion of audio to text. Its interface is like that of a very simple notepad and allows the conversion of audio to text for a number of languages including English, Español, Français, Italiano, Português, and more.

Features
- Advanced speech recognition
- Easy editing within the notes
- Easy sharing to mail, tweets, etc.
- No storing of any data and hence offers the necessary security
Pricing
- Free
9. Voice Note
Voice Note is an online speech recognition tool that can automatically record and type anything including speech, interview, etc. This tool can convert any audio file into text format which can easily be opened in Microsoft Word.
Features
- No saving of data in any servers
- Customizable options for audio and text
- A number of languages to choose from while converting audio to text
- Easy copying and exporting options
- Direct Print option from the site
Price
- Free
10. Voice Notebook
Voice Notebook is a speech recognition app that can also convert audio files to text. This application is compatible with a wide range of devices like Mac, Windows, Linux OS, Android, and iOS.
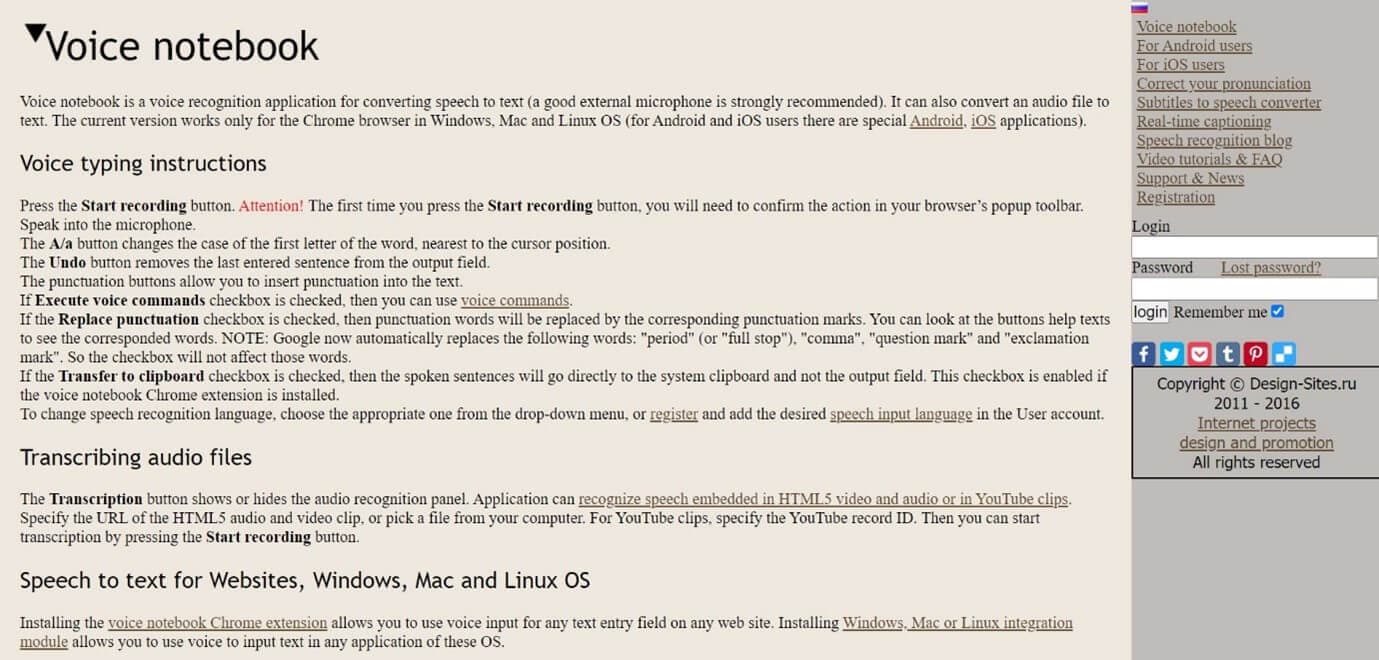
Features
- Voice commands are available when you transcribe audio to text
- Has the ability to recognize any speech embedded in YouTube clips or HTML5 audio or video
- Simple interface and easy editing of text
- An option to download into TXT format is available
Price
- Free
11. NaturalReaders
Natural Readers is a professional program that can convert any text into spoken words. This program offers a lot of features like adjusting the speed of audio, conversion into mp3, selection of voice, etc.
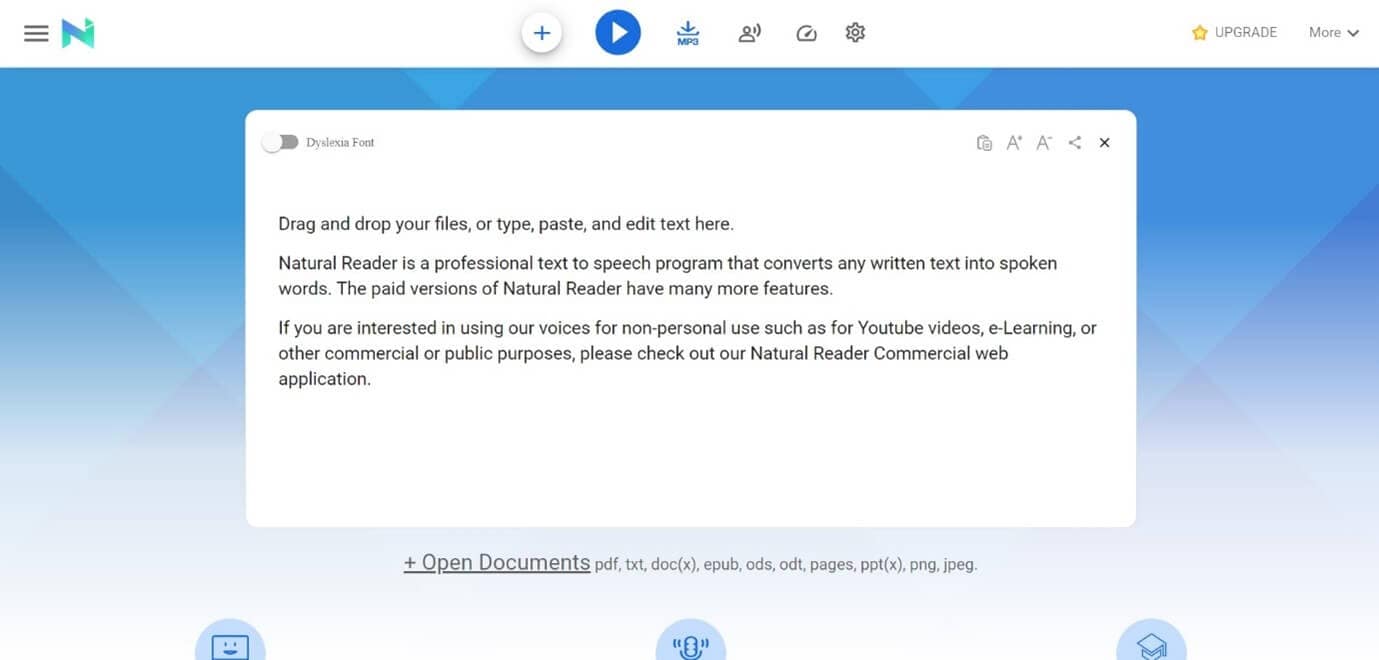
Features
- A font option available for dyslexic people
- Supports formats like pdf, txt, docs, epub, ods, ppt, png, jpeg
- App versions of this online tool are available both for android and apple devices
Pricing
- Free
- Premium plan - $9.99 per month, $59.88 per year
- Plus plan - $19.00 per month, $110.00 per year
Filmora Audio to Text Converter
Filmora - Audio to Text Converter
• Enables you to convert video speech to text in one click
• Extremely accurate in video speech recognition
• Cross-platform supported - (Windows, Mac, iOS, Android)
Transcribe Audio to Text Free Transcribe Audio to Text Free Transcribe Audio to Text Free Learn More >
Conclusion
We have listed above the top 11 tools that can be used to convert audio to text on any device using a browser. Converting audio to text allows you to easily access the required information, edit it, or even share it fully or partially with anyone you wish,
The applications we have listed are free and some of them might charge for the extra features they provide. So no matter what your profession is if you are looking for an app to convert audio to text or record and produce the text of the recordings, choose any one of the listed above applications.
We hope our suggestions help you reduce effort and save time. Please leave your valuable feedback in the comment box below, thank you.
Transform Long Videos into Short Ones Instantly
Turn long videos into viral clips. Effortlessly transform lengthy videos into engaging, shareable clips.

Shanoon Cox
Shanoon Cox is a writer and a lover of all things video.
Follow @Shanoon Cox
Shanoon Cox
Mar 27, 2024• Proven solutions
An audio-to-text converter is a tool that can convert audio files to texts or even record any audio and produce the text of it simultaneously. Audio files are one of the most used methods of storing information. From online classes and long lectures to big business meetings and product information, audio is being shared a lot across the world.
But accessing information from a long audio file can be difficult and time-consuming, which is why there is a need to convert audio to text. Information in the form of text can easily be fully or partly accessed and edited whenever needed. And texts can also easily be shared with whomever you want.
So let’s have a look at some of the best audio-to-text converters that might be of use to you.
10+ Free Online Audio to Text Converters
There is number of audio text converters available in the online market that can help you while studying, researching, or even in your business. Some of these recorders can convert any audio file to texts while some others can record and convert to text at the same time. Here we will talk about the top 11 free applications that can be used to convert audio to text.
| 1 - Filmora | 2 - Audext | 3 - Sonix.ai |
|---|---|---|
| 4 - Virtualspeech.com | 5 - Speechnotes | 6 - SpeechTexter |
| 7 - Textfromtospeech.com | 8 - Dictation.io | 9 - Voice Note |
| 10 - Voice Notebook | 11 - NaturalReaders |
1. Wondershare Filmora
Filmora’s Speech To Text (STT) function allows you to transcript audio/voice to subtitles/text in one click. it can save your plenty of time on transcribing subtitles and boost your editing efficiency by applying speech-to-text.
What you need to do is download the software and subsribe for its plan.
Features
- Built-in function to transcribe subtitles and captions for your video
- High accuracy in generating text, allows you to edit text by yourself
- Supports up to 26 languages of transcription to engage more users all around the world
- Offers various tools for editing your videos and audio
2. Audext
Audext is a free online application that can help you to save a lot of time while transcribing any audio to text. The transcription to text is done with the use of an advanced AI and hence produces faster and more accurate results.
Audext is used by people from different sectors like education, marketing, media, consulting, healthcare, etc. for their work purposes.
Features
- An inbuilt editor for editing the text while transcribing
- Identifies the speaker easily
- Supports a variety of audio and video formats like MP3, WAV, MP4, etc.
- Offers an option of easy upload and export of files
Pricing
- Free
- Transcription costs for one hour are $12
- Or with the subscription $5
3. Sonix.ai
Sonix is a fast and accurate application that can be used to convert audio to text for any purpose. This application offers a 30-minute free transcription after which an affordable amount may be charged.
Features
- Automatic transcription of files and accessibility of these files from any device
- Advanced translation of these devices into 30 different languages
- Addition of subtitles into any video for easy understanding
- A Sonix media player that allows to share and publish files easily
Pricing
- Free
- Standard subscription - $10 per hour
- Premium subscription - $5 per hour, and an addition of $22 per month
4. Virtualspeech.com
Virtualspeech is an online tool that can transcribe audio to text free. It is a very simple application that allows fats conversion of audio files to texts. After conversion, the file will be emailed to the user from where it can be downloaded and saved.
Features
- Free conversion of any audio files under 1 minute.
- Conversion of audio files of formats Mp3, Wav, or Ogg.
- Provides security as the no files are stored on the server and the site is secured with a b SSL
- Speech to text converter within the site
Pricing
- $0.50 per minute after the free minute
Filmora Audio to Text Converter
Filmora - Audio to Text Converter
• Enables you to convert video speech to text in one click
• Extremely accurate in video speech recognition
• Cross-platform supported - (Windows, Mac, iOS, Android)
Transcribe Audio to Text Free Transcribe Audio to Text Free Transcribe Audio to Text Free Learn More >
5. Speechnotes
Speechnotes is a powerful online notepad that can easily convert audio to text. This tool has implemented an efficient and clean design that makes conversion and editing very easy.
Features
- Best results with an advanced speech recognition technology
- Built-in tools that allow easy editing and correction of the converted text
- Fast working on any web browser and no installation apps required
- Autosave feature that ensures that your data is not lost
- Export to Google Drive option for easy accessibility from any device
Pricing
- Free
- Premium version with the addition of some extra features
6. SpeechTexter
SpeechTexter is a multilingual application that can help you transcribe any type of book, document, blog posts, etc. by using your audio. This tool has a custom dictionary that allows adding short commands for adding frequently used data like phone numbers, punctuation marks, addresses, etc.
Features
- Offers accuracy rate of 90 to 95% percent
- Can be used to increase your fluency in English
- Offers powerful real-time speech recognition
- Easy creation of emails, text notes, blog posts, etc.
- A custom dictionary that can be customized according to the individual use
- Supports more than 60 languages
- Available on both chrome browser and android
Pricing
- Free
7. Textfromtospeech.com
Textfromtospeech is a free online tool that allows you to easily convert audio to text without the need for registration downloading or installation. It has a very simple interface that can record and convert your speech into text with a single click.
Features
- Free and online text recognition and transcription
- Supports many languages
- Pause and record option while converting large files
- Can use voice commands for insertion of symbols like “comma”, “full stop”, etc.
- Smart capitalization
- Easy saving, copying, and sharing of the dictated text
- Available on mobile devices, tablet, and computer
Pricing
- Free
![]()
A cross-platform for making videos anywhere for all creators
Why your video editing isn’t good enough? How about some creative inspo?
- 100 Million+ Users
- 150+ Countries and Regions
- 4 Million+ Social Media Followers
- 5 Million+ Stock Media for Use
* Secure Download
8. Dictation.io
Dictation is a free and simple tool that offers fast conversion of audio to text. Its interface is like that of a very simple notepad and allows the conversion of audio to text for a number of languages including English, Español, Français, Italiano, Português, and more.
Features
- Advanced speech recognition
- Easy editing within the notes
- Easy sharing to mail, tweets, etc.
- No storing of any data and hence offers the necessary security
Pricing
- Free
9. Voice Note
Voice Note is an online speech recognition tool that can automatically record and type anything including speech, interview, etc. This tool can convert any audio file into text format which can easily be opened in Microsoft Word.
Features
- No saving of data in any servers
- Customizable options for audio and text
- A number of languages to choose from while converting audio to text
- Easy copying and exporting options
- Direct Print option from the site
Price
- Free
10. Voice Notebook
Voice Notebook is a speech recognition app that can also convert audio files to text. This application is compatible with a wide range of devices like Mac, Windows, Linux OS, Android, and iOS.
Features
- Voice commands are available when you transcribe audio to text
- Has the ability to recognize any speech embedded in YouTube clips or HTML5 audio or video
- Simple interface and easy editing of text
- An option to download into TXT format is available
Price
- Free
11. NaturalReaders
Natural Readers is a professional program that can convert any text into spoken words. This program offers a lot of features like adjusting the speed of audio, conversion into mp3, selection of voice, etc.
Features
- A font option available for dyslexic people
- Supports formats like pdf, txt, docs, epub, ods, ppt, png, jpeg
- App versions of this online tool are available both for android and apple devices
Pricing
- Free
- Premium plan - $9.99 per month, $59.88 per year
- Plus plan - $19.00 per month, $110.00 per year
Filmora Audio to Text Converter
Filmora - Audio to Text Converter
• Enables you to convert video speech to text in one click
• Extremely accurate in video speech recognition
• Cross-platform supported - (Windows, Mac, iOS, Android)
Transcribe Audio to Text Free Transcribe Audio to Text Free Transcribe Audio to Text Free Learn More >
Conclusion
We have listed above the top 11 tools that can be used to convert audio to text on any device using a browser. Converting audio to text allows you to easily access the required information, edit it, or even share it fully or partially with anyone you wish,
The applications we have listed are free and some of them might charge for the extra features they provide. So no matter what your profession is if you are looking for an app to convert audio to text or record and produce the text of the recordings, choose any one of the listed above applications.
We hope our suggestions help you reduce effort and save time. Please leave your valuable feedback in the comment box below, thank you.
Transform Long Videos into Short Ones Instantly
Turn long videos into viral clips. Effortlessly transform lengthy videos into engaging, shareable clips.
Shanoon Cox
Shanoon Cox is a writer and a lover of all things video.
Follow @Shanoon Cox
“Disconnect the Chatter: How to Mute Your Microphone in Zoom Meetings”
Zoom Meeting is a beneficial application, and video conferencing is on another level because of this app. Zoom offers high-quality audio and video. With this conferencing app, cross-platform messaging is also possible, and you can also schedule your meeting calendar with Zoom.
Many offices conduct formal meetings through Zoom. During the pandemic era, online classes were taken through Zoom. Sometimes, you wish to mute the mic and sit back. What bothers you is that you don’t know how to mute audio in zoom. If this is your case, then stay with us. We are about to discuss how you can mute zoom audio.
In this article
01 How to Mute Zoom Audio on Windows and Mac
02 How to Mute Zoom Audio on iPhone and Android
03 Tips To Optimize Zoom Audio Settings for Better Performance
04 Frequently Asked Questions about Zoom
Part 1. How to Mute Zoom Audio on Windows and Mac
Imagine you are having a meeting on Zoom, and there are a lot of people in the meeting. You are trying to do some office work, but their voices disturb you. You cannot even leave the meeting. What are you going to do now? Are you going to submit average quality work?
One thing that you can do is to mute audio on Zoom. The question is, do you know how to mute the microphone on zoom? Let us share the steps that will help you to mute Zoom audio on your Windows or Mac.
Step 1: First of all, open the desktop Zoom app and start a call. Then, for the options to appear on the screen, you need to move the cursor.
Step 2: To mute any participant, bring the cursor over their name. The options will appear. You can click on the blue ‘Mute’ button to mute them. Or else, you can open a pop-up menu by right-clicking on the participants’ names. There, select the option of ‘Mute Audio.’ You can unmute them in the same way.

Step 3: If you are the meeting host, you can manage all participants at once. For that, look at the bottom toolbar hit the ‘Manage Participants’ tab. Zoom meeting will display the total count of the participants in a sidebar on the screen. Along with the participants’ names, a microphone and video icon will also appear.

Step 5: If you are the meeting host, then you can mute individual participants. You have to bring the cursor over the microphone icon. A ‘Mute’ and ‘Unmute’ buttons will show up.

Step 6: Being the host, you can ‘Mute All’ and ‘Unmute All’ participants at once by clicking on these buttons at the bottom. A pop-up will appear on the screen, don’t forget to check the box. With this, the participants can unmute themselves.
Step 7: Also, the participants receive a message if the host is muting or unmuting everyone. To complete the process and apply the changes, hit the ‘Continue’ button.

Part 2. How to Mute Zoom Audio on iPhone and Android
Zoom meeting is compatible with Windows, Mac, Android, and also iPhone. You don’t need to always join zoom meetings with your computer. Sometimes, you join zoom with your mobile. In any case, you might need to mute zoom audio. Sadly, you don’t know how to mute Zoom audio. Let us share an easy step-by-step guideline to do this on both Android and iPhone.
Step 1: If you want to mute the sound of your mobile device, then in the top left corner, tap on the volume button. You will see ‘X’ appears over the speaker icon. You can tap on it again to play the sound.

Step 2: Being the host, you can manage participants. For that, look at the bottom and click on the ‘Participants’ tab. A pop-up will appear on your screen, and you can individually mute participants. For this, you need to hit the microphone icon visible next to the participants’ names. You can easily reverse this and unmute it by tapping on the microphone icon again. You can also manage the settings by clicking on the participant’s name.

Step 3: The host has the authority to Mute all participants at once. For this, the host needs to tap on the ‘Mute All’ button from the bottom. The host needs to check the box. This will allow the participants to unmute themselves.

Step 4: Lastly, once you are done and satisfied with everything, hit the ‘Close’ option. This will close the participants’ window.
Part 3. Tips To Optimize Zoom Audio Settings for Better Performance
Although Zoom meeting is itself an amazing app with so many different features, among those features, one is that Zoom has high-quality video and audio. Besides everything, you can still improve Zoom Audio’s performance by following the tips that are shared below.
· Reduce Background Noise
Your audio performance is instantly improved if you reduce background noise. Any disturbing noise in the background falls under this category. It can be the fan, air conditioning, ticking clocks, etc. You should move away from the noise.
· Use High-Quality Microphone
For better audio performance, use a high-quality microphone for your Zoom meetings. This factor is the most important factor when it comes to improving audio. Investing in a decent and good external microphone is never a bad option.
· Stable Internet Connection
With a weak internet connection, your voice breaks. If you want to have improved Zoom audio performance, then make sure that you have a stable internet connection. Distortion and disturbance cause problems while communicating.
· Distance from Microphone
You must sit at an average distance from your microphone. Sitting too close will sound like you are shouting. Whereas sitting too far, your voice is quieter, and background noise sounds loud. So, measure the appropriate distance from the microphone.
Part 4. Frequently Asked Questions about Zoom
1. Can you mute Zoom audio without muting the computer?
Yes, you can mute zoom without muting your computer. For Windows, look at the bottom right corner. Right-click on the speaker/volume icon. A pop-up menu will appear; from there, select ‘Open Volume Mixer.’ When Volume Mixer appears on the screen, turn down and mute the volume for Zoom Meetings.
In case you are a Mac user, then let us tell you what to do. During the Zoom call, click on the Zoom Meetings Control for Audio. Then select the option of ‘Audio Settings.’ From the audio setting panel, you can turn down the volume for the ‘Speaker.’ This lowers the volume for Zoom meetings and can even mute it.
2. How can I improve my zoom video quality?
Various ways could be adopted to improve the video quality for Zoom meetings. For instance, you can use the ‘Touch up my Appearance’ feature. Or else, you can enable HD, apply Studio Effects, enable Zoom’s Low Light Adjustment setting, etc.
3. How do I change the resolution of a video Zoom?
For changing the resolution of Zoom video, firstly open Zoom on either your mobile or computer. Then, head over to the ‘Settings’ section. There, you need to select ‘Video Quality’ settings. Lastly, check the box with HD. This will enable the HD option, and your device will stream high-quality videos.
4. How do you set a virtual background on Zoom without a green screen?
For setting a virtual background on Zoom, you firstly need to sign in to your account. After that, you should open the ‘Settings’ by clicking on your profile picture. From settings, select ‘Virtual Background.’ Now, you can add the image that you want as your virtual background. You can even upload any image and video by hitting the ‘+’ sign.
5. Where do you get zoom backgrounds?
Zoom website offers a variety of cool virtual backgrounds. You can easily download them and use them. In comparison, there is another site that offers free backgrounds. You can also download virtual background images from Unsplash and use them easily.
Final Thoughts
Now are days, Zoom Meeting is being widely used. This article will surely increase your knowledge regarding Zoom Audio. We have shared the steps for both computer and mobile for Zoom mute microphone. We also shared tips that will help you improve the Zoom audio performance.
02 How to Mute Zoom Audio on iPhone and Android
03 Tips To Optimize Zoom Audio Settings for Better Performance
04 Frequently Asked Questions about Zoom
Part 1. How to Mute Zoom Audio on Windows and Mac
Imagine you are having a meeting on Zoom, and there are a lot of people in the meeting. You are trying to do some office work, but their voices disturb you. You cannot even leave the meeting. What are you going to do now? Are you going to submit average quality work?
One thing that you can do is to mute audio on Zoom. The question is, do you know how to mute the microphone on zoom? Let us share the steps that will help you to mute Zoom audio on your Windows or Mac.
Step 1: First of all, open the desktop Zoom app and start a call. Then, for the options to appear on the screen, you need to move the cursor.
Step 2: To mute any participant, bring the cursor over their name. The options will appear. You can click on the blue ‘Mute’ button to mute them. Or else, you can open a pop-up menu by right-clicking on the participants’ names. There, select the option of ‘Mute Audio.’ You can unmute them in the same way.
Step 3: If you are the meeting host, you can manage all participants at once. For that, look at the bottom toolbar hit the ‘Manage Participants’ tab. Zoom meeting will display the total count of the participants in a sidebar on the screen. Along with the participants’ names, a microphone and video icon will also appear.
Step 5: If you are the meeting host, then you can mute individual participants. You have to bring the cursor over the microphone icon. A ‘Mute’ and ‘Unmute’ buttons will show up.
Step 6: Being the host, you can ‘Mute All’ and ‘Unmute All’ participants at once by clicking on these buttons at the bottom. A pop-up will appear on the screen, don’t forget to check the box. With this, the participants can unmute themselves.
Step 7: Also, the participants receive a message if the host is muting or unmuting everyone. To complete the process and apply the changes, hit the ‘Continue’ button.
Part 2. How to Mute Zoom Audio on iPhone and Android
Zoom meeting is compatible with Windows, Mac, Android, and also iPhone. You don’t need to always join zoom meetings with your computer. Sometimes, you join zoom with your mobile. In any case, you might need to mute zoom audio. Sadly, you don’t know how to mute Zoom audio. Let us share an easy step-by-step guideline to do this on both Android and iPhone.
Step 1: If you want to mute the sound of your mobile device, then in the top left corner, tap on the volume button. You will see ‘X’ appears over the speaker icon. You can tap on it again to play the sound.
Step 2: Being the host, you can manage participants. For that, look at the bottom and click on the ‘Participants’ tab. A pop-up will appear on your screen, and you can individually mute participants. For this, you need to hit the microphone icon visible next to the participants’ names. You can easily reverse this and unmute it by tapping on the microphone icon again. You can also manage the settings by clicking on the participant’s name.
Step 3: The host has the authority to Mute all participants at once. For this, the host needs to tap on the ‘Mute All’ button from the bottom. The host needs to check the box. This will allow the participants to unmute themselves.
Step 4: Lastly, once you are done and satisfied with everything, hit the ‘Close’ option. This will close the participants’ window.
Part 3. Tips To Optimize Zoom Audio Settings for Better Performance
Although Zoom meeting is itself an amazing app with so many different features, among those features, one is that Zoom has high-quality video and audio. Besides everything, you can still improve Zoom Audio’s performance by following the tips that are shared below.
· Reduce Background Noise
Your audio performance is instantly improved if you reduce background noise. Any disturbing noise in the background falls under this category. It can be the fan, air conditioning, ticking clocks, etc. You should move away from the noise.
· Use High-Quality Microphone
For better audio performance, use a high-quality microphone for your Zoom meetings. This factor is the most important factor when it comes to improving audio. Investing in a decent and good external microphone is never a bad option.
· Stable Internet Connection
With a weak internet connection, your voice breaks. If you want to have improved Zoom audio performance, then make sure that you have a stable internet connection. Distortion and disturbance cause problems while communicating.
· Distance from Microphone
You must sit at an average distance from your microphone. Sitting too close will sound like you are shouting. Whereas sitting too far, your voice is quieter, and background noise sounds loud. So, measure the appropriate distance from the microphone.
Part 4. Frequently Asked Questions about Zoom
1. Can you mute Zoom audio without muting the computer?
Yes, you can mute zoom without muting your computer. For Windows, look at the bottom right corner. Right-click on the speaker/volume icon. A pop-up menu will appear; from there, select ‘Open Volume Mixer.’ When Volume Mixer appears on the screen, turn down and mute the volume for Zoom Meetings.
In case you are a Mac user, then let us tell you what to do. During the Zoom call, click on the Zoom Meetings Control for Audio. Then select the option of ‘Audio Settings.’ From the audio setting panel, you can turn down the volume for the ‘Speaker.’ This lowers the volume for Zoom meetings and can even mute it.
2. How can I improve my zoom video quality?
Various ways could be adopted to improve the video quality for Zoom meetings. For instance, you can use the ‘Touch up my Appearance’ feature. Or else, you can enable HD, apply Studio Effects, enable Zoom’s Low Light Adjustment setting, etc.
3. How do I change the resolution of a video Zoom?
For changing the resolution of Zoom video, firstly open Zoom on either your mobile or computer. Then, head over to the ‘Settings’ section. There, you need to select ‘Video Quality’ settings. Lastly, check the box with HD. This will enable the HD option, and your device will stream high-quality videos.
4. How do you set a virtual background on Zoom without a green screen?
For setting a virtual background on Zoom, you firstly need to sign in to your account. After that, you should open the ‘Settings’ by clicking on your profile picture. From settings, select ‘Virtual Background.’ Now, you can add the image that you want as your virtual background. You can even upload any image and video by hitting the ‘+’ sign.
5. Where do you get zoom backgrounds?
Zoom website offers a variety of cool virtual backgrounds. You can easily download them and use them. In comparison, there is another site that offers free backgrounds. You can also download virtual background images from Unsplash and use them easily.
Final Thoughts
Now are days, Zoom Meeting is being widely used. This article will surely increase your knowledge regarding Zoom Audio. We have shared the steps for both computer and mobile for Zoom mute microphone. We also shared tips that will help you improve the Zoom audio performance.
Streamlining Audio Dynamics: A Comprehensive Approach to Volume Normalization with VLC
How To Normalize Volume in VLC
How to normalize volume, why should we do it, and what is it after all? – these are the questions when it comes to editing our audio files, as well as the video clips we tend to change the sound of. So, first of all, the volume normalization is pretty much explained as follows: The process when a constant amount of gain is applied to the audio recording, bringing the amplitude to a desirable level, which is “the norm” for the project. If it is a little bit difficult to understand, we have to highlight that when this tool is applied to our volume, the whole recording has the same amount of gain across it, every piece affected the same way. Accordingly, when we normalize volume, the relative dynamics are not changed.
But, why bother at all and why not leave it the way it is? Well, the answer to this is almost the same as on why editing exists in general, right? Things are not perfect! This is the fact that prompts us to make our video clips and audio better, improve it at least on the level which can get us the right amount of viewers and listeners. Everyone have had some pain listening to several podcasts, when the volume was too high or too low, or there were so much background noise that the whole recording was hurting the ears of a person! People will not convert to being loyal subscribers, viewers and listeners if their user experience is not favored. So, it is in our best interest to serve their best interest, with a little bit of editing.
When it comes to normalizing audio, there are two reasons we refer to this tool. First is when we feel we need to get the maximum volume, and the second is when we need to match different volumes.
In the first case, you might have somewhat quite voice recording, and would like to make it better without changing its dynamic range, while making it as loud as possible. And when it comes to matching volumes, it is logical that you need to manipulate your editing this way in case you have a group of audio files, each or some of them are at different volumes, so, understandably, if not necessarily, you would like to make them come closer to the same volume.
So, until we give you the step-by step guide on how to normalize your volume in VLC player, we also need to inform you about audio normalization types. Here, generally, we come across three of them: a so-called peak normalization, helping adjust the recording based on the highest signal level present in the recording; another is called loudness normalization and it adjusts the recording based on perceived loudness. Last but not least, RMS (Root-Mean-Square), changes the value of all the samples, where their average electrical volume overall is a specified level.
Using any of this, making it better to listen to your voice, without people being annoyed and their ears becoming exhausting with what you have to offer, you will be making it enjoyable for them and easy to come back to your content, as they will not be obliged to change the volume on their own audio players. Instead, their experience with you will be calm and effortless, which you are aiming to achieve.
So, not, what about VLC? – this is a very popular media player, favorite for a lot of people all around the world, so you should already be quite familiar with what it is, at least by having streamed videos and movies there. Speaking more of what it represents, it is a free-to-use, robust, and feature-packed software that plays a wide range of audio, image, and video files. It is worth noting that it can also play multimedia files directly from extractable devices or the PC and additionally, the program can stream from popular websites such as Disney+, Hulu, Netflix, and so on.
As if it was not enough, you can do simple video and audio editing in VLC Media Player, which a lot of people are unaware of! For example, you can easily trim and cut videos. So, as it happens, we can also normalize volume in VLC Media Player. It is a very handy feature and it works on Windows as well as on Mac. Sooo… How to do that? Because, actually, it is so simple that you might be surprised you didn’t know about this earlier. To learn how to normalize volume in VLC, follow this simple guideline:
First, of course, as every time working with any software, you need to have VLC Media Player installed on your device. Once you have it installed, open VLC. Go to the Tools and Preferences and there, you will need to check the single box which is next to Normalize volume in Effects. Now, set the level to the one that works best for you. Then, when you are happy with the result, you can Save.
This is not something perfect, because it’s so simple to do and actually what it does is just help adjust the general volume, so it leaves the specifics alone.

But, it might be the case that you are not so satisfied with the simple editing and want a little more to get from the editing process on VLC. So, you can do more with the Audio Effects menu there. And the steps are as follows:
First, on your VLC player, find Tools and then, in the menu, go to Preferences. The window will open, and there you need to select All in Show settings – actually it is a little bit hard to find because this is in the bottom left corner of the window. From there, you will need to navigate to Audio, and then, a little below, click on Filters and highlight it. The checkbox next to the Dynamic range compressor will probably be unchecked – so, check in it.

Next, see where Compressor is in the left panel? Select it. And now, you are free to make the changes to the levels as you see fit.

Here, if you are a little bit overwhelmed with the wide range of options to work on, you can just concentrate the most on Makeup gain, Threshold, and Ratio. The first one is by which you adjust in quiet sequences to raise the volume, the second will help you reduce louder sequences to even things out, and ratio is the maximum level of all audio within a movie, let’s say.
Don’t underestimate Attack time and release time, either. They graduate the changes to ramp them up at first, then down again, rather than initiating them immediately. So, if you set them to your liking as well, this will ensure that you have a more fluid transition in and out of the scene and there are less sudden, sometimes scary volume changes.
Therefore, you are now equipped with the most information you will need to normalize volume in VLC Player – so free to give it a go, play around with the different settings and carry out the best result imaginable for you!
How to normalize audio in Wondershare Filmora?
Now, even though we already know how to normalize audio in VLC in the simplest, as well as in the more advanced way, it might be even better if we know some more about normalizing audios in different programs. Something worth discussing is a software called Wondershare Filmora , which carries out the same task wonderfully. Although, unlike VLC Media Player, it is a real video editor , but don’t panic if you have never laid your hand on editing – it is one of the easiest to use ini the word, operating also both on Mac and Windows, and its interface is utterly understandable for beginners right away. And, actually, it is a qhile that Wondershare Filmora X introduced the feature to normalize the audio for the first time. What to say more - you might want to stop now and download the latest version of Filmora because now we are about to learn how to normalize audio from the video there – so, tune in!
Free Download For Win 7 or later(64-bit)
Free Download For macOS 10.14 or later
When it is done installing, open the software. Now, click and drag the video of which the audio you want to normalize. Now you can select the clip you have chosen – if there are multiple, select all of them, then right-click and choose Detach Audio.

Now if you have this kind of graphic before your eyes, you can be pretty sure without even listening, that the noises are really, really different from each other, which highlights once again how useful audio normalization can be:

Select these files, right-click and choose Adjust Audio. New panel will be opened on left top and there, you will see Audio Normalization – check the box there.


After you have clicked on it, wait until the normalization completes.

Soon, all audio will be normalized, and you will already be able to see on the graphics that the volumes are almost on the same level and when you listen to it, you will make sure that there is no longer apparent difference between how they sound. And from there on, you can save the file you just normalized!
So, in this article, we learned a lot about normalizing volumes, why and how it is done, and, more specifically, how to get this task completed in VLC Media Player as well as in Wondershare Filmora X. you can proceed to putting this new information into a good use and come back to learn more about video and audio editing here!
Free Download For macOS 10.14 or later
When it is done installing, open the software. Now, click and drag the video of which the audio you want to normalize. Now you can select the clip you have chosen – if there are multiple, select all of them, then right-click and choose Detach Audio.
Now if you have this kind of graphic before your eyes, you can be pretty sure without even listening, that the noises are really, really different from each other, which highlights once again how useful audio normalization can be:
Select these files, right-click and choose Adjust Audio. New panel will be opened on left top and there, you will see Audio Normalization – check the box there.
After you have clicked on it, wait until the normalization completes.
Soon, all audio will be normalized, and you will already be able to see on the graphics that the volumes are almost on the same level and when you listen to it, you will make sure that there is no longer apparent difference between how they sound. And from there on, you can save the file you just normalized!
So, in this article, we learned a lot about normalizing volumes, why and how it is done, and, more specifically, how to get this task completed in VLC Media Player as well as in Wondershare Filmora X. you can proceed to putting this new information into a good use and come back to learn more about video and audio editing here!
Also read:
- In 2024, Discover Top-Rated Software for Silencing Unwanted Sounds in Your Recordings
- The Ultimate List of Gratis Sound Effect Libraries Online
- In 2024, Accelerating Audio on Windows The Leading 10 Tools for Immediate Volume Increase
- New Elevating Your Edit Workflow Using Audio Duck Features in PowerDirector to Enhance Audio Transitions
- Strategizing Gamers Speech Modification Unveiling the Superior Choices
- Updated 2024 Approved Speech-to-Text Software Showdown Discover the Top 8 Options for PCs, Macs and Online Accessibility
- Updated Effortless Voice Note-Taking on Your Samsung S10 or S9 Device
- In 2024, The AutoTune Plugin Companion for Advanced Sound Editing on Audacity
- New 2024 Approved Explore Cost-Free Methods for Musical Video Addition
- Updated In 2024, Top 10 Alternatives of FaceTime on Android
- Updated The Essentials of Navigating Googles Podcast Experience
- Updated Seamless Setup of Audacity in Ubuntu Instructional Steps for 2024
- New How to Dub a Video Video Dubbing - Wondershare Filmora
- Updated In 2024, Silent Space Sounder A Next-Gen App to Remove Distractions From Your Mobile Audio Experience
- The Ultimate List of Green-Themed Audio Apps for Smartphones
- 2024 Approved The Art of Infusing Audio Harmonies with Visual Narratives at Zero Expense
- New 2024 Approved Essential Techniques Optimizing Voxacell Voice Transformation Use on Discord Platform
- In 2024, 5 Top Free Open-Source Audio Editor Windows
- New 2024 Approved Top Tear-Jerking Melodies The Best Sad Songs of the Year
- New In 2024, Your Ultimate Resource for Score-Free VST Upgrades, Updated Annually
- From Amateur to Expert Utilizing Free Tools for Effective AutoTune in Audacity for 2024
- Updated 2024 Approved Ultimate Audio Enhancer Top Apps for Clearer Sound Quality
- New In 2024, Top 8 Essential Audio Treasures in the Gaming World
- Updated In-Depth Evaluation The Capabilities and Features of Sound Forge for 2024
- New 2024 Approved Unveiling the Science of Digital Voice Mimicry A Dual-Method Approach
- New Perfecting the Choreography Between Images and Acoustics
- Updated In 2024, The Ultimate List of Affordable, Internet-Based Auditory Refinement Platforms – Ranked
- Best Volume Normalizers How to Normalize Audio in Videos, In 2024
- New 2024 Approved Mastering the Art of Sourcing Quiet, Melodic Tunes
- In 2024, Inside Clubhouse Dissecting Its Core Ethos, Features, and Significance in the Modern Era
- In 2024, The Ultimate Guide to Choosing a DAW Our Picks on Top 8 Software for Exceptional Recording, Mixing, and Mastering Capabilities
- How to Transfer Data from Itel P55 to BlackBerry | Dr.fone
- 8 Ultimate Fixes for Google Play Your Realme GT Neo 5 SE Isnt Compatible | Dr.fone
- In 2024, Best Ways to Bypass iCloud Activation Lock from Apple iPhone 14 Pro/iPad/iPod
- New 2024 Approved Steady Shots The Best Free Online Video Stabilizers Reviewed
- In 2024, How To Enable USB Debugging on a Locked Xiaomi Redmi K70 Pro Phone
- 8 Solutions to Solve YouTube App Crashing on Itel S23 | Dr.fone
- 3 Ways to Export Contacts from Apple iPhone XR to Excel CSV & vCard Easily | Dr.fone
- New Replace iMovie with These Top-Rated Windows 10 Video Editors
- In 2024, Learn How To Lock Stolen Your Apple iPhone X Properly | Dr.fone
- Fix Tecno Spark 20C Android System Webview Crash 2024 Issue | Dr.fone
- What are Location Permissions Life360 On Samsung Galaxy F15 5G? | Dr.fone
- Updated Flip It! How to Reverse Your TikTok Videos Like a Pro 2023 Edition for 2024
- In 2024, How to Watch Hulu Outside US On Vivo Y36 | Dr.fone
- Additional Tips About Sinnoh Stone For Realme V30T | Dr.fone
- In 2024, Does Airplane Mode Turn off GPS Location On Samsung Galaxy S23+? | Dr.fone
- How to Unlock Vivo V30 Lite 5G Pattern Lock if Forgotten? 6 Ways
- 2024 Approved 15 Must-Use Gifs Editors
- Remove FRP Lock on Huawei P60
- Still Using Pattern Locks with Nokia C22? Tips, Tricks and Helpful Advice
- New 2024 Approved Unleash Your Creativity Best Vignette Maker Apps for iOS and Android
- How To Teleport Your GPS Location On Honor 100 Pro? | Dr.fone
- A Perfect Guide To Remove or Disable Google Smart Lock On Motorola Moto G04
- New Top 5 Free AVI Video Editors
- Updated 2024 Approved Easy Peasy Video Editing 15 Free Tools for Beginners
- In 2024, How Can Sony Xperia 10 VMirror Share to PC? | Dr.fone
- Troubleshooting Guide How to Fix an Unresponsive Vivo S17 Screen | Dr.fone
- Updated Weve Picked up the Best Online as Well as Offline MOV to GIF Converters . These Converters Are Easy to Use and Have No Limitations on Size. Get Your One for 2024
- Updated In 2024, 10 Free MP4 Video Editing Software Picks
- Title: Updated Comprehensive Guide to Accessible, No-Cost Speech Recognition Apps and Services for 2024
- Author: Ella
- Created at : 2024-05-05 02:26:21
- Updated at : 2024-05-06 02:26:21
- Link: https://sound-optimizing.techidaily.com/updated-comprehensive-guide-to-accessible-no-cost-speech-recognition-apps-and-services-for-2024/
- License: This work is licensed under CC BY-NC-SA 4.0.
