
:max_bytes(150000):strip_icc():format(webp)/GettyImages-1094009490-2694d308001d46049e0755f4dd7fdf4c.jpg)
Updated Discover the Best 7 Online Services for Precise Audio Reduction for 2024
“Discover the Best 7 Online Services for Precise Audio Reduction”
Best Free Online Audio Trimmers to Trim Audio Easily

Liza Brown
Mar 27, 2024• Proven solutions
If you are a music enthusiast and you have a good collection of all genres you love. But keeping large files on your hard drive is a bit messy to manage, given that you would search for a tool to trim audio files on your storage. There are ample online audio trimmers available today however getting the best is still unknown to a lot of people. If you are going to trim your favorite music into short files then you may not want to compromise with the quality that you loved in that music. To make it happen you need to search for the best online audio trimmers that would not only cut off the unpleasant parts of your music but will also keep the quality as it was. In this article, you will learn:
  * [**Part 1:** **8 Free Online Trimmers to Trim Audio**](#part1)
  * [**Part 2:** **Try Advanced Audio Editing With Wondershare Filmora**](#part2)
Part 1: 8 Free Online Trimmers to Trim Audio:
Now, that you are all set to get the best audio cutter online, here are the top 8 audio trimmers that you can use and get the job done. These tools are absolutely free to use and you can use their other functionality as well without paying a single penny to anyone. Let’s see then at a glance:
- [**2. Clideo Audio Cutter** ](#Clideo Audio Cutter)
- [**3. Online Audio & Mp3 Cutter**](#Online Audio & Mp3 Cutter)
- [**4. MP3 Cut**](#MP3 Cut)
- [**5. Kapwing Audio Trimmer**](#Kapwing Audio Trimmer)
- [**6. Bear Audio Tool**](#Bear Audio Tool)
- [**7. Aconvert Audio Tool**](#Aconvert Audio Tool)
- [**8. Audio Alter**](#Audio Alter)
- [**2. Clideo Audio Cutter** ](#Clideo Audio Cutter)
2. Clideo Audio Cutter
Clideo is a great choice to trim audio online, the best part about this tool is the interface that is smooth and you can choose multiple files at once to edit. This tool is secure and free to some extent with all the file formats supported such as MP3, WMA, OGG, WAV, etc. The best way to use this online trimmer is to select audio on your PC, Mac, Android, and iPhone ( yes, it supports all the OS) either from the storage or the Google drive and select the points where you want to start and end. You can change the audio format accordingly after that you can process the file and download it back to your hard drive or cloud storage.

3. Online Audio & Mp3 Cutter
This is a free online tool that would help you trim audio files online without installing complicated software. You only need to choose the mp3 or the audio file from your storage and the audio will start on its own if the browser is supported. Drag the points to the points you want to trim audio and then press the crop button, now you can download your trimmed audio file. This tool is free and it supports file formats such as mp3, m4a, wav, WMA, AMR, ogg, FLAC, m4r, AIFF, 3gpp, ape, and opus.

4. MP3 Cut
Mp3 cut is a free-of-charge tool that makes it easy for you to trim audio online and create ringtones for your iPhone. You don’t need to install any audio editor or cutter to your computer to trim your favorite audio while going through a complicated process. You don’t need to worry about the audio formats because this tool supports over 300 audio formats. The best part about this tool is that it’s free of cost to use and you have an add-on feature of this tool that can extract audio from video files. This is amazing if you have any favorite tracks between a movie then you can easily trim them.

5. Kapwing Audio Trimmer
Kapwing is a free-to-use audio trimmer that can be a wonderful tool to trim your audio online. You just need to upload your files on the UI of this tool or you can paste the link to the video that you want to trim. The process remains the same you need to select the end and start points to download the trimmed audio. It supports almost all the audio formats and can be accessed on any operating system such as Windows, Mac, Android, and iPhone.

6. Bear Audio Tool
Bear audio is a web-based tool that comes with html5 technology where the uploading is directly done on the server and it saves you a lot of time. You can cut, delete, merge, split, fade in, fade out, and adjust the pitch of your file. Make ringtones and play with your favorite songs while trimming and merging them into one another. This tool supports file formats such as MP3, WAV, OGG, WAV, MP3, M4R, OGG, and WMA.

7. Aconvert Audio Tool
Aconvert audio is a good tool that you can use on your computer to convert your files online. You can upload the source file as a video and then convert it to a format like MP3, WAV, etc. It supports a file size of up to 200MB with supported formats such as WAV, WMA, MP3, OGG, AU, FLAC, M4A, MKA, AIFF, OPUS, and RA. The final phase involves the conversion of your favorite file by clicking on the Convert Now button. The download button could be used to save the file to your hard drive or Google storage.

8. Audio Alter
Audio alter is another tool that would help you trim your audio files online. You can select the files from your computer storage and select the Start to endpoints. After selecting the relevant points you need to click on trim and download the file easily. It can handle file sizes up to 20MB with supported file formats such as WAV, MP3, FLAC, OGG. This tool is free to use and anybody can use this tool not only for audio editing but for several other converting tasks that are given on the website panel.

Part 2: Try Advanced Audio Editing With Wondershare Filmora
After trimming the audio files you would need some more add-on features like background noise removal, adjusting volume, and fade in/out audio.
Now, none other than Wondershare Filmora audio editor can do this job because this tool is the best in its category of audio and video editing. You will get different options to debug your audio files for any noise or other errors that you might don’t like in the final copy.
Let’s see how to trim and edit a video with Filmora step by step:
**Step 1: Download and install Filmora on your computer–**You can download Wondershare Filmora below on your computer as it’s compatible with both windows and mac operating systems.


**Step 2: Go to the Filmora dashboard and import your audio files–**Now, you have entered the dashboard and it’s time to import your audio files to start making your audio files best in their quality. Go to the File tab and select Import media to import the audio file to the dashboard and start editing.

**Step 3: Drag the audio to the timeline and make the changes–**Then you need to take the drag and drop the audio file to the timeline, right-click on the audio file and select the Adjust Audio option to view several options to edit the audio file.

Tips:
You can move the indicator to the place where you want to trim, then click the red scissor icon to split or trim the audio. And here is the youtube tutorial to edit the audio:
**Step 4: Get advanced audio editing options–**You can see different options like fade in, fade out, pitch, equalizer, and denoise. You can choose any of these options and get started with the audio adjustments. When you are done with the editing, click on the OK button to save the changes.

Tips:
In case, you have made any mistake and you want to revert the changes to default then you can simply click on RESET and adjust the settings again.
Conclusion
Are you struggling to find an online audio trimmer to trim your audio files? In this article, you have all the solutions in front of you where you can trim and edit your audio files for free, make them more usable and add the audio to your video with the Filmora audio editor that helps you remove background noise, fade in/out, and much more. If you are still stuck somewhere then please drop your queries in the comment box and if you are loving our tool then please don’t forget to share your feedback. You can download and share the tool as much as you can because everybody today needs a reliable tool that is good to use.
Liza Brown
Liza Brown is a writer and a lover of all things video.
Follow @Liza Brown
Liza Brown
Mar 27, 2024• Proven solutions
If you are a music enthusiast and you have a good collection of all genres you love. But keeping large files on your hard drive is a bit messy to manage, given that you would search for a tool to trim audio files on your storage. There are ample online audio trimmers available today however getting the best is still unknown to a lot of people. If you are going to trim your favorite music into short files then you may not want to compromise with the quality that you loved in that music. To make it happen you need to search for the best online audio trimmers that would not only cut off the unpleasant parts of your music but will also keep the quality as it was. In this article, you will learn:
  * [**Part 1:** **8 Free Online Trimmers to Trim Audio**](#part1)
  * [**Part 2:** **Try Advanced Audio Editing With Wondershare Filmora**](#part2)
Part 1: 8 Free Online Trimmers to Trim Audio:
Now, that you are all set to get the best audio cutter online, here are the top 8 audio trimmers that you can use and get the job done. These tools are absolutely free to use and you can use their other functionality as well without paying a single penny to anyone. Let’s see then at a glance:
- [**2. Clideo Audio Cutter** ](#Clideo Audio Cutter)
- [**3. Online Audio & Mp3 Cutter**](#Online Audio & Mp3 Cutter)
- [**4. MP3 Cut**](#MP3 Cut)
- [**5. Kapwing Audio Trimmer**](#Kapwing Audio Trimmer)
- [**6. Bear Audio Tool**](#Bear Audio Tool)
- [**7. Aconvert Audio Tool**](#Aconvert Audio Tool)
- [**8. Audio Alter**](#Audio Alter)
- [**2. Clideo Audio Cutter** ](#Clideo Audio Cutter)
2. Clideo Audio Cutter
Clideo is a great choice to trim audio online, the best part about this tool is the interface that is smooth and you can choose multiple files at once to edit. This tool is secure and free to some extent with all the file formats supported such as MP3, WMA, OGG, WAV, etc. The best way to use this online trimmer is to select audio on your PC, Mac, Android, and iPhone ( yes, it supports all the OS) either from the storage or the Google drive and select the points where you want to start and end. You can change the audio format accordingly after that you can process the file and download it back to your hard drive or cloud storage.
3. Online Audio & Mp3 Cutter
This is a free online tool that would help you trim audio files online without installing complicated software. You only need to choose the mp3 or the audio file from your storage and the audio will start on its own if the browser is supported. Drag the points to the points you want to trim audio and then press the crop button, now you can download your trimmed audio file. This tool is free and it supports file formats such as mp3, m4a, wav, WMA, AMR, ogg, FLAC, m4r, AIFF, 3gpp, ape, and opus.
4. MP3 Cut
Mp3 cut is a free-of-charge tool that makes it easy for you to trim audio online and create ringtones for your iPhone. You don’t need to install any audio editor or cutter to your computer to trim your favorite audio while going through a complicated process. You don’t need to worry about the audio formats because this tool supports over 300 audio formats. The best part about this tool is that it’s free of cost to use and you have an add-on feature of this tool that can extract audio from video files. This is amazing if you have any favorite tracks between a movie then you can easily trim them.
5. Kapwing Audio Trimmer
Kapwing is a free-to-use audio trimmer that can be a wonderful tool to trim your audio online. You just need to upload your files on the UI of this tool or you can paste the link to the video that you want to trim. The process remains the same you need to select the end and start points to download the trimmed audio. It supports almost all the audio formats and can be accessed on any operating system such as Windows, Mac, Android, and iPhone.
6. Bear Audio Tool
Bear audio is a web-based tool that comes with html5 technology where the uploading is directly done on the server and it saves you a lot of time. You can cut, delete, merge, split, fade in, fade out, and adjust the pitch of your file. Make ringtones and play with your favorite songs while trimming and merging them into one another. This tool supports file formats such as MP3, WAV, OGG, WAV, MP3, M4R, OGG, and WMA.
7. Aconvert Audio Tool
Aconvert audio is a good tool that you can use on your computer to convert your files online. You can upload the source file as a video and then convert it to a format like MP3, WAV, etc. It supports a file size of up to 200MB with supported formats such as WAV, WMA, MP3, OGG, AU, FLAC, M4A, MKA, AIFF, OPUS, and RA. The final phase involves the conversion of your favorite file by clicking on the Convert Now button. The download button could be used to save the file to your hard drive or Google storage.
8. Audio Alter
Audio alter is another tool that would help you trim your audio files online. You can select the files from your computer storage and select the Start to endpoints. After selecting the relevant points you need to click on trim and download the file easily. It can handle file sizes up to 20MB with supported file formats such as WAV, MP3, FLAC, OGG. This tool is free to use and anybody can use this tool not only for audio editing but for several other converting tasks that are given on the website panel.
Part 2: Try Advanced Audio Editing With Wondershare Filmora
After trimming the audio files you would need some more add-on features like background noise removal, adjusting volume, and fade in/out audio.
Now, none other than Wondershare Filmora audio editor can do this job because this tool is the best in its category of audio and video editing. You will get different options to debug your audio files for any noise or other errors that you might don’t like in the final copy.
Let’s see how to trim and edit a video with Filmora step by step:
**Step 1: Download and install Filmora on your computer–**You can download Wondershare Filmora below on your computer as it’s compatible with both windows and mac operating systems.
**Step 2: Go to the Filmora dashboard and import your audio files–**Now, you have entered the dashboard and it’s time to import your audio files to start making your audio files best in their quality. Go to the File tab and select Import media to import the audio file to the dashboard and start editing.
**Step 3: Drag the audio to the timeline and make the changes–**Then you need to take the drag and drop the audio file to the timeline, right-click on the audio file and select the Adjust Audio option to view several options to edit the audio file.
Tips:
You can move the indicator to the place where you want to trim, then click the red scissor icon to split or trim the audio. And here is the youtube tutorial to edit the audio:
**Step 4: Get advanced audio editing options–**You can see different options like fade in, fade out, pitch, equalizer, and denoise. You can choose any of these options and get started with the audio adjustments. When you are done with the editing, click on the OK button to save the changes.
Tips:
In case, you have made any mistake and you want to revert the changes to default then you can simply click on RESET and adjust the settings again.
Conclusion
Are you struggling to find an online audio trimmer to trim your audio files? In this article, you have all the solutions in front of you where you can trim and edit your audio files for free, make them more usable and add the audio to your video with the Filmora audio editor that helps you remove background noise, fade in/out, and much more. If you are still stuck somewhere then please drop your queries in the comment box and if you are loving our tool then please don’t forget to share your feedback. You can download and share the tool as much as you can because everybody today needs a reliable tool that is good to use.
Liza Brown
Liza Brown is a writer and a lover of all things video.
Follow @Liza Brown
Best Online Locations to Find and Download Open-Source Closing Music
10 Best Sources to Download Free Outro Music [No Copyright]
Liza Brown
Mar 27, 2024• Proven solutions
The more powerful the ending of a chapter or music is, the more long-lasting and powerful the impact it will leave behind in the heart and minds of the audience. Hence, one cannot deny the importance of strong outro music in the content to enhance the quality and value of it.
So here we are to guide you all about outro music and 10 best sources to download a perfect outro song.
10 Best Sources to Download Outro Music [No Copyright]
1. Filmora:
It is one of the freely available platforms that allows one to not only avail a diverse variety of features and customization options into your videos and creation but also facilitates one by being a highly compatible software that can be operated in Windows as well as Mac.
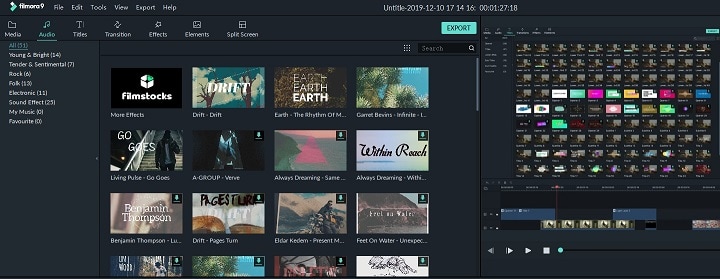
Hence this entails that Filmora is a complete package for quality and quality with your utmost desire while giving a high-end quality output with a vast personalized configuration option.
In any of your videos, Filmora offers you to drastically shift the level of your production by adding a mesmerizing outro music that well suits the content and level up the end result.
This not only offers you royalty free outro music from their own audio library but also supports importing any of your already download music files from your system and can perform multiple customization operations to enhance your video’s end result.
2. Audionautix:
If you are looking for outro music download MP3 music instantly then you have got to try Audionautix which is a website that entails one to avail as many music tracks as you want in be able to download it instantly. As soon as you deliver a link to any music, you are free to listen and download music from “music by audionatic.com”.
Without the hassle of registration or payment, you can select, search, listen and download a pool of good outro music.
3. FreePD:
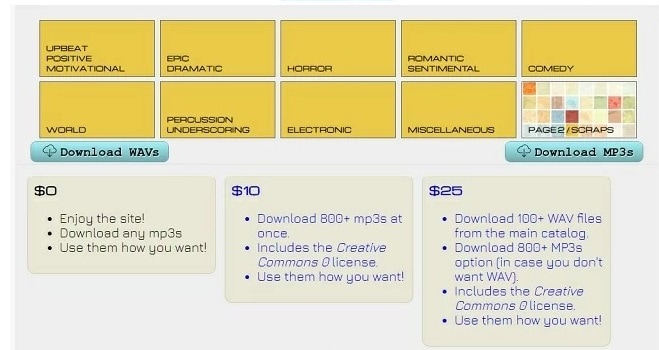
This is free of cost and free from copyright hassle site where you are free to download any of the cool outro music you want. All you have to do is to download a music track and consolidate it with your composition giving you a sea of the genre of music you can choose from ranging from horror, romantic, suspense, sentimental and lot more.
Not only limited to their given library, you can download any music of your likeliness downloaded using this site on any of the social media platform.
4. Jamendo:

This domain is a connecting platform of music fonder and musicians worldwide. This aims to affiliate free music community, spreading the love with mesmerizing music and creating value surrounded by it.
The site is not only a free domain for music lovers but offers you a pool of music library that allows one to listen and download with merely a matter of a single click. With a registration process away, you can save on your systems and share free outro music on any social media platform.
5. SoundSnap:

The feature that makes this free online software outshine over the others is that it not only provides a wide variety of music but also offers a huge pallet of sound effects, distinct genre of sounds and audio clips and several samples to let you explore and play with experimenting music and enhance your creativity.
However, this requires you to make an account prior to downloading music tracks.
6. Musopen:

This website provides a free hand to record any music and download royalty free outro music. This website has recently released several Beethoven sonatas of piano, all on a public domain.
This gives you a free and publically available powerful domain to search and download any outro music no copyright.
7. Free Play Music:
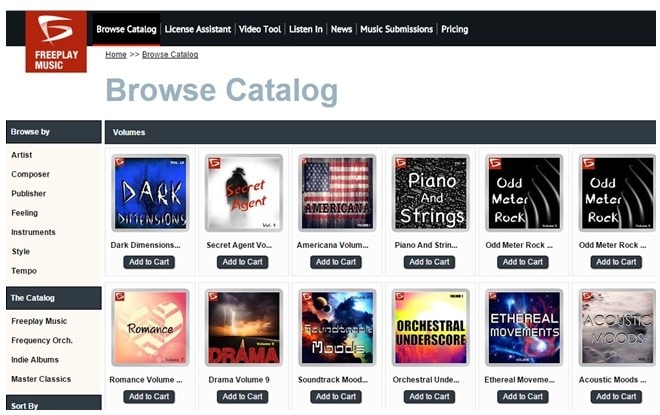
This is considered as one of the renowned small-scaled company of music-licensing. You can undoubtedly call this domain a music composer, bestowing you with the online library of tons of music belonging to several genres. Moreover, this contains zillions of musical and classical pieces of work which allows one to be used as per their likeliness.
Fortunately, there exists a list of playlist with royalty free outro music and the top-ranked music tracks, all accessible from this online website. It lets one first assure regarding your choice of music by first letting one listen to the selected music then lets you download as many music tracks as you want.
8. West One Music:

West one music is basically a British production of a music company globally that facilitates you with a pool of music and songs, including intro, outro and background music around the entire world.
This company was established in the year 2003 in Soho, London with having these groups contained eight distinct labels. Fired earth music, the scoring house, noise refinery, and west one music are some of the labels that exist.
Not only limited to these facilitations but this domain offers a vast variety and distinct genre of music sounds ranging from rock band to classical, western to brass, electronic to woodwind and so many to consider.
9. AudioBlocks:
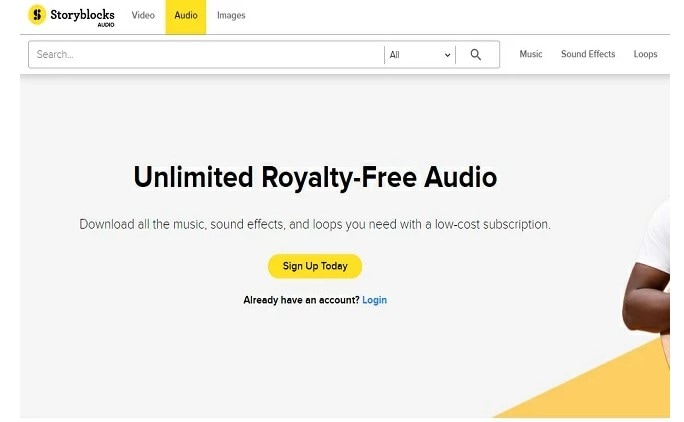
AudioBlocks is considered as one of the copyright-free websites that allows you to use any of their publically available playlist of distinct types of music that can be used as intro, outro or background depending upon the usability of the user while facilitating more than 100,000 music tracks, more than enough for one to choose the best one out of the available pool.
This website is free to use at any instant without bounding one with hidden terms and conditions and allowing them to download and utilize music from their song library at any time. One of the most highlighting features bestowed to the users by this website is that it facilitates one with royalty free outro music for the sake of commercials or any of your personal music-related projects.
Their perfectly maintained and updated listing of the songs allows one to search and choose the freshly available and trendy music from their playlist without the hassle to search it from scratch.
10. Bensound
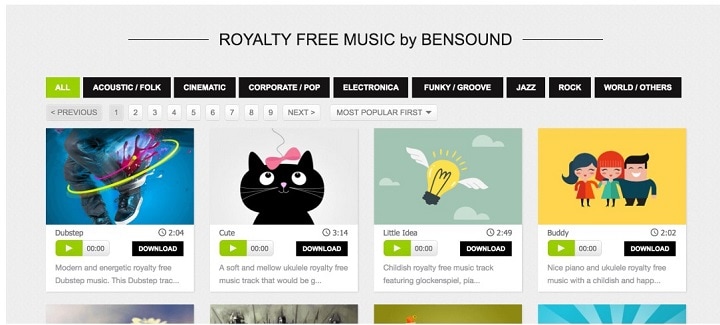
This is yet another browser-based website that is entirely free of cost to download and use music for outro song and a stock of royalty free music for the sake of either any of your multimedia projects or YouTube outro music for your productions in YouTube domain.
This facilitate one with vast palate music types ranging from classical to rock, electronica to acoustic folks and cinematic and so on, just right for any of the type of your video to elevate it to the next level.
Best Practice to Choose the Right Outro Music for Your Video
Since the quality of your production is highly relied on the beat conclusion of your music, it’s of high significance to choose a perfect outro song. But it requires you to know some of the best practices that you can follow while picking a track perfect for you. So, stay tuned!
- Evaluate the type and purpose of the video and then assessing what role the outro music will be playing in the video to best know what fits the purpose.
- You need to have an understanding of the genre of music that rightly escalates the soul of the listener and evokes the desired value.
- Make use of outro music as Bookends to indicate the ending of a video with impactful text or animation.
- You can make use of reference music to guide you to your desired music rhythm, progression, key speed or instrumentation.
- You must know your budget to spend on the outro music to create or own music as per the requirements and resources.
- If your content is on a professional level, then it’s better to consider hiring a good composer as the composition is like a backbone of the song, making it either a hit or a miss!
- Choose self-explanatory music that speaks to the viewers and best connects with them to serve the content’s purpose in an effective manner.
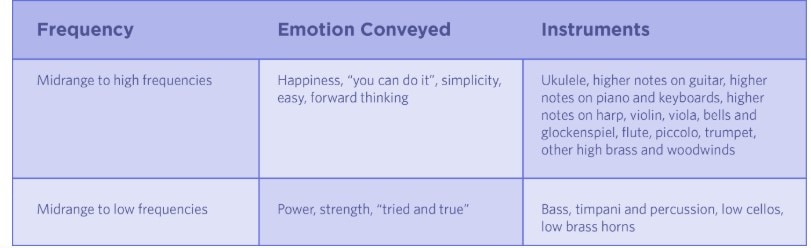
- You ought to consider the tone and the role of frequency.
- A little break in the music catches the attention of an audience to fulfill the aim behind the content.
- Using famous music or the one that best mimics the famous ones would be best to capture the audience’s attention and interest.
What is Outro Music?
By outro music definition, it means that music is affiliated at the end of the song. However, this term is an umbrella term which also means the concluding or ending track of an album. This basically refers to the linear structure of a song starting from intro, verse, chorus, bridge, verse and then finally the outro which is used only once at the end.
However, the chorus and verse can be repeated more than once but the occurrence of intro, outro, and bridge is used only once. The primary reason for inserting an outro into a song is to have a mesmerizing and impactful ending to it, giving listeners a soothing experience since ending matters the most to leave a powerful impact behind.
A piece of outro music in the video is music or song that used at the end of the video. Outra music is important because it’s one of the key elements that attract people to what you expect.
What Are the Most Popular Style Outro Music?
As once said by a French poet, Music is the literature of heart, written with utmost love, sympathy, passion and pure emotions. It is the outro or the strong ending of the movie, play, song or literally anything that outsell the content and leave a powerful impact to be remembered forever and so does the outro of a song, making it a hit or miss for the entire content for whatever purpose that music is used for.
Hence, the significance of outro music cannot be more emphasized enough. Thus the choice of the song is utterly important and styles/genre must be chosen wisely to boost up your content or your music alone.
So let’s explore some of the best and top-ranked style of outro music and the type of content where it fits the most to give you an instant recipe of perfection!
Type 1: cinematic
Usability: victorious, sweeping, grand and big events.
Type 2: corporate
Usability: unobtrusive, inviting and engaging event.
Type 3: ambient
Usability: calm, soothing and centered events
Type 4: acoustic:
Usability: connected, empathetic, melancholy and human
Type 5: comedic
Usability: bright, bubbly, exciting and fun events
Type 6: electronic
Usability: curious, cerebral and electronic
Type 7: hip hop
Usability: confident, edgy and fast
Type 8: rock
Usability: substantial, raw and gritty
Type 9: Funk
Usability: unapologetic, bright and discordant
With this wide variety along with the usability of such outro music, you can now surely get an idea which of the above fits your content the best to uplift the perfectionism in your creation!
Composing Outro Music
Typically, the recapitulation is often used to conclude while using the sonata form is performed. To end a piece of clip or song, the thematic material is often repeated in the process to provide the closure in the tonic key from the exposition. Unexpected digression being fooled by a return in order to produce more empathic confirmation regarding the structural relationship employed to the body of the production.
Moreover, the styles of the outro also make a huge impact and difference in successfully delivering the purpose of the video.
- Fadeout Effect: the echoing effect leave a heartfelt story in heart and mind
- Full stop Effect: shows abruption, finality, emptiness and completeness effect in the song.
Having more than 300 effects available in Filmora with tons of audio editing features available for free, running on both platforms, Windows, and Mac, you can make perfect outro music for your production to attract the target audience and uplift the quality and value of your content!
How to Record Music for an Outro Using Filmora Scrn?
Filmora Scrn is a powerful tool to not only record the audio but all the video playing on the screen, thus facilitating you to record your favorite outro playing in the system.
Step1: after launching the app, tap on “get started” where you’ll see 4 tabs, “scree, audio, camera and advanced” to customize the recording setting.
Step 2: choose the “Audio” tab, where you need to select “computer audio” to record the outro song running in your system and “don’t capture” in the Microphone option.
Step 3: press “record” for recording initiation.
Step 4: hit the “pause” tab to pause and F10 key to stop the recording.
Step 5: Edit the recording as per your likeliness.
Step 6: export your recording in any of the audio formats to save it.

Conclusion
As much as a powerful start of the music is important to attract the audience, the perfect end leaves an utmost impact on them, making your content valuable and distinct. Many software or website can help you make outro songs but the versatility and feasibility in use of Filmora and Filmora Scrn leave one speechless with the profound promising results it produces.
Liza Brown
Liza Brown is a writer and a lover of all things video.
Follow @Liza Brown
Liza Brown
Mar 27, 2024• Proven solutions
The more powerful the ending of a chapter or music is, the more long-lasting and powerful the impact it will leave behind in the heart and minds of the audience. Hence, one cannot deny the importance of strong outro music in the content to enhance the quality and value of it.
So here we are to guide you all about outro music and 10 best sources to download a perfect outro song.
10 Best Sources to Download Outro Music [No Copyright]
1. Filmora:
It is one of the freely available platforms that allows one to not only avail a diverse variety of features and customization options into your videos and creation but also facilitates one by being a highly compatible software that can be operated in Windows as well as Mac.
Hence this entails that Filmora is a complete package for quality and quality with your utmost desire while giving a high-end quality output with a vast personalized configuration option.
In any of your videos, Filmora offers you to drastically shift the level of your production by adding a mesmerizing outro music that well suits the content and level up the end result.
This not only offers you royalty free outro music from their own audio library but also supports importing any of your already download music files from your system and can perform multiple customization operations to enhance your video’s end result.
2. Audionautix:
If you are looking for outro music download MP3 music instantly then you have got to try Audionautix which is a website that entails one to avail as many music tracks as you want in be able to download it instantly. As soon as you deliver a link to any music, you are free to listen and download music from “music by audionatic.com”.
Without the hassle of registration or payment, you can select, search, listen and download a pool of good outro music.
3. FreePD:
This is free of cost and free from copyright hassle site where you are free to download any of the cool outro music you want. All you have to do is to download a music track and consolidate it with your composition giving you a sea of the genre of music you can choose from ranging from horror, romantic, suspense, sentimental and lot more.
Not only limited to their given library, you can download any music of your likeliness downloaded using this site on any of the social media platform.
4. Jamendo:
This domain is a connecting platform of music fonder and musicians worldwide. This aims to affiliate free music community, spreading the love with mesmerizing music and creating value surrounded by it.
The site is not only a free domain for music lovers but offers you a pool of music library that allows one to listen and download with merely a matter of a single click. With a registration process away, you can save on your systems and share free outro music on any social media platform.
5. SoundSnap:
The feature that makes this free online software outshine over the others is that it not only provides a wide variety of music but also offers a huge pallet of sound effects, distinct genre of sounds and audio clips and several samples to let you explore and play with experimenting music and enhance your creativity.
However, this requires you to make an account prior to downloading music tracks.
6. Musopen:
This website provides a free hand to record any music and download royalty free outro music. This website has recently released several Beethoven sonatas of piano, all on a public domain.
This gives you a free and publically available powerful domain to search and download any outro music no copyright.
7. Free Play Music:
This is considered as one of the renowned small-scaled company of music-licensing. You can undoubtedly call this domain a music composer, bestowing you with the online library of tons of music belonging to several genres. Moreover, this contains zillions of musical and classical pieces of work which allows one to be used as per their likeliness.
Fortunately, there exists a list of playlist with royalty free outro music and the top-ranked music tracks, all accessible from this online website. It lets one first assure regarding your choice of music by first letting one listen to the selected music then lets you download as many music tracks as you want.
8. West One Music:
West one music is basically a British production of a music company globally that facilitates you with a pool of music and songs, including intro, outro and background music around the entire world.
This company was established in the year 2003 in Soho, London with having these groups contained eight distinct labels. Fired earth music, the scoring house, noise refinery, and west one music are some of the labels that exist.
Not only limited to these facilitations but this domain offers a vast variety and distinct genre of music sounds ranging from rock band to classical, western to brass, electronic to woodwind and so many to consider.
9. AudioBlocks:
AudioBlocks is considered as one of the copyright-free websites that allows you to use any of their publically available playlist of distinct types of music that can be used as intro, outro or background depending upon the usability of the user while facilitating more than 100,000 music tracks, more than enough for one to choose the best one out of the available pool.
This website is free to use at any instant without bounding one with hidden terms and conditions and allowing them to download and utilize music from their song library at any time. One of the most highlighting features bestowed to the users by this website is that it facilitates one with royalty free outro music for the sake of commercials or any of your personal music-related projects.
Their perfectly maintained and updated listing of the songs allows one to search and choose the freshly available and trendy music from their playlist without the hassle to search it from scratch.
10. Bensound
This is yet another browser-based website that is entirely free of cost to download and use music for outro song and a stock of royalty free music for the sake of either any of your multimedia projects or YouTube outro music for your productions in YouTube domain.
This facilitate one with vast palate music types ranging from classical to rock, electronica to acoustic folks and cinematic and so on, just right for any of the type of your video to elevate it to the next level.
Best Practice to Choose the Right Outro Music for Your Video
Since the quality of your production is highly relied on the beat conclusion of your music, it’s of high significance to choose a perfect outro song. But it requires you to know some of the best practices that you can follow while picking a track perfect for you. So, stay tuned!
- Evaluate the type and purpose of the video and then assessing what role the outro music will be playing in the video to best know what fits the purpose.
- You need to have an understanding of the genre of music that rightly escalates the soul of the listener and evokes the desired value.
- Make use of outro music as Bookends to indicate the ending of a video with impactful text or animation.
- You can make use of reference music to guide you to your desired music rhythm, progression, key speed or instrumentation.
- You must know your budget to spend on the outro music to create or own music as per the requirements and resources.
- If your content is on a professional level, then it’s better to consider hiring a good composer as the composition is like a backbone of the song, making it either a hit or a miss!
- Choose self-explanatory music that speaks to the viewers and best connects with them to serve the content’s purpose in an effective manner.
- You ought to consider the tone and the role of frequency.
- A little break in the music catches the attention of an audience to fulfill the aim behind the content.
- Using famous music or the one that best mimics the famous ones would be best to capture the audience’s attention and interest.
What is Outro Music?
By outro music definition, it means that music is affiliated at the end of the song. However, this term is an umbrella term which also means the concluding or ending track of an album. This basically refers to the linear structure of a song starting from intro, verse, chorus, bridge, verse and then finally the outro which is used only once at the end.
However, the chorus and verse can be repeated more than once but the occurrence of intro, outro, and bridge is used only once. The primary reason for inserting an outro into a song is to have a mesmerizing and impactful ending to it, giving listeners a soothing experience since ending matters the most to leave a powerful impact behind.
A piece of outro music in the video is music or song that used at the end of the video. Outra music is important because it’s one of the key elements that attract people to what you expect.
What Are the Most Popular Style Outro Music?
As once said by a French poet, Music is the literature of heart, written with utmost love, sympathy, passion and pure emotions. It is the outro or the strong ending of the movie, play, song or literally anything that outsell the content and leave a powerful impact to be remembered forever and so does the outro of a song, making it a hit or miss for the entire content for whatever purpose that music is used for.
Hence, the significance of outro music cannot be more emphasized enough. Thus the choice of the song is utterly important and styles/genre must be chosen wisely to boost up your content or your music alone.
So let’s explore some of the best and top-ranked style of outro music and the type of content where it fits the most to give you an instant recipe of perfection!
Type 1: cinematic
Usability: victorious, sweeping, grand and big events.
Type 2: corporate
Usability: unobtrusive, inviting and engaging event.
Type 3: ambient
Usability: calm, soothing and centered events
Type 4: acoustic:
Usability: connected, empathetic, melancholy and human
Type 5: comedic
Usability: bright, bubbly, exciting and fun events
Type 6: electronic
Usability: curious, cerebral and electronic
Type 7: hip hop
Usability: confident, edgy and fast
Type 8: rock
Usability: substantial, raw and gritty
Type 9: Funk
Usability: unapologetic, bright and discordant
With this wide variety along with the usability of such outro music, you can now surely get an idea which of the above fits your content the best to uplift the perfectionism in your creation!
Composing Outro Music
Typically, the recapitulation is often used to conclude while using the sonata form is performed. To end a piece of clip or song, the thematic material is often repeated in the process to provide the closure in the tonic key from the exposition. Unexpected digression being fooled by a return in order to produce more empathic confirmation regarding the structural relationship employed to the body of the production.
Moreover, the styles of the outro also make a huge impact and difference in successfully delivering the purpose of the video.
- Fadeout Effect: the echoing effect leave a heartfelt story in heart and mind
- Full stop Effect: shows abruption, finality, emptiness and completeness effect in the song.
Having more than 300 effects available in Filmora with tons of audio editing features available for free, running on both platforms, Windows, and Mac, you can make perfect outro music for your production to attract the target audience and uplift the quality and value of your content!
How to Record Music for an Outro Using Filmora Scrn?
Filmora Scrn is a powerful tool to not only record the audio but all the video playing on the screen, thus facilitating you to record your favorite outro playing in the system.
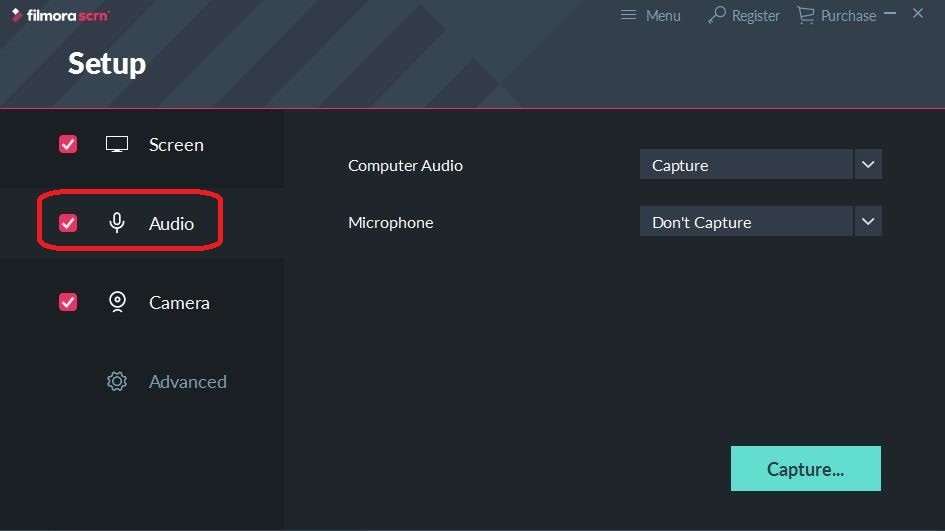
Step1: after launching the app, tap on “get started” where you’ll see 4 tabs, “scree, audio, camera and advanced” to customize the recording setting.
Step 2: choose the “Audio” tab, where you need to select “computer audio” to record the outro song running in your system and “don’t capture” in the Microphone option.
Step 3: press “record” for recording initiation.
Step 4: hit the “pause” tab to pause and F10 key to stop the recording.
Step 5: Edit the recording as per your likeliness.
Step 6: export your recording in any of the audio formats to save it.
Conclusion
As much as a powerful start of the music is important to attract the audience, the perfect end leaves an utmost impact on them, making your content valuable and distinct. Many software or website can help you make outro songs but the versatility and feasibility in use of Filmora and Filmora Scrn leave one speechless with the profound promising results it produces.
Liza Brown
Liza Brown is a writer and a lover of all things video.
Follow @Liza Brown
Liza Brown
Mar 27, 2024• Proven solutions
The more powerful the ending of a chapter or music is, the more long-lasting and powerful the impact it will leave behind in the heart and minds of the audience. Hence, one cannot deny the importance of strong outro music in the content to enhance the quality and value of it.
So here we are to guide you all about outro music and 10 best sources to download a perfect outro song.
10 Best Sources to Download Outro Music [No Copyright]
1. Filmora:
It is one of the freely available platforms that allows one to not only avail a diverse variety of features and customization options into your videos and creation but also facilitates one by being a highly compatible software that can be operated in Windows as well as Mac.
Hence this entails that Filmora is a complete package for quality and quality with your utmost desire while giving a high-end quality output with a vast personalized configuration option.
In any of your videos, Filmora offers you to drastically shift the level of your production by adding a mesmerizing outro music that well suits the content and level up the end result.
This not only offers you royalty free outro music from their own audio library but also supports importing any of your already download music files from your system and can perform multiple customization operations to enhance your video’s end result.
2. Audionautix:
If you are looking for outro music download MP3 music instantly then you have got to try Audionautix which is a website that entails one to avail as many music tracks as you want in be able to download it instantly. As soon as you deliver a link to any music, you are free to listen and download music from “music by audionatic.com”.
Without the hassle of registration or payment, you can select, search, listen and download a pool of good outro music.
3. FreePD:
This is free of cost and free from copyright hassle site where you are free to download any of the cool outro music you want. All you have to do is to download a music track and consolidate it with your composition giving you a sea of the genre of music you can choose from ranging from horror, romantic, suspense, sentimental and lot more.
Not only limited to their given library, you can download any music of your likeliness downloaded using this site on any of the social media platform.
4. Jamendo:
This domain is a connecting platform of music fonder and musicians worldwide. This aims to affiliate free music community, spreading the love with mesmerizing music and creating value surrounded by it.
The site is not only a free domain for music lovers but offers you a pool of music library that allows one to listen and download with merely a matter of a single click. With a registration process away, you can save on your systems and share free outro music on any social media platform.
5. SoundSnap:
The feature that makes this free online software outshine over the others is that it not only provides a wide variety of music but also offers a huge pallet of sound effects, distinct genre of sounds and audio clips and several samples to let you explore and play with experimenting music and enhance your creativity.
However, this requires you to make an account prior to downloading music tracks.
6. Musopen:
This website provides a free hand to record any music and download royalty free outro music. This website has recently released several Beethoven sonatas of piano, all on a public domain.
This gives you a free and publically available powerful domain to search and download any outro music no copyright.
7. Free Play Music:
This is considered as one of the renowned small-scaled company of music-licensing. You can undoubtedly call this domain a music composer, bestowing you with the online library of tons of music belonging to several genres. Moreover, this contains zillions of musical and classical pieces of work which allows one to be used as per their likeliness.
Fortunately, there exists a list of playlist with royalty free outro music and the top-ranked music tracks, all accessible from this online website. It lets one first assure regarding your choice of music by first letting one listen to the selected music then lets you download as many music tracks as you want.
8. West One Music:
West one music is basically a British production of a music company globally that facilitates you with a pool of music and songs, including intro, outro and background music around the entire world.
This company was established in the year 2003 in Soho, London with having these groups contained eight distinct labels. Fired earth music, the scoring house, noise refinery, and west one music are some of the labels that exist.
Not only limited to these facilitations but this domain offers a vast variety and distinct genre of music sounds ranging from rock band to classical, western to brass, electronic to woodwind and so many to consider.
9. AudioBlocks:
AudioBlocks is considered as one of the copyright-free websites that allows you to use any of their publically available playlist of distinct types of music that can be used as intro, outro or background depending upon the usability of the user while facilitating more than 100,000 music tracks, more than enough for one to choose the best one out of the available pool.
This website is free to use at any instant without bounding one with hidden terms and conditions and allowing them to download and utilize music from their song library at any time. One of the most highlighting features bestowed to the users by this website is that it facilitates one with royalty free outro music for the sake of commercials or any of your personal music-related projects.
Their perfectly maintained and updated listing of the songs allows one to search and choose the freshly available and trendy music from their playlist without the hassle to search it from scratch.
10. Bensound
This is yet another browser-based website that is entirely free of cost to download and use music for outro song and a stock of royalty free music for the sake of either any of your multimedia projects or YouTube outro music for your productions in YouTube domain.
This facilitate one with vast palate music types ranging from classical to rock, electronica to acoustic folks and cinematic and so on, just right for any of the type of your video to elevate it to the next level.
Best Practice to Choose the Right Outro Music for Your Video
Since the quality of your production is highly relied on the beat conclusion of your music, it’s of high significance to choose a perfect outro song. But it requires you to know some of the best practices that you can follow while picking a track perfect for you. So, stay tuned!
- Evaluate the type and purpose of the video and then assessing what role the outro music will be playing in the video to best know what fits the purpose.
- You need to have an understanding of the genre of music that rightly escalates the soul of the listener and evokes the desired value.
- Make use of outro music as Bookends to indicate the ending of a video with impactful text or animation.
- You can make use of reference music to guide you to your desired music rhythm, progression, key speed or instrumentation.
- You must know your budget to spend on the outro music to create or own music as per the requirements and resources.
- If your content is on a professional level, then it’s better to consider hiring a good composer as the composition is like a backbone of the song, making it either a hit or a miss!
- Choose self-explanatory music that speaks to the viewers and best connects with them to serve the content’s purpose in an effective manner.
- You ought to consider the tone and the role of frequency.
- A little break in the music catches the attention of an audience to fulfill the aim behind the content.
- Using famous music or the one that best mimics the famous ones would be best to capture the audience’s attention and interest.
What is Outro Music?
By outro music definition, it means that music is affiliated at the end of the song. However, this term is an umbrella term which also means the concluding or ending track of an album. This basically refers to the linear structure of a song starting from intro, verse, chorus, bridge, verse and then finally the outro which is used only once at the end.
However, the chorus and verse can be repeated more than once but the occurrence of intro, outro, and bridge is used only once. The primary reason for inserting an outro into a song is to have a mesmerizing and impactful ending to it, giving listeners a soothing experience since ending matters the most to leave a powerful impact behind.
A piece of outro music in the video is music or song that used at the end of the video. Outra music is important because it’s one of the key elements that attract people to what you expect.
What Are the Most Popular Style Outro Music?
As once said by a French poet, Music is the literature of heart, written with utmost love, sympathy, passion and pure emotions. It is the outro or the strong ending of the movie, play, song or literally anything that outsell the content and leave a powerful impact to be remembered forever and so does the outro of a song, making it a hit or miss for the entire content for whatever purpose that music is used for.
Hence, the significance of outro music cannot be more emphasized enough. Thus the choice of the song is utterly important and styles/genre must be chosen wisely to boost up your content or your music alone.
So let’s explore some of the best and top-ranked style of outro music and the type of content where it fits the most to give you an instant recipe of perfection!
Type 1: cinematic
Usability: victorious, sweeping, grand and big events.
Type 2: corporate
Usability: unobtrusive, inviting and engaging event.
Type 3: ambient
Usability: calm, soothing and centered events
Type 4: acoustic:
Usability: connected, empathetic, melancholy and human
Type 5: comedic
Usability: bright, bubbly, exciting and fun events
Type 6: electronic
Usability: curious, cerebral and electronic
Type 7: hip hop
Usability: confident, edgy and fast
Type 8: rock
Usability: substantial, raw and gritty
Type 9: Funk
Usability: unapologetic, bright and discordant
With this wide variety along with the usability of such outro music, you can now surely get an idea which of the above fits your content the best to uplift the perfectionism in your creation!
Composing Outro Music
Typically, the recapitulation is often used to conclude while using the sonata form is performed. To end a piece of clip or song, the thematic material is often repeated in the process to provide the closure in the tonic key from the exposition. Unexpected digression being fooled by a return in order to produce more empathic confirmation regarding the structural relationship employed to the body of the production.
Moreover, the styles of the outro also make a huge impact and difference in successfully delivering the purpose of the video.
- Fadeout Effect: the echoing effect leave a heartfelt story in heart and mind
- Full stop Effect: shows abruption, finality, emptiness and completeness effect in the song.
Having more than 300 effects available in Filmora with tons of audio editing features available for free, running on both platforms, Windows, and Mac, you can make perfect outro music for your production to attract the target audience and uplift the quality and value of your content!
How to Record Music for an Outro Using Filmora Scrn?
Filmora Scrn is a powerful tool to not only record the audio but all the video playing on the screen, thus facilitating you to record your favorite outro playing in the system.
Step1: after launching the app, tap on “get started” where you’ll see 4 tabs, “scree, audio, camera and advanced” to customize the recording setting.
Step 2: choose the “Audio” tab, where you need to select “computer audio” to record the outro song running in your system and “don’t capture” in the Microphone option.
Step 3: press “record” for recording initiation.
Step 4: hit the “pause” tab to pause and F10 key to stop the recording.
Step 5: Edit the recording as per your likeliness.
Step 6: export your recording in any of the audio formats to save it.
Conclusion
As much as a powerful start of the music is important to attract the audience, the perfect end leaves an utmost impact on them, making your content valuable and distinct. Many software or website can help you make outro songs but the versatility and feasibility in use of Filmora and Filmora Scrn leave one speechless with the profound promising results it produces.
Liza Brown
Liza Brown is a writer and a lover of all things video.
Follow @Liza Brown
How to Increase or Decrease Audio Volume in Audacity?
Audacity is a free, open access, cross-platform sound editing and recording tool. It is compatible with Windows, Mac OS X, Linux, and various other operating systems. All of these aspects have contributed to Audacity’s worldwide popularity. Audacity features an amplified effect that alters the loudness of your chosen audio and other practical tools that can change the sound in different ways.
As a result, Audacity can not only assist you in modifying the level of an audio file, but it can also help you equalize, reduce, normalize, and so on.
Yes, you have heard it right, Audacity increase volume, but the primary question is how? But don’t worry, you will get the answer after reading the article. This article will explain how you can increase or decrease the volume of a whole and a specific segment of the audio file. Let’s get started.
In this article
01 How to Increase or Decrease Volume Without Distortion and Clipping in Audacity
02 How to Increase Volume of Multiple Files in Audacity?
03 How to Increase Volume in Certain Parts of Track?
04 What’s the Difference between Normalize and Amplify?
Part 1: How to Increase or Decrease Volume Without Distortion and Clipping in Audacity
Audio clipping occurs when the audio input becomes too loud for an amplifier to produce, and the surplus signal creates distortion. When editing, you cannot add additional volume to your audio clip forever because this would result in clipping. In this case, you can use the Audacity application to emphasize your material by turning the volume up or down without distortion and clipping on a track or recording.
Learn how Audacity increase volume without distortion by following the procedure described below:
Step 1: First, download and install the Audacity software on your computer.
Step 2: Select the File from the menu above and click Open to open the audio file.

Step 3: Choose the audio track, go to the Effect menu and pick the Amplify option from the drop-down menu.

Note: You can increase or decrease the volume by double-clicking the track and using the slider under the Gain title.
Step 4: Increase or decrease the volume by sliding the slider or typing the amplification value in the text box next to it in the Amplify window as needed.

Note: Ensure that the Allow Clipping checkbox remains unchecked to avoid clipping. Moreover, keep in mind that increasing the volume to a greater extent can result in distortion.
Related: How to Change Audio Volume in Filmora
Part 2: How to Increase Volume of Multiple Files in Audacity?
Audacity is an open-source audio editing tool. It is used for various purposes, like audio recording, music creation, and audio file editing. It also allows you to increase and decrease the volume of audio files.
You may also apply the modifications to multiple files at once, rather than one at a time. Check out the instructions below to learn how to change the volume of multiple audio files:
Step 1: Select the Import option from the File menu, and then pick the Audio option. Browse to your audio files, choose all of them, and then click the Open option.

Step 2: To select all the files, press Ctrl + A, click on the Effect option in the menu bar and pick Amplify.

Step 3: Now, either enter the value in the text box next to the Amplification Decibels tab or use the slider under it. To verify the operation of increasing the volume, check the allow clipping checkbox. When you’re through with the options, click the Ok button.

Step 4: Amplification will be applied to all the tracks. Go to the File option from the above menu to export the files and then select the Export option.

If you’re running Audacity on macOS computer, you can watch the video tutorial below to apply effects to multiple files.
Part 3: How to Increase Volume in Certain Parts of Track?
The audacity software also allows you to alter a specific section of an audio file. The selection tool can assist in locating a particular area of the track. After you’ve chosen a section of the audio file, you may utilize the amplification effect to increase its loudness. Check out the instructions below to learn how you can achieve it:
Step 1: Launch the Audacity software on the computer. To open the audio file, go to the File menu and select Open. You may also open the file by dragging it.
Step 2: Ensure that the Selection tool is active now. Click and hold the mouse left-click to move from one spot on the track to another.

Step 3: After picking the part, go to the Effect option from the menu and select Amplify.

Step 4: Now, for that specific region, modify the amplification and click OK. This will only change the volume for the area you have selected.

Part 4: What’s the Difference between Normalize and Amplify?
Amplify and Normalize are two essential features of the Audacity tool. Many people think they are the same thing, they are right up to some extent, but there exists a big difference between both the features. Before discussing the differences, you need to know what the terms Normalize and Amplify imply.
Amplify
It is the quickest approach to comprehend the effect’s name if you want to know precisely what impacts are. The frequency of the vibration is enhanced to increase the amplification effect. As previously said, it raises a tiny sound.
Furthermore, because this amplification is extended to all frequencies and amplitude, the noise increases. If you choose ten sources and magnify them by ten decibels, each source will be ten decibels louder than your present sound.

Normalize
The meaning of normalizing is standardized, which is also a feature of its name. Whenever you pick an audio input and use the normalize feature, the level is adjusted automatically according to the previously indicated average volume size in Oda City.
As a result, when one sound source is normalized, there is no discernible difference between it and the amplification mechanism. Still, the effect is evident when several sound sources are performed concurrently.
By pressing Ctrl + A and selecting all ten various audio sources, you may compute the required standard of every sound source, enhance the audio input that is smaller than the normal, and create the audio signal more significant than the standard. Shrink the size of each noise source, such as the name, and normalize the sound.

Related: Best Audio Normalizers for Windows
Differences
To differentiate the meaning and impact precisely, amplification means increasing or reducing the sound, whereas normalizing means equalizing the sound. Simply defined, if you magnify ten sources by ten decibels, each of the shorter and louder noises equals ten decibels in their actual loudness.
When the ten sources are normalized, the louder sounds grow louder, conforming to the standard sound source size. Because the amplifying is done regardless, the little noises are going insane during this procedure.
Conclusion
All in all, Audacity does an excellent job at audio editing. If you simply need to modify an audio file, Audacity is a great option. For increasing and decreasing the volume of single and multiple audio files, Audacity is still one of the best bets in the market. We hope that now know how Audacity increase volume of the audio files after reading this article.
02 How to Increase Volume of Multiple Files in Audacity?
03 How to Increase Volume in Certain Parts of Track?
04 What’s the Difference between Normalize and Amplify?
Part 1: How to Increase or Decrease Volume Without Distortion and Clipping in Audacity
Audio clipping occurs when the audio input becomes too loud for an amplifier to produce, and the surplus signal creates distortion. When editing, you cannot add additional volume to your audio clip forever because this would result in clipping. In this case, you can use the Audacity application to emphasize your material by turning the volume up or down without distortion and clipping on a track or recording.
Learn how Audacity increase volume without distortion by following the procedure described below:
Step 1: First, download and install the Audacity software on your computer.
Step 2: Select the File from the menu above and click Open to open the audio file.
Step 3: Choose the audio track, go to the Effect menu and pick the Amplify option from the drop-down menu.
Note: You can increase or decrease the volume by double-clicking the track and using the slider under the Gain title.
Step 4: Increase or decrease the volume by sliding the slider or typing the amplification value in the text box next to it in the Amplify window as needed.
Note: Ensure that the Allow Clipping checkbox remains unchecked to avoid clipping. Moreover, keep in mind that increasing the volume to a greater extent can result in distortion.
Related: How to Change Audio Volume in Filmora
Part 2: How to Increase Volume of Multiple Files in Audacity?
Audacity is an open-source audio editing tool. It is used for various purposes, like audio recording, music creation, and audio file editing. It also allows you to increase and decrease the volume of audio files.
You may also apply the modifications to multiple files at once, rather than one at a time. Check out the instructions below to learn how to change the volume of multiple audio files:
Step 1: Select the Import option from the File menu, and then pick the Audio option. Browse to your audio files, choose all of them, and then click the Open option.
Step 2: To select all the files, press Ctrl + A, click on the Effect option in the menu bar and pick Amplify.
Step 3: Now, either enter the value in the text box next to the Amplification Decibels tab or use the slider under it. To verify the operation of increasing the volume, check the allow clipping checkbox. When you’re through with the options, click the Ok button.
Step 4: Amplification will be applied to all the tracks. Go to the File option from the above menu to export the files and then select the Export option.
If you’re running Audacity on macOS computer, you can watch the video tutorial below to apply effects to multiple files.
Part 3: How to Increase Volume in Certain Parts of Track?
The audacity software also allows you to alter a specific section of an audio file. The selection tool can assist in locating a particular area of the track. After you’ve chosen a section of the audio file, you may utilize the amplification effect to increase its loudness. Check out the instructions below to learn how you can achieve it:
Step 1: Launch the Audacity software on the computer. To open the audio file, go to the File menu and select Open. You may also open the file by dragging it.
Step 2: Ensure that the Selection tool is active now. Click and hold the mouse left-click to move from one spot on the track to another.
Step 3: After picking the part, go to the Effect option from the menu and select Amplify.
Step 4: Now, for that specific region, modify the amplification and click OK. This will only change the volume for the area you have selected.
Part 4: What’s the Difference between Normalize and Amplify?
Amplify and Normalize are two essential features of the Audacity tool. Many people think they are the same thing, they are right up to some extent, but there exists a big difference between both the features. Before discussing the differences, you need to know what the terms Normalize and Amplify imply.
Amplify
It is the quickest approach to comprehend the effect’s name if you want to know precisely what impacts are. The frequency of the vibration is enhanced to increase the amplification effect. As previously said, it raises a tiny sound.
Furthermore, because this amplification is extended to all frequencies and amplitude, the noise increases. If you choose ten sources and magnify them by ten decibels, each source will be ten decibels louder than your present sound.
Normalize
The meaning of normalizing is standardized, which is also a feature of its name. Whenever you pick an audio input and use the normalize feature, the level is adjusted automatically according to the previously indicated average volume size in Oda City.
As a result, when one sound source is normalized, there is no discernible difference between it and the amplification mechanism. Still, the effect is evident when several sound sources are performed concurrently.
By pressing Ctrl + A and selecting all ten various audio sources, you may compute the required standard of every sound source, enhance the audio input that is smaller than the normal, and create the audio signal more significant than the standard. Shrink the size of each noise source, such as the name, and normalize the sound.
Related: Best Audio Normalizers for Windows
Differences
To differentiate the meaning and impact precisely, amplification means increasing or reducing the sound, whereas normalizing means equalizing the sound. Simply defined, if you magnify ten sources by ten decibels, each of the shorter and louder noises equals ten decibels in their actual loudness.
When the ten sources are normalized, the louder sounds grow louder, conforming to the standard sound source size. Because the amplifying is done regardless, the little noises are going insane during this procedure.
Conclusion
All in all, Audacity does an excellent job at audio editing. If you simply need to modify an audio file, Audacity is a great option. For increasing and decreasing the volume of single and multiple audio files, Audacity is still one of the best bets in the market. We hope that now know how Audacity increase volume of the audio files after reading this article.
Also read:
- Updated 2024 Approved Clearing the Auditory Clutter Sequential Steps for Removing Background Audio
- New Audio Enhancement Techniques in After Effects A Comprehensive 2023 Guide for 2024
- New Top 8 iOS Digital Audio Workstations (DAW) for Creative Minds on iPad & iPhone
- New Exclusive Insight Choosing Among the Top 3 Leading Web Platforms for Enhanced Media Sounds for 2024
- New In 2024, The Filmmakers Voice How to Raise Your Pitch for Impact Using Filmora
- Where Can I Find Glass Breaking Sound Effect, In 2024
- In 2024, Consumers Recommended List of High-Quality Zero-Cost Audio Trimming Tools for Online Use
- Updated 2024 Approved Ultimate Guide to Auditory Separation From Visual Media The 2023 Methodology
- New In 2024, The Sound Detectives Handbook Extracting Silence From Video Files in iOS/OS X Systems
- New Achieving Perfect Ambience Expert Techniques for Gradual Volume Changes with Adobe After Effects for 2024
- New 2024 Approved Precision Timing in Post-Production Matching Video Cuts with Audio Beats Using Premiere Pro
- Updated How to Make Your Voice Deeper With Filmora
- New Top 10 Essential Harvesting Tools for Video Editors for 2024
- Budget Beats for Video Production Finding No-Cost Music
- New 2024 Approved Top 10 MP3 Capture Software for Windows Users
- New 2024 Approved Free & Value-Oriented Mac Audio Editing Suite
- Updated 3 Top-Ranked Online Tools for Enhancing Audio Clarity
- New The Ultimate Guide to Adding Auto-Tuned Magic in Audacity for 2024
- New Virtual Meow Melody Mixer
- Updated Exclusive Ranking 2024S Leading Vocal Nullification Software & Services
- Updated Clearer Screen, Cleaner Sound Techniques for Dampening Background Audio in Digital Videos for 2024
- Play Store Not Working On Motorola G24 Power? 8 Solutions Inside | Dr.fone
- In 2024, Unlock Filmora for Free Legit and Secure Download Options
- How to Detect and Stop mSpy from Spying on Your Honor 90 GT | Dr.fone
- In 2024, Still Using Pattern Locks with Samsung Galaxy F04? Tips, Tricks and Helpful Advice
- Updated How to Split Videos in Final Cut Pro
- New In 2024, Vignette Masterpieces The Best iOS and Android Apps
- 6 Solutions to Fix Error 505 in Google Play Store on Poco X6 Pro | Dr.fone
- How To Bypass FRP on Lava Agni 2 5G
- Sign .docx file Online for Free
- Unlock Your Device iCloud DNS Bypass Explained and Tested, Plus Easy Alternatives On Apple iPhone 13 Pro
- In 2024, Apple ID is Greyed Out From Apple iPhone 6s Plus How to Bypass?
- The Ultimate Final Cut Pro Hack Flipping Clips in 4 Easy Steps
- New In 2024, The Best Free MPEG Video Splitters for Windows, Mac, and Linux
- New In 2024, 10 Free Video Editing Apps for Android with No Strings Attached
- Updated Light Up Your Videos Top-Rated Brightening Apps for 2024
- In 2024, How To Unlock Stolen iPhone 11 In Different Conditionsin | Dr.fone
- Ultimate guide to get the meltan box pokemon go For Oppo Reno 10 5G | Dr.fone
- Here are Some Pro Tips for Pokemon Go PvP Battles On Apple iPhone 6s | Dr.fone
- Title: Updated Discover the Best 7 Online Services for Precise Audio Reduction for 2024
- Author: Ella
- Created at : 2024-05-05 02:27:28
- Updated at : 2024-05-06 02:27:28
- Link: https://sound-optimizing.techidaily.com/updated-discover-the-best-7-online-services-for-precise-audio-reduction-for-2024/
- License: This work is licensed under CC BY-NC-SA 4.0.
