
Updated In 2024, Mastering Mobile Audio Recordings The 10 Leading iPhone Apps
Mastering Mobile Audio Recordings: The 10 Leading iPhone Apps
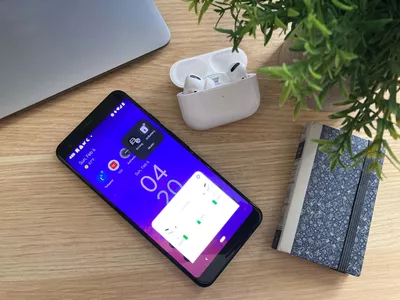
10 Best Voice Recorder Apps for iPhones

Benjamin Arango
Mar 27, 2024• Proven solutions
Are you an aspiring musician or podcaster? Or maybe you just want to record some conversations for personal use. If so, then recording your voice via an iPhone is an easy way to capture these moments. But which voice recorder app should you use to get the best possible results?
iPhones typically come with a good quality microphone, so choosing a suitable voice recorder app can have a significant impact on the quality levels of your recordings. By selecting an app that prioritizes sound quality and ensures minimal audio clipping and distortion, you can ensure that all your recordings are captured in crystal clear clarity. That’s why we combed through the Internet in search of the best voice recorder apps for iPhones you can use in different contexts.
Best Voice Recording Apps for iPhone
There are several factors you should take into consideration before you choose to install a voice recorder app on your iPhone. Moreover, you can find many free options that can be quite effective if you are just looking for an easy way to record narration and dialogue with your iPhone or iPad. So, here are some of the best voice recording apps you can find on the App Store.
![]()
A cross-platform for making videos anywhere for all creators

Why your video editing isn’t good enough? How about some creative inspo?
- 100 Million+ Users
- 150+ Countries and Regions
- 4 Million+ Social Media Followers
- 5 Million+ Stock Media for Use
* Secure Download

1. Voice Memos
Price: Free
Supported OS: iOS 12.0 or later
Best For Recording notes for free

If you look into the folder named Extras on your iPhone’s home screen, you will find the Voice Memos app that lets you record audio without any restrictions. All you have to do to start recording your thoughts or a conversation is tap on the Record button. Voice Memos lets you pause and resume a recording whenever you want, and you can also record conversations while using other apps on your iPhone. After the recording session is completed, you can trim the audio file you created and save it to your device or delete it if you are not happy with the results.
Pros
- Easy to use
- Available to all iPhone and iWatch owners for free
Cons
- Equipped with only basic audio editing tools
- No file-sharing features
2. AudioShare
Price: $2.99
Supported OS: iOS 10.0 or later
Best for: Music industry professionals

Musicians and all other creatives who work with large numbers of audio files are going to love using AudioShare. Besides powerful file management tools that enable you to transfer files from one app to another or to a computer, this app also allows you to record audio from an external microphone. Moreover, you can choose from a variety of bit and sample rates or record and play your recordings at different playback qualities.
You can import your own music into AudioShare and trim, fade in or fade out all audio recordings you make with this and other apps. Once you are done editing, you can export your files to all apps that are compatible with AudioShare.
Pros
- Excellent voice recording capabilities
- Makes audio file management easier
Cons
- Previous audio recording experience is necessary
- Selection of audio effects could be richer
3. Awesome Voice Recorder
Price: Free, but offers in-app purchases
Supported OS: iOS 9.0 or later
Best for: Music industry professionals

Recording a lecture or an interview is equally easy with AVR as you just have to select the quality of the recording you want to create, decide if you want the make a mono or stereo recording and choose if your file is going to be saved in MP3, M4A or WAV format. The app also lets you add tags that help you highlight the most important parts of the recording or resume a recording session after a maximum three-minute pause. AVR also reduces constant background noises that can impact the quality of the output audio files you create.
Pros
- Offers versatile voice recording tools
- Makes file management faster and easier
Cons
- Supports a limited number of audio file formats
- The steep learning curve for inexperienced users
4. Voice Recorder and Audio Editor
Price: Free, but offers in-app purchases
Supported OS: iOS 9.0 or later
Best for: Students

In case you are searching for a voice recorder that can also transcribe audio files accurately, you should look no further. The app doesn’t restrict the duration of your audio recordings, but if you want to transcribe your files or add text notes to them you must make in-app purchases. The free version of Voice Recorder and Audio Editor lets you select the file format of the audio files you are creating, alter their playback speed or trim the parts you don’t need. Once you’ve recorded and edited your voice recordings you can easily share them to social media or store them on the cloud.
Pros
- Unlimited recording times
- Supports WiFi transfer of recordings
Cons
- Offers only basic audio editing tools
- File transcription feature isn’t free
5. Voice Record Pro
Price: Free, but offers in-app purchases
Supported OS: iOS 10.3 or later
Best for: Journalists

Starting a new voice recording session with this app is a straightforward process that can be completed in just a few quick taps. Voice Record Pro can capture voice recordings in all standard file formats and it enables you to convert your files to any format you choose. The app also allows you to add bookmarks, photos, and notes to your recordings or merge multiple audio recordings into a single file. Voice Record Pro offers a broad spectrum of export options so that you can easily upload your voice recordings to cloud storage services, a FTP server or post them on YouTube as movie clips.
Pros
- Excellent file export options
- Produces high-quality audio recordings
Cons
- You must make an in-app purchase to remove ads
- No audio file transcription options
6. HT Professional Recorder
Price: $9.99
Supported OS: iOS 9.0 or later
Best for: Students and professionals from different industries

As the app’s name suggests, HT Professional Recorder is aimed at iPhone users who would like to record meetings, conferences, dictations or use it for other business purposes. HT Professional Recorder can pick up voices in superb quality from four feet away, and it easily recognizes soft voices and whispers. In addition, you can create 30-minute email recordings and it automatically splits recordings that exceed this time limit into multiple emails. You can also use this app to send recordings that last up to 15 hours via FTP servers or web browsers.
Pros
- Overwrite feature enables users to make corrections
- Offers three levels of microphone sensitivity
Cons
- No transcription options
- Poor selection of audio editing tools
7. Voice Recorder – Audio Record
Price: $3.99
Supported OS: iOS 9.0 or later
Best for: Students and businessmen

iPhone owners who often find themselves in rooms where recording a speaker from close proximity is not an option should try this voice recorder app. Voice Recorder – Audio Record can pick up voices that are as far as 300 hundred feet away and lets you select the quality of the audio recording or pick a format of the audio file. You can also connect external microphones and resume recordings after phone calls. Voice Recorder – Audio Record supports all standard sharing options, and it uploads each audio recording you create to Dropbox automatically.
Pros
- Allows users to record voices via an external microphone
- Picks up sounds over great distances
Cons
- Audio editing options could be better
- No noise reduction features
8. MultiTrack DAW
Price: $9.99, offers in-app purchases
Supported OS: iOS 9.0 or later
Best for: Music industry professionals

This app offers much more than simple voice recording options, as you can use it to manipulate audio files in virtually any way you want. The free version of MultiTrack DAW grants you access to eight stereo tracks, but you must make an in-app purchase if you want to add 8 or 16 more tracks. The app offers a variety of input options, which enables you to connect external microphones and use them to record voices or any other sound. The non-destructive editing utilizes Bins and Regions while the app also allows you to apply configurable bus effects.
Pros
- Powerful audio recording and audio editing features
- Supports a variety of input and output file formats
Cons
- More expensive than most voice recorder apps for iPhones
- Aimed only at seasoned sound recording professionals
9. Recorder Plus : Voice Recorder
Price: Free, but offers in-app purchases
Supported OS: iOS 9.0 or later
Best for: Recording notes

This is a simple voice recording app that doesn’t offer much more than basic audio recording options. You can use it to capture voice recordings that can last for a couple of seconds or a few hours, while the app is active or running in the background. You can start a new recording session with a single tap, which makes Recorder Plus : Voice Recorder a perfect choice if you want to record your thoughts, ideas or notes quickly. The free version of the app provides you with only limited voice recording and audio editing options and you must make in-app purchases if you want to create high-quality MP3 recordings or trim and play audio files.
Pros
- Quick voice recording setup
- Adjustable audio quality
Cons
- Sharing voice recording to cloud drives is only possible if you make an in-app purchase
- Audio editing options are basic
10. Otter Voice Meeting Notes
Price: Free, but offers in-app purchases
Supported OS: iOS 10.0 or later
Best for: Students, Journalists, Businessmen

In most situations, the time you spend taking or transcribing notes can be utilized for more important tasks. Otter Voice Meeting Notes app offers an easy solution to this problem by recording and transcribing lectures, business meetings or interviews in real-time with near-perfect accuracy. The app’s AI can also recognize different speakers, although it requires some previous training, which allows you to transcribe entire conversations effortlessly. Moreover, you can create groups, share transcripts live with all members and invite them to view, edit or highlight the most important parts of the text.
Pros
- Automatic transcription of all voice recordings
- Offers a broad range of collaboration options
Cons
- Expensive monthly and annual subscriptions
- No voice recording settings
What is the Free Best Voice Recorder App for iPhones?
With so many voice recording apps on the App Store, finding the one you can use in every situation can be difficult. In addition, most of the apps you can install for free, require you to make in-app purchases in order to use all of the features they have to offer.
So, if you don’t want to spend money on a voice recording app, we suggest using the Voice Memos app that is already installed on your iPhone. This may not be the most powerful voice recording app you can find on the market, but it is still easy to use and it doesn’t limit the maximum duration of your audio recordings.
Below is a comparison table for the above 10 voice recording apps for iPhone.
| NO. | Voice Recorder | User Rating | Supported OS | Price | Best For |
|---|---|---|---|---|---|
| 1 | Voice Memos | Not available | iOS 12.0 or later | Free | Recording memos |
| 2 | AudioShare | 4.7 | iOS 10.0 or later | $2.99 | Music industry professionals |
| 3 | AVR | 4.6 | iOS 9.0 or later | Free, but offers in-app purchases | Music industry professionals |
| 4 | Voice Recorder and Audio Editor | 4.7 | iOS 9.0 or later | Free, but offers in-app purchases | Students |
| 5 | Voice Record Pro | 4.7 | iOS 10.3 or later | Free, but offers in-app purchases | Journalists |
| 6 | HT Professional Recorder | 4.7 | iOS 9.0 or later | $9.99 | Students and professionals |
| 7 | Voice Recorder – Audio Record | 4.6 | iOS 9.0 or later | $3.99 | Students and Businessmen |
| 8 | MultiTrack DAW | 4.5 | iOS 9.0 or later | $9.99 offers in-app purchases | Music industry professionals |
| 9 | Recorder Plus: Voice Recorder | 4.4 | iOS 9.0 or later | Free, but offers in-app purchases | Recording notes |
| 10 | Otter Voice Meeting Notes | 4.8 | iOS 10.0 | Free, but offers in-app purchases | Students, Journalists, Businessmen |
If you want to record voiceover and add it to a video , you may need a video editing software like Wondershare Filmora video editor .


Benjamin Arango
Benjamin Arango is a writer and a lover of all things video.
Follow @Benjamin Arango
Benjamin Arango
Mar 27, 2024• Proven solutions
Are you an aspiring musician or podcaster? Or maybe you just want to record some conversations for personal use. If so, then recording your voice via an iPhone is an easy way to capture these moments. But which voice recorder app should you use to get the best possible results?
iPhones typically come with a good quality microphone, so choosing a suitable voice recorder app can have a significant impact on the quality levels of your recordings. By selecting an app that prioritizes sound quality and ensures minimal audio clipping and distortion, you can ensure that all your recordings are captured in crystal clear clarity. That’s why we combed through the Internet in search of the best voice recorder apps for iPhones you can use in different contexts.
Best Voice Recording Apps for iPhone
There are several factors you should take into consideration before you choose to install a voice recorder app on your iPhone. Moreover, you can find many free options that can be quite effective if you are just looking for an easy way to record narration and dialogue with your iPhone or iPad. So, here are some of the best voice recording apps you can find on the App Store.
![]()
A cross-platform for making videos anywhere for all creators
Why your video editing isn’t good enough? How about some creative inspo?
- 100 Million+ Users
- 150+ Countries and Regions
- 4 Million+ Social Media Followers
- 5 Million+ Stock Media for Use
* Secure Download
1. Voice Memos
Price: Free
Supported OS: iOS 12.0 or later
Best For Recording notes for free
If you look into the folder named Extras on your iPhone’s home screen, you will find the Voice Memos app that lets you record audio without any restrictions. All you have to do to start recording your thoughts or a conversation is tap on the Record button. Voice Memos lets you pause and resume a recording whenever you want, and you can also record conversations while using other apps on your iPhone. After the recording session is completed, you can trim the audio file you created and save it to your device or delete it if you are not happy with the results.
Pros
- Easy to use
- Available to all iPhone and iWatch owners for free
Cons
- Equipped with only basic audio editing tools
- No file-sharing features
2. AudioShare
Price: $2.99
Supported OS: iOS 10.0 or later
Best for: Music industry professionals
Musicians and all other creatives who work with large numbers of audio files are going to love using AudioShare. Besides powerful file management tools that enable you to transfer files from one app to another or to a computer, this app also allows you to record audio from an external microphone. Moreover, you can choose from a variety of bit and sample rates or record and play your recordings at different playback qualities.
You can import your own music into AudioShare and trim, fade in or fade out all audio recordings you make with this and other apps. Once you are done editing, you can export your files to all apps that are compatible with AudioShare.
Pros
- Excellent voice recording capabilities
- Makes audio file management easier
Cons
- Previous audio recording experience is necessary
- Selection of audio effects could be richer
3. Awesome Voice Recorder
Price: Free, but offers in-app purchases
Supported OS: iOS 9.0 or later
Best for: Music industry professionals
Recording a lecture or an interview is equally easy with AVR as you just have to select the quality of the recording you want to create, decide if you want the make a mono or stereo recording and choose if your file is going to be saved in MP3, M4A or WAV format. The app also lets you add tags that help you highlight the most important parts of the recording or resume a recording session after a maximum three-minute pause. AVR also reduces constant background noises that can impact the quality of the output audio files you create.
Pros
- Offers versatile voice recording tools
- Makes file management faster and easier
Cons
- Supports a limited number of audio file formats
- The steep learning curve for inexperienced users
4. Voice Recorder and Audio Editor
Price: Free, but offers in-app purchases
Supported OS: iOS 9.0 or later
Best for: Students
In case you are searching for a voice recorder that can also transcribe audio files accurately, you should look no further. The app doesn’t restrict the duration of your audio recordings, but if you want to transcribe your files or add text notes to them you must make in-app purchases. The free version of Voice Recorder and Audio Editor lets you select the file format of the audio files you are creating, alter their playback speed or trim the parts you don’t need. Once you’ve recorded and edited your voice recordings you can easily share them to social media or store them on the cloud.
Pros
- Unlimited recording times
- Supports WiFi transfer of recordings
Cons
- Offers only basic audio editing tools
- File transcription feature isn’t free
5. Voice Record Pro
Price: Free, but offers in-app purchases
Supported OS: iOS 10.3 or later
Best for: Journalists
Starting a new voice recording session with this app is a straightforward process that can be completed in just a few quick taps. Voice Record Pro can capture voice recordings in all standard file formats and it enables you to convert your files to any format you choose. The app also allows you to add bookmarks, photos, and notes to your recordings or merge multiple audio recordings into a single file. Voice Record Pro offers a broad spectrum of export options so that you can easily upload your voice recordings to cloud storage services, a FTP server or post them on YouTube as movie clips.
Pros
- Excellent file export options
- Produces high-quality audio recordings
Cons
- You must make an in-app purchase to remove ads
- No audio file transcription options
6. HT Professional Recorder
Price: $9.99
Supported OS: iOS 9.0 or later
Best for: Students and professionals from different industries
As the app’s name suggests, HT Professional Recorder is aimed at iPhone users who would like to record meetings, conferences, dictations or use it for other business purposes. HT Professional Recorder can pick up voices in superb quality from four feet away, and it easily recognizes soft voices and whispers. In addition, you can create 30-minute email recordings and it automatically splits recordings that exceed this time limit into multiple emails. You can also use this app to send recordings that last up to 15 hours via FTP servers or web browsers.
Pros
- Overwrite feature enables users to make corrections
- Offers three levels of microphone sensitivity
Cons
- No transcription options
- Poor selection of audio editing tools
7. Voice Recorder – Audio Record
Price: $3.99
Supported OS: iOS 9.0 or later
Best for: Students and businessmen
iPhone owners who often find themselves in rooms where recording a speaker from close proximity is not an option should try this voice recorder app. Voice Recorder – Audio Record can pick up voices that are as far as 300 hundred feet away and lets you select the quality of the audio recording or pick a format of the audio file. You can also connect external microphones and resume recordings after phone calls. Voice Recorder – Audio Record supports all standard sharing options, and it uploads each audio recording you create to Dropbox automatically.
Pros
- Allows users to record voices via an external microphone
- Picks up sounds over great distances
Cons
- Audio editing options could be better
- No noise reduction features
8. MultiTrack DAW
Price: $9.99, offers in-app purchases
Supported OS: iOS 9.0 or later
Best for: Music industry professionals
This app offers much more than simple voice recording options, as you can use it to manipulate audio files in virtually any way you want. The free version of MultiTrack DAW grants you access to eight stereo tracks, but you must make an in-app purchase if you want to add 8 or 16 more tracks. The app offers a variety of input options, which enables you to connect external microphones and use them to record voices or any other sound. The non-destructive editing utilizes Bins and Regions while the app also allows you to apply configurable bus effects.
Pros
- Powerful audio recording and audio editing features
- Supports a variety of input and output file formats
Cons
- More expensive than most voice recorder apps for iPhones
- Aimed only at seasoned sound recording professionals
9. Recorder Plus : Voice Recorder
Price: Free, but offers in-app purchases
Supported OS: iOS 9.0 or later
Best for: Recording notes
This is a simple voice recording app that doesn’t offer much more than basic audio recording options. You can use it to capture voice recordings that can last for a couple of seconds or a few hours, while the app is active or running in the background. You can start a new recording session with a single tap, which makes Recorder Plus : Voice Recorder a perfect choice if you want to record your thoughts, ideas or notes quickly. The free version of the app provides you with only limited voice recording and audio editing options and you must make in-app purchases if you want to create high-quality MP3 recordings or trim and play audio files.
Pros
- Quick voice recording setup
- Adjustable audio quality
Cons
- Sharing voice recording to cloud drives is only possible if you make an in-app purchase
- Audio editing options are basic
10. Otter Voice Meeting Notes
Price: Free, but offers in-app purchases
Supported OS: iOS 10.0 or later
Best for: Students, Journalists, Businessmen
In most situations, the time you spend taking or transcribing notes can be utilized for more important tasks. Otter Voice Meeting Notes app offers an easy solution to this problem by recording and transcribing lectures, business meetings or interviews in real-time with near-perfect accuracy. The app’s AI can also recognize different speakers, although it requires some previous training, which allows you to transcribe entire conversations effortlessly. Moreover, you can create groups, share transcripts live with all members and invite them to view, edit or highlight the most important parts of the text.
Pros
- Automatic transcription of all voice recordings
- Offers a broad range of collaboration options
Cons
- Expensive monthly and annual subscriptions
- No voice recording settings
What is the Free Best Voice Recorder App for iPhones?
With so many voice recording apps on the App Store, finding the one you can use in every situation can be difficult. In addition, most of the apps you can install for free, require you to make in-app purchases in order to use all of the features they have to offer.
So, if you don’t want to spend money on a voice recording app, we suggest using the Voice Memos app that is already installed on your iPhone. This may not be the most powerful voice recording app you can find on the market, but it is still easy to use and it doesn’t limit the maximum duration of your audio recordings.
Below is a comparison table for the above 10 voice recording apps for iPhone.
| NO. | Voice Recorder | User Rating | Supported OS | Price | Best For |
|---|---|---|---|---|---|
| 1 | Voice Memos | Not available | iOS 12.0 or later | Free | Recording memos |
| 2 | AudioShare | 4.7 | iOS 10.0 or later | $2.99 | Music industry professionals |
| 3 | AVR | 4.6 | iOS 9.0 or later | Free, but offers in-app purchases | Music industry professionals |
| 4 | Voice Recorder and Audio Editor | 4.7 | iOS 9.0 or later | Free, but offers in-app purchases | Students |
| 5 | Voice Record Pro | 4.7 | iOS 10.3 or later | Free, but offers in-app purchases | Journalists |
| 6 | HT Professional Recorder | 4.7 | iOS 9.0 or later | $9.99 | Students and professionals |
| 7 | Voice Recorder – Audio Record | 4.6 | iOS 9.0 or later | $3.99 | Students and Businessmen |
| 8 | MultiTrack DAW | 4.5 | iOS 9.0 or later | $9.99 offers in-app purchases | Music industry professionals |
| 9 | Recorder Plus: Voice Recorder | 4.4 | iOS 9.0 or later | Free, but offers in-app purchases | Recording notes |
| 10 | Otter Voice Meeting Notes | 4.8 | iOS 10.0 | Free, but offers in-app purchases | Students, Journalists, Businessmen |
If you want to record voiceover and add it to a video , you may need a video editing software like Wondershare Filmora video editor .
Benjamin Arango
Benjamin Arango is a writer and a lover of all things video.
Follow @Benjamin Arango
Crafting a Commanding Presence in Audio Media with Filmora’s Filters
You have watched trailers for movies, TV shows, and YouTube videos throughout the year. Your ears have heard radio advertisements and podcasts. It has dawned on you that deep voices sound much better than shallow voices. However, how to make your voice deeper?
Nature would list voice deepening at the top of her list of requests if she had one. People who use their voices as a source of income, voice actors, and even the everyday person think about reducing the pitch of the sound they make.
Speaking with a deeper voice can help you sound more authoritative or become a better speaker. We have conducted extensive research on this topic, and controlling your breathing is one way to make your voice deeper, but it requires a lot of practice. Likewise, you can project your voice and try various techniques to use when you speak deeply, such as swallowing before you start to speak.
If you want to learn how you can make your voice deeper, then you just landed on the right page. In this article, we will suggest to you some natural tips to make your voice deeper, but it is a very time-consuming process because it needs a lot of practice. There is another method to make your voice sound deeper if you are recording it for videos or any other purpose. There are many software and apps available in the market today that can help you alter your voice and make it sound deeper. This article will show you how you can make your voice deeper using Filmora X.
So, Let’s start our article with a basic question.
Can You Make Your Voice Deeper?
Yes, It is possible to make your voice deeper.
It is possible to train your voice for a deep, more attractive sound even though you cannot lower it. According to numerous sources online, you can achieve a lower voice pitch by doing specific exercises. However, experts and physicians have not tested these deep voice exercises, which can lead to long-term harm to your throat.
The best way is to use software like Filmora X because all you need to do is record your voice and leave the rest to the software. Using Filmora X, you can easily edit your voice and adjust the pitch to make it sound deeper.

How To Make Your Voice Deeper Naturally?
1. Listen to Yourself
First of all, you have to think about what you have to work with. Record yourself talking with the app on your phone that records audio. If you do not listen carefully to your voice, you will not know what needs to be fixed.
Take a moment to listen to your voice. Because you’re now hearing your voice from an external perspective, it might sound completely different from how you thought it would. You can’t always avoid mistakes, but you can learn from them.
Take note of how you sound and accept that this is exactly how you sound. During this exercise, listen carefully as words come out of your mouth, study your pitch, and record your voice so you can review the recording later after you’ve completed your exercise.
2. Relax Your Muscles
As a consequence of stress, bad posture, and injuries, our muscles are drowning in tension. Our entire lives involve the use of our bodies, which directly affects our muscles and adds a great deal of tension. There are four key areas of our body. If you want to make your voice deeper, then you have to release tension from these four key areas. They include the tongue, jaw, throat, and neck. All these organs play a key role in controlling your voice. So, if you are able to relieve stress from these organs and you are able to relax them, then you can easily make your voice deeper with a little practice.
3. Use Your Diaphram
If you’re wondering how to make your voice deeper, you shouldn’t use your chest for breathing when we have a whole respiratory system to control. As a rule of thumb, the deeper your voice sounds, the deeper the air you inhale goes. You can direct the air to go just where you want it by adjusting the diaphragm.
As you breathe in, bring your nose to your mouth and push your chest backward while taking deep breaths from your nose. When you exhale, tell yourself your full name as you do so. When you speak, you may feel a vibration. It is now easier for you to produce a deeper voice effect since you have learned how to use your diaphragm.
In the world of professional singing, diaphragmatic breathing is one of the most popular techniques. With it, they can control their voice and position it precisely when they want, to produce deep, low-pitched cries (or even high-pitched cries). When you first start, you won’t be able to do it naturally, but you’ll be able to do it subconsciously with practice.
4. Practice Your Chest Voice
The magic happens in your chest voice. You can make it sound stronger, deeper, and less nasal with a little control. These exercises will focus on deepening your voice since you’re looking for ways to make your voice deeper.
Engage your throat first and then speak normally. You will sound lighter and less confident if you usually speak through your nose, which is not good for a deep voice.
Make a hissing sound while exhaling a deep diaphragmatic breath. Having your voice-controlled right within your lungs will allow you to open up your chest. It would help if you started talking now. You will feel your voice flowing up and out of your mouth via your breath. This is the voice of your chest.
5. Hum Like You Mean It
Humming warms up your voice, making it easier to control. In addition, it unleashes feelings of relaxation throughout your entire body, so your muscles can be relaxed. With Hum, you’ll be able to lower your voice pitch, talk deeper, and even make your voice sound deeper in a video. Hold your breath with a deep humming for as long as possible. During this process, your vocal cords will be stretched, and stretched vocal cords always give a voice a deeper tone.
As you breathe in again, point your chin downwards toward your chest. Put your chin up and start humming. Speak now. You will feel intense and deep in your voice.
These are some of the natural ways to make your voice deeper. But the thing is, all of them need a lot of practice, and according to experts, one can also damage his vocal cords when practicing all these techniques. But as we told you earlier, there is an easier way of making your voice deeper which is discussed below.
How To Make Your Voice Deeper With Filmora?
You can use Filmora to make your voice sound deeper in your already recorded videos. You don’t need to do intense exercises to sound deeper. Just record your video in your natural voice and follow the steps given below to edit your voice and make it deeper.
Step1: First of all, make sure that the latest version of Wondershare Filmora video editor is installed on your computer. If it isn’t already installed, then you can download it below or go to the official website.
For Win 7 or later (64-bit)
For macOS 10.12 or later
Step2: Now, Run the Program and import your video to Filmora by clicking on the file, then import, and then click on import media files.

Step3: Now drag the video and drop it into the timeline.

Step4: Now, right-click on the track in the timeline and click on “Adjust Audio” from the menu.

Step 5: Now, you need to adjust the pitch at this step. Try to lower the pitch by a point or two, and you play the video. You will notice a considerable change in your voice. You will feel that your voice has become much deeper than the original one.

Step 6: Reduce the pitch point by point by point and observe that at which point do you have the desired depth in your voice.
Step7: Once you are satisfied with the results, all you need to do is click on the “OK” button to save the settings and then export your video to your system.
These are some simple steps to make your voice deeper in Filmora easily. It only takes a few seconds if you do the things right.
Conclusion
So, in this article, we discussed some of the natural ways to make your voice deeper, and then we discussed how you can make your voice deeper with Filmora. If you compare both methods, then in our opinion, using FIlmora is the best choice here. Using natural methods requires you to do a lot of practice, and still, there is a possibility that you won’t be able to get the desired results. But, in Filmora, all you need to do is adjust the pitch of your voice, and you are good to go. Here you also have an option to make your voice deeper as much as you.
You might be interested in: Top Siri Voice Generator for Windows .
Versatile Video Editor - Wondershare Filmora
An easy yet powerful editor
Numerous effects to choose from
Detailed tutorials provided by the official channel
For macOS 10.12 or later
Step2: Now, Run the Program and import your video to Filmora by clicking on the file, then import, and then click on import media files.
Step3: Now drag the video and drop it into the timeline.
Step4: Now, right-click on the track in the timeline and click on “Adjust Audio” from the menu.
Step 5: Now, you need to adjust the pitch at this step. Try to lower the pitch by a point or two, and you play the video. You will notice a considerable change in your voice. You will feel that your voice has become much deeper than the original one.
Step 6: Reduce the pitch point by point by point and observe that at which point do you have the desired depth in your voice.
Step7: Once you are satisfied with the results, all you need to do is click on the “OK” button to save the settings and then export your video to your system.
These are some simple steps to make your voice deeper in Filmora easily. It only takes a few seconds if you do the things right.
Conclusion
So, in this article, we discussed some of the natural ways to make your voice deeper, and then we discussed how you can make your voice deeper with Filmora. If you compare both methods, then in our opinion, using FIlmora is the best choice here. Using natural methods requires you to do a lot of practice, and still, there is a possibility that you won’t be able to get the desired results. But, in Filmora, all you need to do is adjust the pitch of your voice, and you are good to go. Here you also have an option to make your voice deeper as much as you.
You might be interested in: Top Siri Voice Generator for Windows .
Versatile Video Editor - Wondershare Filmora
An easy yet powerful editor
Numerous effects to choose from
Detailed tutorials provided by the official channel
Perfecting Soft Audio Edges: A Guide to Smooth Transitioning in iMovie
How to Fade Music and Audio in iMovie on Mac?

Shanoon Cox
Mar 27, 2024• Proven solutions
Fade-in and fade-out effects can help you smooth the video, music, and audio transitions, thus you can make a better movie. When editing videos in iMovie, people may have many video clips and transitions connected to the clips. The fade in and fade out effect seems more important than ever. This tutorial will show you how to fade music and audio in iMovie.
- Part 1: How to Fade Music and Audio in iMovie on Mac
- Part 2: An Easier Way to Fade Audio and Music on Mac
Apart from fading in/fading out the audio, we also want to introduce the video fade-in and fade-out effects, which will help your video to get more attention. Watch the tutorial below to get detailed information about how to fade in/fade out your videos easily.
Related : How to Fade-in and Fade-out Video Clips
After adding the fade-in and fade-out effects to your video, let’s check how to fade your music and audio in iMovie first, and then we will show you how to fade in/fade out your music and audio file in an easier way.
You may also like:
- iMovie for Windows: 10 Best iMovie Alternatives for You
- How to Add Audio to Your Videos
- How to Add Video Effects in iMovie
Part 1: How to Fade Music and Audio in iMovie on Mac
There are two ways available to fade music and audio with iMovie. One is using the fade handles, and the other is using the audio inspector. Before using iMovie audio fade-out effects, please import your video and audio files to iMovie and start a new project.
Method 1: Use Fade Handles to Add Fade in/Fade out Effect in iMovie
Firstly, let’s take a look at the video below to check how to fade audio in/out the audio in iMovie with fade handles.
Step 1. Enable Audio Waveform
When the project opens, check “Show Waveforms” at the bottom of the Project window.

Note: The Blue waveforms indicate the sound recorded within your video clips. Green and purple waveforms indicate sounds and music you’ve added to your project.
Step 2. Move Pointer to Apply Fade Effects
Move the pointer over a waveform, and drag the small gray fade handle at the left of the clip to adjust the fade audio in effect. Then drag the small fade handle at the right of the clip to adjust the fade-out effect.

Step 3. Playback to Check
Move the playhead to the beginning part of the clips with fade effects to check the fade-in and fade-out effects. If everything works OK, uncheck “Show Waveforms” to hide the waveforms.

Related: How to Remove Background Noise from Video
Method 2: Use the Audio Inspector to Apply Fade in/Fade Out Effect in iMovie
To fade audios in and out in iMovie with the audio inspector, you can follow these steps:
Step 1. Open Your iMovie Project and Select a Clip
Double-click the video clip, choose “Clip Adjustments” to open the Inspector, and then click the “Audio” tab.

If there are two audio tracks, and you want to set the fade in and fade out in iMovie for the background music, you can double-click the background music clip to open the audio inspector. This inspector is a little different. If you don’t know how to add background music to iMovie, you can refer to this post: add background music in iMovie .
Step 2. Set the Fade In and Fade Out Effect
In the window, you can manually set the fade-in and fade-out length by dragging the slider bar to the right or left.
If you do not choose “Manual”, that means you’d like iMovie to automatically set it for you. Usually, when you drag video clips to the Project, iMovie will set the fade-in and fade-out effect randomly by increasing the audio volume at the beginning of the clip and decrease the volume at the end of the clip.
If you manually adjust the effect, you can have a better effect.
Step 3. Save the Audio Fade In and Out Effect

After the settings, you can preview the effect in the viewing window to make sure all goes well, and you are much satisfied. Then click “Done” to save the audio fade-in and fade-out effects in iMovie.
Now, that’s done! I hope the above information does help you to set the fade effects to smooth your video and audio transitions.
Related: How to Get More iMovie Themes
Part 2: An Easier Way to Fade Audio and Music on Mac
Let watch the video below to check how to apply fade-in and fade-out effects in an easier way with Wondershare Filmora for Mac. And download it now to try it by yourself.
Download Mac Version ](https://tools.techidaily.com/wondershare/filmora/download/ )
If you want to quickly apply fade-in or fade-out effects, iMovie’s alternative for Mac - Wondershare Filmora can help you. It enables you to easily edit videos. After you’ve made your creation, it also allows you to directly upload the complete video file to YouTube and Vimeo for sharing. Check out the quick guide below to see how to add audio fade effects in Filmora.
Step 1. Import Your Video
Import the video clip you want to add audio in and out effect. To do this, click “File” > “Import Media” to import your local file to the user’s album. Or you can drag and drop these target files from the computer to this app’s album.
Step 2. Add the Audio Fade In/Out Effect to Your Video
Place the video onto the timeline. Double-click on it and then choose “Audio”. In the tab, you can drag the slider bar to the right or left to manually set the fade in and fade out the length.

Step 3. Save Your Video
Click the “Export” button to select one of the export methods. You can choose your desired format or mobile devices, burn it to DVD and upload it to YouTube and Vimeo.

That’s all about how to fade music and audio with iMovie and its alternative. If you want to learn more about how to edit video clips with Filmora, you can visit its YouTube channel to get more detailed information. Feel free to leave comments below if you need further assistance.
Shanoon Cox
Shanoon Cox is a writer and a lover of all things video.
Follow @Shanoon Cox
Shanoon Cox
Mar 27, 2024• Proven solutions
Fade-in and fade-out effects can help you smooth the video, music, and audio transitions, thus you can make a better movie. When editing videos in iMovie, people may have many video clips and transitions connected to the clips. The fade in and fade out effect seems more important than ever. This tutorial will show you how to fade music and audio in iMovie.
- Part 1: How to Fade Music and Audio in iMovie on Mac
- Part 2: An Easier Way to Fade Audio and Music on Mac
Apart from fading in/fading out the audio, we also want to introduce the video fade-in and fade-out effects, which will help your video to get more attention. Watch the tutorial below to get detailed information about how to fade in/fade out your videos easily.
Related : How to Fade-in and Fade-out Video Clips
After adding the fade-in and fade-out effects to your video, let’s check how to fade your music and audio in iMovie first, and then we will show you how to fade in/fade out your music and audio file in an easier way.
You may also like:
- iMovie for Windows: 10 Best iMovie Alternatives for You
- How to Add Audio to Your Videos
- How to Add Video Effects in iMovie
Part 1: How to Fade Music and Audio in iMovie on Mac
There are two ways available to fade music and audio with iMovie. One is using the fade handles, and the other is using the audio inspector. Before using iMovie audio fade-out effects, please import your video and audio files to iMovie and start a new project.
Method 1: Use Fade Handles to Add Fade in/Fade out Effect in iMovie
Firstly, let’s take a look at the video below to check how to fade audio in/out the audio in iMovie with fade handles.
Step 1. Enable Audio Waveform
When the project opens, check “Show Waveforms” at the bottom of the Project window.
Note: The Blue waveforms indicate the sound recorded within your video clips. Green and purple waveforms indicate sounds and music you’ve added to your project.
Step 2. Move Pointer to Apply Fade Effects
Move the pointer over a waveform, and drag the small gray fade handle at the left of the clip to adjust the fade audio in effect. Then drag the small fade handle at the right of the clip to adjust the fade-out effect.
Step 3. Playback to Check
Move the playhead to the beginning part of the clips with fade effects to check the fade-in and fade-out effects. If everything works OK, uncheck “Show Waveforms” to hide the waveforms.
Related: How to Remove Background Noise from Video
Method 2: Use the Audio Inspector to Apply Fade in/Fade Out Effect in iMovie
To fade audios in and out in iMovie with the audio inspector, you can follow these steps:
Step 1. Open Your iMovie Project and Select a Clip
Double-click the video clip, choose “Clip Adjustments” to open the Inspector, and then click the “Audio” tab.
If there are two audio tracks, and you want to set the fade in and fade out in iMovie for the background music, you can double-click the background music clip to open the audio inspector. This inspector is a little different. If you don’t know how to add background music to iMovie, you can refer to this post: add background music in iMovie .
Step 2. Set the Fade In and Fade Out Effect
In the window, you can manually set the fade-in and fade-out length by dragging the slider bar to the right or left.
If you do not choose “Manual”, that means you’d like iMovie to automatically set it for you. Usually, when you drag video clips to the Project, iMovie will set the fade-in and fade-out effect randomly by increasing the audio volume at the beginning of the clip and decrease the volume at the end of the clip.
If you manually adjust the effect, you can have a better effect.
Step 3. Save the Audio Fade In and Out Effect
After the settings, you can preview the effect in the viewing window to make sure all goes well, and you are much satisfied. Then click “Done” to save the audio fade-in and fade-out effects in iMovie.
Now, that’s done! I hope the above information does help you to set the fade effects to smooth your video and audio transitions.
Related: How to Get More iMovie Themes
Part 2: An Easier Way to Fade Audio and Music on Mac
Let watch the video below to check how to apply fade-in and fade-out effects in an easier way with Wondershare Filmora for Mac. And download it now to try it by yourself.
Download Mac Version ](https://tools.techidaily.com/wondershare/filmora/download/ )
If you want to quickly apply fade-in or fade-out effects, iMovie’s alternative for Mac - Wondershare Filmora can help you. It enables you to easily edit videos. After you’ve made your creation, it also allows you to directly upload the complete video file to YouTube and Vimeo for sharing. Check out the quick guide below to see how to add audio fade effects in Filmora.
Step 1. Import Your Video
Import the video clip you want to add audio in and out effect. To do this, click “File” > “Import Media” to import your local file to the user’s album. Or you can drag and drop these target files from the computer to this app’s album.
Step 2. Add the Audio Fade In/Out Effect to Your Video
Place the video onto the timeline. Double-click on it and then choose “Audio”. In the tab, you can drag the slider bar to the right or left to manually set the fade in and fade out the length.
Step 3. Save Your Video
Click the “Export” button to select one of the export methods. You can choose your desired format or mobile devices, burn it to DVD and upload it to YouTube and Vimeo.
That’s all about how to fade music and audio with iMovie and its alternative. If you want to learn more about how to edit video clips with Filmora, you can visit its YouTube channel to get more detailed information. Feel free to leave comments below if you need further assistance.
Shanoon Cox
Shanoon Cox is a writer and a lover of all things video.
Follow @Shanoon Cox
Also read:
- Updated 2024 Approved Unveiling the Secrets to Successful Sound Recording in GarageBand
- In 2024, Starting Your Sound Journey Right 2023S Top 6 Affordable DAW Tools for Beginners
- Updated Ultimate List of Powerful Gender-Swapping Apps Elevating Masculine Voices to Femininity for 2024
- Updated 2024 Approved Reviews, Features and Tutorial of Lexis Audio Editor
- New In 2024, Final Cut Pro Guide Integrating Waveform Graphics and Animated Sounds for Enhanced Editing
- Updated Music Meets Motion Advanced Techniques for Beats Alignment in Final Cut Pro X
- In 2024, Ultimate List of Websites Offering Authentic Nature Sound Archives
- Updated 2024 Approved Speech-to-Text Software Showdown Discover the Top 8 Options for PCs, Macs and Online Accessibility
- In 2024, Strategies for Creating Fluid Movement Between Video Segments
- 2024 Approved Audio Purity Unleashed Advanced Noise Reduction Techniques Using Wondershare Filmora
- Updated Ultimate Audio Enhancer Top Apps for Clearer Sound Quality
- New In 2024, 6 Top Chrome Audio Recorder
- Updated In 2024, How to Isolate and Extract Audio From MP4 Media
- Updated Auditory Balance Expert Tips on Achieving Even Audio Volume in Video Formats
- New Mastering Audio Conversion with Audacity and Lame Codec
- New In 2024, SkypEssay Revolutionize Communication by Altering Your Voice on Video Calls
- New Essential Free Tools for Every Freelancers Audio Editing Needs on Windows/Mac Platforms
- New Cutting-Edge Audio Tricks for a Polished iMovie Experience
- 2024 Approved Exploring the Capabilities of AVS Audio Software – A Deep Dive Into Features, Ratings, and Options
- In 2024, Top 6 Multichannel Sound Integration Tools for Professional Broadcasts
- New Song Selection Guide Copyright-Free Melodies for Montages
- 2024 Approved Exploring the Top Audio Distortion Software of Today
- Updated In 2024, Harmony Helpers The Premier Sync Edit Software for Video Rhythms, 2023 Release
- Updated In 2024, Seamless Song Editing on Mac Unveiling the Most Acclaimed MP3 Cutter Applications
- In 2024, Sonic Elevation in Podcasting Unveiling 11 Premier Locations to Acquire Soundscapes
- Updated Navigating the Best Online Platforms for Acquiring and Sharing BGM
- New Mastering Live Sound Techniques for Capturing Real-Time Audio Broadcasts for 2024
- Updated Best Free Ways to Remove Static Noise From Audio in Seconds
- Updated 2024 Approved Innovative Sound Editing - Top 4 Applications Redefining Music Production on Mac
- Updated The Pathway to Pristine Soundscapes Techniques for Eradicating Background Distractions Via Internet Services
- New In 2024, The Ultimate Tutorial Computer Sound Recordings with Audacity
- Expertly Curated List of Premier Audio Trimming Software Websites for 2024
- Updated 2024 Approved Exploring Audio Representation Displaying Sound Waves & Adding Animated Elements to Your Projects in Final Cut Pro
- Updated 2024 Approved Evolve Your Tone on the Fly Examining the Most Prominent Real-Time Voice Altering Apps & Programs
- Chill-Out Playlists for Non-Profit Video Arrangements
- New Podcast to Text Discovering the Top 10 Free & Paid Conversion Tools for 2024
- Updated 2024 Approved From Silence to Symphony A Practical Approach to Changing Video Audio (Part 1)
- New Demystifying the Functionality of Googles Audio Streaming Feature Podcast Edition for 2024
- New 2024 Approved 3 Ways to Get Rid of Echo in Your Audio Recordings
- In 2024, From Beginner to Pro The Ultimate Selection of 8 High-Performing DAW Platforms for Recording, Mixing, and Mastering Success
- New Innovative Practices for Distinguished Music Video Production
- New 2024 Approved Webinar Series The Complete Guide Unpacked
- New Audacity Mastery Enhancing Your Podcast Sound and Delivery for 2024
- Incorporating Audio Into New and Enhanced MKV Files
- Navigating the Art of Copying Music From Spotify Tips & Tricks
- In 2024, Budget-Friendly Audio File Modifier for Mac Users
- 2024 Approved Unleash Creative Freedom Best Public Domain Video Resources
- How to Transfer Videos from Samsung Galaxy A14 5G to iPad | Dr.fone
- How to Upgrade Apple iPhone SE (2022) without Data Loss? | Dr.fone
- Updated 2024 Approved Elevate Your Designs with Feather Shapes in After Effects
- In 2024, How to use Pokemon Go Joystick on Apple iPhone 6 Plus? | Dr.fone
- Make Super Easy Coin Magic With Filmora for 2024
- In 2024, Change Location on Yik Yak For your Lava Yuva 3 Pro to Enjoy More Fun | Dr.fone
- 6 Methods to Protect Yourself from Location Tracking on Apple iPhone 13 Pro Max | Dr.fone
- How to Update iPhone 14 Plus without Losing Any Data? | Dr.fone
- New 2024 Approved Resize Your Images Online Quick and Simple Ratio Changers
- The Quickest Way to Cut Videos on Mac Top Methods for 2024
- In 2024, Top 15 Augmented Reality Games Like Pokémon GO To Play On OnePlus Nord CE 3 5G | Dr.fone
- Title: Updated In 2024, Mastering Mobile Audio Recordings The 10 Leading iPhone Apps
- Author: Ella
- Created at : 2024-06-23 23:11:13
- Updated at : 2024-06-24 23:11:13
- Link: https://sound-optimizing.techidaily.com/updated-in-2024-mastering-mobile-audio-recordings-the-10-leading-iphone-apps/
- License: This work is licensed under CC BY-NC-SA 4.0.
