
:max_bytes(150000):strip_icc():format(webp)/young-muslim-woman-using-phone-1137305438-75947aa7fb484506bf9da8c38fc68a03.jpg)
Updated In 2024, Perfecting the Sound The Process of Equalizing Audio in DaVinci Resolve
Perfecting the Sound: The Process of Equalizing Audio in DaVinci Resolve
How To Normalize Audio In DaVinci Resolve
It happens a lot of times that we are not satisfied with several details our videos and audios contain, and we need to edit them. One of the most common problems we face is that our volumes are not normalized, and we need to take some extra time in order to achieve the best result for our audiences. Even with little or no knowledge about this very specific topic, we need to inform ourselves and find the solutions, make our videos more watch-able and our audios more listen-able, so to say.
There are several ways the audio normalization is achieved. One type is called peak normalization, helping adjust the recording based on the highest signal level present in the recording; the second is loudness normalization, adjusting the recording based on perceived loudness. RMS (Root-Mean-Square) changes the value of all the samples, where their average electrical volume overall is a specified level.
Mostly, there are two reasons why we should give audio normalization a try. You need to decide yourself, what is your reason and expected outcome when you use audio normalization. First is when your aim is to get the maximum volume, but the second boils down to matching different volumes with each other.
When it comes to normalizing audio, there are two reasons we refer to this tool. First is when we feel we need to get the maximum volume, and the second is when we need to match different volumes.
More concretely, in general, audio normalization is when a constant amount of gain is applied to the audio recording, bringing the amplitude to a desirable level, “the norm” for the project. It means that when this tool is applied to our volume, the whole recording has the same amount of gain across it, every piece affected the same way. Accordingly, when we normalize volume, the relative dynamics are not changed.
You can have the desired result using different kinds of software. Nowadays, a lot of programs offer you the tool which facilitates this process. So, one of them would be DaVinci Resolve, which we are going to discuss in this article.
What is DaVinci Resolve? The description goes: “DaVinci Resolve is the world’s only solution that combines editing, color correction, visual effects, motion graphics and audio post production all in one software tool!” so, let’s discover what this software can do to help us balance the audio!
So, how to balance your audio in DaVinci Resolve? We are going to discuss everything step by step – how to set your target loudness level, how to monitor the loudness, and how you can use the automation feature.
Well, of course, have the program installed and opened. Then, add your video with the audio you want to edit or the audio separately, if that’s what you are aiming to do.
The first step you need to make is to set your target loudness level – for this, find the little settings button on the right bottom of the program and click on it. Now, go down to the Fairlight menu and change the Target Loudness Level. If you are doing the audio normalization for the Youtube content, then it is recommended to set it to -14 LUFS.

Next, you are going to head to the Fairlight page and make sure that your meters are open. the loudness meter is on the right top of the layout of the program, and it goes from +9 to -15 LUFS.

Here, zero represents exactly what our target loudness level is, in this case, as you remember, we set it to -14 LUFS. So, ensure that our loudness is as close as zero as possible on the meter, but you can also make it lower, such as -3. Whenever you play, you will be able to see that there are some numbers popping up to the right of the meter.

The first one, you’ll find, is Short – constantly changing, indicating how far above or below the target loudness level you are at a given time. Short Max tells you how far above or below your target loudness level the loudest point of your video is. Range is a measure of your quietest pick to your loudest peak, and the last one is Integrated – it gives you the overall loudness of your video in relation to your target loudness level. Integrated is the number we aim to keep around -3 or 0.
We can use our main slider (next to the sequence on the right) to make our video louder or quieter until we hit that target loudness level.

Also, there is an automation tool that can help you dial in your loudness. In order to access this feature, find a red icon, looking like a wave with kind of a key frames.

Next, open up your Index (on the far top panel, a little bit from the left), and make sure you are in the tracks menu in your editing index.

What you want to do is to make your main track visible on the timeline, so hit on the eyeball next to your main and go to your timeline, where you will expand your main track until you see your Loudness History options.

Here, you will need to check in the box next to Integrated and turn on the Loudness History. This will show the integrated loudness level, adjust your main track’s volume accordingly, so you are below the zero line. And, that’s actually it!
How to normalize audio in Wondershare Filmora X?
Even though doing this with the help of DaVinci Resolve is really helpful, and, let’s say, sophisticated, you might find it a little complicated, in case you were not so familiar with video/audio editing. So, we would like you to have some information about what alternative you can turn to, and in this case, it’s worth bringing up a software - Wondershare Filmora X . With it, you will find that the same task can be carried out wonderfully. It is also a video editor, but it is one of the easiest to use in the word, supported by Mac and Windows. Filmora offers a great, neat, user-friendly interface, and helps you understand the very basics of editing. Actually, it has not been long since Wondershare Filmora X introduced the feature to normalize the audio. So, you might want download the latest version of Filmora X and start following along the steps we are going to provide for you to understand how audio normalization works on Filmora X .
Free Download For Win 7 or later(64-bit)
Free Download For macOS 10.14 or later
After having installed and opened a software, click and drag the video of which the audio you want to normalize. Now you can select the clip you have chosen – if there are multiple, select all of them, then right-click and choose Detach Audio.

Now, you can see on the graphic that the noises are of different levels from each other. This makes us understand why we need to balance our audio files whenever we are aiming for a good listening experience for our audiences.

Select these files, right-click and choose Adjust Audio. New panel will be opened on left top and there, you will see Audio Normalization – check the box there.


Now, after clicking on it, you can just wait and the normalization will be completed soon.

When it happens, you will be able to see on the graphics that the volumes are almost on the same level, moreover, listening to it, your ears will “understand” that there is no longer apparent difference between how they sound. So, let’s hope you are happy with the result – in this case, you can save the file you just normalized!
So, in this article, we learned one or two things about normalizing volumes and its types, why and how it is done, and how do it in DaVinci Resolve as well as in Wondershare Filmora X. we hope the guidelines will serve you in the best way and from now on, you will be able to create great sounds!
Free Download For macOS 10.14 or later
After having installed and opened a software, click and drag the video of which the audio you want to normalize. Now you can select the clip you have chosen – if there are multiple, select all of them, then right-click and choose Detach Audio.
Now, you can see on the graphic that the noises are of different levels from each other. This makes us understand why we need to balance our audio files whenever we are aiming for a good listening experience for our audiences.
Select these files, right-click and choose Adjust Audio. New panel will be opened on left top and there, you will see Audio Normalization – check the box there.
Now, after clicking on it, you can just wait and the normalization will be completed soon.
When it happens, you will be able to see on the graphics that the volumes are almost on the same level, moreover, listening to it, your ears will “understand” that there is no longer apparent difference between how they sound. So, let’s hope you are happy with the result – in this case, you can save the file you just normalized!
So, in this article, we learned one or two things about normalizing volumes and its types, why and how it is done, and how do it in DaVinci Resolve as well as in Wondershare Filmora X. we hope the guidelines will serve you in the best way and from now on, you will be able to create great sounds!
Auditory Precision in Filmmaking: Employing Audio Ducking Strategies
What is Audio Ducking and How to Use it in Filmora: A Beginner-friendly Guide

Benjamin Arango
Mar 27, 2024• Proven solutions
If you are a content creator, you might already know the importance of having the right audio component in a video. For attaining a perfect balance between voiceovers and the background audio, the concept of “ducking” is implemented. I have come up with this post to help you know more about audio ducking and its importance. I will also include a detailed guide for implementing audio ducking on a video in a stepwise manner. Let’s begin!

- Part 1: What Is Audio Ducking?
- Part 2: When to Use Audio Ducking?
- Part 3: How to Use the Audio Ducking Feature in Filmora?
Audio Ducking: What Is It All About?
In nutshell, it is a process that “ducks” or lowers the background volume when a voiceover appears. For instance, let’s consider that we already have a background score in our video playing. When we would add a narrator’s voice or apply a voiceover, it would create a lot of confusion. Therefore, we implement the audio ducking process to lower the background audio and amplify the voiceover instead.
In most cases, it is achieved through a side-chain compression technique. A control channel is set up that enables the compression of one sound (the background) while amplifying another (the voiceover).


When Do You Need to Implement Audio Ducking?
Since the concept of audio ducking is pretty useful, it can be implemented in different ways during the video editing process. While you can apply the process to any video, here are some of the major instances where it is used.
Travel Vlogs
If you are a travel vlogger, you might already know how tough it can be to make yourself heard in a video. When there are too many background noises, your voice can be diminished. This is exactly where you can apply audio ducking to decrease the background noise and focus on your voice.
Make-up Tutorials
While creating make-up video tutorials, most of us use a background track to keep our viewers engaged. At the same time, you need to let them know about the process by speaking clearly. If you use audio ducking, then you can easily attain a perfect balance between both sounds.
Other Instances
Ideally, if you are creating any other tutorial video for your audience, then audio ducking can be useful. From making video game tutorials to coming up with video lectures on a crucial topic, the concept would come in handy time and time again.
How to Use the Audio Ducking Feature in Filmora?
To implement audio ducking in your videos, you can use a reliable editing tool like Wondershare Filmora . It is a user-friendly and powerful video editing application that lets you “duck” the background sound and easily amplify voiceovers.
- Without undergoing any complicated process, you can implement audio ducking and even scale it (from 1 to 100) to attain the right balance in your videos.
- Filmora also offers tons of powerful audio features for video editing. It has a dedicated audio mixer that would let you split, detach, split, or mute the audio.
- The application can also be used to add voiceovers to your video on its native interface. You can also use its inbuilt operations like noise remover, fade in/fade out, equalizer, etc. to make the needed changes.
- Besides audio ducking, you can also access tons of advanced editing features in Filmora like motion tracking, color grading, keyframing, and so much more.
- The application also offers a wide range of filters, presets, effects, stickers, and royalty-free music that you can easily use in your videos.
To learn how to implement audio ducking in your videos using Filmora, you can go through these basic steps:
Step 1. Import Your Videos on Filmora
To begin with, you have to install Wondershare Filmora on your computer and launch it. Now, go to the “Import” feature from the top, choose to add files, and browse and load your videos. After adding the video, you can drag it to the timeline below to start editing.

Step 2. Import An Audio or Record Voiceovers
Let’s suppose that your video already has an audio track in the background, and now you wish to add another audio component. Most of the people would like to record their voices in the video. For this, you can click on the voiceover (mic) icon at the bottom of the preview panel. This will open a dedicated window so that you can start recording your voice for the video.

Apart from that, you can also go to the “Import” feature to add any other audio component to the project. Besides that, Wondershare Filmora also has a wide range of royalty-free audio files that you can easily add to your projects.

Step 3. Apply Audio Ducking to Your Video
After adding the second audio component, you can view it under the video timeline on Filmora. Now, you need to select the audio track you wish to amplify (like your voiceover) and not the track that already has a prominent volume.

Once you have selected the audio you wish to amplify, right-click to get its context menu. Just select the “Adjust Audio” feature from all the available options.

This will launch a dedicated window on the screen with various audio options to apply. Go to the “Ducking” option here and enable the “Lower the volume of other clips” feature. You can also use a slider here to adjust how much you wish to lower the volume of other clips in the project.

That’s it! Once you have selected the value, click on the “OK” button. You can now preview the results on Filmora and check that the volume of other audio components has been ducked. You can later go to the “Export” option and save the project in the format of your choice.

After reading this post, I’m sure that you will know more about audio ducking and how we can implement it. Since many content creators encounter issues while working on their videos, audio ducking would certainly be a helpful feature. With an application like Wondershare Filmora, you can easily implement audio ducking on multiple files and further edit your videos like a pro!
Benjamin Arango
Benjamin Arango is a writer and a lover of all things video.
Follow @Benjamin Arango
Benjamin Arango
Mar 27, 2024• Proven solutions
If you are a content creator, you might already know the importance of having the right audio component in a video. For attaining a perfect balance between voiceovers and the background audio, the concept of “ducking” is implemented. I have come up with this post to help you know more about audio ducking and its importance. I will also include a detailed guide for implementing audio ducking on a video in a stepwise manner. Let’s begin!
- Part 1: What Is Audio Ducking?
- Part 2: When to Use Audio Ducking?
- Part 3: How to Use the Audio Ducking Feature in Filmora?
Audio Ducking: What Is It All About?
In nutshell, it is a process that “ducks” or lowers the background volume when a voiceover appears. For instance, let’s consider that we already have a background score in our video playing. When we would add a narrator’s voice or apply a voiceover, it would create a lot of confusion. Therefore, we implement the audio ducking process to lower the background audio and amplify the voiceover instead.
In most cases, it is achieved through a side-chain compression technique. A control channel is set up that enables the compression of one sound (the background) while amplifying another (the voiceover).
When Do You Need to Implement Audio Ducking?
Since the concept of audio ducking is pretty useful, it can be implemented in different ways during the video editing process. While you can apply the process to any video, here are some of the major instances where it is used.
Travel Vlogs
If you are a travel vlogger, you might already know how tough it can be to make yourself heard in a video. When there are too many background noises, your voice can be diminished. This is exactly where you can apply audio ducking to decrease the background noise and focus on your voice.
Make-up Tutorials
While creating make-up video tutorials, most of us use a background track to keep our viewers engaged. At the same time, you need to let them know about the process by speaking clearly. If you use audio ducking, then you can easily attain a perfect balance between both sounds.
Other Instances
Ideally, if you are creating any other tutorial video for your audience, then audio ducking can be useful. From making video game tutorials to coming up with video lectures on a crucial topic, the concept would come in handy time and time again.
How to Use the Audio Ducking Feature in Filmora?
To implement audio ducking in your videos, you can use a reliable editing tool like Wondershare Filmora . It is a user-friendly and powerful video editing application that lets you “duck” the background sound and easily amplify voiceovers.
- Without undergoing any complicated process, you can implement audio ducking and even scale it (from 1 to 100) to attain the right balance in your videos.
- Filmora also offers tons of powerful audio features for video editing. It has a dedicated audio mixer that would let you split, detach, split, or mute the audio.
- The application can also be used to add voiceovers to your video on its native interface. You can also use its inbuilt operations like noise remover, fade in/fade out, equalizer, etc. to make the needed changes.
- Besides audio ducking, you can also access tons of advanced editing features in Filmora like motion tracking, color grading, keyframing, and so much more.
- The application also offers a wide range of filters, presets, effects, stickers, and royalty-free music that you can easily use in your videos.
To learn how to implement audio ducking in your videos using Filmora, you can go through these basic steps:
Step 1. Import Your Videos on Filmora
To begin with, you have to install Wondershare Filmora on your computer and launch it. Now, go to the “Import” feature from the top, choose to add files, and browse and load your videos. After adding the video, you can drag it to the timeline below to start editing.
Step 2. Import An Audio or Record Voiceovers
Let’s suppose that your video already has an audio track in the background, and now you wish to add another audio component. Most of the people would like to record their voices in the video. For this, you can click on the voiceover (mic) icon at the bottom of the preview panel. This will open a dedicated window so that you can start recording your voice for the video.
Apart from that, you can also go to the “Import” feature to add any other audio component to the project. Besides that, Wondershare Filmora also has a wide range of royalty-free audio files that you can easily add to your projects.
Step 3. Apply Audio Ducking to Your Video
After adding the second audio component, you can view it under the video timeline on Filmora. Now, you need to select the audio track you wish to amplify (like your voiceover) and not the track that already has a prominent volume.
Once you have selected the audio you wish to amplify, right-click to get its context menu. Just select the “Adjust Audio” feature from all the available options.
This will launch a dedicated window on the screen with various audio options to apply. Go to the “Ducking” option here and enable the “Lower the volume of other clips” feature. You can also use a slider here to adjust how much you wish to lower the volume of other clips in the project.
That’s it! Once you have selected the value, click on the “OK” button. You can now preview the results on Filmora and check that the volume of other audio components has been ducked. You can later go to the “Export” option and save the project in the format of your choice.
After reading this post, I’m sure that you will know more about audio ducking and how we can implement it. Since many content creators encounter issues while working on their videos, audio ducking would certainly be a helpful feature. With an application like Wondershare Filmora, you can easily implement audio ducking on multiple files and further edit your videos like a pro!
Benjamin Arango
Benjamin Arango is a writer and a lover of all things video.
Follow @Benjamin Arango
Comprehensive List of Free Outro Music Archives (No Copyright) [2023 Edition]
10 Best Sources to Download Free Outro Music [No Copyright]

Liza Brown
Mar 27, 2024• Proven solutions
The more powerful the ending of a chapter or music is, the more long-lasting and powerful the impact it will leave behind in the heart and minds of the audience. Hence, one cannot deny the importance of strong outro music in the content to enhance the quality and value of it.
So here we are to guide you all about outro music and 10 best sources to download a perfect outro song.
10 Best Sources to Download Outro Music [No Copyright]
1. Filmora:
It is one of the freely available platforms that allows one to not only avail a diverse variety of features and customization options into your videos and creation but also facilitates one by being a highly compatible software that can be operated in Windows as well as Mac.
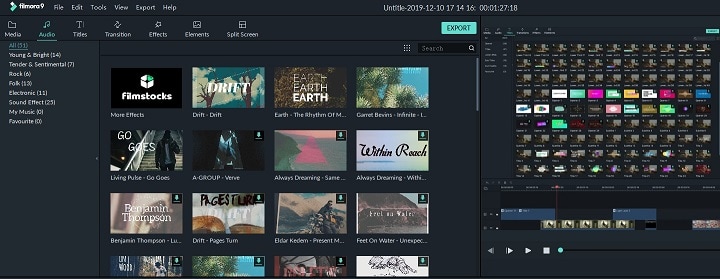
Hence this entails that Filmora is a complete package for quality and quality with your utmost desire while giving a high-end quality output with a vast personalized configuration option.
In any of your videos, Filmora offers you to drastically shift the level of your production by adding a mesmerizing outro music that well suits the content and level up the end result.
This not only offers you royalty free outro music from their own audio library but also supports importing any of your already download music files from your system and can perform multiple customization operations to enhance your video’s end result.
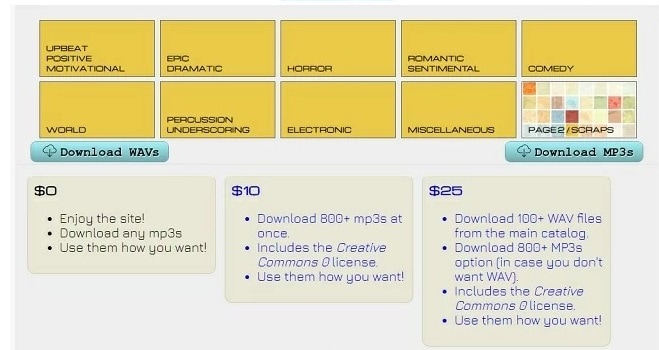
2. Audionautix:
If you are looking for outro music download MP3 music instantly then you have got to try Audionautix which is a website that entails one to avail as many music tracks as you want in be able to download it instantly. As soon as you deliver a link to any music, you are free to listen and download music from “music by audionatic.com”.
Without the hassle of registration or payment, you can select, search, listen and download a pool of good outro music.
3. FreePD:
This is free of cost and free from copyright hassle site where you are free to download any of the cool outro music you want. All you have to do is to download a music track and consolidate it with your composition giving you a sea of the genre of music you can choose from ranging from horror, romantic, suspense, sentimental and lot more.
Not only limited to their given library, you can download any music of your likeliness downloaded using this site on any of the social media platform.
4. Jamendo:

This domain is a connecting platform of music fonder and musicians worldwide. This aims to affiliate free music community, spreading the love with mesmerizing music and creating value surrounded by it.
The site is not only a free domain for music lovers but offers you a pool of music library that allows one to listen and download with merely a matter of a single click. With a registration process away, you can save on your systems and share free outro music on any social media platform.
5. SoundSnap:

The feature that makes this free online software outshine over the others is that it not only provides a wide variety of music but also offers a huge pallet of sound effects, distinct genre of sounds and audio clips and several samples to let you explore and play with experimenting music and enhance your creativity.
However, this requires you to make an account prior to downloading music tracks.
6. Musopen:

This website provides a free hand to record any music and download royalty free outro music. This website has recently released several Beethoven sonatas of piano, all on a public domain.
This gives you a free and publically available powerful domain to search and download any outro music no copyright.
7. Free Play Music:
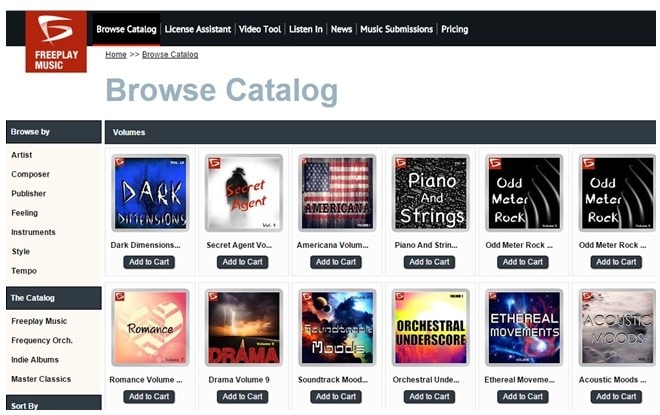
This is considered as one of the renowned small-scaled company of music-licensing. You can undoubtedly call this domain a music composer, bestowing you with the online library of tons of music belonging to several genres. Moreover, this contains zillions of musical and classical pieces of work which allows one to be used as per their likeliness.
Fortunately, there exists a list of playlist with royalty free outro music and the top-ranked music tracks, all accessible from this online website. It lets one first assure regarding your choice of music by first letting one listen to the selected music then lets you download as many music tracks as you want.
8. West One Music:

West one music is basically a British production of a music company globally that facilitates you with a pool of music and songs, including intro, outro and background music around the entire world.
This company was established in the year 2003 in Soho, London with having these groups contained eight distinct labels. Fired earth music, the scoring house, noise refinery, and west one music are some of the labels that exist.
Not only limited to these facilitations but this domain offers a vast variety and distinct genre of music sounds ranging from rock band to classical, western to brass, electronic to woodwind and so many to consider.
9. AudioBlocks:
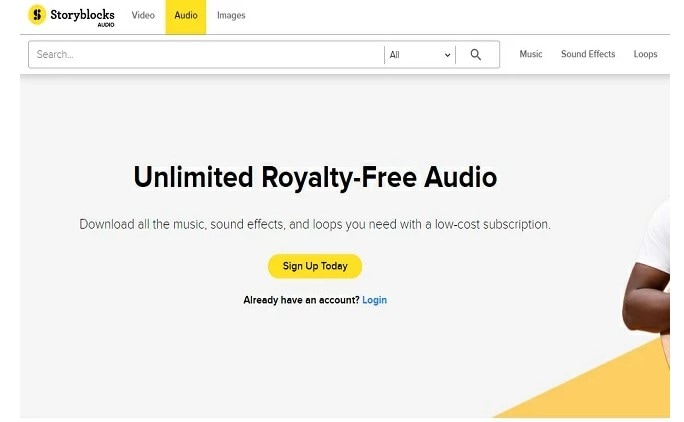
AudioBlocks is considered as one of the copyright-free websites that allows you to use any of their publically available playlist of distinct types of music that can be used as intro, outro or background depending upon the usability of the user while facilitating more than 100,000 music tracks, more than enough for one to choose the best one out of the available pool.
This website is free to use at any instant without bounding one with hidden terms and conditions and allowing them to download and utilize music from their song library at any time. One of the most highlighting features bestowed to the users by this website is that it facilitates one with royalty free outro music for the sake of commercials or any of your personal music-related projects.
Their perfectly maintained and updated listing of the songs allows one to search and choose the freshly available and trendy music from their playlist without the hassle to search it from scratch.
10. Bensound
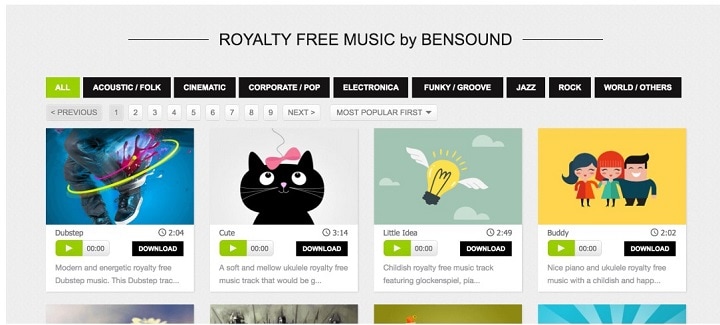
This is yet another browser-based website that is entirely free of cost to download and use music for outro song and a stock of royalty free music for the sake of either any of your multimedia projects or YouTube outro music for your productions in YouTube domain.
This facilitate one with vast palate music types ranging from classical to rock, electronica to acoustic folks and cinematic and so on, just right for any of the type of your video to elevate it to the next level.
Best Practice to Choose the Right Outro Music for Your Video
Since the quality of your production is highly relied on the beat conclusion of your music, it’s of high significance to choose a perfect outro song. But it requires you to know some of the best practices that you can follow while picking a track perfect for you. So, stay tuned!
- Evaluate the type and purpose of the video and then assessing what role the outro music will be playing in the video to best know what fits the purpose.
- You need to have an understanding of the genre of music that rightly escalates the soul of the listener and evokes the desired value.
- Make use of outro music as Bookends to indicate the ending of a video with impactful text or animation.
- You can make use of reference music to guide you to your desired music rhythm, progression, key speed or instrumentation.
- You must know your budget to spend on the outro music to create or own music as per the requirements and resources.
- If your content is on a professional level, then it’s better to consider hiring a good composer as the composition is like a backbone of the song, making it either a hit or a miss!
- Choose self-explanatory music that speaks to the viewers and best connects with them to serve the content’s purpose in an effective manner.
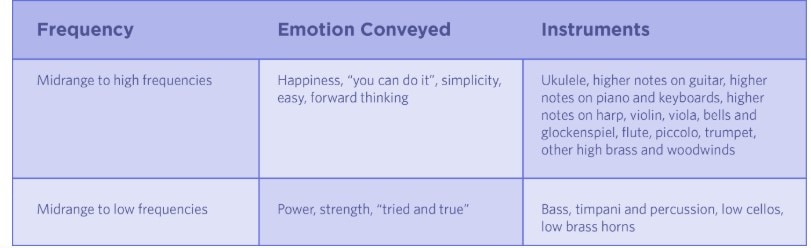
- You ought to consider the tone and the role of frequency.
- A little break in the music catches the attention of an audience to fulfill the aim behind the content.
- Using famous music or the one that best mimics the famous ones would be best to capture the audience’s attention and interest.
What is Outro Music?
By outro music definition, it means that music is affiliated at the end of the song. However, this term is an umbrella term which also means the concluding or ending track of an album. This basically refers to the linear structure of a song starting from intro, verse, chorus, bridge, verse and then finally the outro which is used only once at the end.
However, the chorus and verse can be repeated more than once but the occurrence of intro, outro, and bridge is used only once. The primary reason for inserting an outro into a song is to have a mesmerizing and impactful ending to it, giving listeners a soothing experience since ending matters the most to leave a powerful impact behind.
A piece of outro music in the video is music or song that used at the end of the video. Outra music is important because it’s one of the key elements that attract people to what you expect.
What Are the Most Popular Style Outro Music?
As once said by a French poet, Music is the literature of heart, written with utmost love, sympathy, passion and pure emotions. It is the outro or the strong ending of the movie, play, song or literally anything that outsell the content and leave a powerful impact to be remembered forever and so does the outro of a song, making it a hit or miss for the entire content for whatever purpose that music is used for.
Hence, the significance of outro music cannot be more emphasized enough. Thus the choice of the song is utterly important and styles/genre must be chosen wisely to boost up your content or your music alone.
So let’s explore some of the best and top-ranked style of outro music and the type of content where it fits the most to give you an instant recipe of perfection!
Type 1: cinematic
Usability: victorious, sweeping, grand and big events.
Type 2: corporate
Usability: unobtrusive, inviting and engaging event.
Type 3: ambient
Usability: calm, soothing and centered events
Type 4: acoustic:
Usability: connected, empathetic, melancholy and human
Type 5: comedic
Usability: bright, bubbly, exciting and fun events
Type 6: electronic
Usability: curious, cerebral and electronic
Type 7: hip hop
Usability: confident, edgy and fast
Type 8: rock
Usability: substantial, raw and gritty
Type 9: Funk
Usability: unapologetic, bright and discordant
With this wide variety along with the usability of such outro music, you can now surely get an idea which of the above fits your content the best to uplift the perfectionism in your creation!
Composing Outro Music
Typically, the recapitulation is often used to conclude while using the sonata form is performed. To end a piece of clip or song, the thematic material is often repeated in the process to provide the closure in the tonic key from the exposition. Unexpected digression being fooled by a return in order to produce more empathic confirmation regarding the structural relationship employed to the body of the production.
Moreover, the styles of the outro also make a huge impact and difference in successfully delivering the purpose of the video.
- Fadeout Effect: the echoing effect leave a heartfelt story in heart and mind
- Full stop Effect: shows abruption, finality, emptiness and completeness effect in the song.
Having more than 300 effects available in Filmora with tons of audio editing features available for free, running on both platforms, Windows, and Mac, you can make perfect outro music for your production to attract the target audience and uplift the quality and value of your content!
How to Record Music for an Outro Using Filmora Scrn?
Filmora Scrn is a powerful tool to not only record the audio but all the video playing on the screen, thus facilitating you to record your favorite outro playing in the system.
Step1: after launching the app, tap on “get started” where you’ll see 4 tabs, “scree, audio, camera and advanced” to customize the recording setting.
Step 2: choose the “Audio” tab, where you need to select “computer audio” to record the outro song running in your system and “don’t capture” in the Microphone option.
Step 3: press “record” for recording initiation.
Step 4: hit the “pause” tab to pause and F10 key to stop the recording.
Step 5: Edit the recording as per your likeliness.
Step 6: export your recording in any of the audio formats to save it.

Conclusion
As much as a powerful start of the music is important to attract the audience, the perfect end leaves an utmost impact on them, making your content valuable and distinct. Many software or website can help you make outro songs but the versatility and feasibility in use of Filmora and Filmora Scrn leave one speechless with the profound promising results it produces.
Liza Brown
Liza Brown is a writer and a lover of all things video.
Follow @Liza Brown
Liza Brown
Mar 27, 2024• Proven solutions
The more powerful the ending of a chapter or music is, the more long-lasting and powerful the impact it will leave behind in the heart and minds of the audience. Hence, one cannot deny the importance of strong outro music in the content to enhance the quality and value of it.
So here we are to guide you all about outro music and 10 best sources to download a perfect outro song.
10 Best Sources to Download Outro Music [No Copyright]
1. Filmora:
It is one of the freely available platforms that allows one to not only avail a diverse variety of features and customization options into your videos and creation but also facilitates one by being a highly compatible software that can be operated in Windows as well as Mac.
Hence this entails that Filmora is a complete package for quality and quality with your utmost desire while giving a high-end quality output with a vast personalized configuration option.
In any of your videos, Filmora offers you to drastically shift the level of your production by adding a mesmerizing outro music that well suits the content and level up the end result.
This not only offers you royalty free outro music from their own audio library but also supports importing any of your already download music files from your system and can perform multiple customization operations to enhance your video’s end result.
2. Audionautix:
If you are looking for outro music download MP3 music instantly then you have got to try Audionautix which is a website that entails one to avail as many music tracks as you want in be able to download it instantly. As soon as you deliver a link to any music, you are free to listen and download music from “music by audionatic.com”.
Without the hassle of registration or payment, you can select, search, listen and download a pool of good outro music.
3. FreePD:
This is free of cost and free from copyright hassle site where you are free to download any of the cool outro music you want. All you have to do is to download a music track and consolidate it with your composition giving you a sea of the genre of music you can choose from ranging from horror, romantic, suspense, sentimental and lot more.
Not only limited to their given library, you can download any music of your likeliness downloaded using this site on any of the social media platform.
4. Jamendo:
This domain is a connecting platform of music fonder and musicians worldwide. This aims to affiliate free music community, spreading the love with mesmerizing music and creating value surrounded by it.
The site is not only a free domain for music lovers but offers you a pool of music library that allows one to listen and download with merely a matter of a single click. With a registration process away, you can save on your systems and share free outro music on any social media platform.
5. SoundSnap:
The feature that makes this free online software outshine over the others is that it not only provides a wide variety of music but also offers a huge pallet of sound effects, distinct genre of sounds and audio clips and several samples to let you explore and play with experimenting music and enhance your creativity.
However, this requires you to make an account prior to downloading music tracks.
6. Musopen:
This website provides a free hand to record any music and download royalty free outro music. This website has recently released several Beethoven sonatas of piano, all on a public domain.
This gives you a free and publically available powerful domain to search and download any outro music no copyright.
7. Free Play Music:
This is considered as one of the renowned small-scaled company of music-licensing. You can undoubtedly call this domain a music composer, bestowing you with the online library of tons of music belonging to several genres. Moreover, this contains zillions of musical and classical pieces of work which allows one to be used as per their likeliness.
Fortunately, there exists a list of playlist with royalty free outro music and the top-ranked music tracks, all accessible from this online website. It lets one first assure regarding your choice of music by first letting one listen to the selected music then lets you download as many music tracks as you want.
8. West One Music:
West one music is basically a British production of a music company globally that facilitates you with a pool of music and songs, including intro, outro and background music around the entire world.
This company was established in the year 2003 in Soho, London with having these groups contained eight distinct labels. Fired earth music, the scoring house, noise refinery, and west one music are some of the labels that exist.
Not only limited to these facilitations but this domain offers a vast variety and distinct genre of music sounds ranging from rock band to classical, western to brass, electronic to woodwind and so many to consider.
9. AudioBlocks:
AudioBlocks is considered as one of the copyright-free websites that allows you to use any of their publically available playlist of distinct types of music that can be used as intro, outro or background depending upon the usability of the user while facilitating more than 100,000 music tracks, more than enough for one to choose the best one out of the available pool.
This website is free to use at any instant without bounding one with hidden terms and conditions and allowing them to download and utilize music from their song library at any time. One of the most highlighting features bestowed to the users by this website is that it facilitates one with royalty free outro music for the sake of commercials or any of your personal music-related projects.
Their perfectly maintained and updated listing of the songs allows one to search and choose the freshly available and trendy music from their playlist without the hassle to search it from scratch.
10. Bensound
This is yet another browser-based website that is entirely free of cost to download and use music for outro song and a stock of royalty free music for the sake of either any of your multimedia projects or YouTube outro music for your productions in YouTube domain.
This facilitate one with vast palate music types ranging from classical to rock, electronica to acoustic folks and cinematic and so on, just right for any of the type of your video to elevate it to the next level.
Best Practice to Choose the Right Outro Music for Your Video
Since the quality of your production is highly relied on the beat conclusion of your music, it’s of high significance to choose a perfect outro song. But it requires you to know some of the best practices that you can follow while picking a track perfect for you. So, stay tuned!
- Evaluate the type and purpose of the video and then assessing what role the outro music will be playing in the video to best know what fits the purpose.
- You need to have an understanding of the genre of music that rightly escalates the soul of the listener and evokes the desired value.
- Make use of outro music as Bookends to indicate the ending of a video with impactful text or animation.
- You can make use of reference music to guide you to your desired music rhythm, progression, key speed or instrumentation.
- You must know your budget to spend on the outro music to create or own music as per the requirements and resources.
- If your content is on a professional level, then it’s better to consider hiring a good composer as the composition is like a backbone of the song, making it either a hit or a miss!
- Choose self-explanatory music that speaks to the viewers and best connects with them to serve the content’s purpose in an effective manner.
- You ought to consider the tone and the role of frequency.
- A little break in the music catches the attention of an audience to fulfill the aim behind the content.
- Using famous music or the one that best mimics the famous ones would be best to capture the audience’s attention and interest.
What is Outro Music?
By outro music definition, it means that music is affiliated at the end of the song. However, this term is an umbrella term which also means the concluding or ending track of an album. This basically refers to the linear structure of a song starting from intro, verse, chorus, bridge, verse and then finally the outro which is used only once at the end.
However, the chorus and verse can be repeated more than once but the occurrence of intro, outro, and bridge is used only once. The primary reason for inserting an outro into a song is to have a mesmerizing and impactful ending to it, giving listeners a soothing experience since ending matters the most to leave a powerful impact behind.
A piece of outro music in the video is music or song that used at the end of the video. Outra music is important because it’s one of the key elements that attract people to what you expect.
What Are the Most Popular Style Outro Music?
As once said by a French poet, Music is the literature of heart, written with utmost love, sympathy, passion and pure emotions. It is the outro or the strong ending of the movie, play, song or literally anything that outsell the content and leave a powerful impact to be remembered forever and so does the outro of a song, making it a hit or miss for the entire content for whatever purpose that music is used for.
Hence, the significance of outro music cannot be more emphasized enough. Thus the choice of the song is utterly important and styles/genre must be chosen wisely to boost up your content or your music alone.
So let’s explore some of the best and top-ranked style of outro music and the type of content where it fits the most to give you an instant recipe of perfection!
Type 1: cinematic
Usability: victorious, sweeping, grand and big events.
Type 2: corporate
Usability: unobtrusive, inviting and engaging event.
Type 3: ambient
Usability: calm, soothing and centered events
Type 4: acoustic:
Usability: connected, empathetic, melancholy and human
Type 5: comedic
Usability: bright, bubbly, exciting and fun events
Type 6: electronic
Usability: curious, cerebral and electronic
Type 7: hip hop
Usability: confident, edgy and fast
Type 8: rock
Usability: substantial, raw and gritty
Type 9: Funk
Usability: unapologetic, bright and discordant
With this wide variety along with the usability of such outro music, you can now surely get an idea which of the above fits your content the best to uplift the perfectionism in your creation!
Composing Outro Music
Typically, the recapitulation is often used to conclude while using the sonata form is performed. To end a piece of clip or song, the thematic material is often repeated in the process to provide the closure in the tonic key from the exposition. Unexpected digression being fooled by a return in order to produce more empathic confirmation regarding the structural relationship employed to the body of the production.
Moreover, the styles of the outro also make a huge impact and difference in successfully delivering the purpose of the video.
- Fadeout Effect: the echoing effect leave a heartfelt story in heart and mind
- Full stop Effect: shows abruption, finality, emptiness and completeness effect in the song.
Having more than 300 effects available in Filmora with tons of audio editing features available for free, running on both platforms, Windows, and Mac, you can make perfect outro music for your production to attract the target audience and uplift the quality and value of your content!
How to Record Music for an Outro Using Filmora Scrn?
Filmora Scrn is a powerful tool to not only record the audio but all the video playing on the screen, thus facilitating you to record your favorite outro playing in the system.
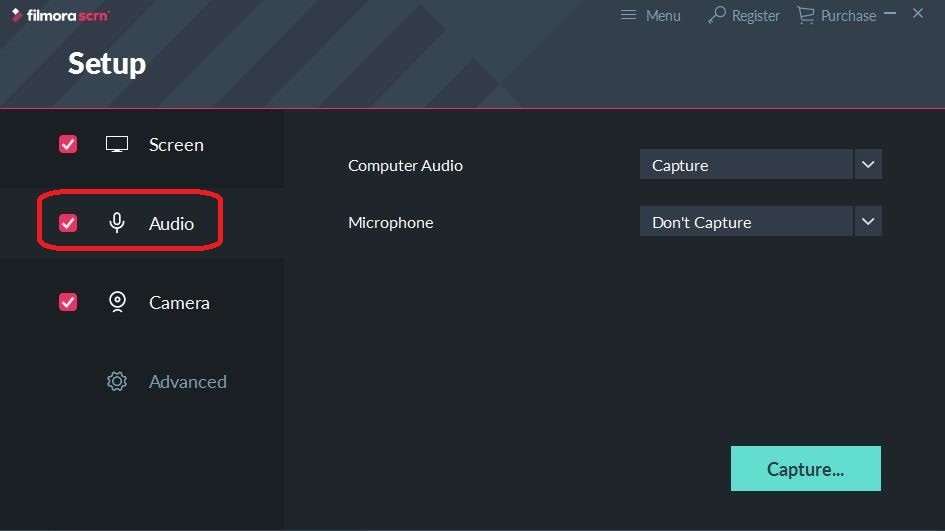
Step1: after launching the app, tap on “get started” where you’ll see 4 tabs, “scree, audio, camera and advanced” to customize the recording setting.
Step 2: choose the “Audio” tab, where you need to select “computer audio” to record the outro song running in your system and “don’t capture” in the Microphone option.
Step 3: press “record” for recording initiation.
Step 4: hit the “pause” tab to pause and F10 key to stop the recording.
Step 5: Edit the recording as per your likeliness.
Step 6: export your recording in any of the audio formats to save it.
Conclusion
As much as a powerful start of the music is important to attract the audience, the perfect end leaves an utmost impact on them, making your content valuable and distinct. Many software or website can help you make outro songs but the versatility and feasibility in use of Filmora and Filmora Scrn leave one speechless with the profound promising results it produces.
Liza Brown
Liza Brown is a writer and a lover of all things video.
Follow @Liza Brown
Liza Brown
Mar 27, 2024• Proven solutions
The more powerful the ending of a chapter or music is, the more long-lasting and powerful the impact it will leave behind in the heart and minds of the audience. Hence, one cannot deny the importance of strong outro music in the content to enhance the quality and value of it.
So here we are to guide you all about outro music and 10 best sources to download a perfect outro song.
10 Best Sources to Download Outro Music [No Copyright]
1. Filmora:
It is one of the freely available platforms that allows one to not only avail a diverse variety of features and customization options into your videos and creation but also facilitates one by being a highly compatible software that can be operated in Windows as well as Mac.
Hence this entails that Filmora is a complete package for quality and quality with your utmost desire while giving a high-end quality output with a vast personalized configuration option.
In any of your videos, Filmora offers you to drastically shift the level of your production by adding a mesmerizing outro music that well suits the content and level up the end result.
This not only offers you royalty free outro music from their own audio library but also supports importing any of your already download music files from your system and can perform multiple customization operations to enhance your video’s end result.
2. Audionautix:
If you are looking for outro music download MP3 music instantly then you have got to try Audionautix which is a website that entails one to avail as many music tracks as you want in be able to download it instantly. As soon as you deliver a link to any music, you are free to listen and download music from “music by audionatic.com”.
Without the hassle of registration or payment, you can select, search, listen and download a pool of good outro music.
3. FreePD:
This is free of cost and free from copyright hassle site where you are free to download any of the cool outro music you want. All you have to do is to download a music track and consolidate it with your composition giving you a sea of the genre of music you can choose from ranging from horror, romantic, suspense, sentimental and lot more.
Not only limited to their given library, you can download any music of your likeliness downloaded using this site on any of the social media platform.
4. Jamendo:
This domain is a connecting platform of music fonder and musicians worldwide. This aims to affiliate free music community, spreading the love with mesmerizing music and creating value surrounded by it.
The site is not only a free domain for music lovers but offers you a pool of music library that allows one to listen and download with merely a matter of a single click. With a registration process away, you can save on your systems and share free outro music on any social media platform.
5. SoundSnap:
The feature that makes this free online software outshine over the others is that it not only provides a wide variety of music but also offers a huge pallet of sound effects, distinct genre of sounds and audio clips and several samples to let you explore and play with experimenting music and enhance your creativity.
However, this requires you to make an account prior to downloading music tracks.
6. Musopen:
This website provides a free hand to record any music and download royalty free outro music. This website has recently released several Beethoven sonatas of piano, all on a public domain.
This gives you a free and publically available powerful domain to search and download any outro music no copyright.
7. Free Play Music:
This is considered as one of the renowned small-scaled company of music-licensing. You can undoubtedly call this domain a music composer, bestowing you with the online library of tons of music belonging to several genres. Moreover, this contains zillions of musical and classical pieces of work which allows one to be used as per their likeliness.
Fortunately, there exists a list of playlist with royalty free outro music and the top-ranked music tracks, all accessible from this online website. It lets one first assure regarding your choice of music by first letting one listen to the selected music then lets you download as many music tracks as you want.
8. West One Music:
West one music is basically a British production of a music company globally that facilitates you with a pool of music and songs, including intro, outro and background music around the entire world.
This company was established in the year 2003 in Soho, London with having these groups contained eight distinct labels. Fired earth music, the scoring house, noise refinery, and west one music are some of the labels that exist.
Not only limited to these facilitations but this domain offers a vast variety and distinct genre of music sounds ranging from rock band to classical, western to brass, electronic to woodwind and so many to consider.
9. AudioBlocks:
AudioBlocks is considered as one of the copyright-free websites that allows you to use any of their publically available playlist of distinct types of music that can be used as intro, outro or background depending upon the usability of the user while facilitating more than 100,000 music tracks, more than enough for one to choose the best one out of the available pool.
This website is free to use at any instant without bounding one with hidden terms and conditions and allowing them to download and utilize music from their song library at any time. One of the most highlighting features bestowed to the users by this website is that it facilitates one with royalty free outro music for the sake of commercials or any of your personal music-related projects.
Their perfectly maintained and updated listing of the songs allows one to search and choose the freshly available and trendy music from their playlist without the hassle to search it from scratch.
10. Bensound
This is yet another browser-based website that is entirely free of cost to download and use music for outro song and a stock of royalty free music for the sake of either any of your multimedia projects or YouTube outro music for your productions in YouTube domain.
This facilitate one with vast palate music types ranging from classical to rock, electronica to acoustic folks and cinematic and so on, just right for any of the type of your video to elevate it to the next level.
Best Practice to Choose the Right Outro Music for Your Video
Since the quality of your production is highly relied on the beat conclusion of your music, it’s of high significance to choose a perfect outro song. But it requires you to know some of the best practices that you can follow while picking a track perfect for you. So, stay tuned!
- Evaluate the type and purpose of the video and then assessing what role the outro music will be playing in the video to best know what fits the purpose.
- You need to have an understanding of the genre of music that rightly escalates the soul of the listener and evokes the desired value.
- Make use of outro music as Bookends to indicate the ending of a video with impactful text or animation.
- You can make use of reference music to guide you to your desired music rhythm, progression, key speed or instrumentation.
- You must know your budget to spend on the outro music to create or own music as per the requirements and resources.
- If your content is on a professional level, then it’s better to consider hiring a good composer as the composition is like a backbone of the song, making it either a hit or a miss!
- Choose self-explanatory music that speaks to the viewers and best connects with them to serve the content’s purpose in an effective manner.
- You ought to consider the tone and the role of frequency.
- A little break in the music catches the attention of an audience to fulfill the aim behind the content.
- Using famous music or the one that best mimics the famous ones would be best to capture the audience’s attention and interest.
What is Outro Music?
By outro music definition, it means that music is affiliated at the end of the song. However, this term is an umbrella term which also means the concluding or ending track of an album. This basically refers to the linear structure of a song starting from intro, verse, chorus, bridge, verse and then finally the outro which is used only once at the end.
However, the chorus and verse can be repeated more than once but the occurrence of intro, outro, and bridge is used only once. The primary reason for inserting an outro into a song is to have a mesmerizing and impactful ending to it, giving listeners a soothing experience since ending matters the most to leave a powerful impact behind.
A piece of outro music in the video is music or song that used at the end of the video. Outra music is important because it’s one of the key elements that attract people to what you expect.
What Are the Most Popular Style Outro Music?
As once said by a French poet, Music is the literature of heart, written with utmost love, sympathy, passion and pure emotions. It is the outro or the strong ending of the movie, play, song or literally anything that outsell the content and leave a powerful impact to be remembered forever and so does the outro of a song, making it a hit or miss for the entire content for whatever purpose that music is used for.
Hence, the significance of outro music cannot be more emphasized enough. Thus the choice of the song is utterly important and styles/genre must be chosen wisely to boost up your content or your music alone.
So let’s explore some of the best and top-ranked style of outro music and the type of content where it fits the most to give you an instant recipe of perfection!
Type 1: cinematic
Usability: victorious, sweeping, grand and big events.
Type 2: corporate
Usability: unobtrusive, inviting and engaging event.
Type 3: ambient
Usability: calm, soothing and centered events
Type 4: acoustic:
Usability: connected, empathetic, melancholy and human
Type 5: comedic
Usability: bright, bubbly, exciting and fun events
Type 6: electronic
Usability: curious, cerebral and electronic
Type 7: hip hop
Usability: confident, edgy and fast
Type 8: rock
Usability: substantial, raw and gritty
Type 9: Funk
Usability: unapologetic, bright and discordant
With this wide variety along with the usability of such outro music, you can now surely get an idea which of the above fits your content the best to uplift the perfectionism in your creation!
Composing Outro Music
Typically, the recapitulation is often used to conclude while using the sonata form is performed. To end a piece of clip or song, the thematic material is often repeated in the process to provide the closure in the tonic key from the exposition. Unexpected digression being fooled by a return in order to produce more empathic confirmation regarding the structural relationship employed to the body of the production.
Moreover, the styles of the outro also make a huge impact and difference in successfully delivering the purpose of the video.
- Fadeout Effect: the echoing effect leave a heartfelt story in heart and mind
- Full stop Effect: shows abruption, finality, emptiness and completeness effect in the song.
Having more than 300 effects available in Filmora with tons of audio editing features available for free, running on both platforms, Windows, and Mac, you can make perfect outro music for your production to attract the target audience and uplift the quality and value of your content!
How to Record Music for an Outro Using Filmora Scrn?
Filmora Scrn is a powerful tool to not only record the audio but all the video playing on the screen, thus facilitating you to record your favorite outro playing in the system.
Step1: after launching the app, tap on “get started” where you’ll see 4 tabs, “scree, audio, camera and advanced” to customize the recording setting.
Step 2: choose the “Audio” tab, where you need to select “computer audio” to record the outro song running in your system and “don’t capture” in the Microphone option.
Step 3: press “record” for recording initiation.
Step 4: hit the “pause” tab to pause and F10 key to stop the recording.
Step 5: Edit the recording as per your likeliness.
Step 6: export your recording in any of the audio formats to save it.
Conclusion
As much as a powerful start of the music is important to attract the audience, the perfect end leaves an utmost impact on them, making your content valuable and distinct. Many software or website can help you make outro songs but the versatility and feasibility in use of Filmora and Filmora Scrn leave one speechless with the profound promising results it produces.
Liza Brown
Liza Brown is a writer and a lover of all things video.
Follow @Liza Brown
Also read:
- In 2024, Audiophiles Guide Selecting the Best Soundtracks that Complement Visual Storytelling
- Updated 2024 Approved Ultimate DJ Streaming Repository
- New In 2024, Sneak Peek Into the Secret of Silent Videos in Windows 10 (No Additional Software)
- New 2024 Approved Mastering Your Music Production The Best Windows and Mac DAWs of the Year 2023
- In 2024, Sonic Ambiance for Catching Up on the Latest News
- New Audio Blending Techniques Creating a Unified Soundtrack for Videos
- Unlocking Free Speech Transcription - A Triad of Simple Approaches for 2024
- Updated 2024 Approved Melody Matters Top-Ranked Linux Auditory Software - Evaluating Cost and Quality
- In 2024, Sound Cleanup A Comprehensive Tutorial on Removing Drums From Audio Files
- In 2024, 5 Famous Linux Audio Recorder and Tips for Recording Sound in Linux
- 2024 Approved The Ultimate Guide to Affordable Video Making Combining Visuals and Sound
- Updated Innovating Sound Design The Impact and Prowess of MAGIX Samplitude
- Updated In 2024, 10 Best Nature Sounds Apps for iOS and Android
- New Enriching AVI Images with Auditory Elements in the 2023 Version
- Updated 2024 Approved Explore the Best 8 Audio Editing Platforms Available for Mac & PC Users
- New How to Add Audio to MKV
- New Guide to Selecting High-Quality MP3 to Text Converters for 2024
- New In 2024, 13 Free Music Production Software for Windows/Mac/Online
- New Transforming Speech The 11 Leading Tools for Personalized Voice Adjustment As
- New In 2024, Mastering the Art of Soundscape Alteration on Digital Media
- Updated 2024 Approved Smart Choices Curating the Best 11 Fee-Exempt Sound Modification Applications on iOS and Android
- Updated In 2024, 5 Top Sites to Download Royalty Free Comedy Background Music
- Updated Seek Out the Bell Echo Simulation Soundtrack for 2024
- New Top 8 Online Free Voice Recorder for 2024
- New In 2024, The Premium Collection Top 3 Online Platforms for Lifting MP3 Volume Levels
- 2024 Approved Unveiling the Button Tap Acoustic Signature
- The Hidden Harmonics Techniques for Non-Invasively Stripping Voices From Audio Tracks Using Audacitys Features for 2024
- 10 Best Radio Sound Effects Most Popular
- 2024 Approved Harmonious Hollers Discovering Impactful Sound Effects
- Updated Top 5 Digital Audio Editors for Optimal Sound Quality for 2024
- New 2024 Approved Silencing the Score Advanced Noise Reduction in iMovie Videos
- New 2024 Approved Leveraging Voiceovers in Microsoft PowerPoint A Detailed Walkthrough for Windows & Mac Operating Systems
- New Auditory Alteration Made Easy Two Paths to Revamping Sound in Visual Media
- In 2024, Unveiling the Leading Mixers 5 Highest Rated Audio/Video Combiner Devices
- In 2024, Full Guide on Mirroring Your Vivo S17t to Your PC/Mac | Dr.fone
- How To Transfer WhatsApp From Apple iPhone XS to other iPhone 11 Pro Max devices? | Dr.fone
- New In 2024, Best 5 Solutions on How to Add Emojis to iPhone
- 4 Effective Methods Fake GPS Location on Apple iPhone 6 Plus/iPad | Dr.fone
- How To Repair System of Apple iPhone XS? | Dr.fone
- In 2024, Latest Guide on iPad 2/3 and Apple iPhone 6s iCloud Activation Lock Bypass
- How to recover deleted contacts from Honor Magic V2.
- Reasons for Infinix Hot 40 Pro Stuck on Startup Screen and Ways To Fix Them | Dr.fone
- Best Android Data Recovery - Retrieve Lost Photos from Itel A60.
- Updated In 2024, GoPro Video Editing Simplified A Free Online Resource
- In 2024, How to Unlock Nokia G22 Pattern Lock if Forgotten? 6 Ways
- Top 9 Apple iPhone 11 Monitoring Apps for Parental Controls | Dr.fone
- In 2024, 5 Ways to Track Vivo Y56 5G without App | Dr.fone
- In 2024, FRP Hijacker by Hagard Download and Bypass your Oppo K11x FRP Locks
- 9 Solutions to Fix Process System Isnt Responding Error on Realme 11X 5G | Dr.fone
- In 2024, How to Unlock iPhone 14 Plus?
- In 2024, How to Unlock Apple ID Activation Lock From Apple iPhone 14 Pro Max?
- New What Is an AI Script Generator?
- Title: Updated In 2024, Perfecting the Sound The Process of Equalizing Audio in DaVinci Resolve
- Author: Ella
- Created at : 2024-05-05 02:35:01
- Updated at : 2024-05-06 02:35:01
- Link: https://sound-optimizing.techidaily.com/updated-in-2024-perfecting-the-sound-the-process-of-equalizing-audio-in-davinci-resolve/
- License: This work is licensed under CC BY-NC-SA 4.0.
