
:max_bytes(150000):strip_icc():format(webp)/GettyImages-667603173-fac0b8f4b1d9453c866d332dc73821f8.jpg)
Updated In 2024, Tips to Add Audio to Video in Premiere Pro
Tips to Add Audio to Video in Premiere Pro
Versatile Video Editor - Wondershare Filmora
An easy yet powerful editor
Numerous effects to choose from
Detailed tutorials provided by the official channel
Look at any of the spot commercials, wedding videos, or even some family candid videos. Adding audio makes them appealing and likable. To catch a potential customer or create an emotional connection with the viewer combination of audio and video is a must. This makes the footage attractive and exceptional.
Read on to know more about the step-by-step approach how to add audio to video in Adobe Premiere Pro.
In this article
01 [How to add audio to video in Premiere Pro](#Part 1)
02 [How to adjust audio in Premiere Pro](#Part 2)
03 [Adding Audio to Video files](#Part 3)
Part 1 How to add audio to video in Premiere Pro
Some essential pointers for all would-be videographers are:
● Before you add audio to video in Premiere Pro, be ready to see your file size increase to a large extent. If you add a background score of 15MB, your total video file size will increase by the same amount of 15MB. The best way to take care of such a problem is to use additional compression techniques to get a suitable file size.
● Most videographers use lots of software tools to add audio to video professionally. One such trending software tool is the Adobe Premiere Pro. Its simple to add audio to video in Premiere Pro, edit your audio and video, and fine-tune the audio volume of each video project.
Let’s learn how.

Step1 Find out the Audio option
Navigate to the Audio workspace, select Audio at the top on the tools bar
Step2 Choose the Workspace
Click Window select Workspace click on Audio
Step3 Check toolbar
Within Audio, click on Choose Window Media Browser to show the Media Browser toolbar.
Step4 Select audio files
Go to your audio file; for Windows OS, right-click or control-click the selected audio file for macOS.
Step5 Import and add
Please select the desired audio file, then click import to add it to your Project.
An important tip is to keep the Ingest box selected if you want to copy your audio file concurrently to your project folder.
Adding audio to your series

Step1 Go to the Project panel
Select Window, click on Project to open the Project panel.
Step2 Select audio file
Click on the audio file you imported to select it.
Step3 Check the waveform
Double click the file to open it in the Source panel to check the sound and waveform.
Step4 Check sounds
Play the audio file if you want to check the audio quality, volume, and overall sound.
Step5 Add audio to the video track
Hold the left click on your mouse to drag the audio file to the series in the Timeline panel. You can add any audio file to the video track listed in the panel window in this step.
Step6 Trim audio file
Select the Trim option to trim your audio file the same way you will edit the video file in the final step.
Part 2 How to adjust audio in Premiere Pro
Now that you have understood how to add audio to video in Adobe Premier Pro. Let’s know how to adjust audio in Premier Pro.

Step1 Activate the series
Press on the spacebar to activate your series in the Program panel (appears in the top right of the panel)
Step2 Stop playback
To stop the playback, press the space bar again.
Step3 Choose starting point of playback
Press down the left mouse button to hold and drag the Blue colored play head to wherever you desire the playback to start.
If you feel the audio track is mild or too harsh compared to the rest of the audio series, change each audio track’s volume separately.
Step1 Select Audio Track Mixer
Click Window selects Audio Track Mixer from the menu.
Step2 Click the series name to see the audio mixer
Click the series name of your audio file to show the audio mixer for your series.
Step3 Choose playback to play the audio
At the bottom of the panel is the Audio Track Mixer. Click on playback to star, pause or play your audio in-ring sequence.
Step4 Click on the slider
When your audio file plays or loops, click on the slider to move up or down. It will increase or reduce the volume of each separate audio track in your audio series.
Step5 Adjust the volume
Use the slider to adjust the overall audio volume
Tips
Always keep the audio projects within the -6 to 3 dB volume range to get the best quality of the audio effect. Any lower you won’t be able to hear the sound, or if it’s higher, the sound will hurt the listeners’ ears.
Professional advice to all beginner-level videographers is that as Premiere Pro is complex so you need more straightforward tools like Filmora for all your video editing work. Filmora is easy to use and much cheaper than Premiere Pro.
You may think now why or how Filmora can be the best as an alternative on how to add audio to video using Premiere Pro. Well! It will help you to transform your video into a piece of art incredibly by offering simple drag and drop options, including an easy-to-use interface and powerful editing tools. You can:
● Edit and create your videos with minimal effort
● Get a Music Library to add comedy, fear, tension, and love to every scene
● Get several royalty-free songs and sound effects
● Create videos with up to 800 stunning effects
● Unleash your creativity with its offered Hollywood effects
● Import and export in almost any type of video format
How to use Filmora to add audio to video
Adding sound to any video file enhances its viewability and the whole experience of watching any video. To do this, you need to add audio to video. The same can be done quickly in Filmora, a 3rd-party video editing software tool now the hot favorite of amateur and professional video editors. Below we describe how to add audio to video in Filmora.
Import Media
To start the process of adding audio to video follow these steps.
Step1 Select the audio, add using the Import option or drag and select
Import selected audio using the Filmora Media Panel and add it to your timeline. You can also choose and drag the audio file from the source folder to the Media Panel. Filmora supports multiple audio file formats to ease adding audio to video. The supported audio files are MP3, M4V, MPA, WAV, WMA.

Step2 Add and make the audio file
Adding the audio file to Filmora Media Panel makes it a media asset and can now be used multiple times in future projects. The original file remains as Filmora doesn’t change the original audio file.
Step3 Copying or deleting an audio file
In Filmora, using the feature of copying or deleting an audio file, you can work on the audio and video from any computer or remote PC.
Part 3 Adding Audio to Video files
Using Filmora, it is easy to sync or add audio to the video, which is separately recorded and stored on your device.
Using Filmora, it is easy to sync or add audio to the video, which is separately recorded and stored on your device.
Step1 Click on Import in the Media Panel
Select the audio and video files to import them into Filmora.
Step2 Click on the video file to add audio
Press the Ctrl key (Windows) or Cmd key (Mac OS) and click on the audio file.
Step3 Add audio to video
Right-click on the files selected and choose the Merge audio & video option to add audio to the video.
Filmora analyzes audio and video files and replaces the existing audio with the newly selected audio file. Once the synchronization process is over, the new merged file will be available in the Media Panel for future processing.
The synchronized file will have the same terminology as the original video file with a difference. It will get an extension Merged to its name.
The original file will not get affected in Filmora. This software tool only references the files to generate a new file. The new file created when you add audio to the video can now be added to the timeline and exported.
Wondershare Filmora
Get started easily with Filmora’s powerful performance, intuitive interface, and countless effects!
Try It Free Try It Free Try It Free Learn More about Filmora>

Conclusion
So, this article listed how to add audio to video in Premiere Pro via a step-by-step guide. The guide lets you know the easy method of adding audio to video in Adobe Premiere Pro to all potential videographers. Thus, you can now start your journey of video edition by putting your best click forward!
Look at any of the spot commercials, wedding videos, or even some family candid videos. Adding audio makes them appealing and likable. To catch a potential customer or create an emotional connection with the viewer combination of audio and video is a must. This makes the footage attractive and exceptional.
Read on to know more about the step-by-step approach how to add audio to video in Adobe Premiere Pro.
In this article
01 [How to add audio to video in Premiere Pro](#Part 1)
02 [How to adjust audio in Premiere Pro](#Part 2)
03 [Adding Audio to Video files](#Part 3)
Part 1 How to add audio to video in Premiere Pro
Some essential pointers for all would-be videographers are:
● Before you add audio to video in Premiere Pro, be ready to see your file size increase to a large extent. If you add a background score of 15MB, your total video file size will increase by the same amount of 15MB. The best way to take care of such a problem is to use additional compression techniques to get a suitable file size.
● Most videographers use lots of software tools to add audio to video professionally. One such trending software tool is the Adobe Premiere Pro. Its simple to add audio to video in Premiere Pro, edit your audio and video, and fine-tune the audio volume of each video project.
Let’s learn how.
Step1 Find out the Audio option
Navigate to the Audio workspace, select Audio at the top on the tools bar
Step2 Choose the Workspace
Click Window select Workspace click on Audio
Step3 Check toolbar
Within Audio, click on Choose Window Media Browser to show the Media Browser toolbar.
Step4 Select audio files
Go to your audio file; for Windows OS, right-click or control-click the selected audio file for macOS.
Step5 Import and add
Please select the desired audio file, then click import to add it to your Project.
An important tip is to keep the Ingest box selected if you want to copy your audio file concurrently to your project folder.
Adding audio to your series
Step1 Go to the Project panel
Select Window, click on Project to open the Project panel.
Step2 Select audio file
Click on the audio file you imported to select it.
Step3 Check the waveform
Double click the file to open it in the Source panel to check the sound and waveform.
Step4 Check sounds
Play the audio file if you want to check the audio quality, volume, and overall sound.
Step5 Add audio to the video track
Hold the left click on your mouse to drag the audio file to the series in the Timeline panel. You can add any audio file to the video track listed in the panel window in this step.
Step6 Trim audio file
Select the Trim option to trim your audio file the same way you will edit the video file in the final step.
Part 2 How to adjust audio in Premiere Pro
Now that you have understood how to add audio to video in Adobe Premier Pro. Let’s know how to adjust audio in Premier Pro.
Step1 Activate the series
Press on the spacebar to activate your series in the Program panel (appears in the top right of the panel)
Step2 Stop playback
To stop the playback, press the space bar again.
Step3 Choose starting point of playback
Press down the left mouse button to hold and drag the Blue colored play head to wherever you desire the playback to start.
If you feel the audio track is mild or too harsh compared to the rest of the audio series, change each audio track’s volume separately.
Step1 Select Audio Track Mixer
Click Window selects Audio Track Mixer from the menu.
Step2 Click the series name to see the audio mixer
Click the series name of your audio file to show the audio mixer for your series.
Step3 Choose playback to play the audio
At the bottom of the panel is the Audio Track Mixer. Click on playback to star, pause or play your audio in-ring sequence.
Step4 Click on the slider
When your audio file plays or loops, click on the slider to move up or down. It will increase or reduce the volume of each separate audio track in your audio series.
Step5 Adjust the volume
Use the slider to adjust the overall audio volume
Tips
Always keep the audio projects within the -6 to 3 dB volume range to get the best quality of the audio effect. Any lower you won’t be able to hear the sound, or if it’s higher, the sound will hurt the listeners’ ears.
Professional advice to all beginner-level videographers is that as Premiere Pro is complex so you need more straightforward tools like Filmora for all your video editing work. Filmora is easy to use and much cheaper than Premiere Pro.
You may think now why or how Filmora can be the best as an alternative on how to add audio to video using Premiere Pro. Well! It will help you to transform your video into a piece of art incredibly by offering simple drag and drop options, including an easy-to-use interface and powerful editing tools. You can:
● Edit and create your videos with minimal effort
● Get a Music Library to add comedy, fear, tension, and love to every scene
● Get several royalty-free songs and sound effects
● Create videos with up to 800 stunning effects
● Unleash your creativity with its offered Hollywood effects
● Import and export in almost any type of video format
How to use Filmora to add audio to video
Adding sound to any video file enhances its viewability and the whole experience of watching any video. To do this, you need to add audio to video. The same can be done quickly in Filmora, a 3rd-party video editing software tool now the hot favorite of amateur and professional video editors. Below we describe how to add audio to video in Filmora.
Import Media
To start the process of adding audio to video follow these steps.
Step1 Select the audio, add using the Import option or drag and select
Import selected audio using the Filmora Media Panel and add it to your timeline. You can also choose and drag the audio file from the source folder to the Media Panel. Filmora supports multiple audio file formats to ease adding audio to video. The supported audio files are MP3, M4V, MPA, WAV, WMA.
Step2 Add and make the audio file
Adding the audio file to Filmora Media Panel makes it a media asset and can now be used multiple times in future projects. The original file remains as Filmora doesn’t change the original audio file.
Step3 Copying or deleting an audio file
In Filmora, using the feature of copying or deleting an audio file, you can work on the audio and video from any computer or remote PC.
Part 3 Adding Audio to Video files
Using Filmora, it is easy to sync or add audio to the video, which is separately recorded and stored on your device.
Using Filmora, it is easy to sync or add audio to the video, which is separately recorded and stored on your device.
Step1 Click on Import in the Media Panel
Select the audio and video files to import them into Filmora.
Step2 Click on the video file to add audio
Press the Ctrl key (Windows) or Cmd key (Mac OS) and click on the audio file.
Step3 Add audio to video
Right-click on the files selected and choose the Merge audio & video option to add audio to the video.
Filmora analyzes audio and video files and replaces the existing audio with the newly selected audio file. Once the synchronization process is over, the new merged file will be available in the Media Panel for future processing.
The synchronized file will have the same terminology as the original video file with a difference. It will get an extension Merged to its name.
The original file will not get affected in Filmora. This software tool only references the files to generate a new file. The new file created when you add audio to the video can now be added to the timeline and exported.
Wondershare Filmora
Get started easily with Filmora’s powerful performance, intuitive interface, and countless effects!
Try It Free Try It Free Try It Free Learn More about Filmora>
Conclusion
So, this article listed how to add audio to video in Premiere Pro via a step-by-step guide. The guide lets you know the easy method of adding audio to video in Adobe Premiere Pro to all potential videographers. Thus, you can now start your journey of video edition by putting your best click forward!
“Cinematic Soundscapes: Techniques for Retrieving Audio From Videos”
It is tough to find a suitable sound for your content. Looking for the perfect music for your video can take hours. It is possible that even after spending hours, you still can’t find the ideal music. It usually happens that you like a sound, but it’s part of a video.
The video is the only hurdle between you and the sound. The best way to get over this hurdle is to extract sound from video. You might not have heard about this before, but some amazing sound extractors in the market are widely used for this very purpose. Let us share some information with you regarding how you can extract sound from videos.
In this article
01 Top 1 Recommended Sound Extractor: Wondershare Filmora
02 4 Popular Sound Extractor to Help You Extract Sound from Video
Part 1. Top 1 Recommended Sound Extractor: Wondershare Filmora
The number 1 sound extractor available is Wondershare Filmora . Filmora is not just a video editing software. It offers more than someone can imagine. The editor is inexpensive to use. Filmora has a very pleasing interface that even beginners can understand and work with it. Moreover, it supports a wide range of both input and output formats.
With Filmora, you can do classical video editing. It has many features to offer. For instance, Filmora allows Auto Reframe and Auto Highlight. Along with that, users can do Color Match. Are you interested in knowing something extra about this video editor? Well, the cherry on top, Filmora also has an asset library. You can add fancy elements, transitions, effects, different titles, and a lot more things with Filmora and Filmstock.
For Win 7 or later (64-bit)
For macOS 10.12 or later
Do you want to know what else it can do? Well, Wondershare Filmora is not an ordinary video editor. With this powerful software, you can also edit Audio. Using Filmora, you can adjust Audio, Split Audio, even add Voiceovers. Moreover, extracting sound from video is also something Filmora can do. You can use its ‘Detach Audio’ feature for this purpose. For your help, its step-by-step guideline is shared below:
Step 1: Lets Import Video File
To extract sound from the video, you firstly need to open Wondershare Filmora. After that, you are supposed to import the media file from which you plan to extract the sound. For that, go to the ‘Files’ tab from the top panel. There select ‘Import Media’ and locate the file from your device.

Step 2: Extract Audio from Video
After the file has been imported, drag and drops it onto the timeline. What should be done next? It’s time to extract the audio. You need to right-click on the media file. A menu will pop up on the screen. Hover the cursor on the ‘Audio’ option. A sub-menu will appear; select the ‘Detach Audio’ option.

Step 3: Edit the Audio
The audio and video will appear separately on the timeline, in two different tracks. Do you think the video is of any use? Certainly not. Right-click on the video and select the option of ‘Delete.’ After this, you can freely edit the audio file if you want to. Double click on it to open the ‘Audio’ editing panel.

Step 4: Export and Save the File
Lastly, export the file when you are satisfied with all the edits. For that, hit the ‘Export’ button. In the ‘Local’ tab, you need to select ‘MP3’ as the output format. This is because we are exporting a sound file. In the end, save the file to your desired location and tap on ‘Export’ from the bottom right corner.

Part 2. 4 Popular Sound Extractor to Help You Extract Sound from Video
Are there some other tools to extract sound from video? Well, yes. We have mentioned earlier that the market is full of amazing sound extractors. The following section of this article will walk you through 4 popular sound extractors. We will share online as well as offline tools for both Windows and Mac. Should we start?
1. VLC
The first software to be discussed is VLC Media Player. The software is very popular because of the wide range of features and functionalities you get from it. VLC is a free and open-source media player. The software has no spyware, no user tracking, and no ads. It is compatible with all platforms. You can run it on Windows, Mac, Linux, Unix, Mac OS X, iOS, Android, and others.
Moreover, the media player can play everything. For instance, files, DVDs, Audio CDs, multiple streaming protocols, and other things. Interestingly, on most platforms, VLC has hardware decoding. It supports almost every input and output format. With VLC, you can easily extract sound from video. The software is simple but very fast and powerful.

2. Audacity
The next sound extractor for Windows and Mac that we are about to discuss is Audacity. This is again an open-source, free audio software. It has easy to use interface with a multi-track recorder as well as an editor. Are you a Linux user? Don’t worry; the audio software works like magic on Linux, macOS, Windows, and other operating systems. With Audacity, importing, editing, and combining sound files is very easy.
The software helps you to record live audio or playback from your computers. Do you know how many file formats Audacity supports? Well, the audio format ranges from MP3, AIFF, WAV, FLAC, AU, and others. Along with extracting sound from video, there is another amazing thing that you all should know. With Audacity, recorded files can also be converted into Digital Recordings or CDs.

3. Audio Extractor
The last online sound extractor that we are about to share is Audio Extractor. The tool is very easy to use and understand. Audio Extractor has a self-explanatory interface. The tools’ interface guides the users about the next step.
With three easy steps, you can extract sound from video. Start by accessing the online extractor. Then you need to upload the video from your respective device. This could be done by hitting the ‘Open video’ button. Audio Extractor supports various audio formats. For instance, MP3, MP2, WAV, FLAC, etc. You should select your desired audio format. Lastly, click on the ‘Extract audio’ button, and it’s done.

Last Words
Extracting sound from video and using it elsewhere is a smart thing to do. You can also be among those smart people if you learn from this article. We have talked about multiple unique sound extractors. The article also sheds light on the number 1 sound extractor, Wondershare Filmora.
Wondershare Filmora
Get started easily with Filmora’s powerful performance, intuitive interface, and countless effects!
Try It Free Try It Free Try It Free Learn More >

02 4 Popular Sound Extractor to Help You Extract Sound from Video
Part 1. Top 1 Recommended Sound Extractor: Wondershare Filmora
The number 1 sound extractor available is Wondershare Filmora . Filmora is not just a video editing software. It offers more than someone can imagine. The editor is inexpensive to use. Filmora has a very pleasing interface that even beginners can understand and work with it. Moreover, it supports a wide range of both input and output formats.
With Filmora, you can do classical video editing. It has many features to offer. For instance, Filmora allows Auto Reframe and Auto Highlight. Along with that, users can do Color Match. Are you interested in knowing something extra about this video editor? Well, the cherry on top, Filmora also has an asset library. You can add fancy elements, transitions, effects, different titles, and a lot more things with Filmora and Filmstock.
For Win 7 or later (64-bit)
For macOS 10.12 or later
Do you want to know what else it can do? Well, Wondershare Filmora is not an ordinary video editor. With this powerful software, you can also edit Audio. Using Filmora, you can adjust Audio, Split Audio, even add Voiceovers. Moreover, extracting sound from video is also something Filmora can do. You can use its ‘Detach Audio’ feature for this purpose. For your help, its step-by-step guideline is shared below:
Step 1: Lets Import Video File
To extract sound from the video, you firstly need to open Wondershare Filmora. After that, you are supposed to import the media file from which you plan to extract the sound. For that, go to the ‘Files’ tab from the top panel. There select ‘Import Media’ and locate the file from your device.
Step 2: Extract Audio from Video
After the file has been imported, drag and drops it onto the timeline. What should be done next? It’s time to extract the audio. You need to right-click on the media file. A menu will pop up on the screen. Hover the cursor on the ‘Audio’ option. A sub-menu will appear; select the ‘Detach Audio’ option.
Step 3: Edit the Audio
The audio and video will appear separately on the timeline, in two different tracks. Do you think the video is of any use? Certainly not. Right-click on the video and select the option of ‘Delete.’ After this, you can freely edit the audio file if you want to. Double click on it to open the ‘Audio’ editing panel.
Step 4: Export and Save the File
Lastly, export the file when you are satisfied with all the edits. For that, hit the ‘Export’ button. In the ‘Local’ tab, you need to select ‘MP3’ as the output format. This is because we are exporting a sound file. In the end, save the file to your desired location and tap on ‘Export’ from the bottom right corner.
Part 2. 4 Popular Sound Extractor to Help You Extract Sound from Video
Are there some other tools to extract sound from video? Well, yes. We have mentioned earlier that the market is full of amazing sound extractors. The following section of this article will walk you through 4 popular sound extractors. We will share online as well as offline tools for both Windows and Mac. Should we start?
1. VLC
The first software to be discussed is VLC Media Player. The software is very popular because of the wide range of features and functionalities you get from it. VLC is a free and open-source media player. The software has no spyware, no user tracking, and no ads. It is compatible with all platforms. You can run it on Windows, Mac, Linux, Unix, Mac OS X, iOS, Android, and others.
Moreover, the media player can play everything. For instance, files, DVDs, Audio CDs, multiple streaming protocols, and other things. Interestingly, on most platforms, VLC has hardware decoding. It supports almost every input and output format. With VLC, you can easily extract sound from video. The software is simple but very fast and powerful.
2. Audacity
The next sound extractor for Windows and Mac that we are about to discuss is Audacity. This is again an open-source, free audio software. It has easy to use interface with a multi-track recorder as well as an editor. Are you a Linux user? Don’t worry; the audio software works like magic on Linux, macOS, Windows, and other operating systems. With Audacity, importing, editing, and combining sound files is very easy.
The software helps you to record live audio or playback from your computers. Do you know how many file formats Audacity supports? Well, the audio format ranges from MP3, AIFF, WAV, FLAC, AU, and others. Along with extracting sound from video, there is another amazing thing that you all should know. With Audacity, recorded files can also be converted into Digital Recordings or CDs.
3. Audio Extractor
The last online sound extractor that we are about to share is Audio Extractor. The tool is very easy to use and understand. Audio Extractor has a self-explanatory interface. The tools’ interface guides the users about the next step.
With three easy steps, you can extract sound from video. Start by accessing the online extractor. Then you need to upload the video from your respective device. This could be done by hitting the ‘Open video’ button. Audio Extractor supports various audio formats. For instance, MP3, MP2, WAV, FLAC, etc. You should select your desired audio format. Lastly, click on the ‘Extract audio’ button, and it’s done.
Last Words
Extracting sound from video and using it elsewhere is a smart thing to do. You can also be among those smart people if you learn from this article. We have talked about multiple unique sound extractors. The article also sheds light on the number 1 sound extractor, Wondershare Filmora.
Wondershare Filmora
Get started easily with Filmora’s powerful performance, intuitive interface, and countless effects!
Try It Free Try It Free Try It Free Learn More >
Mastering Music Creation at Home: Ranking the Top 10 Digital Audio Environments
FREE 10 Best Online Music Makers

Benjamin Arango
Apr 26, 2024• Proven solutions


Expressing ideas through music was never easy, and even today in the age of powerful digital audio stations like Ableton Live or FruityLoops , producing original music requires a certain set of skills. However, online content producers often need music for their videos, but they neither have the time or the budget to hire a professional musician to create a soundtrack for their project in studio conditions. If you are looking for a quick way to make your own music online, then you should keep reading, because in this article we are going to take you through the ten best online music makers you should check out in 2021.
10 Best Online Music Makers in 2021
The music-making platforms that are currently available online are still not as nearly as powerful as professional software products for music producers. Nonetheless, this doesn’t mean that you can’t use them to create the music you like or just have fun with them. Here are the ten best online music makers in 2019.
1. Typeatone
Price: Free
Image from Internet
Have you ever wondered what your words would sound like if they were turned into music? Head over to the Typeatone platform if you want to find out since all you have to do in order to start creating your own music is type in the text. As you type, the platform will automatically start playing your words and once you’re done, you’ll be able to hear your new song. You can also choose between different instruments to make the process of creating music with Typeatone even more entertaining. You can share all of your creations with your friends on social media.
![]()
A cross-platform for making videos anywhere for all creators

Why your video editing isn’t good enough? How about some creative inspo?
- 100 Million+ Users
- 150+ Countries and Regions
- 4 Million+ Social Media Followers
- 5 Million+ Stock Media for Use
* Secure Download

2. Audiotool
Price: Free
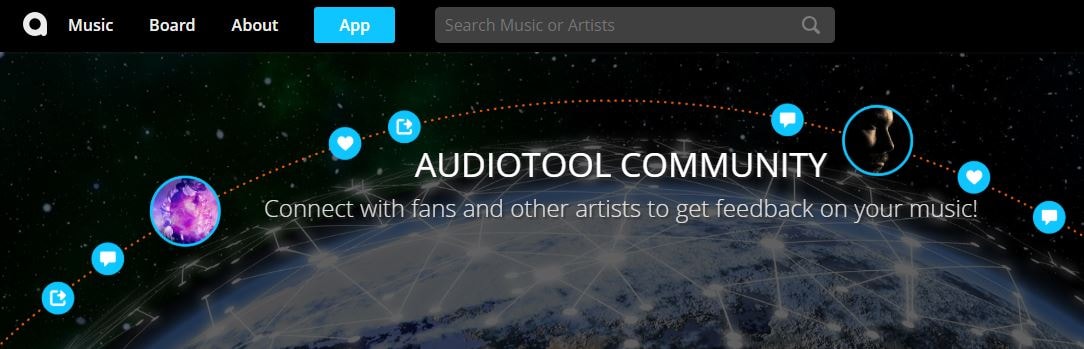
Image from Internet
Electronic music producers who often use synthesizers like Roland TB-303 or Roland TR-909 are going to love the features this online collaborative platform offers. Audiotool hosts a huge music library, you can explore even if you are not a registered user. In order to access the platform’s music studio, you first have to create an account and make sure that you are signed in. Audiotool is also a community of like-minded people where you can meet artists whose work you appreciate or hear what others think about your work. The only downside is that Audiotool’s abundance of features can be overwhelming for the newcomers to the world of electronic music production.
3. AudioSauna
Price: Free
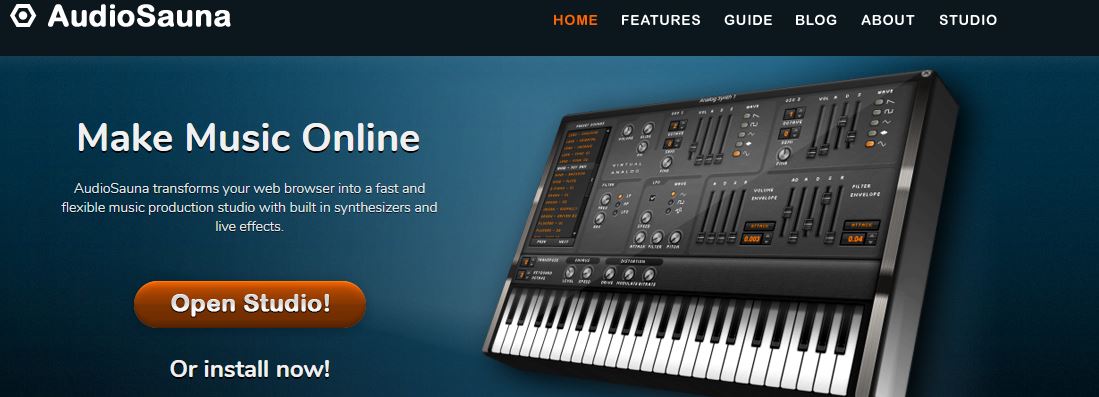
Image from Internet
AudioSauna seems to offer everything its users need to create inspiring music because it is equipped with frequency modulation synth, virtual analog synth and a sampler that provides layering features. Moreover, its intuitive interface makes the process of arranging the song structure or changing several note values simultaneously much easier. Creating an account on AudioSauna will enable to record all your projects and export them as audio files that can be uploaded to SoundCloud or any other audio distribution platform. AudioSauna is a perfect tool for skilled producers who want to create their music online.
4. Soundtrap
Price: Free trial available, subscription plans start at $3.99 per month

Image from Internet
Soundtrap offers a long list of features that enable professional musicians to create their music online. All you have to do is create an account and you will get access to the Sountrap’s studio that let you create new beat patterns, use a synthesizer or even invite friends to make music together. The platform also offers the possibility to connect your own instruments to the Soundtrap’s studio, so that you can record your music as you play it. This online platform also has an Education section where you can share your knowledge with others or learn valuable music lessons.
5. PatternSketch
Price: Free
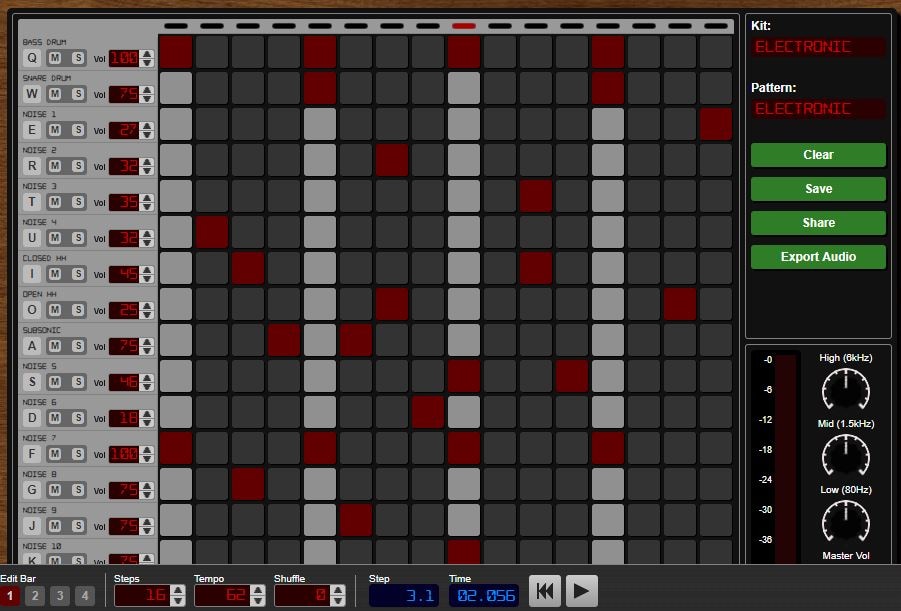
Image from Internet
This basic and yet effective drum machine can help you generate amazing beats for the songs you’re working on. Once you sign up, you will be able to choose from a number of different kits and patterns that are fully customizable or create your own original beats. After you create a pattern you like, you can save it with a single click or send it to your friends via email. Optionally, you can export all of your creations from PatternSketch and save them as wav, mp3 or ogg files, although in some cases mp3 audio files may not loop properly.
6. Soundation
Price: Free version available, pricing plans start at $1.99 per month

Image from Internet
If you choose to create music with the free version of Soundation, you’ll be able to work on up to ten projects, try out over 700 audio effects and loops, and export all your music in low quality. Purchasing the Intro pricing plan will enable you to work on an unlimited number of projects, make live audio recordings, import audio files smaller than 100MB or use an external midi controller. Moreover, opting for any of the annual or monthly subscription plans will allow you to export entire projects and audio files in high resolution from Soundation.
7. Text to Speech
Price: Free

online-music-maker-Text to Speech.jpg
Vocals are often overlooked in contemporary electronic music, but there are so many ways they can be used creatively. The platform lets you turn up to 50000 characters into speech at once, and it also offers several different voices you can choose from. Before you create an audio file you can determine how fast the text is going to be vocalized, so you should try different options and see which one fits your project the best. Text to Speech platform can be used during the process of creating a new song, but the tools it offers are not enough to make an entire song.
8. Looplabs
Price: Free
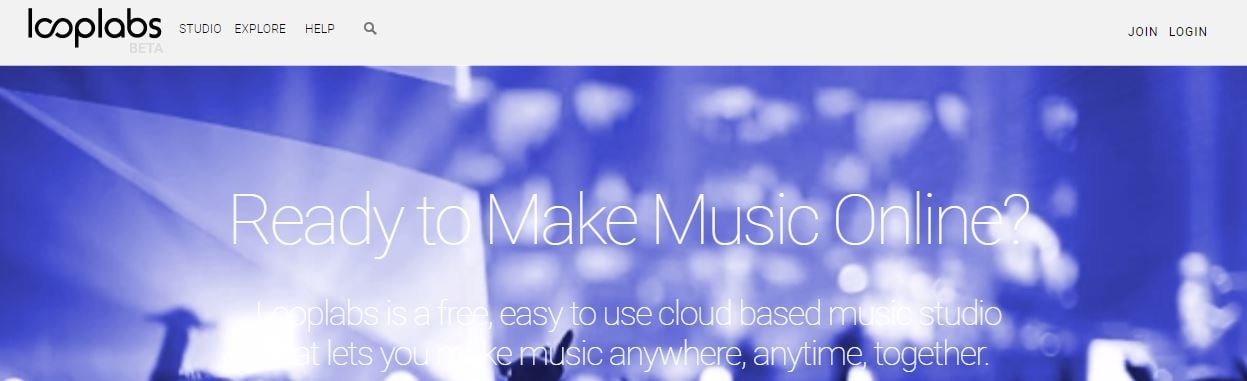
Music enthusiasts who would like to produce different genres of music online should definitely get familiar with Looplabs, as this online music maker lets its users remix songs or make music from scratch. Besides being one of the best places on the Internet to record music, Looplabs is also a community where you can meet people who like your music or discover artists whose work you admire. The Looplab’s studio features samples for a broad range of music genres and musical instruments, and you can use it to make Electro or Funk music equally effectively.
9. Online Sequencer
Price: Free
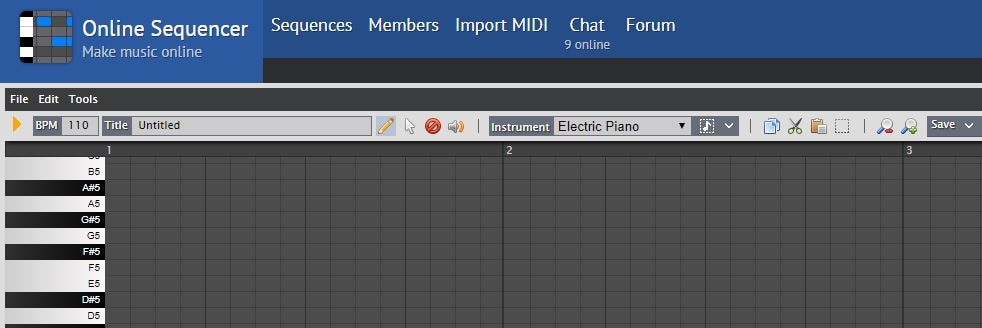
This is a perfect tool for developing an idea for a song, as you can create a sequence in just a few minutes. You can choose from Piano, Drums and Guitar categories of instruments or browse through a huge collection of fully customizable preset sequences that is updated on a daily basis. The platform also lets you import MIDI files and work on projects you’ve already started developing or you can export your sequences as MIDI files from the Online Sequencer and edit them with your DAW. Even though Online Sequencer is a useful tool for making music, the features it offers can’t really be compared with those on Soundation or AudioSauna.
10. Autochords
Price: Free
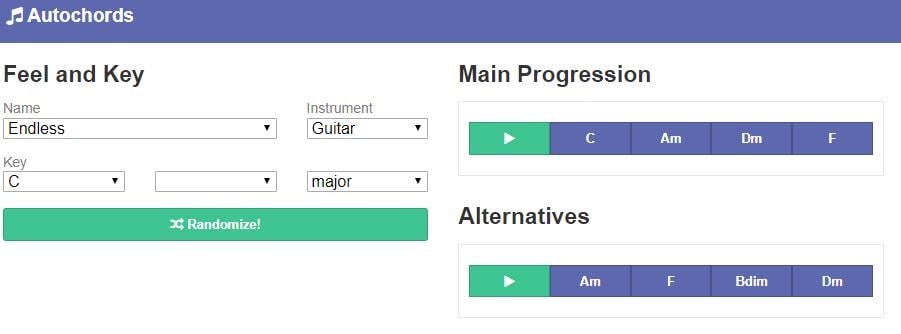
Finding new ideas for songs is often more difficult than it sounds, and if you ever face a creative block you should simply head over to Autochords. This platform suggests chord progressions based on the parameters you set, so you just have to select an instrument and the name of the song to set the feel, and the platform will show you the main progression and its alternatives. Rather than being an online music maker, Autochords is more a tool that helps piano and guitar players understand chord progressions better. iPhone and iPad users can download the Autochords app from the App Store for free.
Read More to Get : Best Free DAW for Windows and Mac for Beginners >>
Conclusion
You don’t have to be a professional musician in order to start making music online, you just have to love music, and an online music maker of your choice will take care of the rest. Do you use online music makers for entertainment or to express your creativity? Leave a comment below and share your opinions with us.
Benjamin Arango
Benjamin Arango is a writer and a lover of all things video.
Follow @Benjamin Arango
Benjamin Arango
Apr 26, 2024• Proven solutions
Expressing ideas through music was never easy, and even today in the age of powerful digital audio stations like Ableton Live or FruityLoops , producing original music requires a certain set of skills. However, online content producers often need music for their videos, but they neither have the time or the budget to hire a professional musician to create a soundtrack for their project in studio conditions. If you are looking for a quick way to make your own music online, then you should keep reading, because in this article we are going to take you through the ten best online music makers you should check out in 2021.
10 Best Online Music Makers in 2021
The music-making platforms that are currently available online are still not as nearly as powerful as professional software products for music producers. Nonetheless, this doesn’t mean that you can’t use them to create the music you like or just have fun with them. Here are the ten best online music makers in 2019.
1. Typeatone
Price: Free
Image from Internet
Have you ever wondered what your words would sound like if they were turned into music? Head over to the Typeatone platform if you want to find out since all you have to do in order to start creating your own music is type in the text. As you type, the platform will automatically start playing your words and once you’re done, you’ll be able to hear your new song. You can also choose between different instruments to make the process of creating music with Typeatone even more entertaining. You can share all of your creations with your friends on social media.
![]()
A cross-platform for making videos anywhere for all creators
Why your video editing isn’t good enough? How about some creative inspo?
- 100 Million+ Users
- 150+ Countries and Regions
- 4 Million+ Social Media Followers
- 5 Million+ Stock Media for Use
* Secure Download
2. Audiotool
Price: Free
Image from Internet
Electronic music producers who often use synthesizers like Roland TB-303 or Roland TR-909 are going to love the features this online collaborative platform offers. Audiotool hosts a huge music library, you can explore even if you are not a registered user. In order to access the platform’s music studio, you first have to create an account and make sure that you are signed in. Audiotool is also a community of like-minded people where you can meet artists whose work you appreciate or hear what others think about your work. The only downside is that Audiotool’s abundance of features can be overwhelming for the newcomers to the world of electronic music production.
3. AudioSauna
Price: Free
Image from Internet
AudioSauna seems to offer everything its users need to create inspiring music because it is equipped with frequency modulation synth, virtual analog synth and a sampler that provides layering features. Moreover, its intuitive interface makes the process of arranging the song structure or changing several note values simultaneously much easier. Creating an account on AudioSauna will enable to record all your projects and export them as audio files that can be uploaded to SoundCloud or any other audio distribution platform. AudioSauna is a perfect tool for skilled producers who want to create their music online.
4. Soundtrap
Price: Free trial available, subscription plans start at $3.99 per month
Image from Internet
Soundtrap offers a long list of features that enable professional musicians to create their music online. All you have to do is create an account and you will get access to the Sountrap’s studio that let you create new beat patterns, use a synthesizer or even invite friends to make music together. The platform also offers the possibility to connect your own instruments to the Soundtrap’s studio, so that you can record your music as you play it. This online platform also has an Education section where you can share your knowledge with others or learn valuable music lessons.
5. PatternSketch
Price: Free
Image from Internet
This basic and yet effective drum machine can help you generate amazing beats for the songs you’re working on. Once you sign up, you will be able to choose from a number of different kits and patterns that are fully customizable or create your own original beats. After you create a pattern you like, you can save it with a single click or send it to your friends via email. Optionally, you can export all of your creations from PatternSketch and save them as wav, mp3 or ogg files, although in some cases mp3 audio files may not loop properly.
6. Soundation
Price: Free version available, pricing plans start at $1.99 per month
Image from Internet
If you choose to create music with the free version of Soundation, you’ll be able to work on up to ten projects, try out over 700 audio effects and loops, and export all your music in low quality. Purchasing the Intro pricing plan will enable you to work on an unlimited number of projects, make live audio recordings, import audio files smaller than 100MB or use an external midi controller. Moreover, opting for any of the annual or monthly subscription plans will allow you to export entire projects and audio files in high resolution from Soundation.
7. Text to Speech
Price: Free

online-music-maker-Text to Speech.jpg
Vocals are often overlooked in contemporary electronic music, but there are so many ways they can be used creatively. The platform lets you turn up to 50000 characters into speech at once, and it also offers several different voices you can choose from. Before you create an audio file you can determine how fast the text is going to be vocalized, so you should try different options and see which one fits your project the best. Text to Speech platform can be used during the process of creating a new song, but the tools it offers are not enough to make an entire song.
8. Looplabs
Price: Free
Music enthusiasts who would like to produce different genres of music online should definitely get familiar with Looplabs, as this online music maker lets its users remix songs or make music from scratch. Besides being one of the best places on the Internet to record music, Looplabs is also a community where you can meet people who like your music or discover artists whose work you admire. The Looplab’s studio features samples for a broad range of music genres and musical instruments, and you can use it to make Electro or Funk music equally effectively.
9. Online Sequencer
Price: Free
This is a perfect tool for developing an idea for a song, as you can create a sequence in just a few minutes. You can choose from Piano, Drums and Guitar categories of instruments or browse through a huge collection of fully customizable preset sequences that is updated on a daily basis. The platform also lets you import MIDI files and work on projects you’ve already started developing or you can export your sequences as MIDI files from the Online Sequencer and edit them with your DAW. Even though Online Sequencer is a useful tool for making music, the features it offers can’t really be compared with those on Soundation or AudioSauna.
10. Autochords
Price: Free
Finding new ideas for songs is often more difficult than it sounds, and if you ever face a creative block you should simply head over to Autochords. This platform suggests chord progressions based on the parameters you set, so you just have to select an instrument and the name of the song to set the feel, and the platform will show you the main progression and its alternatives. Rather than being an online music maker, Autochords is more a tool that helps piano and guitar players understand chord progressions better. iPhone and iPad users can download the Autochords app from the App Store for free.
Read More to Get : Best Free DAW for Windows and Mac for Beginners >>
Conclusion
You don’t have to be a professional musician in order to start making music online, you just have to love music, and an online music maker of your choice will take care of the rest. Do you use online music makers for entertainment or to express your creativity? Leave a comment below and share your opinions with us.
Benjamin Arango
Benjamin Arango is a writer and a lover of all things video.
Follow @Benjamin Arango
Also read:
- In 2024, Essential Economical Mac Audiophiles Multitrack Mixer App
- New 2024 Approved Essential Unlicensed Melodies for Picture Sequences
- Updated In 2024, Premier Digital Aids to Refine and Clean Up Sounds
- Updated Apowersoft Audio Recorder Tutorial and 4 Alternatives for 2024
- New Finding Your Groove An Introductory Guide to Choosing the Perfect Rap Soundscape
- New 10 Must-Have Sound Recording Devices for Broadcast Enthusiasts
- Unlocking Your Library The Ultimate Techniques for Extracting Spotify Tracks
- VoiceCraft 2024 - Advanced Audiophile Tools for Professional Singer Edits
- Updated In 2024, Trimming Sound Out of MP4 Videos for Editing Purposes
- Silencing Soundscape Guiding You to Audio Deletion in MOV Files for Both Operating Systems
- New Comparing Real-Time Audio Changes Our Reliable Review of the Top Tools for 2024
- New Best Song Finder Apps to Recognize Music on Android
- Updated The Art of Gamers Vocal Disguise Selecting the Ultimate Toolkit for 2024
- New Cutting-Edge Tools for Podcasters A Guide to the Best Free & Paid Audio Editing Software on the Market for 2024
- The 5 Highest-Rated Audio Mixers Suited to Mac Systems
- New Navigating Vocaroos Sound Recording Procedures Insights and Options
- In 2024, Unraveling Rap Music Its Origins, Evolution, and Global Influence
- In 2024, Mastering Audio Integration Combining Sounds for Your Videography Project
- New In 2024, How to Remove Sound From iPhone Video? Easy Guide
- New 2024 Approved From Novice to Pro Comprehensive Guidelines on iPhone Audio Recording
- Updated 2024 Approved 10 Best Sites to Download Free HD Video Backgrounds
- New The Art of Soundscape Separation Isolating Audio From Visual Media
- New The Essential Manual Tackling Unwanted Audio Elements with Precision in Audacity
- Updated In 2024, Free & Value-Oriented Mac Audio Editing Suite
- In 2024, Audiophiles Guide Selecting the Best Soundtracks that Complement Visual Storytelling
- In 2024, How to Capture Streaming Audio
- 11 Proven Solutions to Fix Google Play Store Not Working Issue on OnePlus Nord CE 3 5G | Dr.fone
- In 2024, How to Unlock Infinix Hot 30 5G Phone without Google Account?
- In 2024, Top 5 Samsung Galaxy S23 Ultra Bypass FRP Tools for PC That Actually Work
- Full Guide to Fix iToolab AnyGO Not Working On Realme 12 5G | Dr.fone
- Solutions to Spy on OnePlus Ace 2 with and without jailbreak | Dr.fone
- In 2024, How To Unlock Stolen iPhone 6 In Different Conditionsin | Dr.fone
- New In 2024, Beyond Pinnacle Studio Top Video Editing Software for Mac
- In 2024, How to Use Google Assistant on Your Lock Screen Of Samsung Galaxy M34 5G Phone
- In 2024, How to Change Netflix Location to Get More Country Version On Asus ROG Phone 8 Pro | Dr.fone
- Does find my friends work on Poco M6 5G | Dr.fone
- Honor Magic Vs 2 Messages Recovery - Recover Deleted Messages from Honor Magic Vs 2
- In 2024, Getting the Pokemon Go GPS Signal Not Found 11 Error in Vivo Y100 | Dr.fone
- Unlock android phone if you forget the Spark 20C password or pattern lock
- 2024 Approved Best CapCut Templates for Slow Motion Video Trend
- Online signatures for Word 2016
- How to Detect and Remove Spyware on Vivo Y55s 5G (2023)? | Dr.fone
- In 2024, Ultimate Guide on Google FRP Bypass
- Updated MKV Video Cutter The Best Free Options for This Year for 2024
- How to Use Google Assistant on Your Lock Screen Of Infinix Hot 30i Phone
- Title: Updated In 2024, Tips to Add Audio to Video in Premiere Pro
- Author: Ella
- Created at : 2024-05-05 02:41:20
- Updated at : 2024-05-06 02:41:20
- Link: https://sound-optimizing.techidaily.com/updated-in-2024-tips-to-add-audio-to-video-in-premiere-pro/
- License: This work is licensed under CC BY-NC-SA 4.0.
