

Updated Quick and Easy Vocal Removal in Audacity A Guide
Quick and Easy Vocal Removal in Audacity: A Guide
Removing vocals from audio tracks or songs can be tricky. You may want to create a video and need an instrumental track to add to the background. Maybe you are a content creator looking to remove vocals from a song and extract the instrumental parts for background music in various projects. The Audacity vocal remover makes it easy to achieve this. The vocal remover in Audacity is a great tool that brings satisfactory results without losing the quality of the original track. In this article, we explain two methods of vocal reduction and isolation Audacity and the steps you can follow to do the same in Filmora.
AI Vocal Remover A cross-platform for facilitating your video editing process by offering valuable benefits Free Download Learn More

Method 1: Remove Vocals Using Audacity Vocal Reduction Tool
The first method of removing vocals in Audacity is using the built-in vocal remover. This method is effective in completely removing vocals depending on how much processing is on the vocal. Even if the vocals are not completely removed, the method will reduce the volume significantly to give you great results. Let’s have a look at how to isolate vocal audacity with this method.
Step 1: Open Audacity
The first thing you need to do is open the Audacity software in preparation for the vocal removal.

Step 2: Import the Audio Track
Go to File > Import > Audio to import the audio track you want to edit.

Step 3: Select Audio Track
Select the song or audio track from which you want to remove the vocals. This allows Audacity to load the waveform of the track into the editor.

Step 4: Export as MP3
Backup the file so that you still have the whole song available for use later. Go to File > Export > Export as MP3. Audacity will export the track in the original file format. If it was a WAV audio file, the export will be to that type. This ensures that the audio artifacts are kept in the best condition for editing. Be sure to name the exported file in something you will easily remember.

Step 5: Import the New Audio File
Once you have exported the audio file, click “Close “on the original file. Then import the file you exported in the last step.

Step 6: Apply Vocal Reduction and Isolation
Click on Select, then Select All. On the Effect drop-down menu, select Audacity Vocal Reduction and Isolation.

Step 7: Remove Vocals
Click on the Action tab and select Remove Vocals. Wait for Audacity to remove the vocal and click Play to listen to the edited track. Audacity isolate vocals giving you clear instruments for your audio track or song file.

This method is a quick and easy way to remove vocals from any song in Audacity. It works best with any kind of song and will produce the edited track in just a matter of minutes. On the drawback, this method does not always wholly remove vocal and you may at times still hear bits of it. It may also remove other elements of the audio in addition to the vocal. Nonetheless, it is an effective approach that will work most of the time.
Method 2: Remove Vocals Using Audacity Splitting Audio Channels
When working with songs or audio tracks with vocals in one channel and instruments in another, this is the best method to use. The Audacity vocal remover plugin gives you a simple way to separate the vocals and other sounds in an audio file. However, you cannot tell song that has multiple channels simply by looking at or listening to it. Therefore, you can try this method with any of your files and see the quality of the outcome. Here are the steps for this audacity separate vocals method:
Step 1: Import Your File
Start by importing your audio track or song file into Audacity.

Step 2: Split Stereo to Mono
In the title of the audio, click the Down Arrow. Then select Split Stereo to Mono.

Step 3: Play Solo
Click on the Play button and choose Solo on each track. This allows you to see if there is any isolated vocal on either channel.

Step 4: Delete Isolated Vocal
From the results, delete the section that contains the isolated vocal from the Audacity session.

This alternative method is also effective in extract vocals Audacity. The main benefit is it has fewer steps than the first method. It will also completely remove vocals that are on their own channel. However, the method is limited in that it does not work for the vast majority of audio. It will only work for audio tracks with vols on one channel and instruments on another.
Alternative Way to Remove Vocals from Audio with Filmora
Another great option for removing vocals from a song is using Wondershare Filmora. The video editing software comes with some interesting features, including vocal removal. The recently released Filmora Version 13 is more versatile and user-friendly for better edits. With the integration of AI, users can automate vocal removal which would normally require a lot of time and incredible skill to execute. The AI in the software does this in a few minutes. Filmora also has some amazing features that automate video editing, allowing you to do more with less effort.
Free Download For Win 7 or later(64-bit)
Free Download For macOS 10.14 or later
Quick Tutorial on Removing Vocals with Filmora
The AI Vocal Remover feature on Filmora separates vocals and music from any song or audio track. You can use this feature to extract any acapella from music tracks or dub videos freely by removing the vocals completely. The feature allows you to keep high-quality audio while removing the vocals. It uses advanced algorithms to isolate vocals while maintaining exceptional audio quality. This ensures that vocals are effectively separated from the background music, by audio fidelity is not lost. To remove vocals from your video or audio files, follow these simple steps:
Method 1: Filmora Top Toolbar
Step 1 – Launch Filmors and Create a New Projects
Click on the Filmora icon on your desktop to launch the software. Log in to sign up using the Profile icon at the top. Navigate to the control panel on the left side, and then choose the Create Project Option, and click New Project.

Step 2: Import Source Files and Add to Timeline
On the Main Filmora Interface, select Media from the custom toolbar. Then click Files and import the files you want to use to Filmora. Select the imported files, and drag and drop them into the timeline panel.

Step 3 – Enable AI Vocal Removal
Select the audio track or music clip you want to use in the timeline. Navigate toward the Tools tab at the top toolbar. Choose the Audio option from the drop-down menu and click on the AI Vocal Remover.

Method 2: Running AI Vocal Remover from the Timeline
Once you upload media Filmora, select the media that you want to remove vocal from. Then drag and drop it to the timeline panel. Right-click on the video and choose the AI Vocal Remover from the options panel. This will automatically remove vocals from the video.

Compared to Audacity, Filmora’s AI Vocal Remover tool is quick and easy to use. It will facilitate your video editing process by allowing you to remove vocals and use instrumentals on the go. For instance, this feature allows you to easily dub any video without having to cover up the current vocals. This means that your videos will be more entertaining and engaging while keeping great soundtracks. Match the energy in your videos with the quality of the instrumentals with just a few clicks.
Conclusion
Removing vocals from a video song or audio file gives you more freedom in your projects. You can use the audio as an instrumental or in other creative ways. Audacity is among the most popular vocal removers on the internet. It offers several ways to remove vocals clearly from your audio tracks or music files. Vocal isolation audacity is easy and takes only a few steps. However, we recommend the AI vocal remover feature by Filmora because it is more versatile and accurate. The automated feature takes care of everything for you when removing the vocals from your audio files. You also get to utilize other useful video editing features that automate mundane tasks.
Free Download Free Download Learn More
Method 1: Remove Vocals Using Audacity Vocal Reduction Tool
The first method of removing vocals in Audacity is using the built-in vocal remover. This method is effective in completely removing vocals depending on how much processing is on the vocal. Even if the vocals are not completely removed, the method will reduce the volume significantly to give you great results. Let’s have a look at how to isolate vocal audacity with this method.
Step 1: Open Audacity
The first thing you need to do is open the Audacity software in preparation for the vocal removal.
Step 2: Import the Audio Track
Go to File > Import > Audio to import the audio track you want to edit.
Step 3: Select Audio Track
Select the song or audio track from which you want to remove the vocals. This allows Audacity to load the waveform of the track into the editor.
Step 4: Export as MP3
Backup the file so that you still have the whole song available for use later. Go to File > Export > Export as MP3. Audacity will export the track in the original file format. If it was a WAV audio file, the export will be to that type. This ensures that the audio artifacts are kept in the best condition for editing. Be sure to name the exported file in something you will easily remember.
Step 5: Import the New Audio File
Once you have exported the audio file, click “Close “on the original file. Then import the file you exported in the last step.
Step 6: Apply Vocal Reduction and Isolation
Click on Select, then Select All. On the Effect drop-down menu, select Audacity Vocal Reduction and Isolation.
Step 7: Remove Vocals
Click on the Action tab and select Remove Vocals. Wait for Audacity to remove the vocal and click Play to listen to the edited track. Audacity isolate vocals giving you clear instruments for your audio track or song file.
This method is a quick and easy way to remove vocals from any song in Audacity. It works best with any kind of song and will produce the edited track in just a matter of minutes. On the drawback, this method does not always wholly remove vocal and you may at times still hear bits of it. It may also remove other elements of the audio in addition to the vocal. Nonetheless, it is an effective approach that will work most of the time.
Method 2: Remove Vocals Using Audacity Splitting Audio Channels
When working with songs or audio tracks with vocals in one channel and instruments in another, this is the best method to use. The Audacity vocal remover plugin gives you a simple way to separate the vocals and other sounds in an audio file. However, you cannot tell song that has multiple channels simply by looking at or listening to it. Therefore, you can try this method with any of your files and see the quality of the outcome. Here are the steps for this audacity separate vocals method:
Step 1: Import Your File
Start by importing your audio track or song file into Audacity.
Step 2: Split Stereo to Mono
In the title of the audio, click the Down Arrow. Then select Split Stereo to Mono.
Step 3: Play Solo
Click on the Play button and choose Solo on each track. This allows you to see if there is any isolated vocal on either channel.
Step 4: Delete Isolated Vocal
From the results, delete the section that contains the isolated vocal from the Audacity session.
This alternative method is also effective in extract vocals Audacity. The main benefit is it has fewer steps than the first method. It will also completely remove vocals that are on their own channel. However, the method is limited in that it does not work for the vast majority of audio. It will only work for audio tracks with vols on one channel and instruments on another.
Alternative Way to Remove Vocals from Audio with Filmora
Another great option for removing vocals from a song is using Wondershare Filmora. The video editing software comes with some interesting features, including vocal removal. The recently released Filmora Version 13 is more versatile and user-friendly for better edits. With the integration of AI, users can automate vocal removal which would normally require a lot of time and incredible skill to execute. The AI in the software does this in a few minutes. Filmora also has some amazing features that automate video editing, allowing you to do more with less effort.
Free Download For Win 7 or later(64-bit)
Free Download For macOS 10.14 or later
Quick Tutorial on Removing Vocals with Filmora
The AI Vocal Remover feature on Filmora separates vocals and music from any song or audio track. You can use this feature to extract any acapella from music tracks or dub videos freely by removing the vocals completely. The feature allows you to keep high-quality audio while removing the vocals. It uses advanced algorithms to isolate vocals while maintaining exceptional audio quality. This ensures that vocals are effectively separated from the background music, by audio fidelity is not lost. To remove vocals from your video or audio files, follow these simple steps:
Method 1: Filmora Top Toolbar
Step 1 – Launch Filmors and Create a New Projects
Click on the Filmora icon on your desktop to launch the software. Log in to sign up using the Profile icon at the top. Navigate to the control panel on the left side, and then choose the Create Project Option, and click New Project.
Step 2: Import Source Files and Add to Timeline
On the Main Filmora Interface, select Media from the custom toolbar. Then click Files and import the files you want to use to Filmora. Select the imported files, and drag and drop them into the timeline panel.
Step 3 – Enable AI Vocal Removal
Select the audio track or music clip you want to use in the timeline. Navigate toward the Tools tab at the top toolbar. Choose the Audio option from the drop-down menu and click on the AI Vocal Remover.
Method 2: Running AI Vocal Remover from the Timeline
Once you upload media Filmora, select the media that you want to remove vocal from. Then drag and drop it to the timeline panel. Right-click on the video and choose the AI Vocal Remover from the options panel. This will automatically remove vocals from the video.
Compared to Audacity, Filmora’s AI Vocal Remover tool is quick and easy to use. It will facilitate your video editing process by allowing you to remove vocals and use instrumentals on the go. For instance, this feature allows you to easily dub any video without having to cover up the current vocals. This means that your videos will be more entertaining and engaging while keeping great soundtracks. Match the energy in your videos with the quality of the instrumentals with just a few clicks.
Conclusion
Removing vocals from a video song or audio file gives you more freedom in your projects. You can use the audio as an instrumental or in other creative ways. Audacity is among the most popular vocal removers on the internet. It offers several ways to remove vocals clearly from your audio tracks or music files. Vocal isolation audacity is easy and takes only a few steps. However, we recommend the AI vocal remover feature by Filmora because it is more versatile and accurate. The automated feature takes care of everything for you when removing the vocals from your audio files. You also get to utilize other useful video editing features that automate mundane tasks.
The Updated Guide to Voiceovers in Filmmaking - From Recording to Editing
How to Record & Add Voiceover to Videos

Liza Brown
Mar 27, 2024• Proven solutions
Have you ever wanna add your own voice to video , make a voice over demo for uploading and sharing on social network sites or create a documentary for some important stuff? You can do this as long as you have nice video editing software like Wondershare Filmora Video Editor .
The voiceover function in Filmora video editing software allows you to record your own voice or add voice over file to video easily. You can custom the pitch, speed, and volume of the recorded voiceover, apply fade in and fade out effects as well. In this post, I’ll share how to record and add voiceover to a video with Filmora on your computer.


In Filmora, you can edit your video first and then record the voiceover after. Or, you can record the voiceover first and then edit the video around. In either way, you may need to prepare the script or an outline for smother recording.
Check the tutorial about How to Edit Audio in Filmora
Part 1: Record Voiceover and Add it to Video
In most cases, we recommend you to record the voiceover first so the sound will be more natural. In the following part, I’ll show you how to record Voiceover in Filmora.
1. Connect Microphone to Computer
Plug the microphone into your computer when you’re ready to get started. It’s better to use some professional external microphones to capture high quality sound.
2. Record voiceover
Installing Filmora on your computer, click the Wondershare Filmora icon to launch it. In the starting interface, click New Project to create a new one. Go to the Record tab, and then click “Record a Voiceover ” option to arouse the Record Audio windows.
Installing Filmora on your computer, click the Wondershare Filmora icon to launch it. In the starting interface, click New Project to create a new one. Go to the Record tab, and then click “Record a Voiceover ” option to arouse the Record Audio windows.

Or simply click the microphone icon and you will have 3 seconds of countdown to start speaking. When finished, click the microphone icon again. Then you will see a new Record file appearing on the audio track automatically.
3. Edit Recorded Voiceover to Video
To edit the recorded voiceover, click the it in the audio track and a new window will pop up for you to adjust audio settings, such as change the Speed, Volume, Pitch, etc. of the voiceover.

You can trim, cut out unwanted sound section from the recorded voiceover, or apply the fade in and fade out effect to the voiceover for smother transition.
Creative Audio Editing: How to Change the Recorded Voice
4. Sync Voiceover to Video
Now, it’s time to sync the recorded voiceover to video to make a video. Since Filmora supports up to 100 audio tracks, you can now add some background music to the voiceover as well.
Then import and drag-n-drop the video footage to the video track, drag and drop the sound track to the right position to fit your video. You can keep the audio and video track in the same length if needed.

Note: If you’ve recorded the voiceover on your iPhone or other device already, and want to add it to the video, you can import it in the Project Library and then sync it to video.
To attract viewer’s attention, sometimes, you may need to add some titles or subtitles to emphasis the key points. Here is the detailed steps about how to add titles to video.

5. Export and save the new file
Check your video in the right previewing window. If you’re satisfied, click “Export” to export your new video file. You can either save the video to various formats or directly share it on YouTube and other social media platform. Moreover, you can even burn a DVD disk in minutes to watch it on TV.

You see, with Wondershare Filmora video editor, it’s that easy to add a custom voiceover to video. Now master this feature and open a world of new possibilities for your video making!
Part 2: How to Record and Add Voiceover File during Video editing in Filmora
If you’ve recorded the voiceover on your iPhone or other device already, and want to add it to the video, you can follow the steps below:
1. Import the video to Filmora
After entering the Filmora main editing interface, click “Import” or drag and drop your video and voiceover file to the project library.

Filmora video editing software supports a vast range of formats, so you do not have to convert the files before importing. When all the files are imported, drag and drop them to the Video Timeline.
2. Record Voiceover in Video Editing
If you’re editng video and want to record voiceover in real time, you can also click the Record icon to start the recording.
Place the Playhead to the position where you need a voiceover, and then click the Microphone icon in the toolbar to start.
As before, the recorded voiceover will be added to the audio track automatically.
Note: To start a new record on the Timeline, you don’t need to close the dialog, just move the Time Indicator to another position and record a new voiceover.
3. Edit voiceover and Export
Just like what we said before, you can then edit the recorded voiceover to fit the video perfectly and then export it to your computer or upload to YouTube directly.
Filmora features more audio editing tools for improving the sound. Below is a video tutorial for applying fade in and out transition in Filmora. Download the trial version to test yourself.
Liza Brown
Liza Brown is a writer and a lover of all things video.
Follow @Liza Brown
Liza Brown
Mar 27, 2024• Proven solutions
Have you ever wanna add your own voice to video , make a voice over demo for uploading and sharing on social network sites or create a documentary for some important stuff? You can do this as long as you have nice video editing software like Wondershare Filmora Video Editor .
The voiceover function in Filmora video editing software allows you to record your own voice or add voice over file to video easily. You can custom the pitch, speed, and volume of the recorded voiceover, apply fade in and fade out effects as well. In this post, I’ll share how to record and add voiceover to a video with Filmora on your computer.
In Filmora, you can edit your video first and then record the voiceover after. Or, you can record the voiceover first and then edit the video around. In either way, you may need to prepare the script or an outline for smother recording.
Check the tutorial about How to Edit Audio in Filmora
Part 1: Record Voiceover and Add it to Video
In most cases, we recommend you to record the voiceover first so the sound will be more natural. In the following part, I’ll show you how to record Voiceover in Filmora.
1. Connect Microphone to Computer
Plug the microphone into your computer when you’re ready to get started. It’s better to use some professional external microphones to capture high quality sound.
2. Record voiceover
Installing Filmora on your computer, click the Wondershare Filmora icon to launch it. In the starting interface, click New Project to create a new one. Go to the Record tab, and then click “Record a Voiceover ” option to arouse the Record Audio windows.
Installing Filmora on your computer, click the Wondershare Filmora icon to launch it. In the starting interface, click New Project to create a new one. Go to the Record tab, and then click “Record a Voiceover ” option to arouse the Record Audio windows.
Or simply click the microphone icon and you will have 3 seconds of countdown to start speaking. When finished, click the microphone icon again. Then you will see a new Record file appearing on the audio track automatically.
3. Edit Recorded Voiceover to Video
To edit the recorded voiceover, click the it in the audio track and a new window will pop up for you to adjust audio settings, such as change the Speed, Volume, Pitch, etc. of the voiceover.
You can trim, cut out unwanted sound section from the recorded voiceover, or apply the fade in and fade out effect to the voiceover for smother transition.
Creative Audio Editing: How to Change the Recorded Voice
4. Sync Voiceover to Video
Now, it’s time to sync the recorded voiceover to video to make a video. Since Filmora supports up to 100 audio tracks, you can now add some background music to the voiceover as well.
Then import and drag-n-drop the video footage to the video track, drag and drop the sound track to the right position to fit your video. You can keep the audio and video track in the same length if needed.
Note: If you’ve recorded the voiceover on your iPhone or other device already, and want to add it to the video, you can import it in the Project Library and then sync it to video.
To attract viewer’s attention, sometimes, you may need to add some titles or subtitles to emphasis the key points. Here is the detailed steps about how to add titles to video.
5. Export and save the new file
Check your video in the right previewing window. If you’re satisfied, click “Export” to export your new video file. You can either save the video to various formats or directly share it on YouTube and other social media platform. Moreover, you can even burn a DVD disk in minutes to watch it on TV.
You see, with Wondershare Filmora video editor, it’s that easy to add a custom voiceover to video. Now master this feature and open a world of new possibilities for your video making!
Part 2: How to Record and Add Voiceover File during Video editing in Filmora
If you’ve recorded the voiceover on your iPhone or other device already, and want to add it to the video, you can follow the steps below:
1. Import the video to Filmora
After entering the Filmora main editing interface, click “Import” or drag and drop your video and voiceover file to the project library.
Filmora video editing software supports a vast range of formats, so you do not have to convert the files before importing. When all the files are imported, drag and drop them to the Video Timeline.
2. Record Voiceover in Video Editing
If you’re editng video and want to record voiceover in real time, you can also click the Record icon to start the recording.
Place the Playhead to the position where you need a voiceover, and then click the Microphone icon in the toolbar to start.
As before, the recorded voiceover will be added to the audio track automatically.
Note: To start a new record on the Timeline, you don’t need to close the dialog, just move the Time Indicator to another position and record a new voiceover.
3. Edit voiceover and Export
Just like what we said before, you can then edit the recorded voiceover to fit the video perfectly and then export it to your computer or upload to YouTube directly.
Filmora features more audio editing tools for improving the sound. Below is a video tutorial for applying fade in and out transition in Filmora. Download the trial version to test yourself.
Liza Brown
Liza Brown is a writer and a lover of all things video.
Follow @Liza Brown
“7 Must-Listen Episodes: Transform Your Strategy with Today’s Social Media Trends”
10 Social Media Podcasts to Help You Make Marketing Strategy

Benjamin Arango
Mar 27, 2024• Proven solutions
The rise of podcasts has never been so demanding that it is as of now. Even though every digital marketer hasn’t exploited it to the fullest potential, there is still an upsurge in podcasting, mainly social media marketing podcasts. It is called useful digital marketing when you are excited to be on every customer’s platform and ultimately raise your product or service awareness. The format of the Podcast itself allows deep and regular connection with the audience. Along with that, we can list various other benefits of incorporating podcasts for your brand as an ideal digital marketing strategy.
Benefits of Podcasting
- Low Competition
- High Engagement
- Growing Platform
- Convenient for the audience
- On-Demand Technology
10 Social Media Marketing Podcasts Worth Listening To
One of the good aspects of using a Podcast is listening to them anytime, even in our downtimes. Luckily, this technology has provided us with some awesome social media mix Podcasts worth listening to for the audience. Let’s unleash the ten best social media Podcasts, as mentioned below!
- 1.Influencer Entrepreneurs
- 2.Instagram Secrets
- 3.The Blogging Millionaire
- 4.Social Media Marketing Talk Show
- 5.Social Pros Podcast
- 6.Marketing Smarts
- 7.Marketing School
- 8.Visual Marketing with Tailwind
- 9.Instagram Marketing Secrets
- 10.Maximize Your Social Influence
1.Influencer Entrepreneurs

Jenny Melrose hosts this Podcast with beneficial insights on productivity, turning a side hustle into a full-time job, workshops, online courses, and promoting her services or products. Listening to her podcast will let you channelize your entrepreneurship productivity in the best ways possible.
The frequency of her podcasts is around seven days, with an average duration of 27 minutes. The podcast topics are the How to Effectively Cultivate Community within Your Brand, How to Get Photography Clients, etc.
2.Instagram Secrets

Luke Thompson has started this podcast to let you get up from the baby steps of using the Instagram platform for lead generation and other customer services. Overall, it is a beginner-friendly podcast with different topics on the Instagram platform. He has also released some podcasts about technical issues such as gaining followers, Instagram’s new algorithm, etc.
His podcasts’ frequency is around 19-20 days, with an average duration of 7 minutes.
3.The Blogging Millionaire

Brandon Gaille hosts this awesome Blog Millionaire podcast while discussing various ways to be successful in blogging. The podcast is worth listening to as Brandon himself did a successful business out of his podcast even after facing medical hardships in childhood.
His podcast frequency is also around seven days, with an average duration of 8 minutes.
4.Social Media Marketing Talk Show

Social Media Examiner hosts this fantastic social media marketing podcast where they are used to talk about several different social media topics. Digital marketers, social media enthusiasts, and small businesses must listen to this useful podcast crucial to know about various social media platforms.
The frequency of Podcasts is around 7-14 days with a duration of 40-50 mins.
5.Social Pros Podcast
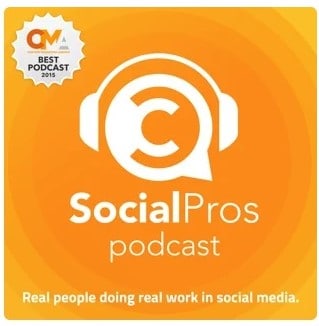
Jay Baer and his guest host this Social Pros Podcast, explicitly talking about social media industry trends. They generally discuss social media’s importance in getting the message out and encouraging the entire brand awareness. The answers are actionable, diverse, and pretty helpful to media leaders who want to increase their chances of getting noticed.
The frequency of this podcast is around seven days, with an average duration of 38 minutes.
6.Marketing Smarts
It is one of the best social media podcasts with a discussion on in-depth interviews of different marketers. MarketingProfss hosts this specific podcast after listening, which you will follow one or two strategies about social media marketing. You can manually search the Podcast’s topics by the names of different subcategories given along.
It is a weekly Podcast with a duration of 30 mins approx.
7.Marketing School

The marketing gurus Neil Patel and Eric Siu host this podcast to provide the audience with useful insights on marketing, statistics, and the entire game. This podcast has more than 1400 episodes in bite-sized, quick, and rapid-fire sessions. Thus, it is a must-listen podcast for digital and social media marketers. And, the best part is that a 5-10 mins Podcast uploads daily over the official website.
8.Visual Marketing with Tailwind

This podcast is perfect if you are on Pinterest and Instagram. Primarily, Alisa Meredith, marketing specialist at Tailwind, hosts this podcast. As the name suggests, the topics create incredible visuals on Instagram and Pinterest to engage the audience. However, there is no such organized scheduling of podcasts upload here. But, every episode is worth listening to for effective visual marketing.
9.Instagram Marketing Secrets

The Instagram Marketing Secrets podcast by Derek Videll is ideal for marketing enthusiasts. It is one of the best social media marketing podcasts, specifically on Instagram, for lead generation and successful conversions. Derek himself comes from a marketing and sales background to tell you the internal secrets and the so-called Instagram competitors.
The podcast is uploaded every 6th to 7th day with an average duration of 15 minutes.
10.Maximize Your Social Influence
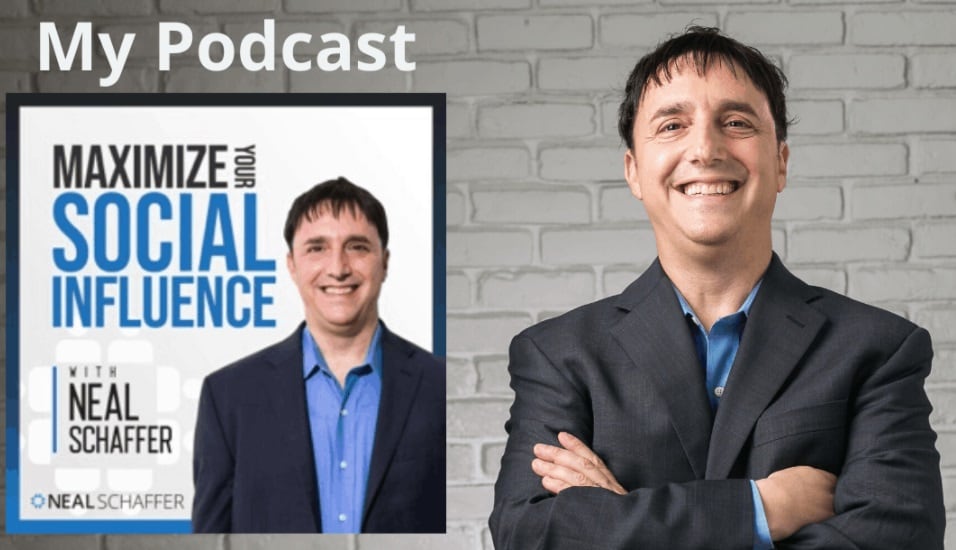
This Podcast ultimately teaches how to look at marketing from the angle of influencing. It is essential to become a social media influencer to level up the game and attract your niche’s right audience. Neil Schaffer, the digital and marketing expert host this podcast with the perspective of sharing his secrets and marketing success stories.
The above Podcast also has a weekly schedule of 30-35 mins each.
Start Your First Podcast with Wondershare Filmora
So yes, don’t wait to start your podcast with Wondershare Filmora X! Why Filmora X? It is because of the most intuitive, advanced, and simple to use video and audio editor. Furthermore, the newly launched features of Filmora X tell us about how easy it is to indulge professionalism online. A useful feature for creating podcasts in Wondershare Filmora is Audio Ducking. By checking the quality while editing your video podcast, you can effectively lower the volume of multiple clips in your style. It is the go-to option if you want to highlight your voice within the video. It is pretty easy to use audio ducking as you are only required to move the slider and adjust the video podcast’s background volume as per your needs.
Conclusion
Thus, now you can apply social media strategies learned from the best ten social media podcasts and make your Podcast as well. It is the correct time to reveal your creative side and start making video podcasts using Filmora X.
Benjamin Arango
Benjamin Arango is a writer and a lover of all things video.
Follow @Benjamin Arango
Benjamin Arango
Mar 27, 2024• Proven solutions
The rise of podcasts has never been so demanding that it is as of now. Even though every digital marketer hasn’t exploited it to the fullest potential, there is still an upsurge in podcasting, mainly social media marketing podcasts. It is called useful digital marketing when you are excited to be on every customer’s platform and ultimately raise your product or service awareness. The format of the Podcast itself allows deep and regular connection with the audience. Along with that, we can list various other benefits of incorporating podcasts for your brand as an ideal digital marketing strategy.
Benefits of Podcasting
- Low Competition
- High Engagement
- Growing Platform
- Convenient for the audience
- On-Demand Technology
10 Social Media Marketing Podcasts Worth Listening To
One of the good aspects of using a Podcast is listening to them anytime, even in our downtimes. Luckily, this technology has provided us with some awesome social media mix Podcasts worth listening to for the audience. Let’s unleash the ten best social media Podcasts, as mentioned below!
- 1.Influencer Entrepreneurs
- 2.Instagram Secrets
- 3.The Blogging Millionaire
- 4.Social Media Marketing Talk Show
- 5.Social Pros Podcast
- 6.Marketing Smarts
- 7.Marketing School
- 8.Visual Marketing with Tailwind
- 9.Instagram Marketing Secrets
- 10.Maximize Your Social Influence
1.Influencer Entrepreneurs
Jenny Melrose hosts this Podcast with beneficial insights on productivity, turning a side hustle into a full-time job, workshops, online courses, and promoting her services or products. Listening to her podcast will let you channelize your entrepreneurship productivity in the best ways possible.
The frequency of her podcasts is around seven days, with an average duration of 27 minutes. The podcast topics are the How to Effectively Cultivate Community within Your Brand, How to Get Photography Clients, etc.
2.Instagram Secrets
Luke Thompson has started this podcast to let you get up from the baby steps of using the Instagram platform for lead generation and other customer services. Overall, it is a beginner-friendly podcast with different topics on the Instagram platform. He has also released some podcasts about technical issues such as gaining followers, Instagram’s new algorithm, etc.
His podcasts’ frequency is around 19-20 days, with an average duration of 7 minutes.
3.The Blogging Millionaire
Brandon Gaille hosts this awesome Blog Millionaire podcast while discussing various ways to be successful in blogging. The podcast is worth listening to as Brandon himself did a successful business out of his podcast even after facing medical hardships in childhood.
His podcast frequency is also around seven days, with an average duration of 8 minutes.
4.Social Media Marketing Talk Show
Social Media Examiner hosts this fantastic social media marketing podcast where they are used to talk about several different social media topics. Digital marketers, social media enthusiasts, and small businesses must listen to this useful podcast crucial to know about various social media platforms.
The frequency of Podcasts is around 7-14 days with a duration of 40-50 mins.
5.Social Pros Podcast
Jay Baer and his guest host this Social Pros Podcast, explicitly talking about social media industry trends. They generally discuss social media’s importance in getting the message out and encouraging the entire brand awareness. The answers are actionable, diverse, and pretty helpful to media leaders who want to increase their chances of getting noticed.
The frequency of this podcast is around seven days, with an average duration of 38 minutes.
6.Marketing Smarts
It is one of the best social media podcasts with a discussion on in-depth interviews of different marketers. MarketingProfss hosts this specific podcast after listening, which you will follow one or two strategies about social media marketing. You can manually search the Podcast’s topics by the names of different subcategories given along.
It is a weekly Podcast with a duration of 30 mins approx.
7.Marketing School
The marketing gurus Neil Patel and Eric Siu host this podcast to provide the audience with useful insights on marketing, statistics, and the entire game. This podcast has more than 1400 episodes in bite-sized, quick, and rapid-fire sessions. Thus, it is a must-listen podcast for digital and social media marketers. And, the best part is that a 5-10 mins Podcast uploads daily over the official website.
8.Visual Marketing with Tailwind
This podcast is perfect if you are on Pinterest and Instagram. Primarily, Alisa Meredith, marketing specialist at Tailwind, hosts this podcast. As the name suggests, the topics create incredible visuals on Instagram and Pinterest to engage the audience. However, there is no such organized scheduling of podcasts upload here. But, every episode is worth listening to for effective visual marketing.
9.Instagram Marketing Secrets
The Instagram Marketing Secrets podcast by Derek Videll is ideal for marketing enthusiasts. It is one of the best social media marketing podcasts, specifically on Instagram, for lead generation and successful conversions. Derek himself comes from a marketing and sales background to tell you the internal secrets and the so-called Instagram competitors.
The podcast is uploaded every 6th to 7th day with an average duration of 15 minutes.
10.Maximize Your Social Influence
This Podcast ultimately teaches how to look at marketing from the angle of influencing. It is essential to become a social media influencer to level up the game and attract your niche’s right audience. Neil Schaffer, the digital and marketing expert host this podcast with the perspective of sharing his secrets and marketing success stories.
The above Podcast also has a weekly schedule of 30-35 mins each.
Start Your First Podcast with Wondershare Filmora
So yes, don’t wait to start your podcast with Wondershare Filmora X! Why Filmora X? It is because of the most intuitive, advanced, and simple to use video and audio editor. Furthermore, the newly launched features of Filmora X tell us about how easy it is to indulge professionalism online. A useful feature for creating podcasts in Wondershare Filmora is Audio Ducking. By checking the quality while editing your video podcast, you can effectively lower the volume of multiple clips in your style. It is the go-to option if you want to highlight your voice within the video. It is pretty easy to use audio ducking as you are only required to move the slider and adjust the video podcast’s background volume as per your needs.
Conclusion
Thus, now you can apply social media strategies learned from the best ten social media podcasts and make your Podcast as well. It is the correct time to reveal your creative side and start making video podcasts using Filmora X.
Benjamin Arango
Benjamin Arango is a writer and a lover of all things video.
Follow @Benjamin Arango
Also read:
- 2024 Approved Journey Into Jazz Mysteries Beyond Commonplace Knowledge
- New The Complete Guide to Muting Unwanted Audio Layers in Audacity
- Updated Unleash Your Inner Jellyfish How to Apply Clownfish Voice Changes on Fortnite and Beyond
- Updated Chromecast to the Future Exploring Popular Audio Recorders
- New Streamline Your Sound Top 8 Apps for Efficient Audio Recordings for 2024
- Updated Mac Audio Enthusiasts Selection of Top 4 Music Editing Software for 2024
- Navigating Internet-Based Audio Manipulation Techniques for 2024
- The Ultimate Guide to Automatic Volume Reduction Audio Ducking Tips in Adobe Premiere Pro on macOS
- Mastering Final Cut Pro Visualizing Sound with Audio Waveforms & Dynamic Animation Effects for 2024
- 2024 Approved Top 5 Humorous Tone Adjusters for Enhanced Call Amusement
- New 2024 Approved Elite Sound Mixers for Superior Stream Quality
- 2024 Approved Digital Filtration Guide to Removing Ambient Noise in Online Video Media
- In 2024, Exploring the Best Digital Audio Workstations for Your PC and Mac
- New 2024 Approved Ultimate Guide to the Leading 11 Free Voice Changing Applications on iOS & Android Platforms
- Updated Silencing Background Buzz Expert Strategies for Minimizing Microphone Interference for 2024
- Updated 2024 Approved The Complete Strategy for Embedding Music Into iMovie Footage
- In 2024, Harnessing the Clownfish Voice Change Technique for More Dynamic Conversations on Discord/Fortnite/Skype
- New 2024 Approved Premium Triumvirate Top-Ranked MP3 Volume Intensifier Software Solutions Online
- New 2024 Approved Ultimate Soundscape Creators for Immersive Video Streaming
- New 2024 Approved Elevate Your IGTV Storytelling With Musical Elements
- Updated Prime Virtual Locations for Elevating Your MP3 Audio Levels
- New How to Lower Volume of the Media Files for 2024
- DJ Audio Editor Software Reviews
- New In 2024, The Songbird Anthology (MP3 Version)
- Updated Silence Safari In-Depth Techniques for Deafening iPhone Clips for 2024
- 2024 Approved Top 7 Digital Tools for Seamless Audio Cutting and Editing
- New 2024 Approved Top-Rated No-Cost Digital Audio Editors for the Web
- Updated How to Easily Use Audio Track Mixer in Premiere Pro
- How to Remove a Previously Synced Google Account from Your Nubia Red Magic 8S Pro
- New In 2024, Best Free Online Audio Waveform Animation Makers
- In 2024, Bypass Activation Lock From Apple iPhone 13 - 4 Easy Ways
- Best Ways on How to Unlock/Bypass/Swipe/Remove OnePlus 11 5G Fingerprint Lock
- Recover your pictures after Asus ROG Phone 8 Pro has been deleted.
- Updated In 2024, Top-Rated Android Apps to Download Now
- In 2024, 3 Ways for Android Pokemon Go Spoofing On Nokia 130 Music | Dr.fone
- How To Update or Downgrade iPhone 13 mini Without Losing Data? | Dr.fone
- A Full Review of Splice Video Editor
- Top Ever Ways Make Tiktok Slideshow Solved for 2024
- Title: Updated Quick and Easy Vocal Removal in Audacity A Guide
- Author: Ella
- Created at : 2024-06-24 00:02:36
- Updated at : 2024-06-25 00:02:36
- Link: https://sound-optimizing.techidaily.com/updated-quick-and-easy-vocal-removal-in-audacity-a-guide/
- License: This work is licensed under CC BY-NC-SA 4.0.
