
:max_bytes(150000):strip_icc():format(webp)/001_how-to-transfer-data-from-ps4-to-ps5-3392eb400af3482fabad65cabb2a1a91.jpg)
Updated The One-Stop Shop for Podcast Platforms and Directories
The One-Stop Shop for Podcast Platforms and Directories
Submitting your podcast show on different platforms is essential to get the right audiences. As we all know, the more podcast directories you publish your show, the more listeners you get.
Yet, finding the ideal choices can take time and effort with many podcast directories available online. Worry less. We’ve compiled a list of the best podcast directories you can always count on to publish your podcast show anytime.
- YouTube
- Spotify
- Apple Podcasts
- Google Podcasts
- Pandora
- Audible
- NPR One
- Tune In
- Podcast Addict
- RadioPublic
- Overcast
- Pocket Casts
- CastBox
- Stitcher
- More choices to submit your podcast shows
- How to submit a show to podcast directories?
- Hot FAQs on Podcast Directories
Part 1. What are podcast directories?
A podcast directory is a listening app. It’s the place where podcasts and their listeners meet. Podcast listeners search for, subscribe to, and listen to your Podcast using their podcast directory of choice. Popular podcast directories include Apple Podcasts, Spotify, and Google Podcasts.
Part 2. 15 Top podcast directories to focus on in 2024
Thankfully, research conducted by EdisonResearch shows the weekly audience reach of top podcast directories. So this list will help us locate the best podcasting directories. And it can multiply your audience size and quickly reach a more extensive user base.
According to Edison Research, the top 15 Podcast Networks are:
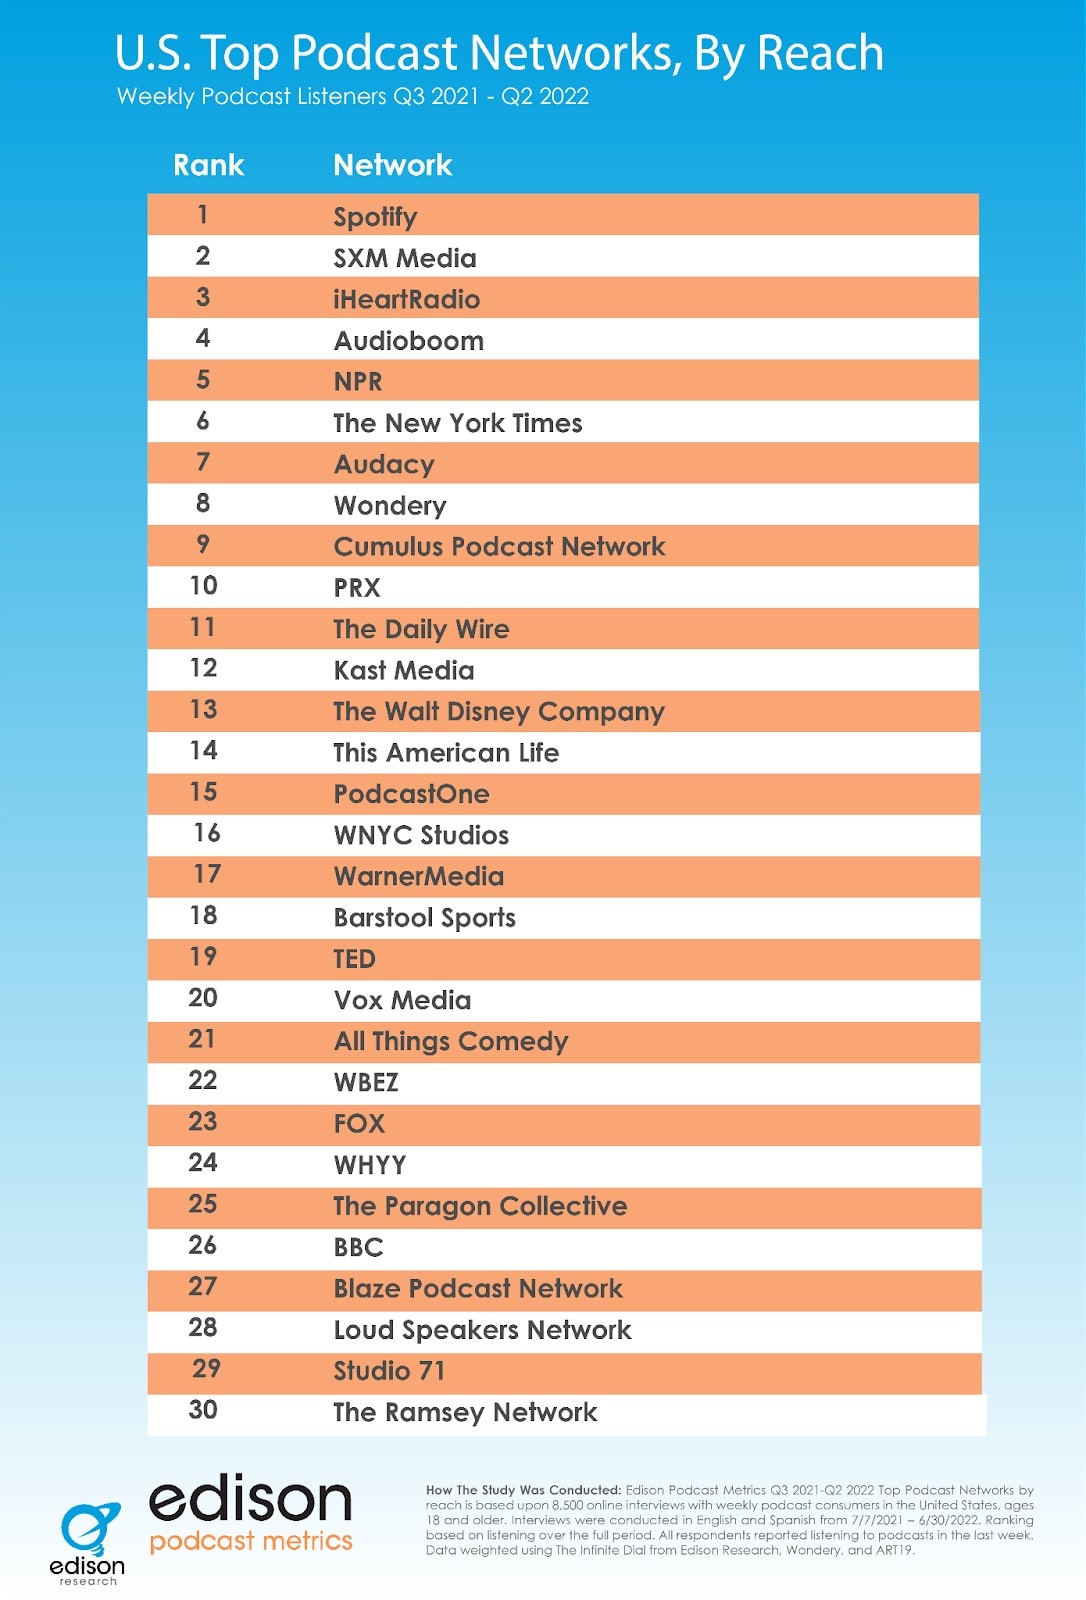
You must retain that Edison’s research only analyzes the US podcast services. Yet, our guide has compiled the best podcasting directories to connect with users worldwide.
Below you will find the list of top podcast directories and their reviews. But keep in mind that when it comes to podcast directories, there is no such thing as best or worse. Instead, it’s all about the user base and audience reach. So, it is best to submit your podcasts to multiple podcasting directories.
1. YouTube
With a monthly active user base of 2.5 billion, YouTube should be the top choice of any podcast creator. According to a recent survey by Statista, YouTube took over Spotify to become the largest platform for podcast consumption worldwide. Additionally, 47.7% of the US audience prefers YouTube over other platforms for listening to podcasts.
Not to forget, YouTube comes pre-installed on all smartphones and is also accessible via the Web to users worldwide. Another benefit of YouTube is that it is free for creators and users. Plus, once you grow your user base, it also allows you to get surplus revenue.

Of course, YouTube is a video-only platform. Still, you can use tools like Wondershare Filmora to create video-based podcasts seamlessly. You can simply convert the video podcasts into an audio format using Filmora itself and then reupload the same Podcast to even audio-based podcast directories.
Free Download For Win 7 or later(64-bit)
Free Download For macOS 10.14 or later
Tools like Fimora also allow you to directly publish the created Podcast on YouTube (so you do not have to worry about video requirements mandatory for YouTube).
- User Review of YouTube on G2: “YouTube is one of those sites that you can’t live without for a business. Everyone knows what YouTube is, and users (globally) use the platform daily.”
- Monthly User Base: Over 2.5 billion active users.
- Supported OS: All major OS and web browsers.
2. Spotify
Spotify has over 389 million listeners across 187 markets worldwide. Available on all major OS and its web presence makes it one of the best directories of podcasts on the internet.
Aside from its audience base, Spotify also provides real-time insights, like who your audience is, what they like, which episodes they prefer, and even what songs they want. All these insights will also help you plan your future content according to the audience.
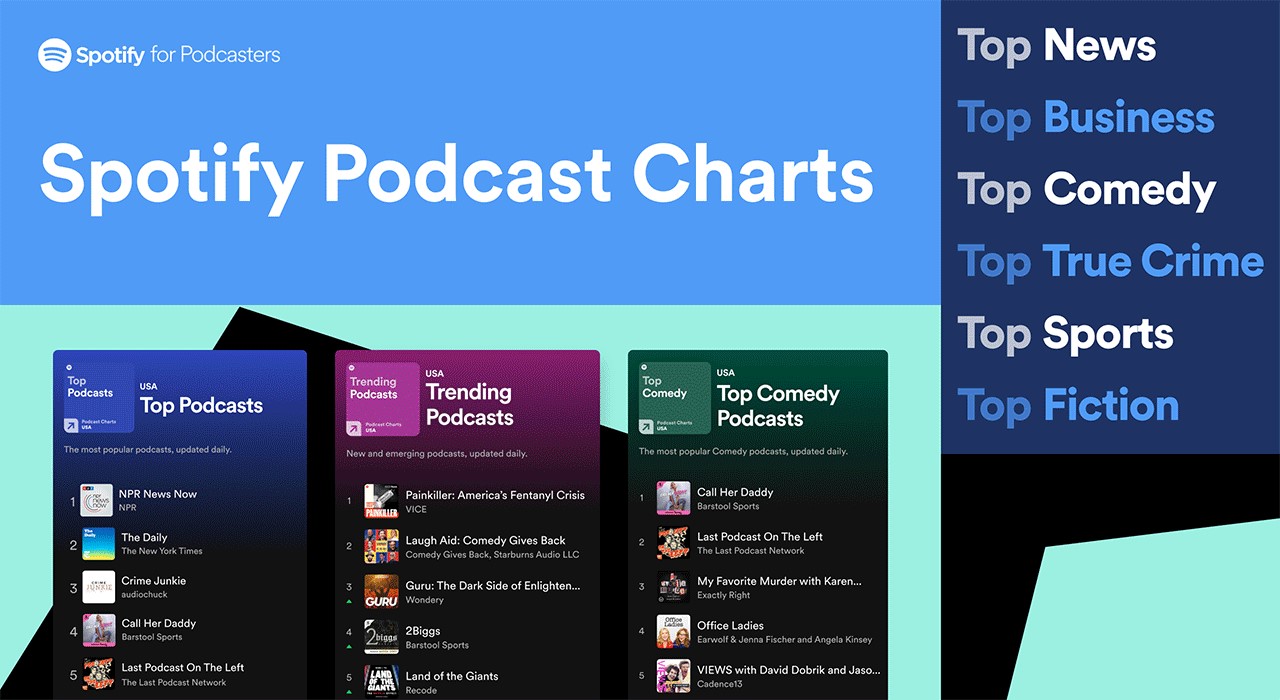
Spotify’s personalized recommendations and algorithms are another pluses, given you can get discovered easily/ Like YouTube, Spotify allows you to upload even video podcasts. While you can also create and upload podcasts in audio format only.
- User Review of Spotify on G2: “I can find any song, artist, album, and even podcasts at any time and no commercials.”
- Monthly User Base: Over 360 million active users.
- Supported OS: All major OS and web browsers.
3. Apple Podcasts
Apple Podcast is another top directory for a podcast that creators cannot ignore. Given it is an exclusive-podcast platform, its 28.5 million active user base in more than 170 countries and regions is enough to tell its greatness.
It is essential to understand that YouTube and Spotify are not exclusive podcast platforms like Apple Podcasts. And while Spotify and YouTube are best for connecting novice podcast listeners, Apple Podcast is the way to go if you want to connect with a dedicated podcast community.
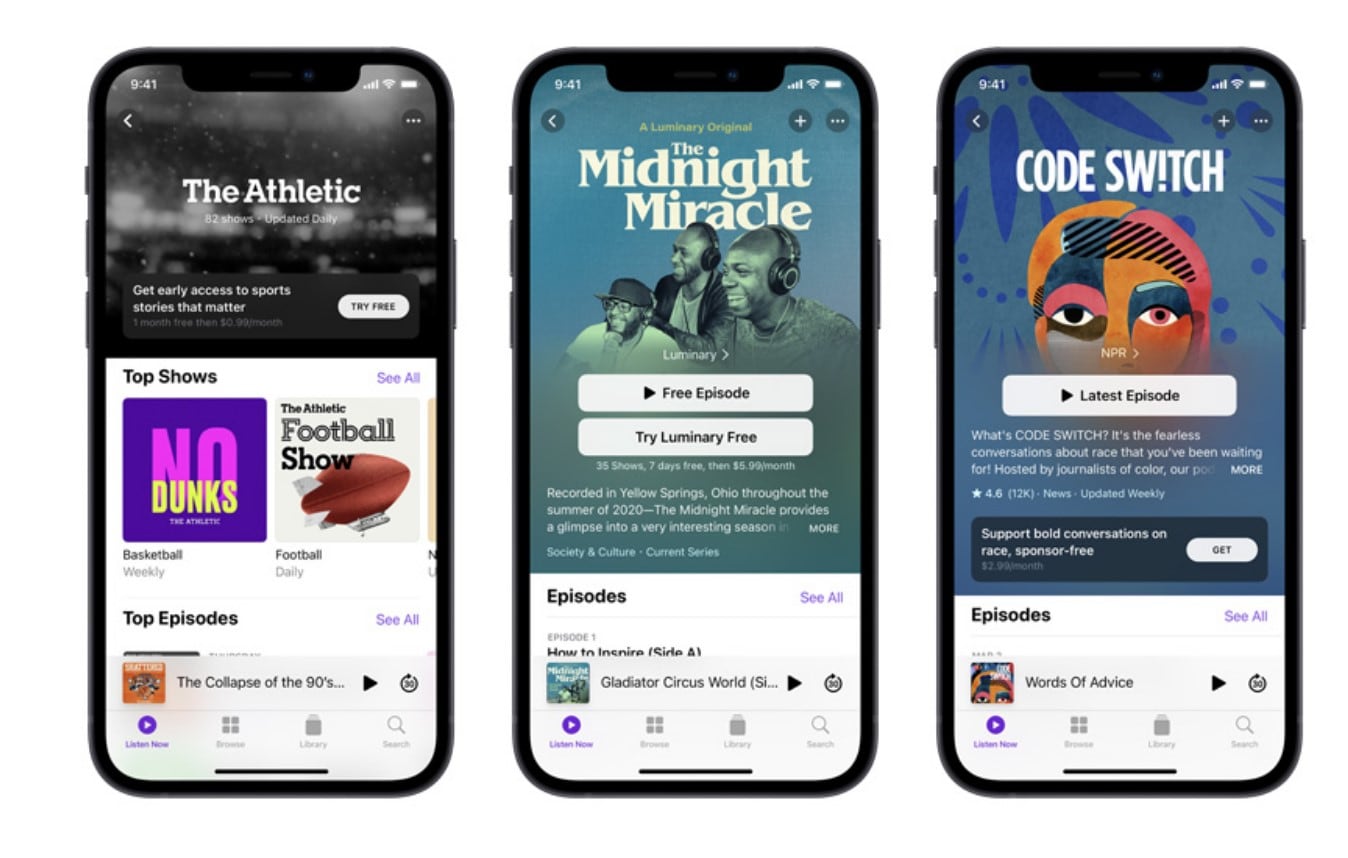
The best thing about the Apple Podcast directory is it allows you to create a podcast (via Apple Podcast Connect), but you must be an Apple user. However, you can submit your podcasts to Apple Podcast via RSS feed even if you are not an Apple user.
In all, given Apple Podcast is available for Apple users and is known by default on all Apple devices (the most prominent smartphone company in the world), Apple Podcast is a must-use podcast directory.
- User Review of Apple Podcast: “Apple once again nails with simplicity, millions of shows of my interest, and freemium service.”
- Monthly User Base: Over 28.5 million active users.
- Supported OS: All Apple devices.
4. Google Podcasts
Google Podcasts has over 100 million downloads on Play Store alone and is also available on the web, App Store, Blackberry, and ChromeOS users. A completely subscription-free and ad-free platform, Google Podcasts is one of the top podcasting directories among users.
However, unlike the Apple Podcast directory, it does not have a studio, so you can only submit your podcasts via RSS feeds. Still, its user base and the advanced algorithms are an opportunity to connect with users who like the subjects you discuss.
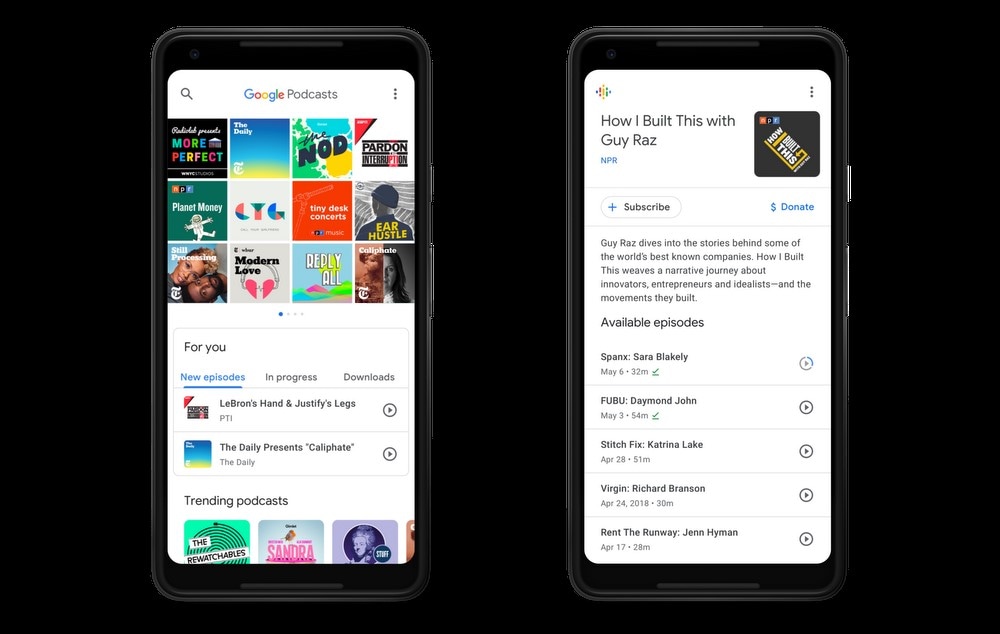
Like Spotify and Apple Podcast directories, Google Podcasts also show you real-time analytics and guide you about users so that you can plan your content accordingly. Given that it only requires a Google account to start, it is another top podcast directory you cannot ignore.
- User Review of Google Podcast
“Google Podcast includes everything that a podcast listener wants. It’s simple, free, and includes valuable options like Sleep Timer, Playback speed, and more.”
- Monthly User Base: Over 30 million active users.
- Supported OS: Dedicated apps for all major OS and web presence.
5. Pandora
Pandora has over 64 million monthly active users, with a listener spending up to 24 hours/monthly on the platform. It explains that users spend up to 45 minutes on the Pandora platform tuning in to their favorite podcasts. Again, its search-based algorithms allow you to get discovered by users that like subjects and topics on which you’re creating podcasts, meaning it is simple to connect with a large user base conveniently.
Pandora only accepts podcasts via RSS feed, which should be in MP3 format. But recent notifications have shown more audio formats will be added.
However, it is vital to retain that Pandora Podcast’s team critically analyzes all submissions manually. So, it might take up to 4-6 weeks for your first Podcast to appear on the platform.
- User Review of Pandora Podcast
“Pandora Podcasts recommendations are a blessing for me, who always finds it confusing to locate the right episode to spend my time on.”
- Monthly User Base: Over 64 million active users.
- Supported OS: Dedicated apps for all major OS and web presence.
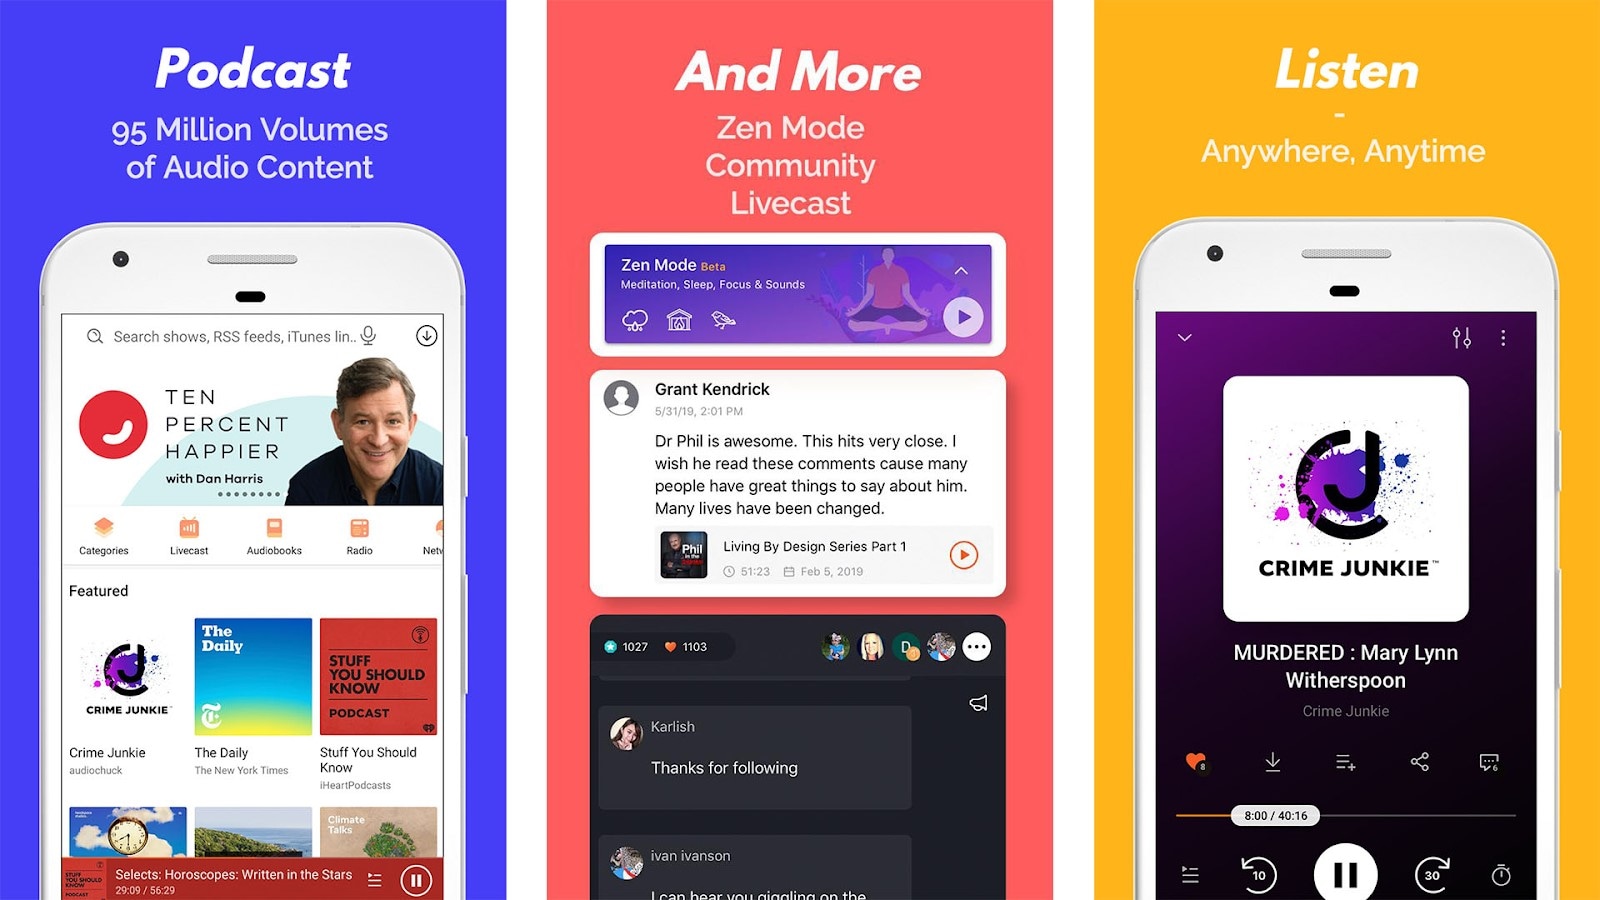
6. Audible
Although popular among audiobook lovers, Audible has a considerable podcast following too. Its monthly active user base is around 41 million. The biggest benefit of registering your Podcast on the Audible directory of podcasts is that it connects with users who use Alexa to discover new podcasts.
Besides Audible, the Podcast will also be available for users of the Amazon Music app. That means you can connect with even more users via one submission only. Not to forget, Amazon Prime Video (a massive following) users get a free subscription to Amazon Music, so there’s a perfect chance that you will connect with users conveniently.
It is important to note that both Amazon Music and Audible offer podcasts for entirely free to users, so a more extensive user base prefers these platforms over paid platforms.
- User Review of Pandora Podcast
“You get to listen to any audiobook in the “included” library no matter which subscription you purchase..”
- Monthly User Base: Over 64 million active users.
- Supported OS: Android, iOS,
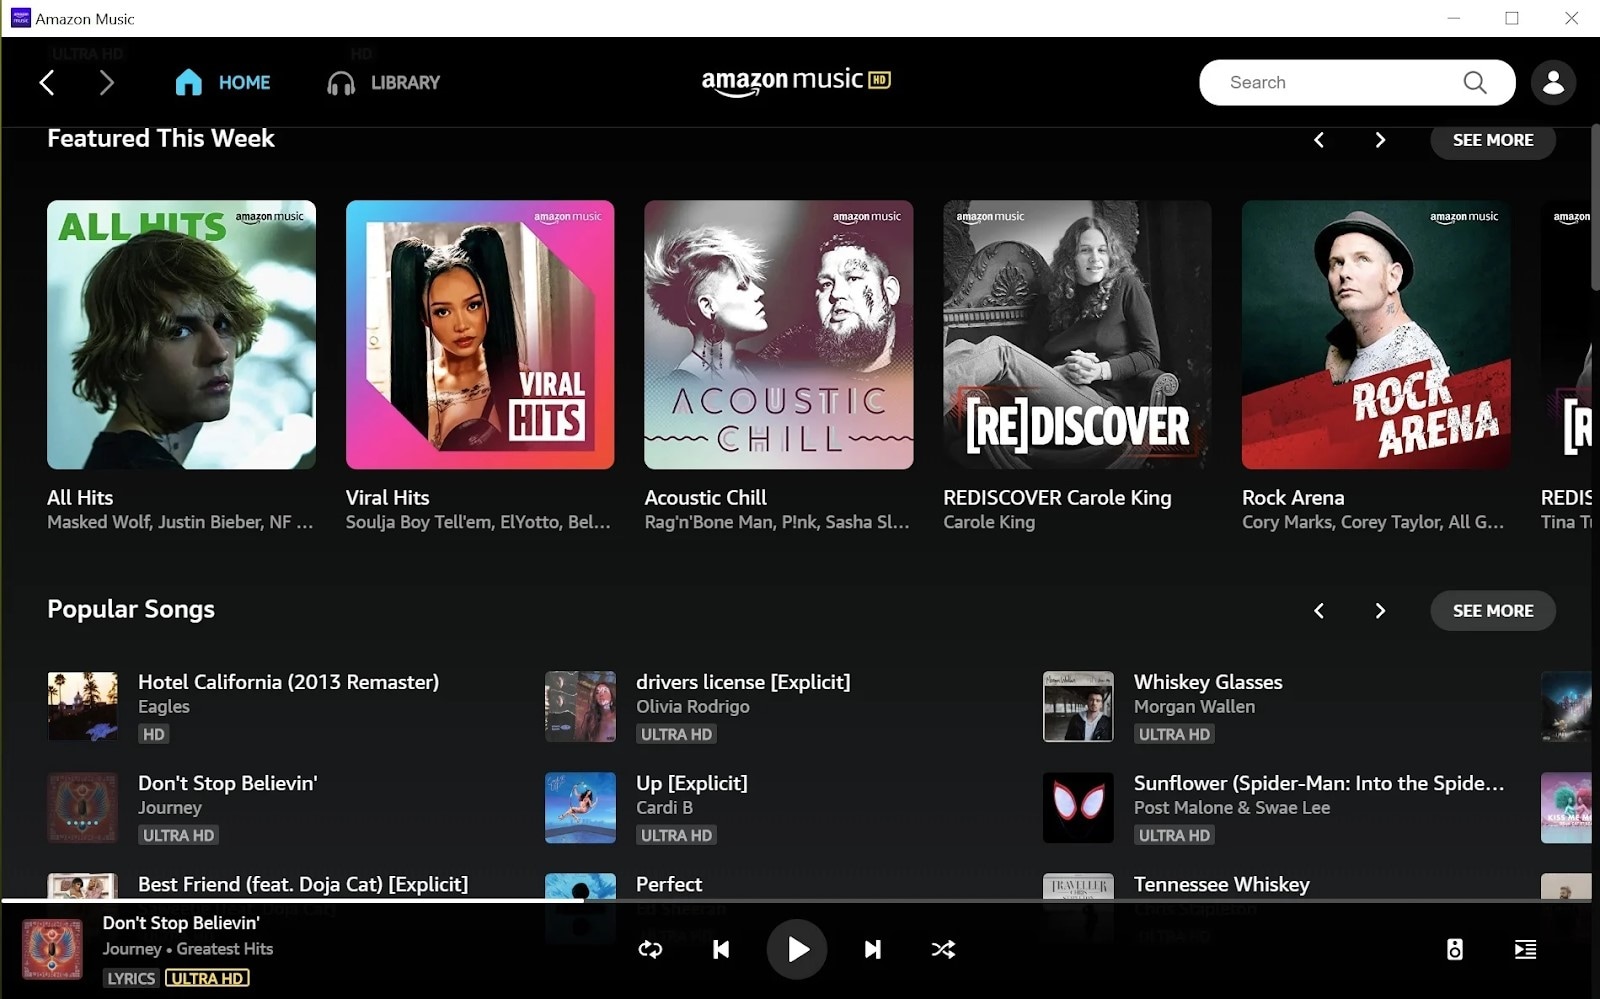
7. NPR One
With an average listener spending up to 145 minutes weekly, the NPR One podcast directory is one of the best podcast directories you can trust to submit your show online. The podcast directory has a userbase of over 500 thousand users globally, and
- User Review of NPR One Podcast
“I’ve been using this app for years now. It’s been my trusty companion to give me the news. I primarily use it with the sleep timer. I’m not a super picky consumer, especially when I don’t pay for the app!
But for many months now, the sleep timer will frequently think the time is up and shut off the player well before it should. The player will often shut off within 5 minutes of using the 30 min sleep timer. It’s annoying to open the player hit resume, and reset the sleep timer.”
- Monthly User Base: 500 thousand
- Supported OS: Android, iOS
8. Tune In

Technically, TuneIn is a radio. But lately, it has become prevalent amongst podcast listeners to find their favorite shows and also listen to music. The podcast directory has a global user base of over 75 million and a monthly visit of 7million+, which makes it a great spot for any podcaster to publish their show.
- User Review of Tune In Podcast
“I’ve been using the app for 4 years. I like it, but there are some annoying “features.”
the screen won’t time out when the app is active.
the developers must have recently made a change. I used to search through my list of “recent” (there were about 20) to look for new episodes of my favorite podcasts.
Now, the app only allows me to see the last four podcasts or stations I have listened to. So it is not helpful.’
- Monthly User Base: Over 7 million active users
- Supported OS: Dedicated apps for all major OS and web presence.
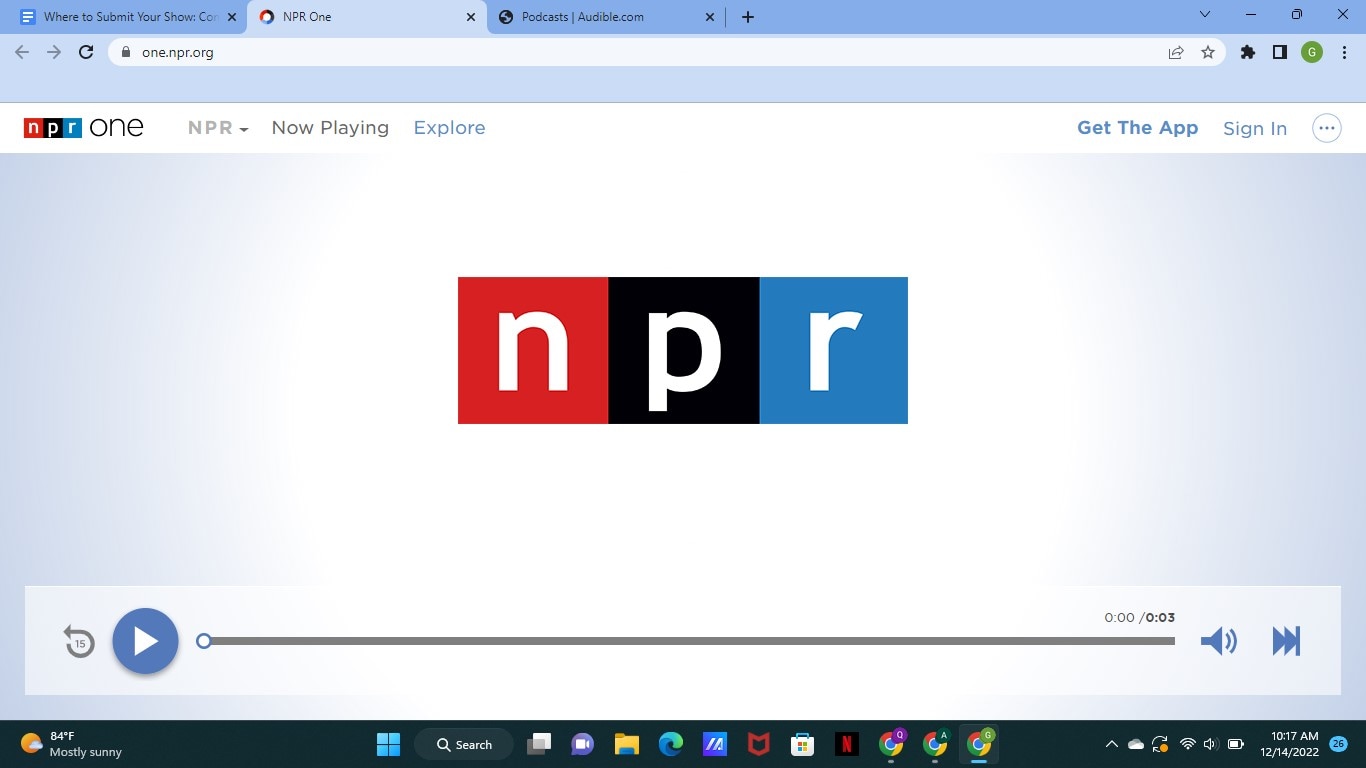
9. Podcast Addict
With over 10 million downloads on Google Playstore, Podcast Addict is one of Android’s most popular podcast apps. You can publish your podcast show, as it allows you to connect with the ideal audience quickly and easily.
Also, Podcast Addict is one of the few podcast directories available in various languages, including French and German. So it’s a perfect choice non-English podcasters.
- User Review of PodcastAddit
**”**Been using this for years. It does everything I could ever want when listening/ referencing/ re-listening to my favorite podcasts and a lot more.
I’ve suffered through having to use other podcast players (e.g., listening to something “exclusive”), but I couldn’t stand the inane simplicity of other players long enough to finish their content.
Also, it takes a bit to get used to (especially if you’re coming from other stripped-down players), but very worth the small effort for a powerful app.”
- Monthly User Base: Over 750 thousand active users.
- Supported OS: Dedicated Android App and web presence.
10. RadioPublic

Having been in the game for over 15 years, RadioPublic is another excellent podcast directory you can count on to submit your show. Although the platform does not have a massive user base compared to its competitors, it will help you grow your listeners and business by getting your podcast show to the right audience.
On RadioPublic, an average listener spends up to 72 minutes every day finding new podcast shows and listening to new episodes from their favorite podcasts. And given that the platform offers many robust features, listeners can enjoy a seamless listening experience on any device.
Overall, the RadioPublic podcast directory offers you a smart way to publish your show and grow your audience without going through stress.
- User Review of RadioPublic
“Glad I waited a while to find a podcast website provider. Starting from scratch in WordPress seemed too much hassle. Luckily the site came along while I was dithering about what to do.
The RadioPublic team onboarded the other 5 billion podcasts as one of the first examples, and I’m delighted to have chosen this option. Already, my pod site feels “complete” to look at, and more features are coming soon that will help with marketing, understanding listeners, and building a podcast brand.”
- Monthly User Base: Over 300 Thousand active users
- Supported OS: Dedicated apps for all major OS and web presence.
11. Overcast
Overcast is a dedicated podcast app for Apple devices, and what makes it a great podcast directory is that it offers unique features that attract many listeners.
On this platform, you’ll be allowed to display advertising slots, enabling listeners to subscribe to your podcast show within a few clicks. Plus, unlike many of its competitors, listeners have control over what podcast show is displayed in the featured podcast section. It is helpful as it lets listeners quickly discover every new episode you publish.
Overall, many incredible features make Overcast a good choice, and chances are your Podcast will get to real listeners when you publish them here.
- User Review of Overcast
**”**Nice alternative to Apple’s. I’ve been well pleased so far. It isn’t always the most intuitive, but I’ve eventually figured out how to achieve almost everything I’ve wanted to. The benefits of adding a show via RSS have become immediately clear.
Being a subscriber to a show and getting early access episodes and bonus material right in my podcast manager makes it easy to stay up with all my shows.”
- Monthly User Base: Over 70 Thousand active users.
- Supported OS: Dedicated app for iOS and web presence.
12. Pocket Casts
If you’re looking for a free podcast directory to publish your Podcast show, Pocket Casts is the ideal one for you. This podcast directory is packed with many rich features that podcasters will find very helpful. In addition, thanks to its beautifully designed website interface, you won’t find the platform difficult to use.
Besides, many listeners love Pocket Podcasts as it offers them incredible features—for example, improved discovery options, playback speed options, and lots more. In addition, they’ve enhanced how they find and listen to podcasts on the platform. You can’t go wrong publishing your show on a platform like this one.
- User Review of Pocket Casts
“Wonderful app, the most reliable one I’ve found. Even with accounts, most others lose all your progress data which hasn’t happened once with this, and I’ve switched phones 3 times. The progress tracker is so accurate you can pause on one device, open the same account and continue listening. Most apps can’t even keep things downloaded. Search does take a minute but finds stuff no other app does.”
- Monthly User Base: Over 1 Million active users.
- Supported OS: Dedicated apps for all major OS and web presence.
13. CastBox
CastBox is another unique podcast directory that podcasters trust to publish their show online. The platform boasts an optimized SEO and artificial intelligence that lets listeners find new podcast shows. Thanks to its massive user base of up to 20 Million users, your Podcast could reach a wide range of audiences quickly and easily.
Also, CastBox offers social media features that allow listeners to comment and share your podcast show on their social media page, thus helping you get your show to more listeners and potentially increase your fanbase.
- User Review of CastBox
“I’ve been a podcaster for years and an avid podcast listener for a while. So I searched high and low for the best podcast app and distribution service, Castbox. They have a great app and website, a huge content library, and a superb feature set. Also, their app allows offline listening, as I can download my favorite podcast show.”
- Monthly User Base: Over 1 million active users
- Supported OS: Dedicated apps for all major OS and web presence.
14. Stitcher
Last but not least podcast directory on our list is Stitcher. The platform boasts more than 14.5 Million active listeners, with an average listener having up to 25 hours of listening duration per month.
Stitcher helps you alleviate the stress of getting your show to the right audience, and thanks to the platform’s easy podcast submission requirements, you only need to have at least one podcast episode on your RSS Feed to get approved.
Also, Stitcher offers a unique analytic tool that allows you to track the performance of your show on the platform, and what more impressive is that it’s integrated into more than fifty car models. In addition, it works with any vehicle that supports Apple’s CarPlay and Android Auto, which makes it a great choice for podcasters who believe their audience loves to listen to their show while driving.
- User Review of Stitcher
“So glad I switched! I have my podcasts but didn’t listen to them much - partially because Apple Podcasts is so hard to use. I switched to Stitcher to listen to The Magnus Archives, and I love it!”
- Monthly User Base: Over 1.5 million active users.
- Supported OS: Dedicated apps for all major OS and web presence.
Part 3. More choices to submit your podcast shows
The above Podcast directories are great choices you can always count on any day. However, if you’re looking for more options, the following are reliable podcasting directories to choose from;
Part 4. How to submit a show to podcast directories?
Submitting a podcast show to podcast directories is pretty simple. Here, we used Spotify as an example to show you how you can easily submit your podcast show within a few clicks. The steps are as follows;
Step1 Create a Spotify account using the email attached to your podcast host.
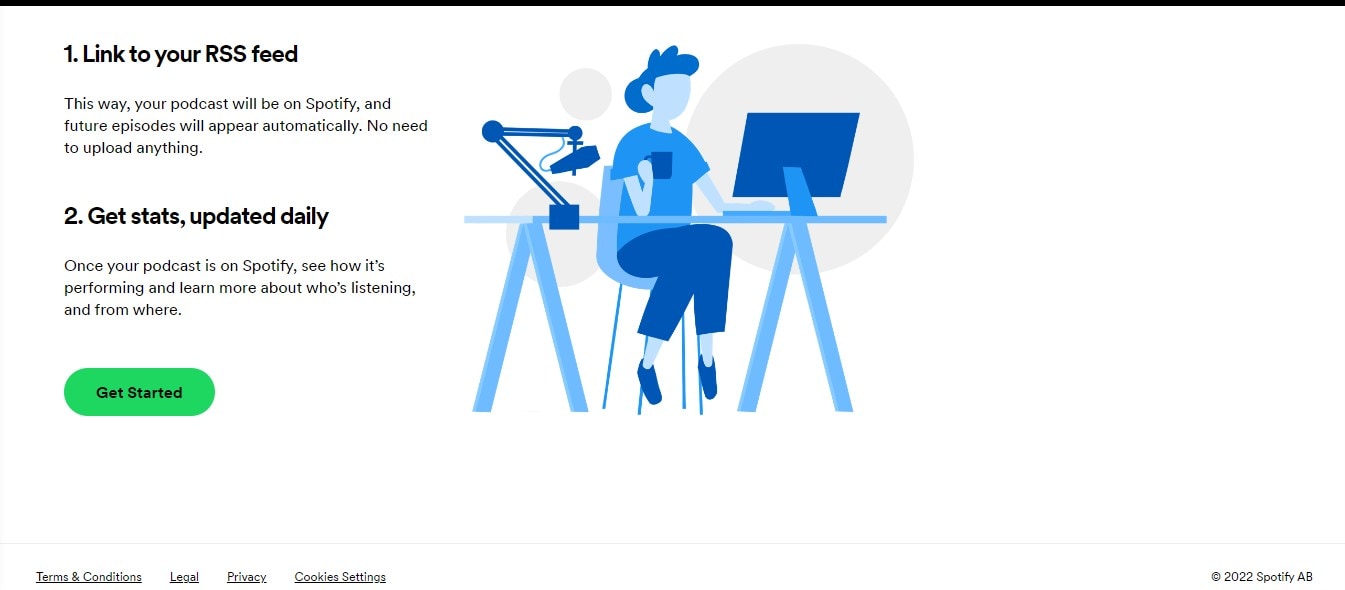
Step2 Open Spotify for Podcasters in your browser and login into your account. Then, click Get Started on the new screen.
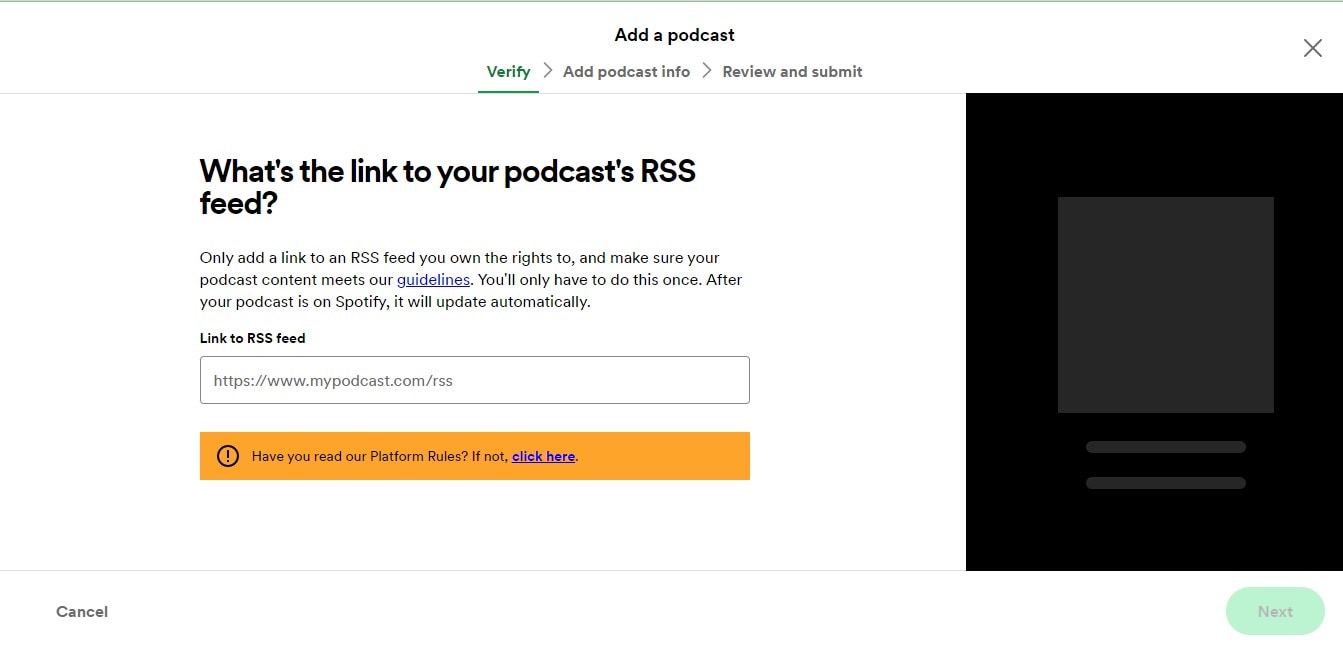
Step3 Provide your Podcast’s RSS Feed and click Next to proceed.
Step4 You’ll be asked to add information about your Podcast, from its description to the title, artwork, etc.
Step5 Verify the Podcast by submitting the code sent to your email.
Step6 Review the information you’ve provided so far and submit it to Spotify for review.
Once you complete the steps, keep an eye on the submitted Podcast, as Spotify won’t message you even if your Podcast has been published.
Hot FAQs on Podcast Directories
1. Are podcast directories free?
Almost all top podcast directories are entirely free for creators. All you have to do is sign up on the platforms. Then, check the platform’s requirements to submit your podcast episodes, like the format, cover photos, and description. Of course, the requirements vary depending on the platform.
2. Can any podcast be on a directory of podcasts?
Yes, you can choose from any podcast directory to publish your Podcast. There’s no limitation. When submitting, you must select the ideal category for your podcast show so it can be displayed to the right audience.
3. Does it cost to join a podcast directory?
Yes, and the cost of joining a podcast directory varies depending on your platform.
Conclusion
The podcast directories introduced above are reliable for submitting podcast shows. So, chances are there, no matter what your podcast show is about. It’ll help you connect with the right audience. However, one thing is vital you need to make sure you choose the podcast directory that suits you.
Part 1. What are podcast directories?
A podcast directory is a listening app. It’s the place where podcasts and their listeners meet. Podcast listeners search for, subscribe to, and listen to your Podcast using their podcast directory of choice. Popular podcast directories include Apple Podcasts, Spotify, and Google Podcasts.
Part 2. 15 Top podcast directories to focus on in 2024
Thankfully, research conducted by EdisonResearch shows the weekly audience reach of top podcast directories. So this list will help us locate the best podcasting directories. And it can multiply your audience size and quickly reach a more extensive user base.
According to Edison Research, the top 15 Podcast Networks are:
You must retain that Edison’s research only analyzes the US podcast services. Yet, our guide has compiled the best podcasting directories to connect with users worldwide.
Below you will find the list of top podcast directories and their reviews. But keep in mind that when it comes to podcast directories, there is no such thing as best or worse. Instead, it’s all about the user base and audience reach. So, it is best to submit your podcasts to multiple podcasting directories.
1. YouTube
With a monthly active user base of 2.5 billion, YouTube should be the top choice of any podcast creator. According to a recent survey by Statista, YouTube took over Spotify to become the largest platform for podcast consumption worldwide. Additionally, 47.7% of the US audience prefers YouTube over other platforms for listening to podcasts.
Not to forget, YouTube comes pre-installed on all smartphones and is also accessible via the Web to users worldwide. Another benefit of YouTube is that it is free for creators and users. Plus, once you grow your user base, it also allows you to get surplus revenue.
Of course, YouTube is a video-only platform. Still, you can use tools like Wondershare Filmora to create video-based podcasts seamlessly. You can simply convert the video podcasts into an audio format using Filmora itself and then reupload the same Podcast to even audio-based podcast directories.
Free Download For Win 7 or later(64-bit)
Free Download For macOS 10.14 or later
Tools like Fimora also allow you to directly publish the created Podcast on YouTube (so you do not have to worry about video requirements mandatory for YouTube).
- User Review of YouTube on G2: “YouTube is one of those sites that you can’t live without for a business. Everyone knows what YouTube is, and users (globally) use the platform daily.”
- Monthly User Base: Over 2.5 billion active users.
- Supported OS: All major OS and web browsers.
2. Spotify
Spotify has over 389 million listeners across 187 markets worldwide. Available on all major OS and its web presence makes it one of the best directories of podcasts on the internet.
Aside from its audience base, Spotify also provides real-time insights, like who your audience is, what they like, which episodes they prefer, and even what songs they want. All these insights will also help you plan your future content according to the audience.
Spotify’s personalized recommendations and algorithms are another pluses, given you can get discovered easily/ Like YouTube, Spotify allows you to upload even video podcasts. While you can also create and upload podcasts in audio format only.
- User Review of Spotify on G2: “I can find any song, artist, album, and even podcasts at any time and no commercials.”
- Monthly User Base: Over 360 million active users.
- Supported OS: All major OS and web browsers.
3. Apple Podcasts
Apple Podcast is another top directory for a podcast that creators cannot ignore. Given it is an exclusive-podcast platform, its 28.5 million active user base in more than 170 countries and regions is enough to tell its greatness.
It is essential to understand that YouTube and Spotify are not exclusive podcast platforms like Apple Podcasts. And while Spotify and YouTube are best for connecting novice podcast listeners, Apple Podcast is the way to go if you want to connect with a dedicated podcast community.
The best thing about the Apple Podcast directory is it allows you to create a podcast (via Apple Podcast Connect), but you must be an Apple user. However, you can submit your podcasts to Apple Podcast via RSS feed even if you are not an Apple user.
In all, given Apple Podcast is available for Apple users and is known by default on all Apple devices (the most prominent smartphone company in the world), Apple Podcast is a must-use podcast directory.
- User Review of Apple Podcast: “Apple once again nails with simplicity, millions of shows of my interest, and freemium service.”
- Monthly User Base: Over 28.5 million active users.
- Supported OS: All Apple devices.
4. Google Podcasts
Google Podcasts has over 100 million downloads on Play Store alone and is also available on the web, App Store, Blackberry, and ChromeOS users. A completely subscription-free and ad-free platform, Google Podcasts is one of the top podcasting directories among users.
However, unlike the Apple Podcast directory, it does not have a studio, so you can only submit your podcasts via RSS feeds. Still, its user base and the advanced algorithms are an opportunity to connect with users who like the subjects you discuss.
Like Spotify and Apple Podcast directories, Google Podcasts also show you real-time analytics and guide you about users so that you can plan your content accordingly. Given that it only requires a Google account to start, it is another top podcast directory you cannot ignore.
- User Review of Google Podcast
“Google Podcast includes everything that a podcast listener wants. It’s simple, free, and includes valuable options like Sleep Timer, Playback speed, and more.”
- Monthly User Base: Over 30 million active users.
- Supported OS: Dedicated apps for all major OS and web presence.
5. Pandora
Pandora has over 64 million monthly active users, with a listener spending up to 24 hours/monthly on the platform. It explains that users spend up to 45 minutes on the Pandora platform tuning in to their favorite podcasts. Again, its search-based algorithms allow you to get discovered by users that like subjects and topics on which you’re creating podcasts, meaning it is simple to connect with a large user base conveniently.
Pandora only accepts podcasts via RSS feed, which should be in MP3 format. But recent notifications have shown more audio formats will be added.
However, it is vital to retain that Pandora Podcast’s team critically analyzes all submissions manually. So, it might take up to 4-6 weeks for your first Podcast to appear on the platform.
- User Review of Pandora Podcast
“Pandora Podcasts recommendations are a blessing for me, who always finds it confusing to locate the right episode to spend my time on.”
- Monthly User Base: Over 64 million active users.
- Supported OS: Dedicated apps for all major OS and web presence.
6. Audible
Although popular among audiobook lovers, Audible has a considerable podcast following too. Its monthly active user base is around 41 million. The biggest benefit of registering your Podcast on the Audible directory of podcasts is that it connects with users who use Alexa to discover new podcasts.
Besides Audible, the Podcast will also be available for users of the Amazon Music app. That means you can connect with even more users via one submission only. Not to forget, Amazon Prime Video (a massive following) users get a free subscription to Amazon Music, so there’s a perfect chance that you will connect with users conveniently.
It is important to note that both Amazon Music and Audible offer podcasts for entirely free to users, so a more extensive user base prefers these platforms over paid platforms.
- User Review of Pandora Podcast
“You get to listen to any audiobook in the “included” library no matter which subscription you purchase..”
- Monthly User Base: Over 64 million active users.
- Supported OS: Android, iOS,
7. NPR One
With an average listener spending up to 145 minutes weekly, the NPR One podcast directory is one of the best podcast directories you can trust to submit your show online. The podcast directory has a userbase of over 500 thousand users globally, and
- User Review of NPR One Podcast
“I’ve been using this app for years now. It’s been my trusty companion to give me the news. I primarily use it with the sleep timer. I’m not a super picky consumer, especially when I don’t pay for the app!
But for many months now, the sleep timer will frequently think the time is up and shut off the player well before it should. The player will often shut off within 5 minutes of using the 30 min sleep timer. It’s annoying to open the player hit resume, and reset the sleep timer.”
- Monthly User Base: 500 thousand
- Supported OS: Android, iOS
8. Tune In
Technically, TuneIn is a radio. But lately, it has become prevalent amongst podcast listeners to find their favorite shows and also listen to music. The podcast directory has a global user base of over 75 million and a monthly visit of 7million+, which makes it a great spot for any podcaster to publish their show.
- User Review of Tune In Podcast
“I’ve been using the app for 4 years. I like it, but there are some annoying “features.”
the screen won’t time out when the app is active.
the developers must have recently made a change. I used to search through my list of “recent” (there were about 20) to look for new episodes of my favorite podcasts.
Now, the app only allows me to see the last four podcasts or stations I have listened to. So it is not helpful.’
- Monthly User Base: Over 7 million active users
- Supported OS: Dedicated apps for all major OS and web presence.
9. Podcast Addict
With over 10 million downloads on Google Playstore, Podcast Addict is one of Android’s most popular podcast apps. You can publish your podcast show, as it allows you to connect with the ideal audience quickly and easily.
Also, Podcast Addict is one of the few podcast directories available in various languages, including French and German. So it’s a perfect choice non-English podcasters.
- User Review of PodcastAddit
**”**Been using this for years. It does everything I could ever want when listening/ referencing/ re-listening to my favorite podcasts and a lot more.
I’ve suffered through having to use other podcast players (e.g., listening to something “exclusive”), but I couldn’t stand the inane simplicity of other players long enough to finish their content.
Also, it takes a bit to get used to (especially if you’re coming from other stripped-down players), but very worth the small effort for a powerful app.”
- Monthly User Base: Over 750 thousand active users.
- Supported OS: Dedicated Android App and web presence.
10. RadioPublic
Having been in the game for over 15 years, RadioPublic is another excellent podcast directory you can count on to submit your show. Although the platform does not have a massive user base compared to its competitors, it will help you grow your listeners and business by getting your podcast show to the right audience.
On RadioPublic, an average listener spends up to 72 minutes every day finding new podcast shows and listening to new episodes from their favorite podcasts. And given that the platform offers many robust features, listeners can enjoy a seamless listening experience on any device.
Overall, the RadioPublic podcast directory offers you a smart way to publish your show and grow your audience without going through stress.
- User Review of RadioPublic
“Glad I waited a while to find a podcast website provider. Starting from scratch in WordPress seemed too much hassle. Luckily the site came along while I was dithering about what to do.
The RadioPublic team onboarded the other 5 billion podcasts as one of the first examples, and I’m delighted to have chosen this option. Already, my pod site feels “complete” to look at, and more features are coming soon that will help with marketing, understanding listeners, and building a podcast brand.”
- Monthly User Base: Over 300 Thousand active users
- Supported OS: Dedicated apps for all major OS and web presence.
11. Overcast
Overcast is a dedicated podcast app for Apple devices, and what makes it a great podcast directory is that it offers unique features that attract many listeners.
On this platform, you’ll be allowed to display advertising slots, enabling listeners to subscribe to your podcast show within a few clicks. Plus, unlike many of its competitors, listeners have control over what podcast show is displayed in the featured podcast section. It is helpful as it lets listeners quickly discover every new episode you publish.
Overall, many incredible features make Overcast a good choice, and chances are your Podcast will get to real listeners when you publish them here.
- User Review of Overcast
**”**Nice alternative to Apple’s. I’ve been well pleased so far. It isn’t always the most intuitive, but I’ve eventually figured out how to achieve almost everything I’ve wanted to. The benefits of adding a show via RSS have become immediately clear.
Being a subscriber to a show and getting early access episodes and bonus material right in my podcast manager makes it easy to stay up with all my shows.”
- Monthly User Base: Over 70 Thousand active users.
- Supported OS: Dedicated app for iOS and web presence.
12. Pocket Casts
If you’re looking for a free podcast directory to publish your Podcast show, Pocket Casts is the ideal one for you. This podcast directory is packed with many rich features that podcasters will find very helpful. In addition, thanks to its beautifully designed website interface, you won’t find the platform difficult to use.
Besides, many listeners love Pocket Podcasts as it offers them incredible features—for example, improved discovery options, playback speed options, and lots more. In addition, they’ve enhanced how they find and listen to podcasts on the platform. You can’t go wrong publishing your show on a platform like this one.
- User Review of Pocket Casts
“Wonderful app, the most reliable one I’ve found. Even with accounts, most others lose all your progress data which hasn’t happened once with this, and I’ve switched phones 3 times. The progress tracker is so accurate you can pause on one device, open the same account and continue listening. Most apps can’t even keep things downloaded. Search does take a minute but finds stuff no other app does.”
- Monthly User Base: Over 1 Million active users.
- Supported OS: Dedicated apps for all major OS and web presence.
13. CastBox
CastBox is another unique podcast directory that podcasters trust to publish their show online. The platform boasts an optimized SEO and artificial intelligence that lets listeners find new podcast shows. Thanks to its massive user base of up to 20 Million users, your Podcast could reach a wide range of audiences quickly and easily.
Also, CastBox offers social media features that allow listeners to comment and share your podcast show on their social media page, thus helping you get your show to more listeners and potentially increase your fanbase.
- User Review of CastBox
“I’ve been a podcaster for years and an avid podcast listener for a while. So I searched high and low for the best podcast app and distribution service, Castbox. They have a great app and website, a huge content library, and a superb feature set. Also, their app allows offline listening, as I can download my favorite podcast show.”
- Monthly User Base: Over 1 million active users
- Supported OS: Dedicated apps for all major OS and web presence.
14. Stitcher
Last but not least podcast directory on our list is Stitcher. The platform boasts more than 14.5 Million active listeners, with an average listener having up to 25 hours of listening duration per month.
Stitcher helps you alleviate the stress of getting your show to the right audience, and thanks to the platform’s easy podcast submission requirements, you only need to have at least one podcast episode on your RSS Feed to get approved.
Also, Stitcher offers a unique analytic tool that allows you to track the performance of your show on the platform, and what more impressive is that it’s integrated into more than fifty car models. In addition, it works with any vehicle that supports Apple’s CarPlay and Android Auto, which makes it a great choice for podcasters who believe their audience loves to listen to their show while driving.
- User Review of Stitcher
“So glad I switched! I have my podcasts but didn’t listen to them much - partially because Apple Podcasts is so hard to use. I switched to Stitcher to listen to The Magnus Archives, and I love it!”
- Monthly User Base: Over 1.5 million active users.
- Supported OS: Dedicated apps for all major OS and web presence.
Part 3. More choices to submit your podcast shows
The above Podcast directories are great choices you can always count on any day. However, if you’re looking for more options, the following are reliable podcasting directories to choose from;
Part 4. How to submit a show to podcast directories?
Submitting a podcast show to podcast directories is pretty simple. Here, we used Spotify as an example to show you how you can easily submit your podcast show within a few clicks. The steps are as follows;
Step1 Create a Spotify account using the email attached to your podcast host.
Step2 Open Spotify for Podcasters in your browser and login into your account. Then, click Get Started on the new screen.
Step3 Provide your Podcast’s RSS Feed and click Next to proceed.
Step4 You’ll be asked to add information about your Podcast, from its description to the title, artwork, etc.
Step5 Verify the Podcast by submitting the code sent to your email.
Step6 Review the information you’ve provided so far and submit it to Spotify for review.
Once you complete the steps, keep an eye on the submitted Podcast, as Spotify won’t message you even if your Podcast has been published.
Hot FAQs on Podcast Directories
1. Are podcast directories free?
Almost all top podcast directories are entirely free for creators. All you have to do is sign up on the platforms. Then, check the platform’s requirements to submit your podcast episodes, like the format, cover photos, and description. Of course, the requirements vary depending on the platform.
2. Can any podcast be on a directory of podcasts?
Yes, you can choose from any podcast directory to publish your Podcast. There’s no limitation. When submitting, you must select the ideal category for your podcast show so it can be displayed to the right audience.
3. Does it cost to join a podcast directory?
Yes, and the cost of joining a podcast directory varies depending on your platform.
Conclusion
The podcast directories introduced above are reliable for submitting podcast shows. So, chances are there, no matter what your podcast show is about. It’ll help you connect with the right audience. However, one thing is vital you need to make sure you choose the podcast directory that suits you.
Techniques for Separating Soundtracks From Visual Media in Adobe Premiere Pro
Are you into the creative industry? Do you need to detach audio from a video? Are you a fan of Premiere Pro?
With the media industry progressing, advanced features are on the rise. Each upgrade is for the creator’s ease. The well-developed functions limit the stress at the workplace. Don’t you agree? The media production needs to detach audio from video. It is essential to censor audio out or eliminate unwanted background noise.
Most often, audio has to be detached for B-roll. One can detach audio Premiere Pro effortlessly. The article covers the procedure to extract and separate audio from a video. We shall also have a preview of Filmora. So, what are we waiting for? Let us commence this!
In this article
01 How Can You Extract, Separate, or Detach Audio from Video? [Premiere Pro]
02 Tips to Detach or Remove Audio From Video in Filmora
Part 1: How Can You Extract, Separate, or Detach Audio from Video? [Premiere Pro]
Premiere Pro detaches audio flawlessly. Adobe Premiere Pro is a video editing software. With creative tools, a flexible interface, and powerful capabilities, Premiere Pro turns your raw footage into something extraordinary. It enables you to perform color grading, color correction, and transitions effectively. The largest toolset has made life bearable for creators.
Additionally, Adobe Premiere Pro has an excellent range of collaboration tools. There are learning tools to guide the beginner towards a successful process. These tutorials have assisted the user in performing basic operations productively. The refined video editing tools have created a revolution in the market. The Auto Reframe feature changes the crop selection by keeping the attention where it is due.
Are you invested in detaching the audio process? Worry no more as we have got you. Premiere Pro doesn’t leave its users empty-handed. Audio extraction and separation both would be included in this section.
Audio Extraction Process
The audio extraction procedure is a great way to lubricate the editing process. The audio is extracted to add new audio master clips in this phenomenon. The channel mapping, duration, gain, speed, and footage adjustment are applied to the extracted clips. The original content remains preserved.
Before detaching audio, let us shift our focus to extracting it. So, are you with us? Follow the step-by-step below to extract audio from the video.
Step 1: Launching Premiere Pro
Open Adobe Premiere Pro. Press ‘New Project’ from the interface that appears. The default settings are good to go. However, make sure that the output location is appropriate. Hit ‘OK.’

Step 2: Importing the Clips
Now, click on ‘Media Browser’ from the middle panel. Import the targeted video clips to initiate the process. Select the videos whose audio has to be extracted. Head to the ‘Clip’ section and choose ‘Audio Options.’ Hit ‘Extract Audio’ afterward.

Step 3: File Extraction
In a couple of seconds, Premiere Pro creates duplicate audio files. The original video clips are not affected in any way. Moving on, let us move on to export the extracted audio clips.

Step 4: Exporting Process
Mark in and out points on your sequence for the session you wish to export. Mute the rest of the tracks. Now, navigate to the ‘File,’ press ‘Export,’ and then ‘Media.’ For encoding format, choose between MP3 and WAV form audio based on the original file format. Choose the output location. Hit ‘Export,’ and you are done.

Audio Detaching Process
Similarly, audio separation is another way to access a part of the audio. It permits you to use any audio section and make necessary edits to it. To detach audio in Premiere Pro, kindly follow the guidelines below.
Step 1: Importing the Media Files
Launch Premiere Pro from your computer. The interface opens up in seconds. The user is recommended to browse the targeted video with attached audio. Add it to the timeline of the Premiere Pro.

Step 2: Unlinking Process
After that, right-click on the clip. Choose ‘Unlink’ from the list of options that appear. The user can easily select and edit both the audio and video content. However, you can also separate audio using another faster process.

Step 3: Deleting Process
Hold down the ALT key from your keyboard and click on the audio clip to do this more effectively. Use the ‘Delete’ button and get rid of it once and for all. Now, make necessary edits, and you are done for the day!

Part 2: Tips to Detach or Remove Audio From Video in Filmora
Wondershare Filmora needs no introduction. Filmora has always had something refined to offer in a world full of video editors. Wouldn’t you agree? A content creator needs a video editing tool with an interactive interface with balanced functions.
Filmora knows different tricks to keep creative professionals invested in it. From keyframing to motion tracking and green screen to color matching, Wondershare Filmora wouldn’t disappoint you. The optimized GPU detection brings productivity to work. As far as audio editing is concerned, Filmora has advanced tools on the go.
The audio equalizer and audio mixer fine-tune the music and adjust the audio of separate tracks, respectively. You can split audio, adjust the audio volume, and perform audio ducking. The creative creators can also add a voiceover and trim the clips. The original audio of the video can also be replaced technically. Isn’t that the whole dream?
In short, Filmora has everything under one platform. There is no need to download extensive video editors for each functionality.
Moving on to the section, we shall discuss the procedure to detach or remove audio using this exceptional tool. So, let us try this!
For Win 7 or later (64-bit)
For macOS 10.12 or later
Step 1: Browsing the Video
Download Wondershare Filmora in your system. Launch it as soon as the process is concluded. Import the targeted video files into the program. Drag the video from the library onto the timeline.

Step 2: Removing Audio
To remove the audio, right-click on the video file from the timeline. Click on ‘Detach audio’ from the options that appear. The audio file is separated from the video file. It is displayed in another track below the video track.

Step 3: Final Process
Now, the user is free to make edits to the audio and perform modifications as deemed necessary. Delete the separated audio track if you wish to add a new voiceover or audio in the background. You can do so by clicking on the trash button above the timeline.

Conclusion
The raw videos undergo treatment to look ravishing. Don’t you think? Without the needed editing, these videos wouldn’t stand anywhere. After the original audio is detached, a better message is expressed to replace it with promising content.
The article introduced Premiere Pro. Moreover, how to detach audio from video Premiere Pro was also discussed in detail. If you want to extract audio from video, this write-up will help you. Wondershare Filmora is a video editing software with great tools to get the trick done in seconds.
Versatile Video Editor - Wondershare Filmora
An easy yet powerful editor
Numerous effects to choose from
Detailed tutorials provided by the official channel
02 Tips to Detach or Remove Audio From Video in Filmora
Part 1: How Can You Extract, Separate, or Detach Audio from Video? [Premiere Pro]
Premiere Pro detaches audio flawlessly. Adobe Premiere Pro is a video editing software. With creative tools, a flexible interface, and powerful capabilities, Premiere Pro turns your raw footage into something extraordinary. It enables you to perform color grading, color correction, and transitions effectively. The largest toolset has made life bearable for creators.
Additionally, Adobe Premiere Pro has an excellent range of collaboration tools. There are learning tools to guide the beginner towards a successful process. These tutorials have assisted the user in performing basic operations productively. The refined video editing tools have created a revolution in the market. The Auto Reframe feature changes the crop selection by keeping the attention where it is due.
Are you invested in detaching the audio process? Worry no more as we have got you. Premiere Pro doesn’t leave its users empty-handed. Audio extraction and separation both would be included in this section.
Audio Extraction Process
The audio extraction procedure is a great way to lubricate the editing process. The audio is extracted to add new audio master clips in this phenomenon. The channel mapping, duration, gain, speed, and footage adjustment are applied to the extracted clips. The original content remains preserved.
Before detaching audio, let us shift our focus to extracting it. So, are you with us? Follow the step-by-step below to extract audio from the video.
Step 1: Launching Premiere Pro
Open Adobe Premiere Pro. Press ‘New Project’ from the interface that appears. The default settings are good to go. However, make sure that the output location is appropriate. Hit ‘OK.’
Step 2: Importing the Clips
Now, click on ‘Media Browser’ from the middle panel. Import the targeted video clips to initiate the process. Select the videos whose audio has to be extracted. Head to the ‘Clip’ section and choose ‘Audio Options.’ Hit ‘Extract Audio’ afterward.
Step 3: File Extraction
In a couple of seconds, Premiere Pro creates duplicate audio files. The original video clips are not affected in any way. Moving on, let us move on to export the extracted audio clips.
Step 4: Exporting Process
Mark in and out points on your sequence for the session you wish to export. Mute the rest of the tracks. Now, navigate to the ‘File,’ press ‘Export,’ and then ‘Media.’ For encoding format, choose between MP3 and WAV form audio based on the original file format. Choose the output location. Hit ‘Export,’ and you are done.
Audio Detaching Process
Similarly, audio separation is another way to access a part of the audio. It permits you to use any audio section and make necessary edits to it. To detach audio in Premiere Pro, kindly follow the guidelines below.
Step 1: Importing the Media Files
Launch Premiere Pro from your computer. The interface opens up in seconds. The user is recommended to browse the targeted video with attached audio. Add it to the timeline of the Premiere Pro.
Step 2: Unlinking Process
After that, right-click on the clip. Choose ‘Unlink’ from the list of options that appear. The user can easily select and edit both the audio and video content. However, you can also separate audio using another faster process.
Step 3: Deleting Process
Hold down the ALT key from your keyboard and click on the audio clip to do this more effectively. Use the ‘Delete’ button and get rid of it once and for all. Now, make necessary edits, and you are done for the day!
Part 2: Tips to Detach or Remove Audio From Video in Filmora
Wondershare Filmora needs no introduction. Filmora has always had something refined to offer in a world full of video editors. Wouldn’t you agree? A content creator needs a video editing tool with an interactive interface with balanced functions.
Filmora knows different tricks to keep creative professionals invested in it. From keyframing to motion tracking and green screen to color matching, Wondershare Filmora wouldn’t disappoint you. The optimized GPU detection brings productivity to work. As far as audio editing is concerned, Filmora has advanced tools on the go.
The audio equalizer and audio mixer fine-tune the music and adjust the audio of separate tracks, respectively. You can split audio, adjust the audio volume, and perform audio ducking. The creative creators can also add a voiceover and trim the clips. The original audio of the video can also be replaced technically. Isn’t that the whole dream?
In short, Filmora has everything under one platform. There is no need to download extensive video editors for each functionality.
Moving on to the section, we shall discuss the procedure to detach or remove audio using this exceptional tool. So, let us try this!
For Win 7 or later (64-bit)
For macOS 10.12 or later
Step 1: Browsing the Video
Download Wondershare Filmora in your system. Launch it as soon as the process is concluded. Import the targeted video files into the program. Drag the video from the library onto the timeline.
Step 2: Removing Audio
To remove the audio, right-click on the video file from the timeline. Click on ‘Detach audio’ from the options that appear. The audio file is separated from the video file. It is displayed in another track below the video track.
Step 3: Final Process
Now, the user is free to make edits to the audio and perform modifications as deemed necessary. Delete the separated audio track if you wish to add a new voiceover or audio in the background. You can do so by clicking on the trash button above the timeline.
Conclusion
The raw videos undergo treatment to look ravishing. Don’t you think? Without the needed editing, these videos wouldn’t stand anywhere. After the original audio is detached, a better message is expressed to replace it with promising content.
The article introduced Premiere Pro. Moreover, how to detach audio from video Premiere Pro was also discussed in detail. If you want to extract audio from video, this write-up will help you. Wondershare Filmora is a video editing software with great tools to get the trick done in seconds.
Versatile Video Editor - Wondershare Filmora
An easy yet powerful editor
Numerous effects to choose from
Detailed tutorials provided by the official channel
Exploring the Best: A Ranked List of 6 Top Transcription Automation Tools
The Best Automatic Transcription Software

Benjamin Arango
Mar 27, 2024• Proven solutions
Transcribing the audio and video recordings of interviews and meetings can help you to understand better the data you collected. Even if you are creating video content, a transcription can assist you in increasing its visibility on search engines. Transcribing a recording of any kind can make it easier to organize and archive the information the recording contains, and it enables you to have easy access to this data whenever you need it.
However, transcribing a single video or audio file can be a painstakingly long and time-consuming process. That is why opting for an automatic transcription software is the right choice for you if you are looking for a way to save time on audio and video transcription.
In this article, we are going to take you through some of the best automatic transcription software products and help you choose the one that best fits your needs.
The Best Automatic Transcription Software in 2020
Even though a quick Google search is going to reveal a broad spectrum of different automatic transcription software products that are advertised as free, you will still have to purchase a license or a subscription if you want to use all of their features. Let’s take a look at some of the best automatic transcription software in 2020, including free and paid solutions both.
1. Trint
Price: Free trial available, pricing options start at $44 per month
Compatibility: Web-based, iOS
In case you don’t want to go through the hustle of installing an automatic transcription software on your PC or Mac, then Trint is an excellent choice for you, as it allows you to transcribe audio and video files directly from your web browser. Besides turning video and files into text in minutes, Trint also lets you edit the transcribed text, add captions to videos or even share these files on the Internet.
The software is equipped with advanced text-to-speech algorithms that can transcribe audio and video recordings in a broad range of different languages, including all dialects of the English language.
Once the automatic transcription process is completed, you can use the software’s text editor to improve the quality of the transcription and then embed a searchable transcript to your website. However, the number of available features depends on the pricing plan you choose.
Pros
- All transcriptions are delivered quickly
- Excellent text editing tools
- Support for a large number of different languages
- Allows users to choose the format in which they save their text files
Cons
- More expensive than most automatic transcription software products
- Struggles with long and complex audio and video files
2. Happy Scribe
Price: $14 for one hour of transcription
Compatibility: web-based
Podcasters, video editors, journalists, and researchers can use Happy Scribe with the same level of efficiency, as this web-based application allows them to transcribe audio and video files quickly and accurately. It will take less than 20 minutes to get the first draft of an hour-long recording, while the Speaker Identification feature enables the app to create a new paragraph each time it recognizes a new speaker.
The platform’s algorithms have advanced punctuation capabilities that enable it to use commas, question marks, and full-stops correctly. Furthermore, Happy Scribe’s text editor provides proofreading help so that you can easily identify parts of the text that need to be tightened up. You can also highlight or comment on a section of a text and create a reminder for yourself or your colleagues. Happy Scribe can transcribe texts in 119 languages with excellent accuracy and it lets you export your transcripts in all commonly used text file formats.
Pros
- Quick upload times
- Available in 119 languages and accents
- Results are available within a short period of time
- Equipped with the Speaker Identification feature
Cons
- No monthly or annual subscription available
- Limited file-sharing capabilities
3. Sonix
Price: The first 30 minutes of transcription are free, pricing options start at $10 per hour
Compatibility: Web-based
If you are looking for an affordable automatic transcription software that is stacked with features that enable you to transcribe audio and video files in minutes then Sonix is the right choice for you. This web-based application needs three to four minutes to transcribe a 30-minute audio or video recording.
You can choose if you want to upload files from your computer, Google Drive or Dropbox, and Sonix is going to transcribe them for you automatically. The best part is that you can just click on any part of the generated text and the app is going to play the video or audio recording from that exact spot. Furthermore, you can alter the playback speed of all files you upload to Sonix, use the AudioText Editor that allows you to listen to the audio or video file you transcribed while you are editing it or download the snippets of highlighted text as audio files.
Pros
- Adobe Premiere Pro, Final Cut Pro X, Avid Media Compose integrations
- Features an integrated media player
- Audio and text are synchronized
- Allows users to export transcripts in a broad range of file formats
Cons
- Available features depend on the pricing model
- Automatic transcriptions aren’t always 100% accurate
4. Vocalmatic
Price: The first 30 minutes of transcription are free, pricing options start at $15 for one hour
Compatibility: Web-based
This is a simple online tool that enables podcasters and journalists to transcribe audio and video files. Vocalmatic allows its users to turn a video or an audio recording into text in just a few simple steps, as you just have to upload an MP3, WAV, MP4, WEBM, or MOV file to the platform, and Vocalmatic’s AI will transcribe it for you.
The platform sends you a link to your email once the transcription is completed so that you can edit the text. The app’s online text editor grants you complete control over the timecoded transcript and it allows you to speed up the playback of the file you are transcribing or quickly jump to a particular part of the recording. However, you won’t have a lot of options at your disposal while exporting from Vocalmatic, as you can only save a file as Raw Text or a Word document.
Pros
- The simple and quick transcription process
- Allows users to upload files in different audio and video formats
- Offers automatic transcription in more than a hundred languages
- Equipped with a powerful Speech-to-Text technology
Cons
- No Speaker Recognition capabilities
- Features only basic text editing tools
5. Temi
Price: The first 45 minutes of transcription are free, $0.25 per minute
Compatibility: Web-based, Android, iOS
Transcribing all types of audio and video files with Temi is a straightforward process that only requires you to upload, edit, and download the completed transcript. The web-based automatic transcription software is equipped with a powerful proprietary algorithm that identifies different speakers effortlessly and allows you to create custom timestamps.
Once the transcript is generated you can use the platform’s text editing tools to polish it, although you should keep in mind that Temi offers only basic text editing options. Besides using Temi from a web browser, you can also install the Temi app on your Android or your iPhone and transcribe all audio or video content you capture with your Smartphone just moments after recording it. However, the accuracy of the transcript largely depends on the quality of the recording, as transcripts of videos or audio recordings that contain heavy background noise are mostly unusable.
Pros
- Affordable, and easy to use
- Allows users to upload all types of audio and video files
- Features Speaker Identification technology
- Quick turnaround
Cons
- Temi can only transcribe audio and video files in the English language
- The accuracy of the transcription depends on the quality of the recording
6. Otter
Price: Free, pricing plans start at $8.33 per month
Compatibility: Web-based, iOS, Android
Otter is a great option for anyone in need of an online app that allows them to make audio recordings and transcribe them in real-time. The platform is equipped with speaker identification technology, and it grants you access to a variety of text editing and file-sharing options. However, you cannot transcribe more than 600 hours of content per month with the free version of Otter.
Furthermore, you will have to opt for either the Premium or the Team subscription model if you want to upload prerecorded audio and video files to Otter. The bulk import and export options, a custom vocabulary, or syncing video and audio directly from Dropbox are just a few among numerous options you will have at your disposal if you get a monthly subscription. However, capturing live notes in Zoom meetings, time codes or shared speaker voiceprints are only available within the Team subscription plan.
Pros
- Offers 600 hours of free transcriptions each month
- Transcribes audio recordings in real-time
- Allows users to sync Zoom cloud recordings
- Excellent collaboration features
Cons
- Importing audio or video files is not possible on the free version of Otter
- Time codes are only available within the Team subscription model
Part 2: 3 Tips for Choosing an Automatic Transcription Software
The features of automatic transcription software products offer vary, which is the reason why checking the software’s list of features is the first thing you need to do while searching for a new automatic transcription software. The accuracy with which a software transcribes audio and video files, the amount of text editing tools it offers, or the number of supported languages are just a few among numerous aspects you have to consider before deciding which automatic transcription software you should get.
You don’t have to worry about the software’s compatibility, as you just need a web browser to use any of the automatic subscription software products we featured in this article. However, if you want to transcribe audio and video files from your Smartphone, you should check if the app is compatible with your device and its operating system.
There are only a handful of automatic transcription software products on the market that can be used free of charge, which is why you need to decide if you want to pay per minute of transcription or get a monthly subscription. So, if you are transcribing hundreds of hours of audio and video content each month, it is more affordable to purchase a monthly subscription while paying per minute of transcription is a better option if you don’t transcribe audio and video files often.
Part 3: Automatic Transcription Software FAQs
What is Automatic Transcription?
Automatic transcription is the process during which AI algorithms listen to an audio or video file and transcribe it into text. All automatic transcription software products are equipped with a Speech-to-Text technology that generates text with varying levels of accuracy. That’s the reason why nearly all automatic transcription software products have text editors that allow you to identify and correct mistakes quickly.
What are the Biggest Benefits of Automatic Transcription?
Transcribing an audio or video file manually can take a lot of time and effort, while automatic transcription allows you to generate a transcript in just a few minutes. Afterward, you can just edit the text and use it to access important information quickly or upload it to your website in order to increase its visibility on search engines.
Conclusion
You don’t have to spend countless hours on audio and video file transcriptions since automatic transcription software products offer a simple solution. What’s more, you won’t even have to go through the software installation process, as each of the automatic transcriptions software products we featured in this article can be used from a web browser. Which automatic transcription software are you going to choose? Leave a comment and let us know.
Benjamin Arango
Benjamin Arango is a writer and a lover of all things video.
Follow @Benjamin Arango
Benjamin Arango
Mar 27, 2024• Proven solutions
Transcribing the audio and video recordings of interviews and meetings can help you to understand better the data you collected. Even if you are creating video content, a transcription can assist you in increasing its visibility on search engines. Transcribing a recording of any kind can make it easier to organize and archive the information the recording contains, and it enables you to have easy access to this data whenever you need it.
However, transcribing a single video or audio file can be a painstakingly long and time-consuming process. That is why opting for an automatic transcription software is the right choice for you if you are looking for a way to save time on audio and video transcription.
In this article, we are going to take you through some of the best automatic transcription software products and help you choose the one that best fits your needs.
The Best Automatic Transcription Software in 2020
Even though a quick Google search is going to reveal a broad spectrum of different automatic transcription software products that are advertised as free, you will still have to purchase a license or a subscription if you want to use all of their features. Let’s take a look at some of the best automatic transcription software in 2020, including free and paid solutions both.
1. Trint
Price: Free trial available, pricing options start at $44 per month
Compatibility: Web-based, iOS
In case you don’t want to go through the hustle of installing an automatic transcription software on your PC or Mac, then Trint is an excellent choice for you, as it allows you to transcribe audio and video files directly from your web browser. Besides turning video and files into text in minutes, Trint also lets you edit the transcribed text, add captions to videos or even share these files on the Internet.
The software is equipped with advanced text-to-speech algorithms that can transcribe audio and video recordings in a broad range of different languages, including all dialects of the English language.
Once the automatic transcription process is completed, you can use the software’s text editor to improve the quality of the transcription and then embed a searchable transcript to your website. However, the number of available features depends on the pricing plan you choose.
Pros
- All transcriptions are delivered quickly
- Excellent text editing tools
- Support for a large number of different languages
- Allows users to choose the format in which they save their text files
Cons
- More expensive than most automatic transcription software products
- Struggles with long and complex audio and video files
2. Happy Scribe
Price: $14 for one hour of transcription
Compatibility: web-based
Podcasters, video editors, journalists, and researchers can use Happy Scribe with the same level of efficiency, as this web-based application allows them to transcribe audio and video files quickly and accurately. It will take less than 20 minutes to get the first draft of an hour-long recording, while the Speaker Identification feature enables the app to create a new paragraph each time it recognizes a new speaker.
The platform’s algorithms have advanced punctuation capabilities that enable it to use commas, question marks, and full-stops correctly. Furthermore, Happy Scribe’s text editor provides proofreading help so that you can easily identify parts of the text that need to be tightened up. You can also highlight or comment on a section of a text and create a reminder for yourself or your colleagues. Happy Scribe can transcribe texts in 119 languages with excellent accuracy and it lets you export your transcripts in all commonly used text file formats.
Pros
- Quick upload times
- Available in 119 languages and accents
- Results are available within a short period of time
- Equipped with the Speaker Identification feature
Cons
- No monthly or annual subscription available
- Limited file-sharing capabilities
3. Sonix
Price: The first 30 minutes of transcription are free, pricing options start at $10 per hour
Compatibility: Web-based
If you are looking for an affordable automatic transcription software that is stacked with features that enable you to transcribe audio and video files in minutes then Sonix is the right choice for you. This web-based application needs three to four minutes to transcribe a 30-minute audio or video recording.
You can choose if you want to upload files from your computer, Google Drive or Dropbox, and Sonix is going to transcribe them for you automatically. The best part is that you can just click on any part of the generated text and the app is going to play the video or audio recording from that exact spot. Furthermore, you can alter the playback speed of all files you upload to Sonix, use the AudioText Editor that allows you to listen to the audio or video file you transcribed while you are editing it or download the snippets of highlighted text as audio files.
Pros
- Adobe Premiere Pro, Final Cut Pro X, Avid Media Compose integrations
- Features an integrated media player
- Audio and text are synchronized
- Allows users to export transcripts in a broad range of file formats
Cons
- Available features depend on the pricing model
- Automatic transcriptions aren’t always 100% accurate
4. Vocalmatic
Price: The first 30 minutes of transcription are free, pricing options start at $15 for one hour
Compatibility: Web-based
This is a simple online tool that enables podcasters and journalists to transcribe audio and video files. Vocalmatic allows its users to turn a video or an audio recording into text in just a few simple steps, as you just have to upload an MP3, WAV, MP4, WEBM, or MOV file to the platform, and Vocalmatic’s AI will transcribe it for you.
The platform sends you a link to your email once the transcription is completed so that you can edit the text. The app’s online text editor grants you complete control over the timecoded transcript and it allows you to speed up the playback of the file you are transcribing or quickly jump to a particular part of the recording. However, you won’t have a lot of options at your disposal while exporting from Vocalmatic, as you can only save a file as Raw Text or a Word document.
Pros
- The simple and quick transcription process
- Allows users to upload files in different audio and video formats
- Offers automatic transcription in more than a hundred languages
- Equipped with a powerful Speech-to-Text technology
Cons
- No Speaker Recognition capabilities
- Features only basic text editing tools
5. Temi
Price: The first 45 minutes of transcription are free, $0.25 per minute
Compatibility: Web-based, Android, iOS
Transcribing all types of audio and video files with Temi is a straightforward process that only requires you to upload, edit, and download the completed transcript. The web-based automatic transcription software is equipped with a powerful proprietary algorithm that identifies different speakers effortlessly and allows you to create custom timestamps.
Once the transcript is generated you can use the platform’s text editing tools to polish it, although you should keep in mind that Temi offers only basic text editing options. Besides using Temi from a web browser, you can also install the Temi app on your Android or your iPhone and transcribe all audio or video content you capture with your Smartphone just moments after recording it. However, the accuracy of the transcript largely depends on the quality of the recording, as transcripts of videos or audio recordings that contain heavy background noise are mostly unusable.
Pros
- Affordable, and easy to use
- Allows users to upload all types of audio and video files
- Features Speaker Identification technology
- Quick turnaround
Cons
- Temi can only transcribe audio and video files in the English language
- The accuracy of the transcription depends on the quality of the recording
6. Otter
Price: Free, pricing plans start at $8.33 per month
Compatibility: Web-based, iOS, Android
Otter is a great option for anyone in need of an online app that allows them to make audio recordings and transcribe them in real-time. The platform is equipped with speaker identification technology, and it grants you access to a variety of text editing and file-sharing options. However, you cannot transcribe more than 600 hours of content per month with the free version of Otter.
Furthermore, you will have to opt for either the Premium or the Team subscription model if you want to upload prerecorded audio and video files to Otter. The bulk import and export options, a custom vocabulary, or syncing video and audio directly from Dropbox are just a few among numerous options you will have at your disposal if you get a monthly subscription. However, capturing live notes in Zoom meetings, time codes or shared speaker voiceprints are only available within the Team subscription plan.
Pros
- Offers 600 hours of free transcriptions each month
- Transcribes audio recordings in real-time
- Allows users to sync Zoom cloud recordings
- Excellent collaboration features
Cons
- Importing audio or video files is not possible on the free version of Otter
- Time codes are only available within the Team subscription model
Part 2: 3 Tips for Choosing an Automatic Transcription Software
The features of automatic transcription software products offer vary, which is the reason why checking the software’s list of features is the first thing you need to do while searching for a new automatic transcription software. The accuracy with which a software transcribes audio and video files, the amount of text editing tools it offers, or the number of supported languages are just a few among numerous aspects you have to consider before deciding which automatic transcription software you should get.
You don’t have to worry about the software’s compatibility, as you just need a web browser to use any of the automatic subscription software products we featured in this article. However, if you want to transcribe audio and video files from your Smartphone, you should check if the app is compatible with your device and its operating system.
There are only a handful of automatic transcription software products on the market that can be used free of charge, which is why you need to decide if you want to pay per minute of transcription or get a monthly subscription. So, if you are transcribing hundreds of hours of audio and video content each month, it is more affordable to purchase a monthly subscription while paying per minute of transcription is a better option if you don’t transcribe audio and video files often.
Part 3: Automatic Transcription Software FAQs
What is Automatic Transcription?
Automatic transcription is the process during which AI algorithms listen to an audio or video file and transcribe it into text. All automatic transcription software products are equipped with a Speech-to-Text technology that generates text with varying levels of accuracy. That’s the reason why nearly all automatic transcription software products have text editors that allow you to identify and correct mistakes quickly.
What are the Biggest Benefits of Automatic Transcription?
Transcribing an audio or video file manually can take a lot of time and effort, while automatic transcription allows you to generate a transcript in just a few minutes. Afterward, you can just edit the text and use it to access important information quickly or upload it to your website in order to increase its visibility on search engines.
Conclusion
You don’t have to spend countless hours on audio and video file transcriptions since automatic transcription software products offer a simple solution. What’s more, you won’t even have to go through the software installation process, as each of the automatic transcriptions software products we featured in this article can be used from a web browser. Which automatic transcription software are you going to choose? Leave a comment and let us know.
Benjamin Arango
Benjamin Arango is a writer and a lover of all things video.
Follow @Benjamin Arango
Also read:
- Compilation of Websites Offering Ridiculous Sounds for 2024
- New 2024 Approved Lyric Purifier Toolkit Assemble Custom Music Beds
- Updated From Noise to Music Mastering Sound with Adobe Audition – An Updated Guide & Review
- 2024 Approved Audiophiles Handbook Advanced iMovie Audio Editing Mastery
- Updated 2024 Approved Exploring the Most Trending Audio Recording Software for Streaming
- Mastering Sound with Adobe Audition An In-Depth Look at Its Core Components
- New In 2024, Enhancing Audio Quality Practical Methods to Eradicate Low-Frequency Rumble
- Updated 2024 Approved 10 Best FREE Music Visualization APPs for iPhone and Android
- New In 2024, Exploring the Leading Free Audio Editors A Comprehensive Guide to Windows-Based Software
- 2024 Approved Exhaustive Register of Podcast Discovery Systems
- In 2024, Redefining Auditory Experience Discover the Best 5 Distortion Tools Available
- Updated Top Tear-Jerking Melodies The Best Sad Songs of the Year
- Updated 2024 Approved Android Audio Alteration Navigating Through the Most Trendy 7 Apps
- New In 2024, Sounds of the Game Discovering Cricket Ambient Noises
- New Discover the Best Sound Normalizers for Windows PCs
- How to Record & Add Voiceover to Videos for 2024
- Updated 2024 Approved Leading Audio Alteration Applications for Live Chatting
- Updated Text to MP3 Encoding Across All Major Mobile and Desktop OS
- Updated The Ultimate Checklist for Utilizing Adobe Audition in Sound Production for 2024
- 2024 Approved Top 7 Audio Recording Tools Beyond Audacity - Mobile Edition
- New In 2024, Decoding the Language of Rhythm and Flow in Rap Music
- In 2024, Ultimate guide to get the meltan box pokemon go For Tecno Pova 5 Pro | Dr.fone
- In 2024, How to Detect and Stop mSpy from Spying on Your Apple iPhone 13 | Dr.fone
- 5 Techniques to Transfer Data from Huawei Nova Y71 to iPhone 15/14/13/12 | Dr.fone
- In 2024, Complete Review & Guide to Techeligible FRP Bypass and More For Realme C55
- 2024 Approved Glitch Your Way to Creativity Top Free Online Effect Generators
- In 2024, A Comprehensive Guide to Mastering iPogo for Pokémon GO On Apple iPhone 6s | Dr.fone
- How to bypass Edge 40’s lock screen pattern, PIN or password
- How to Mirror Apple iPhone 13 Pro Max to iPad? | Dr.fone
- In 2024, How to Cast Vivo X90S to Computer for iPhone and Android? | Dr.fone
- Updated Learn Disney Cartoon Drawing to See More Disney Magic Moments
- How do i sign a .wpt file document electronically
- In 2024, Unlock Vivo V30 Phone Password Without Factory Reset Full Guide Here
- Updated Best Free Video Hosting Services for Online Storage and Sharing
- 5 Techniques to Transfer Data from Infinix Hot 30 5G to iPhone 15/14/13/12 | Dr.fone
- New 2024 Approved Subtitle Edit for Mac Download Alternatives
- In 2024, Hassle-Free Ways to Remove FRP Lock on Oppo Reno 8T 5Gwith/without a PC
- In 2024, Solve Common FCPX Problems with a Simple Reset
- Updated Thousands Already Know Ezgif and So Can You
- In 2024, The Ultimate Guide to Unlocking Apple Watch Or Apple iPhone X from iCloud
- In 2024, The Ultimate Guide to Get the Rare Candy on Pokemon Go Fire Red On Xiaomi Redmi Note 12 5G | Dr.fone
- Title: Updated The One-Stop Shop for Podcast Platforms and Directories
- Author: Ella
- Created at : 2024-05-19 06:26:35
- Updated at : 2024-05-20 06:26:35
- Link: https://sound-optimizing.techidaily.com/updated-the-one-stop-shop-for-podcast-platforms-and-directories/
- License: This work is licensed under CC BY-NC-SA 4.0.
