
:max_bytes(150000):strip_icc():format(webp)/GettyImages-591408071-5bc7767d4cedfd0026a2ce3f.jpg)
Updated Top 10 Male to Female Voice Changer Apps for 2024
Top 10 Male to Female Voice Changer Apps
If you’ve been searching for the best android and iOS voice-changing apps around the internet, you’re on the right spot. Voice-changing applications are always fun. They’re handy when you’re pulling a prank on a friend, or you want some amazing effects to test your voice. Thus, we provide you with all the best male to female voice changer apps in the list below.
Record & Edit Voice Fast before Changing Voice
Before changing your voice from male to female, I suggest you edit your voice first. Filmora is an easy-to-use yet powerful video editor helping you quickly edit voice no matter your voice or the audio extracted from videos. Explore Filmora’s audio editing features and get ready for changing voice!
For Win 7 or later (64-bit)
For macOS 10.12 or later


Part 1: Changing Voice Online for Free with Media.io
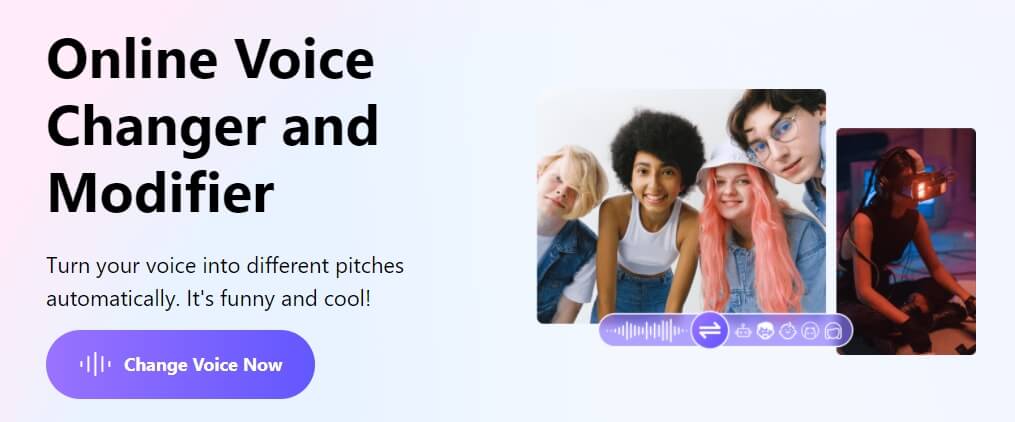
If you want to change voice without downloading and installing any app on your mobile phone, you can try some online solutions. Media.io is an all-in-one online video toolkit that allows you to edit, convert and compress video, audio and image files easily. The online voice changer from Media.io can transform your voice to a male voice, female voice, child voice, robot voice, and Donald Duck voice. If you wish to have voice filters, you won’t have any problems in the future with the Media.io voice changer.

This online voice changer works best on the Chrome browser, so you can utilize it whether using a Windows, Mac, Linux, or Chromebook device. As a result, you can deceive your family or friends by speaking in another people’s voice rather than your own. Doesn’t that sound like fun?
![]()
A cross-platform for making videos anywhere for all creators

Why your video editing isn’t good enough? How about some creative inspo?
- 100 Million+ Users
- 150+ Countries and Regions
- 4 Million+ Social Media Followers
- 5 Million+ Stock Media for Use
* Secure Download

Part 2: Best Male to Female Voice Changer Apps for iPhone and Android
- Girls Voice Changer
- Voice Changer Voice Recorder Editor & Effect
- VoiceFX
- Voice Changer
- Voice Changer - Audio effects
- Magic Call App
- Voice Changer and Sound Recorder
- Super Voice Editor
- Voice Changer with Effects
- Voice Changer - Girls Voice changer Male to Female
1. Girls Voice Changer
Available for: Android, iOS
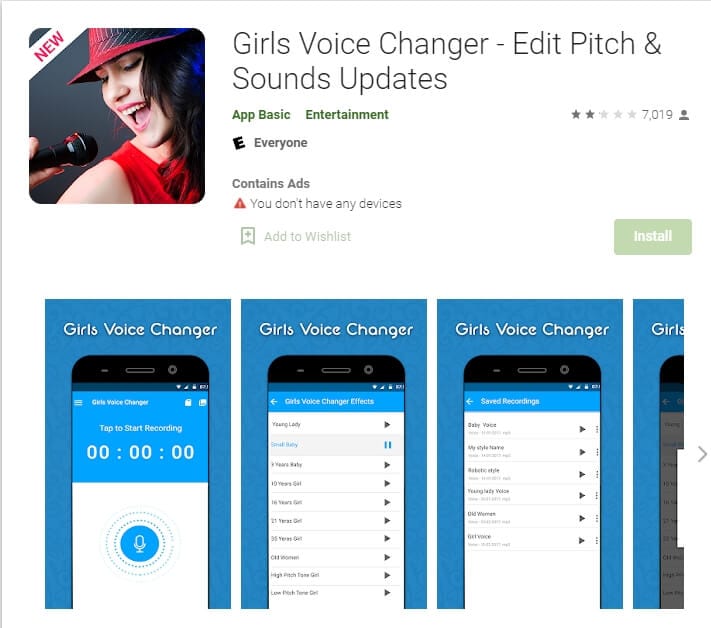
This girl voice changer app is highly portable and easy for any user to use comfortably. It is specifically more popular for changing male voice to female and for pitch adjustments. It’s completely free, so download on your android if you have a storage of about 8MB ready, and start using it!
This male-to-female voice changer app has several options in the library. Though the pitch adjustments are easy to make, some users have informed a lack of performance on very high-pitched settings. However, the smoothness of an android application also depends on how much space is readily available in the device. So next time you’re bored at a part, you have the perfect partner!
2. Voice Changer Voice Recorder Editor & Effect
Available for: Android
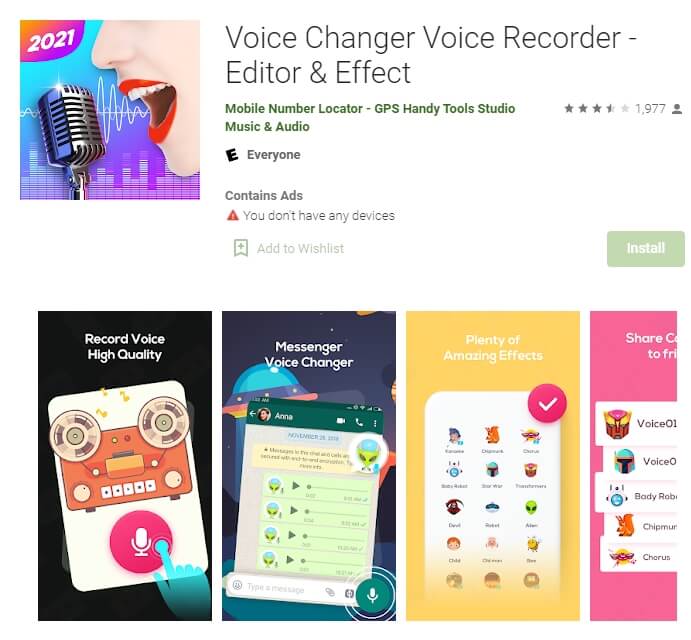
This voice changer application is for multi-purpose. Yes, you can use it as a girl voice changer smoothly and with ease. But apart from male to female voice changing, The “voice changer - voice editor application” can also be used to autotune your voice.
Now autotune is a big feature that every singer uses to make their voices tuned perfectly. With this app, you can also do the same to record your music or have fun while you are bored. The application is pretty to use and can be used as a girl voice changer not only for entertainment but also if you’re practicing. Many people who wish to seek a career in background voices might find this useful.
3. VoiceFX
Available for: Android

The VoiceFX application is filled with a lot of exciting options and features. If you are looking for an app that is more than just a male-to-female voice changer app, the voice fx is highly recommended.
You can also convert your voice into a robot or even an animal from male to female voice. Yes, you read it right. You can turn your manly voice into any of the fictional cartoons you want. This one’s a very easy and efficient way of filming a video with added effects or developing a mini-game with different voice characters. If you haven’t forgotten, there was a very big trend of converting famous music into chipmunk voices. With this app, you can convert your favorite songs into a chipmunk addition song without any problem.
4. Voice Changer
Available for: Android

The voice changer is a very famous male-to-female voice changer app. With over 10 million downloads on the google play store, the voice changer is highly recommended for users who have fun changing their voices from male to female. Compared to other voice changer applications, The Voice changer app has a very elegant and sleek design that makes it very easy to use.
Apart from the male to female voice change option, There are more than 50 other options that you can enjoy. Furthermore, you can share your creations with your friends through Bluetooth or other social media.
5. Voice Changer - Audio effects
Available for: Android

There are a lot of girl voice changer applications on the google play store. But not all of them are up to the mark. The Voice changer - audio effects is another highly recommended voice changer application.
The Voice Changer - Audio effects have a lot of other things to offer as well. Converting your voice from a male to a female has never been easier. Not only can you convert your voice into a girl, but you can also modify it. Furthermore, you can talk to your friends on the phone while you use the voice changer application. Moreover, the voices of animals and robots can also be an alternative to the female voice if you ever get bored of it.
6. Magic Call App
Available for: Android

The magic call is a real-time voice changer app that you can use for changing your voice during a call specifically. It is a really fun app which you can use with your friends to prank even your family!
This is a perfect option for people looking for a real-time girl voice changer app. The main purpose of this application is real-time calls. The magic call is ideal specifically for a male-to-female voice modification. And you can operate this application easily in call durations.
All you have to do is open the voice changer app and dial your call. Apart from Female voice, you can also convert your voice into a cartoon or an animal.
7. Voice Changer and Sound Recorder
Available for: iOS

If you are an iPhone user, then you must know that finding a voice changer on the apple store is like digging a diamond from the ground.
The Voice changer and sound recorder application is found exclusively on the apple store for people who love girl voice changer apps. It is a live call voice changer app, which means converting your voice from a male to a female in between the call. Furthermore, you can even add background voices such as traffic and echo to make your call even funnier. If you are looking for an excuse to get off from your call, then this application has got your back.
8. Super Voice Editor
Available for: Android
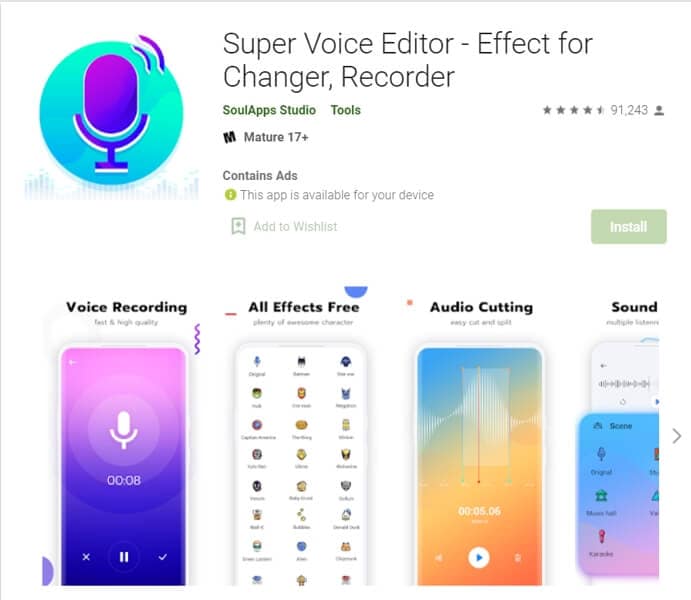
This one is a fun application for people searching for a voice changer app male to female. Not only can you record the audio that you edit, but also use it in real-time! Amazing right? Super voice editor enables you to add effects to your voice while you’re on a call as well. This feature means, next time you’re pulling a prank on the birthday boy, he won’t ever know! Sound like the wonder woman or dexter from his laboratory. The Super-Voice editor is perfect for kids playing in the house and even teenagers looking for something interesting. The SoulApps studio has made it easy for you to sound like your dream faces on the screen. With an MP3 cutter and Ringtone maker, this girl voice changer app is pure creativity.
9. Voice Changer with Effects
Available for: Android

Our list of girl voice changers, Voice changer with effects, is a very practical application that we highly recommend to our users.
With over 50 million downloads on google play, Voice changer with effects is highly suited for anyone looking for more than just a male-to-female voice changer. It has over 40 plus options such as helium, chipmunk, zombie, alien, and many more. With this application, you can even import a favorite audio clip of yours, and then you can easily convert it into a voice you like. If you want to modify your ringtone to an audio clip you just converted, then there is no better application than this one.
10. Voice Changer - Girls Voice changer Male to Female
Available for: Android

If you are looking for a girl voice changer app solely, this application perfectly fits you. The application is specifically designed only to change your voice from a male to a female. Although this application does provide options apart from female voice conversions, those features don’t function ideally. However, if you want a girl voice changer, you won’t have any trouble.
You can use this application while you are on a call. Hence, you can fool your family or friends by using a girl voice instead of your own. We recommend this as an average application that would fit your needs sufficiently.
In conclusion, you have now gone through the list of the perfect options for your android or iOS. Therefore, now you must be ready to choose the best girl voice changer app. So head on to your play store and search for your favorite app right now!
For Win 7 or later (64-bit)
For macOS 10.12 or later
Part 1: Changing Voice Online for Free with Media.io
If you want to change voice without downloading and installing any app on your mobile phone, you can try some online solutions. Media.io is an all-in-one online video toolkit that allows you to edit, convert and compress video, audio and image files easily. The online voice changer from Media.io can transform your voice to a male voice, female voice, child voice, robot voice, and Donald Duck voice. If you wish to have voice filters, you won’t have any problems in the future with the Media.io voice changer.
This online voice changer works best on the Chrome browser, so you can utilize it whether using a Windows, Mac, Linux, or Chromebook device. As a result, you can deceive your family or friends by speaking in another people’s voice rather than your own. Doesn’t that sound like fun?
![]()
A cross-platform for making videos anywhere for all creators
Why your video editing isn’t good enough? How about some creative inspo?
- 100 Million+ Users
- 150+ Countries and Regions
- 4 Million+ Social Media Followers
- 5 Million+ Stock Media for Use
* Secure Download
Part 2: Best Male to Female Voice Changer Apps for iPhone and Android
- Girls Voice Changer
- Voice Changer Voice Recorder Editor & Effect
- VoiceFX
- Voice Changer
- Voice Changer - Audio effects
- Magic Call App
- Voice Changer and Sound Recorder
- Super Voice Editor
- Voice Changer with Effects
- Voice Changer - Girls Voice changer Male to Female
1. Girls Voice Changer
Available for: Android, iOS
This girl voice changer app is highly portable and easy for any user to use comfortably. It is specifically more popular for changing male voice to female and for pitch adjustments. It’s completely free, so download on your android if you have a storage of about 8MB ready, and start using it!
This male-to-female voice changer app has several options in the library. Though the pitch adjustments are easy to make, some users have informed a lack of performance on very high-pitched settings. However, the smoothness of an android application also depends on how much space is readily available in the device. So next time you’re bored at a part, you have the perfect partner!
2. Voice Changer Voice Recorder Editor & Effect
Available for: Android
This voice changer application is for multi-purpose. Yes, you can use it as a girl voice changer smoothly and with ease. But apart from male to female voice changing, The “voice changer - voice editor application” can also be used to autotune your voice.
Now autotune is a big feature that every singer uses to make their voices tuned perfectly. With this app, you can also do the same to record your music or have fun while you are bored. The application is pretty to use and can be used as a girl voice changer not only for entertainment but also if you’re practicing. Many people who wish to seek a career in background voices might find this useful.
3. VoiceFX
Available for: Android
The VoiceFX application is filled with a lot of exciting options and features. If you are looking for an app that is more than just a male-to-female voice changer app, the voice fx is highly recommended.
You can also convert your voice into a robot or even an animal from male to female voice. Yes, you read it right. You can turn your manly voice into any of the fictional cartoons you want. This one’s a very easy and efficient way of filming a video with added effects or developing a mini-game with different voice characters. If you haven’t forgotten, there was a very big trend of converting famous music into chipmunk voices. With this app, you can convert your favorite songs into a chipmunk addition song without any problem.
4. Voice Changer
Available for: Android
The voice changer is a very famous male-to-female voice changer app. With over 10 million downloads on the google play store, the voice changer is highly recommended for users who have fun changing their voices from male to female. Compared to other voice changer applications, The Voice changer app has a very elegant and sleek design that makes it very easy to use.
Apart from the male to female voice change option, There are more than 50 other options that you can enjoy. Furthermore, you can share your creations with your friends through Bluetooth or other social media.
5. Voice Changer - Audio effects
Available for: Android
There are a lot of girl voice changer applications on the google play store. But not all of them are up to the mark. The Voice changer - audio effects is another highly recommended voice changer application.
The Voice Changer - Audio effects have a lot of other things to offer as well. Converting your voice from a male to a female has never been easier. Not only can you convert your voice into a girl, but you can also modify it. Furthermore, you can talk to your friends on the phone while you use the voice changer application. Moreover, the voices of animals and robots can also be an alternative to the female voice if you ever get bored of it.
6. Magic Call App
Available for: Android
The magic call is a real-time voice changer app that you can use for changing your voice during a call specifically. It is a really fun app which you can use with your friends to prank even your family!
This is a perfect option for people looking for a real-time girl voice changer app. The main purpose of this application is real-time calls. The magic call is ideal specifically for a male-to-female voice modification. And you can operate this application easily in call durations.
All you have to do is open the voice changer app and dial your call. Apart from Female voice, you can also convert your voice into a cartoon or an animal.
7. Voice Changer and Sound Recorder
Available for: iOS
If you are an iPhone user, then you must know that finding a voice changer on the apple store is like digging a diamond from the ground.
The Voice changer and sound recorder application is found exclusively on the apple store for people who love girl voice changer apps. It is a live call voice changer app, which means converting your voice from a male to a female in between the call. Furthermore, you can even add background voices such as traffic and echo to make your call even funnier. If you are looking for an excuse to get off from your call, then this application has got your back.
8. Super Voice Editor
Available for: Android
This one is a fun application for people searching for a voice changer app male to female. Not only can you record the audio that you edit, but also use it in real-time! Amazing right? Super voice editor enables you to add effects to your voice while you’re on a call as well. This feature means, next time you’re pulling a prank on the birthday boy, he won’t ever know! Sound like the wonder woman or dexter from his laboratory. The Super-Voice editor is perfect for kids playing in the house and even teenagers looking for something interesting. The SoulApps studio has made it easy for you to sound like your dream faces on the screen. With an MP3 cutter and Ringtone maker, this girl voice changer app is pure creativity.
9. Voice Changer with Effects
Available for: Android
Our list of girl voice changers, Voice changer with effects, is a very practical application that we highly recommend to our users.
With over 50 million downloads on google play, Voice changer with effects is highly suited for anyone looking for more than just a male-to-female voice changer. It has over 40 plus options such as helium, chipmunk, zombie, alien, and many more. With this application, you can even import a favorite audio clip of yours, and then you can easily convert it into a voice you like. If you want to modify your ringtone to an audio clip you just converted, then there is no better application than this one.
10. Voice Changer - Girls Voice changer Male to Female
Available for: Android
If you are looking for a girl voice changer app solely, this application perfectly fits you. The application is specifically designed only to change your voice from a male to a female. Although this application does provide options apart from female voice conversions, those features don’t function ideally. However, if you want a girl voice changer, you won’t have any trouble.
You can use this application while you are on a call. Hence, you can fool your family or friends by using a girl voice instead of your own. We recommend this as an average application that would fit your needs sufficiently.
In conclusion, you have now gone through the list of the perfect options for your android or iOS. Therefore, now you must be ready to choose the best girl voice changer app. So head on to your play store and search for your favorite app right now!
“REAPER 101: A Comprehensive Overview of Features and Functionality”
DAW stands for Digital Audio Workstation. It is where you can record, edit, mix or even master your music. You always need good DAW software to help you with the job to produce music or live recording musicians.
A good DAW software must have a multi-track audio recording , virtual instruments, MIDI sequencer, excellent mixing capabilities, and plug-in processor hosting. The software is found for all major operating systems such as Linux , Windows, and Mac. If you want to learn more about DAW, then stay with us. The article will discuss in detail REAPER Recording Software.
In this article
01 What Is REAPER Recording Software?
02 How to Download and Install REAPER Software?
03 Tutorial for Using REAPER Recording Software
Part 1. What Is REAPER Recording Software?
Recording software like REAPER records computer audio is used to produce music, edit it, transform, and customize your music. With REAPER Recording Software , you can record multi-layer audio and MIDI in various formats. REAPER has the easiest interface that allows you to drag and drop to import, split, move and do many other tasks.

This is just one feature of REAPER that sounds very interesting. In this section, we will talk about more of its features.
1. Record and Edit
You can easily record the audio and (MIDI) Musical Instrumental Digital Interface with REAPER recording software. It lets you edit and customize everything. You can record and edit things limitlessly. When it comes to recording, it’s not at all difficult for REAPER software to record various instruments or vocals.
2. Mixing
Initially, the mixer might seem inflexible, but in reality, REAPER has a lot to offer you. It has great automated capabilities for instrument and effect parameters. It doesn’t matter if you are working because you can still bounce or freeze tracks while working.
The mixer is very flexible. With REAPERs mixer, you just have to drag and drop your recordings so that you can create tracks, and also, you can customize the arrangements by moving the portions.
3. Interface
While looking at the interface, you might question yourself about how to use its interface. Some people love to learn about new things, such as the REAPER Recording Software. Whereas, some people seem least interested because the half-empty interface is not intuitive to them.
Whereas, the best thing about its interface is that you can customize it. REAPER allows you to add different wallpapers and layouts to your software interface.
4. Strong Stability
REAPER Recording Software has very strong stability. This is one of its strongest features as compared to other competitors. The RAM is rarely affected by the load time and the used resources. Moreover, the software offers a wide range of languages. You can select your desired language to run the software.
Part 2. How to Download and Install REAPER Software?
REAPER is a Digital Audio Workstation. The perfect platform where you can manipulate and transform your audio. With REAPER Record Computer audio, you can work efficiently in a resource-friendly studio with saving your time. Stay tuned if you plan to learn more about its pricing and requirements.

Pricing of REAPER Software
A reaper is a brilliant software. It has a 60-day trial period. REAPER costs $60 in total to register. It has complete MIDI sequencing. You can also get a discounted license if REAPER is the best private option for you or has commercial usage. You can set the equal license key on every computer for someone with multiple computers.
System Requirements
The recording software has uncountable features. REAPER software facilitates its users at every level by giving the best audio manipulating platform. The best thing about REAPER Recording Software is its compatibility with different operating systems. Let us add more to your knowledge on this.
Windows
REAPER software is available for Windows 7, 8, 10, XP, and Vista. The version of REAPER for Windows is 6.42. This is for Windows 64-bit whereas, a download package is also available for Windows 32-bit.
macOS
For macOS 64-bit, REAPER has a 6.42 version. This version is compatible with macOS 10.5 – 10.14. Whereas, for macOS 10.15+, the available version of REAPER is 6.42 with a 15MB file size.
Linux
REAPER Recording Software is also compatible with Linux x86_64. The REAPER version is 6.42 with an 11 MB file size. This version can also work on AMD64 64-bit.
Downloading and Installing REAPER
Now that REAPER Record Computer Audio has impressed you a lot. You must be thinking about how to download it. If this is on your mind, then we got you. Allow us to share its steps that will guide you to download the software easily.
Step 1: To install REAPER software, first of all, visit its official website. Then locate and head over to its download section.
Step 2: Click on ‘Download REAPER from the download section.’ For Windows users, they can download the Windows installation package. At the same time, Linux and macOS users can select their installation packages.
Step 3: Lastly, after you have downloaded your systems compatible installation package, you simply have to run it and then install it according to your respective operating system.
Part 3. Tutorial for Using REAPER Recording Software
After its attractive features and detailed downloading procedure, it is finally the time to talk about its works. This section of the article will explain to you more about REAPER Recording Software as we are now going to present a tutorial on how to use the software.
Understand the Layout
Understanding and knowing the layout of your software before you start working on it is essential. The crucial components of REAPER software include the Timeline, Arrangement Window, Track Panel, Toolbar, and lastly, Transport.

The Arrangement window holds all the added items. The items are played from left to right order, similar to their timeline arrangement. You can also zoom in and out. Then comes the transport toolbar, which holds the functions to stop, rewind, play, fast forward, adjust the timeline speed, etc. The toolbar holds all the toggle buttons. You can also customize your toolbar.
New Track Creation
For creating a new track on REAPER, go to the Track menu and hit Insert New Track. A track is like another layer to your audio. Multiple layers and tracks make your work complex yet interesting as you can play all the different tracks at the same time. By double-clicking in the Track Control Panel, you can set a name for the added track.

Audio Hardware Settings for Audio Recording
It is best suggested always to check your audio hardware settings before you start to record, edit or mix with REAPER Recording Software. Your primary focus should be on the recording device’s devices should be set as Input Device, whereas the listening device should be set as the Output Device.
For this, you have to select Preferences from the Options menu. A window will appear in front of you, the REAPER Preference window. You have to select the correct Input and Output devices from the dropdown menu from this window.

Arm your Track
Arming your track is very important. For this, head over to the Track Control Panel, and next to your track name, hit the red circle. If you have various tracks, you should solo this track and mute the other tracks.
As soon as the track is armed, a Gain Meter will activate on the side. From this, you can check if you have properly set the microphone or not. This could be tested by tapping on the microphone.

Record
After all, the hardware settings are done, and your track is armed, it’s time to start the recording. For that, just tap on the Record button in the Transport toolbar. A yellow line in the timeline will indicate the end of the recording.

To end the recording, tap on the Stop button from the Transport Toolbar. Lastly, REAPER Recording Software will ask you to save the file. In case you don’t want it, you can also delete it.
Create and Manipulate Clips
Things like manipulation get a lot easier if you split the clips in REAPER. From the items menu, you have to select the option of Split Item on Cursor. This divides your clip into two clips on each side of the cursor. You can also remove the clips by going to the Items Menu. From there, you just have to hit the Remove Item option, or else, simply press the Delete key on your keyboard.

Removing clips will create a gap in the arrangement window that can be filled by dragging forward the remaining clip.
Volume Adjustments – Normalize
By double-clicking on the item or by selecting ‘Item Properties’ from a right-click, you can normalize the item. A new window will appear as Media Item Properties, from where you have to locate the Volume Settings and then select the option of Normalize.
If your item is already loud, then nothing will happen, but if it is not, then the slider will change from 0.00 dB showing an increase in the volume. Lastly, hit the ‘Apply’ or ‘OK’ button to imply the changes.
Fade in/out
With the Media Properties, you can also adjust a Fade in and a Fade out. For this, you simply have to set an end time for the Fade in, whereas a start time is entered for Fade out. Hit the ‘Ok’ or ‘Apply’ button to apply the changes.
From the Arrangement window, fades can be adjusted. For adjusting the fades, hover with your mouse over the red line. You will see a newly shaped cursor. Just drag on the timeline to play and adjust the Fade with this new cursor.

Automate Changes
With REAPER, you can also automate changes in track parameters. We will guide about automation from Track Envelopes. From Track Control Panel, hit the Trim option. A new Envelopes window will open at this point from where you have to check the Volume box.
A new Volume Track will open up. Here, you have to set new Envelope points. That could be done by holding the shift key, right-clicking on the point, and then selecting Create New Point. A green circle will indicate the new point.
By dragging the Envelope point, you can also adjust the volume. Dragging it towards the top will increase the volume, whereas dragging it towards the bottom will eventually decrease.

Finalize the Audio – Render
After all the above steps have been completed to set the order and adjust your desired volume, the last step comes to render your project file. For that, move to the File menu and select the ‘Render’ option. A window will be opened as ‘Render to File.’ Now, from the dropdown menu, select your desired Output Format.
Lastly, hit the Render 1 File button, and then REAPER will export your project. You can immediately listen to it by selecting the ‘Launch File’ option.

Concluding Thoughts
This article is everything you need to learn about REAPER Recording Software. The article that started from an introduction on DAW took you on a roller coaster ride. Everything about REAPER software has been shared.
We hope that this article helps you in all possible ways. The attractive features impress you, and its pricing and system specifications increase your knowledge. Along with that, the shared tutorial will guide you thoroughly on how to use it.
02 How to Download and Install REAPER Software?
03 Tutorial for Using REAPER Recording Software
Part 1. What Is REAPER Recording Software?
Recording software like REAPER records computer audio is used to produce music, edit it, transform, and customize your music. With REAPER Recording Software , you can record multi-layer audio and MIDI in various formats. REAPER has the easiest interface that allows you to drag and drop to import, split, move and do many other tasks.
This is just one feature of REAPER that sounds very interesting. In this section, we will talk about more of its features.
1. Record and Edit
You can easily record the audio and (MIDI) Musical Instrumental Digital Interface with REAPER recording software. It lets you edit and customize everything. You can record and edit things limitlessly. When it comes to recording, it’s not at all difficult for REAPER software to record various instruments or vocals.
2. Mixing
Initially, the mixer might seem inflexible, but in reality, REAPER has a lot to offer you. It has great automated capabilities for instrument and effect parameters. It doesn’t matter if you are working because you can still bounce or freeze tracks while working.
The mixer is very flexible. With REAPERs mixer, you just have to drag and drop your recordings so that you can create tracks, and also, you can customize the arrangements by moving the portions.
3. Interface
While looking at the interface, you might question yourself about how to use its interface. Some people love to learn about new things, such as the REAPER Recording Software. Whereas, some people seem least interested because the half-empty interface is not intuitive to them.
Whereas, the best thing about its interface is that you can customize it. REAPER allows you to add different wallpapers and layouts to your software interface.
4. Strong Stability
REAPER Recording Software has very strong stability. This is one of its strongest features as compared to other competitors. The RAM is rarely affected by the load time and the used resources. Moreover, the software offers a wide range of languages. You can select your desired language to run the software.
Part 2. How to Download and Install REAPER Software?
REAPER is a Digital Audio Workstation. The perfect platform where you can manipulate and transform your audio. With REAPER Record Computer audio, you can work efficiently in a resource-friendly studio with saving your time. Stay tuned if you plan to learn more about its pricing and requirements.
Pricing of REAPER Software
A reaper is a brilliant software. It has a 60-day trial period. REAPER costs $60 in total to register. It has complete MIDI sequencing. You can also get a discounted license if REAPER is the best private option for you or has commercial usage. You can set the equal license key on every computer for someone with multiple computers.
System Requirements
The recording software has uncountable features. REAPER software facilitates its users at every level by giving the best audio manipulating platform. The best thing about REAPER Recording Software is its compatibility with different operating systems. Let us add more to your knowledge on this.
Windows
REAPER software is available for Windows 7, 8, 10, XP, and Vista. The version of REAPER for Windows is 6.42. This is for Windows 64-bit whereas, a download package is also available for Windows 32-bit.
macOS
For macOS 64-bit, REAPER has a 6.42 version. This version is compatible with macOS 10.5 – 10.14. Whereas, for macOS 10.15+, the available version of REAPER is 6.42 with a 15MB file size.
Linux
REAPER Recording Software is also compatible with Linux x86_64. The REAPER version is 6.42 with an 11 MB file size. This version can also work on AMD64 64-bit.
Downloading and Installing REAPER
Now that REAPER Record Computer Audio has impressed you a lot. You must be thinking about how to download it. If this is on your mind, then we got you. Allow us to share its steps that will guide you to download the software easily.
Step 1: To install REAPER software, first of all, visit its official website. Then locate and head over to its download section.
Step 2: Click on ‘Download REAPER from the download section.’ For Windows users, they can download the Windows installation package. At the same time, Linux and macOS users can select their installation packages.
Step 3: Lastly, after you have downloaded your systems compatible installation package, you simply have to run it and then install it according to your respective operating system.
Part 3. Tutorial for Using REAPER Recording Software
After its attractive features and detailed downloading procedure, it is finally the time to talk about its works. This section of the article will explain to you more about REAPER Recording Software as we are now going to present a tutorial on how to use the software.
Understand the Layout
Understanding and knowing the layout of your software before you start working on it is essential. The crucial components of REAPER software include the Timeline, Arrangement Window, Track Panel, Toolbar, and lastly, Transport.
The Arrangement window holds all the added items. The items are played from left to right order, similar to their timeline arrangement. You can also zoom in and out. Then comes the transport toolbar, which holds the functions to stop, rewind, play, fast forward, adjust the timeline speed, etc. The toolbar holds all the toggle buttons. You can also customize your toolbar.
New Track Creation
For creating a new track on REAPER, go to the Track menu and hit Insert New Track. A track is like another layer to your audio. Multiple layers and tracks make your work complex yet interesting as you can play all the different tracks at the same time. By double-clicking in the Track Control Panel, you can set a name for the added track.
Audio Hardware Settings for Audio Recording
It is best suggested always to check your audio hardware settings before you start to record, edit or mix with REAPER Recording Software. Your primary focus should be on the recording device’s devices should be set as Input Device, whereas the listening device should be set as the Output Device.
For this, you have to select Preferences from the Options menu. A window will appear in front of you, the REAPER Preference window. You have to select the correct Input and Output devices from the dropdown menu from this window.
Arm your Track
Arming your track is very important. For this, head over to the Track Control Panel, and next to your track name, hit the red circle. If you have various tracks, you should solo this track and mute the other tracks.
As soon as the track is armed, a Gain Meter will activate on the side. From this, you can check if you have properly set the microphone or not. This could be tested by tapping on the microphone.
Record
After all, the hardware settings are done, and your track is armed, it’s time to start the recording. For that, just tap on the Record button in the Transport toolbar. A yellow line in the timeline will indicate the end of the recording.
To end the recording, tap on the Stop button from the Transport Toolbar. Lastly, REAPER Recording Software will ask you to save the file. In case you don’t want it, you can also delete it.
Create and Manipulate Clips
Things like manipulation get a lot easier if you split the clips in REAPER. From the items menu, you have to select the option of Split Item on Cursor. This divides your clip into two clips on each side of the cursor. You can also remove the clips by going to the Items Menu. From there, you just have to hit the Remove Item option, or else, simply press the Delete key on your keyboard.
Removing clips will create a gap in the arrangement window that can be filled by dragging forward the remaining clip.
Volume Adjustments – Normalize
By double-clicking on the item or by selecting ‘Item Properties’ from a right-click, you can normalize the item. A new window will appear as Media Item Properties, from where you have to locate the Volume Settings and then select the option of Normalize.
If your item is already loud, then nothing will happen, but if it is not, then the slider will change from 0.00 dB showing an increase in the volume. Lastly, hit the ‘Apply’ or ‘OK’ button to imply the changes.
Fade in/out
With the Media Properties, you can also adjust a Fade in and a Fade out. For this, you simply have to set an end time for the Fade in, whereas a start time is entered for Fade out. Hit the ‘Ok’ or ‘Apply’ button to apply the changes.
From the Arrangement window, fades can be adjusted. For adjusting the fades, hover with your mouse over the red line. You will see a newly shaped cursor. Just drag on the timeline to play and adjust the Fade with this new cursor.
Automate Changes
With REAPER, you can also automate changes in track parameters. We will guide about automation from Track Envelopes. From Track Control Panel, hit the Trim option. A new Envelopes window will open at this point from where you have to check the Volume box.
A new Volume Track will open up. Here, you have to set new Envelope points. That could be done by holding the shift key, right-clicking on the point, and then selecting Create New Point. A green circle will indicate the new point.
By dragging the Envelope point, you can also adjust the volume. Dragging it towards the top will increase the volume, whereas dragging it towards the bottom will eventually decrease.
Finalize the Audio – Render
After all the above steps have been completed to set the order and adjust your desired volume, the last step comes to render your project file. For that, move to the File menu and select the ‘Render’ option. A window will be opened as ‘Render to File.’ Now, from the dropdown menu, select your desired Output Format.
Lastly, hit the Render 1 File button, and then REAPER will export your project. You can immediately listen to it by selecting the ‘Launch File’ option.
Concluding Thoughts
This article is everything you need to learn about REAPER Recording Software. The article that started from an introduction on DAW took you on a roller coaster ride. Everything about REAPER software has been shared.
We hope that this article helps you in all possible ways. The attractive features impress you, and its pricing and system specifications increase your knowledge. Along with that, the shared tutorial will guide you thoroughly on how to use it.
“The Ultimate List of Top-Tier Digital Volume Enhancers Online”
There are times when we download certain videos online and when we play the videos, the volume seems to be very low. Naturally, watching such videos is never going to be comfortable because you have to strain your attention to listen to the dialogues. Besides, the background sound effects will not be prominent which will make the video watching experience underwhelming. That is where an audio booster online tool is useful.
There is no need to download any video volume booster software or app as you will need such a tool occasionally. That is why a video volume booster online tool is more effective. You need to upload your video whichever has low volume and adjust the volume as per requirement. Thereafter, you can export the modified video to save it on your device storage. Here is the list of the top 4 sound booster online for videos.
2. VideoLouder
VideoLouder is free to use audio volume booster online tool. You can increase the volume of any video file that you have downloaded on your hard drive. The online tool supports video file size up to 500 MB. If you want, you can also decrease the volume of the video file. You can directly go to the website and upload the video to increase or decrease the volume. You can even select the number of decibels of sound you want to adjust. Here are the key features of VideoLouder volume booster tool.

- Increase or decrease volume for free.
- Supports different video file formats like AVI, MP4, MPEG, MOV.
- Allows setting the decibels for increase or decrease.
- Allows video file size up to 500 MB which is quite generous.
How to boost video volume online with VideoLouder?
Step 1: From your device web browser, visit <www.videolouder.com>.
Step 2: You will have to click on ‘Browse’ button and select the video file from your device storage whose volume you want to increase or decrease.
Step 3: You will have to click on Select Action and choose the option of the ‘Increase Volume’ or ‘Decrease Volume’ as per requirements.
Step 4: There is the option of ‘How many decibels (dB)?’ where you have to choose the decibel of your preference for increasing or decreasing that much decibel value of sound.
Step 5: Finally, you will have to click on ‘Upload File’ and wait patiently for the video file to get uploaded and volume to get boosted as per your settings.
Thereafter, you can save the file on your device storage and listen to the changes.
3. FileConverto
This is another legitimate MP4 volume booster online to adjust the volume of your video files. Not just MP4 files, you can upload different file formats including AVI and MOV. It is absolutely free to use and has an easy and simple user interface. However, just like other online volume boosters, it also lets you import video having a maximum size of 500 MB. Even FileConverto allows you to customize the decibels freely. Here are the features of FileConverto online tool.

- Can increase as well as decrease volume of video files.
- Ability to customize sound as per decibel requirements.
- Supports multiple video file formats apart from MP4.
- Does not require the setting up of any account.
How to Boost Video Volume Online with FileConverto?
Step 1**:** From your web browser, visit fileconverto.com/boost-video-volume
Step 2: Now click on Browse to select the video file from your device storage.
Step 3: From ‘Select desired action’ option, you will have to select ‘Increase Volume’ or ‘Decrease Volume’.
Step 4: You can set the dB accordingly from ‘How many decibels? option.
Step 5: Finally, click on Submit Now button and wait for the file to upload and volume to get adjusted.
4. Online Video Cutter Volume Booster
There is a wide collection of video editing tools available under Online Video Cutter. Volume Booster is specifically designed to increase the volume of video files. The user interface is better than most other video volume booster online tools. You can drag and drop your video file instantly on its user interface. In fact, you can even select video files from Google Drive and DropBox.
Moreover, you can also paste the URL of the video file such as from YouTube and boost its volume and thereafter, download the video file. You can also check its MP3 volume booster online for increasing or decreasing audio file volume. Here are the key features of Online Video Cutter Volume Booster tool.

- Drag and drop video file instantly.
- Upload video file from Google Drive and DropBox.
- Supports MP4, FLV, AVI, MOV, 3GP, MKV, WM and more file formats.
- Change video speed and preview the changes before downloading.
How to Boost Video Volume Online with Online Video Cutter Volume Booster**?**
Step 1: From your web browser, visit online-video-cutter.com/volume.
Step 2: Drag and drop your video file on the web interface.
Step 3: After the file is uploaded, click on Volume option. Adjust the slider at the bottom as per your requirement.
Step 4: Once done, click on Save button to save the modified video.
Bonus: Video Volume Booster Software
If you are looking for a dedicated software to boost the volume of your videos, we recommend Wondershare Filmora. A standalone software is useful when you have to boost the volume of multiple large video files. Uploading large video files online is a time-consuming as well as a heavy data-consumption process.
With Filmora, you can not only adjust the volume but also optimize various parameters of the audio in a video file. Filmora is a professional video editor and you can ever capture video through webcam as well as capture your screen video with system sound and mic audio. You can add video effects as well as audio effects during the editing phase and export the edited video files in different file formats.
Here are the steps to boost volume in Filmora.
Step 1: Download and install Filmora on your computer. Open the software and click on New Project.
For Win 7 or later (64-bit)
For macOS 10.12 or later
Step 2: Drag and drop your video file on the primary window. Thereafter, drag the video file on Video Timeline.

Step 3: Double-click on the video file to open Editing Panel. Go to Audio tab and adjust the volume and audio parameters to boost the overall volume. When done, click on Ok button.
Step 4: After adjusting, you can play the video to listen to the boosted volume. Finally, click on Export and save the edited video file to your hard drive.
The Bottom Line
Increasing the volume of a video to make the dialogues sound properly and amplify the background music is no more an issue. We have picked the best audio volume booster online where you can adjust video volume instantly. We have also recommended a professional sound booster software named Wondershare Filmora if you want to edit video volume on your computer.
How to boost video volume online with VideoLouder?
Step 1: From your device web browser, visit <www.videolouder.com>.
Step 2: You will have to click on ‘Browse’ button and select the video file from your device storage whose volume you want to increase or decrease.
Step 3: You will have to click on Select Action and choose the option of the ‘Increase Volume’ or ‘Decrease Volume’ as per requirements.
Step 4: There is the option of ‘How many decibels (dB)?’ where you have to choose the decibel of your preference for increasing or decreasing that much decibel value of sound.
Step 5: Finally, you will have to click on ‘Upload File’ and wait patiently for the video file to get uploaded and volume to get boosted as per your settings.
Thereafter, you can save the file on your device storage and listen to the changes.
3. FileConverto
This is another legitimate MP4 volume booster online to adjust the volume of your video files. Not just MP4 files, you can upload different file formats including AVI and MOV. It is absolutely free to use and has an easy and simple user interface. However, just like other online volume boosters, it also lets you import video having a maximum size of 500 MB. Even FileConverto allows you to customize the decibels freely. Here are the features of FileConverto online tool.
- Can increase as well as decrease volume of video files.
- Ability to customize sound as per decibel requirements.
- Supports multiple video file formats apart from MP4.
- Does not require the setting up of any account.
How to Boost Video Volume Online with FileConverto?
Step 1**:** From your web browser, visit fileconverto.com/boost-video-volume
Step 2: Now click on Browse to select the video file from your device storage.
Step 3: From ‘Select desired action’ option, you will have to select ‘Increase Volume’ or ‘Decrease Volume’.
Step 4: You can set the dB accordingly from ‘How many decibels? option.
Step 5: Finally, click on Submit Now button and wait for the file to upload and volume to get adjusted.
4. Online Video Cutter Volume Booster
There is a wide collection of video editing tools available under Online Video Cutter. Volume Booster is specifically designed to increase the volume of video files. The user interface is better than most other video volume booster online tools. You can drag and drop your video file instantly on its user interface. In fact, you can even select video files from Google Drive and DropBox.
Moreover, you can also paste the URL of the video file such as from YouTube and boost its volume and thereafter, download the video file. You can also check its MP3 volume booster online for increasing or decreasing audio file volume. Here are the key features of Online Video Cutter Volume Booster tool.
- Drag and drop video file instantly.
- Upload video file from Google Drive and DropBox.
- Supports MP4, FLV, AVI, MOV, 3GP, MKV, WM and more file formats.
- Change video speed and preview the changes before downloading.
How to Boost Video Volume Online with Online Video Cutter Volume Booster**?**
Step 1: From your web browser, visit online-video-cutter.com/volume.
Step 2: Drag and drop your video file on the web interface.
Step 3: After the file is uploaded, click on Volume option. Adjust the slider at the bottom as per your requirement.
Step 4: Once done, click on Save button to save the modified video.
Bonus: Video Volume Booster Software
If you are looking for a dedicated software to boost the volume of your videos, we recommend Wondershare Filmora. A standalone software is useful when you have to boost the volume of multiple large video files. Uploading large video files online is a time-consuming as well as a heavy data-consumption process.
With Filmora, you can not only adjust the volume but also optimize various parameters of the audio in a video file. Filmora is a professional video editor and you can ever capture video through webcam as well as capture your screen video with system sound and mic audio. You can add video effects as well as audio effects during the editing phase and export the edited video files in different file formats.
Here are the steps to boost volume in Filmora.
Step 1: Download and install Filmora on your computer. Open the software and click on New Project.
For Win 7 or later (64-bit)
For macOS 10.12 or later
Step 2: Drag and drop your video file on the primary window. Thereafter, drag the video file on Video Timeline.
Step 3: Double-click on the video file to open Editing Panel. Go to Audio tab and adjust the volume and audio parameters to boost the overall volume. When done, click on Ok button.
Step 4: After adjusting, you can play the video to listen to the boosted volume. Finally, click on Export and save the edited video file to your hard drive.
The Bottom Line
Increasing the volume of a video to make the dialogues sound properly and amplify the background music is no more an issue. We have picked the best audio volume booster online where you can adjust video volume instantly. We have also recommended a professional sound booster software named Wondershare Filmora if you want to edit video volume on your computer.
Also read:
- Perfecting Game Soundtracks The KineMaster Methodology for Music Integration
- Updated Mastering Audio Mute on TikTok Quick and Easy Techniques
- Essential Music Matches Pairing the Perfect Hits with Your Storyboard Sequences for 2024
- New Find The Finest Tools To Remove Background Noise Online
- 2024 Approved Elevating Audio Standards Top 10 Sound Upgraders for Smartphones (Android/iOS)
- 2024 Approved The Ultimate Technique for Harmonizing Volume in DaVinci Resolve
- New 2024 Approved The Audio-Visual Connection Top Music Picks That Elevate Your Diverse Video Projects
- New Best 15 Apps & Websites to Use to Add Music to a Video With Pros & Conss for 2024
- New 2024 Approved Leveraging Voiceovers in Microsoft PowerPoint A Detailed Walkthrough for Windows & Mac Operating Systems
- Updated The Complete Audio Enhancement Manual From Raw Footage to Final Cut 2023S Methodology
- New The Ultimate Voice Transformation Handbook for Gamers for 2024
- New In 2024, 6 Top Voice Changer for Zoom to Make Your Voice Special and Funny
- In 2024, Tactics for Excising Background Melodies From Visual Media
- New Top-Tier Approaches for Enhancing IGTV with Soundtracks
- 2024 Approved Best Linux Audio Editor Free & Paid
- Updated In 2024, 8 Best Cartoon Sound Effects You Can Download
- New Deep Dive Into the Technological Framework of Sound Forge
- Updated Expert Analysis The Best Audio Editing Software for Live DJs
- Updated 2024 Approved The Art of Dividing Sounds From Videos in iMovie for Mac Enthusiasts
- Updated 2024 Approved Adding Free Soundtracks to Your Pictures Tips for Computers & Smartphones
- Updated Your Ultimate Resource for Score-Free VST Upgrades, Updated Annually for 2024
- New Reimagining Your iOS Device Voice An In-Depth Look at Modifying Siri Across Apple Devices for 2024
- Updated 2024 Approved The Ultimate List of Linux-Compatible Audio Recording Gear and How to Use It
- Heartstrings Unleashed The Most Impactful Ballads
- New 2024 Approved The Ultimate Guide to Disabling TikTok Sounds for Focused Viewing
- Updated 2024 Approved Identify Applause Acoustic Marker
- Discovering the 10 Premium PC Voice Capture Software for 2024
- Updated Perfecting Your Soundtrack Strategies to Cut Out Background Noise and Distortions From Video Recordings
- New Discover Auditory Wolf Screams for 2024
- Turning the Tables on Sound Innovations in Audio Reversal Technology for 2024
- New In 2024, Discover the Premier 5 Audio Cutting Software on Android Devices
- How to Fade Music and Audio in iMovie on Mac, In 2024
- How to Extract Audio From Videos on Win/Mac/Phone
- Updated Audio Mastery on ChromeOS Easier Than You Think, In 2024
- In 2024, How to Remove Distortion From Audio for Your Video
- Updated Exploring the Depths of Audio Wave Manipulation with an Educational Guide for 2024
- New Ultimate Top Pop Tunes Playlist for Video Production for 2024
- New The No-Cost Approach to Blending Audio and Visual Elements for Dynamic Clips for 2024
- Updated Insight Into the Usability of Googles Podcast Listening Tool
- Free Voice Synthesis Convert Your Written Words Into Audio Speech for 2024
- Updated In 2024, Unleash Your Creative Potential with These 5 In-Demand Android Audio Editors
- Updated 2024 Approved Voice Transformation Hack Top 10 Tech Solutions to Change Masculine Speech Into Feminine
- Updated In 2024, Rhythm and Reel Leveraging Premiere Pro Features for Time-Synchronized Video Editing
- New In 2024, Mastering Audio Levels Comprehensive Tutorial on Normalization Techniques in VLC
- New In 2024, Optimizing Your Streams Sound Advanced Tips for Using OBS Audio Ducking
- 4 Easy Ways for Your Vivo T2 5G Hard Reset | Dr.fone
- In 2024, How to Transfer Apps from Poco M6 Pro 4G to Another | Dr.fone
- How to Upgrade iPhone 6s to the Latest iOS/iPadOS Version? | Dr.fone
- How to Find iSpoofer Pro Activation Key On Oppo A56s 5G? | Dr.fone
- Is pgsharp legal when you are playing pokemon On Tecno Spark 20C? | Dr.fone
- In 2024, Can Life360 Track You When Your Vivo T2x 5G is off? | Dr.fone
- New In 2024, A Review of 3D LUT Mobile App - A Composite Application for Editing Media
- 8 Solutions to Solve YouTube App Crashing on Motorola Moto G34 5G | Dr.fone
- In 2024, Best 3 Infinix Note 30 Pro Emulator for Mac to Run Your Wanted Android Apps | Dr.fone
- In This Article, You Will Learn About Splitting the Video Into the Frames in FFmpeg and Mentioning the Easy Option for Doing the Same Task in a Few Seconds by Wondershare Filmora
- In 2024, Which Pokémon can Evolve with a Moon Stone For Vivo Y100A? | Dr.fone
- 2024 Approved Create Engaging Audio Waveform Videos with These Online Generators
- In 2024, 8 Safe and Effective Methods to Unlock Your iPhone 8 Without a Passcode
- The Secret to Captivating Videos Freeze Frames Made Easy for 2024
- In 2024, How to use iSpoofer on Nokia G42 5G? | Dr.fone
- In 2024, How To Change Samsung Galaxy A14 4G Lock Screen Clock in Seconds
- 3 Ways to Track Realme Narzo 60 Pro 5G without Them Knowing | Dr.fone
- 2024 Approved 8 Top Motion Graphics Online Tools for Your Inspiration
- Full Guide How To Fix Connection Is Not Private on Honor 90 Pro | Dr.fone
- In 2024, 5 Techniques to Transfer Data from Tecno Pop 8 to iPhone 15/14/13/12 | Dr.fone
- Updated In 2024, Convert Video to Photo A Step-by-Step Guide with 10 Best Tools
- 2024 Approved What Is AI Pixel Art Generator?
- Best 10 Mock Location Apps Worth Trying On Realme Narzo N55 | Dr.fone
- Recover your photos after Xiaomi Redmi A2+ has been deleted.
- Updated 2024 Approved Ultimate Guide to Animated Characters Drawings
- Title: Updated Top 10 Male to Female Voice Changer Apps for 2024
- Author: Ella
- Created at : 2024-05-05 02:25:24
- Updated at : 2024-05-06 02:25:24
- Link: https://sound-optimizing.techidaily.com/updated-top-10-male-to-female-voice-changer-apps-for-2024/
- License: This work is licensed under CC BY-NC-SA 4.0.
